Table of Contents
Table of Contents

Related Manuals for Acer Predator Connect W6


Summary of Contents for Acer Predator Connect W6
- Page 1 Predator Connect W6 Wi-Fi 6E Router USER MANUAL Version: 0.9.5...
- Page 2 Operating System version. Images provided herein are for reference only and may contain information or features that do not apply to your device. Acer Group shall not be liable for technical or editorial errors or omissions contained in this manual.
-
Page 3: Table Of Contents
Table of Contents 1. Overview ..................2 1.1. Package Contents ..................2 1.2 System Requirements ................2 1.3 Device description ................... 3 1.4 Environmental ..................6 1.5 Power Management ................6 2. Installation ..................7 2.1 First-time setup ..................7 2.2 Getting online ................... -
Page 4: Overview
1. Overview The Predator Connect W6 Wi-Fi 6E Router is designed to feature the latest Wi-Fi 6E technology. This guide provides an overview of Predator Connect W6’s features, and description of the user interface and ports of the device. The Predator Connect W6 Wi-Fi 6E Router delivers multi-gigabit transfer speed along with gaming features and user experience tuned for demands of PC gamers and media streamers. -
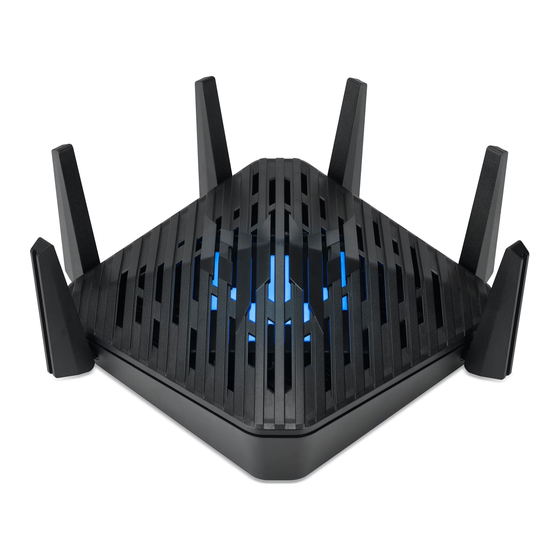
Page 5: Device Description
1.3 Device description 1.3.1 Top View (LED Indicators) LED Type Status Description Flashing Blue Power On Orange Only Visible During Image Upgrade White Only Visible During Factory Reset Green WPS Active Breathing Blue WAN Status: Good Green WAN Status: Normal Orange WAN Status: Not Good Solid... - Page 6 1.3.2 Bottom View A: 2 Wall Mount Holes in blue outlines at 10cm or 4inches wide. Follow the reference image above for correct orientation and proper device mounting. Note: Please check your measurements before any drilling into your wall to avoid any installation issues.
- Page 7 1.3.3 Rear View A: Power Button B: Internet Port (WAN) C: GAME Port (LAN) D: LAN Port 1 E: LAN Port 2 F: LAN Port 3 G: Pin Hole Reset Button H: WPS Button I: USB 3.0 Port J: AC Adaptor Port...
-
Page 8: Environmental
1.4 Environmental Operating temperature: 0 °C to 35 °C (0 °F to 95 °F) Storage temperature: 0 °C to 45 °C (0 °F to 113 °F) 1.5 Power Management Adaptor manufactory: ASIAN POWER DEVICES INC. Model name: WA-36W12FG-AKAA and WA-36W12FU-AKAA Input rating:100-240ac, 50-60Hz, 0.9A max., Class II... -
Page 9: Installation
2.1 First-time setup 2.1.1 Plugging in and powering on. A: Plug in the AC adaptor to the Predator Connect W6 Wi-Fi 6E Router. The adaptor port is located pm the rear left side. Turn the antennas so that they are all facing up like the image below. -
Page 10: Getting Online
C: Push the Power Button located on the rear right side. Once turned on, the Predator Connect W6 Wi-Fi 6E Router’s LED will light up. Please refer to the LED indicator table on page 4 for more information. D: Connect your broadband cable to the “Internet” Port. Once completed, you are just steps away from getting online. - Page 11 Ensure your Predator Connect W6 Wi-Fi 6E Router is switched on and connected to the network. The Internet LED should be blue. To connect your personal device to the internet A. Connect your computer or device to Predator Connect W6 via...
-
Page 12: Device Setup
3. On the Home page, enter the “Admin” password as found on device label on the bottom of the Predator Connect W6 Wi-Fi 6E Router (A). After entering the password, please click and click Log in. - Page 13 4. If you are using the Connect iOS or Android APP, You may scan the QR code to proceed (B). 5. You will be prompted with a systems notification to change your password. Click “Change now” to proceed to the next screen. 6.
- Page 14 8. Once completed, press apply to proceed to the next step. 9. Next, the Home Network Security notification will be prompted. It is recommended to turn on this function. You will be presented with the device’s license agreement.
- Page 15 A. You may also proceed with “Start W6” to begin using your Predator Connect W6 Wi-Fi 6E Router. If in the future, you decide to complete the “Quick setup” process. B. The “Quick setup tab can be located under the “Dashboard” and...
- Page 16 B. Plug one end of the RJ-45 (Ethernet) Cable into your DSL or Cable Modem. And the other end into Predator Connect W6’s WAN port. C. Connect your device to Predator Connect W6 via Wi-Fi or LAN Cable. Next step of the Quick setup is WAN connection mode.
- Page 17 4. On this page, you can further fine-tune and adjust how you would like to use the W6. A. Adjustments can be made to: Turn on or off Wi-Fi for 2.4GHz, 5GHz, and 6GHz Modify Wi-Fi SSID for 2.4GHz, 5GHz, and 6GHz iii.
- Page 18 viii. Click “Next” at the bottom of the page to prompt the Quick setup: “The set up is complete” notification. Click OK to complete the set up. Dashboard A. The Dashboard contains many useful information such as: Connection status, WAN upload and download speeds.
- Page 19 Number of connected devices to 2.4GHz, 5GHz, and or 6GHz Wi-Fi. iii. Number of guest devices connected devices to 2.4GHz, 5GHz, and or 6GHz Wi-Fi. Number of clients connected via ethernet cable. Network traffic Speed test, Etc.
-
Page 20: Regulatory Information
4. Regulatory Information 4.1 Important Safety Precaution Your Predator Connect W6 Wi-Fi 6E Router device is manufactured to comply with European safety standards. This section outlines the safety precautions associated with using the device. Please read the safety and operation instructions before using your device and other accessories. Keep these instructions safe for future reference. -
Page 21: Ethernet Cable Line Safety
Electronics Equipment (WEEE) regulations, visit www.acer- group.com/public/Sustainability 4.5 Ethernet Cable Line Safety Disconnect all Ethernet cable lines from the equipment when not in use and/or before servicing. To avoid the remote risk of electric shock from lightning, do not ... -
Page 22: Warning
equipment in your vehicle is mounted and operating properly. Do not store or carry flammable liquids, gases, or explosive materials in the same compartment as the device, its parts, or enhancements. For vehicles equipped with an air bag, remember that air bags inflate with great force. Do not place objects, including installed or portable wireless equipment in the area over the air bag or in the air bag deployment area. -
Page 23: Wireless Adapter Regulatory Information
4.10 Wireless adapter regulatory information Warning: For safety reasons, turn off all wireless or radio transmitting devices when using your device under the following conditions. Remember to follow any special regulations in force in any area, and always switch off your device when its use is prohibited or when it may cause interference or danger. -
Page 24: Eu Regulatory Conformance
Standard, for use with dedicated accessories. Use of other accessories which contain metals may not ensure compliance with ICNIRP exposure guidelines. Hereby, Acer Incorporated declares that the radio equipment type W6 is in compliance with Directive 2014/53/EU. The full text of the EU declaration of... -
Page 25: Restrictions
4.12 Restrictions Restriction or Requirement in the CE: 5150 to 5350 MHz indoor-use only. UK(NI) WLAN 5GHz Band: For indoor use only. 4.13 EU Regulatory Compliance -- Radio e.i.r.p power limit 2.4G 5G(U-NII-1) 5G(U-NII-2a) 5G(U-NII-2b) 5G(U-NII-3) 6E(U-NII-5) 2400 2483.5 5150 5250 5250 5350... -
Page 26: Eu Regulatory Compliance -- Radio
4.14 EU Regulatory Compliance -- Radio e.i.r.p power limit 2.4G 5G(U-NII-1) 5G(U-NII-2a) 5G(U-NII-2b) 5G(U-NII-3) 6E(U-NII-5) 2400 2483.5 5150 5250 5250 5350 5470 5725 5725 5850 5945 6425 MHz ~ MHz ~ MHz ~ MHz ~ MHz ~ MHz ~ e.i.r.p e.i.r.p 20dBm e.i.r.p 23dBm e.i.r.p 20dBm e.i.r.p 27dBm e.i.r.p 23dBm...