Table of Contents
FRONT LOADING
WASHER DRYER
OWNER'S MANUAL
MODEL:
TWD-BM105GF4 Series
TWD-BM115GF4 Series
TWD-BM125GF4 Series
TWD-BM135GF4 Series
Read this Manual
Read all instructions and explanations for the
installation before use. Follow the instructions
carefully. Keep the operation instructions handy
for later use. If the appliance is sold or passed
on, ensure that the new owner always receives
this operation instructions.
Table of Contents

Related Manuals for Toshiba TWD-BM105GF4 Series


Summary of Contents for Toshiba TWD-BM105GF4 Series
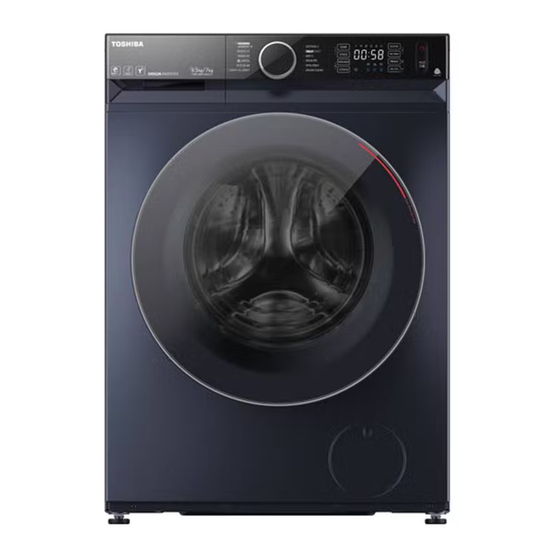
- Page 1 FRONT LOADING WASHER DRYER OWNER’S MANUAL MODEL: TWD-BM105GF4 Series TWD-BM115GF4 Series TWD-BM125GF4 Series TWD-BM135GF4 Series Read this Manual Read all instructions and explanations for the installation before use. Follow the instructions carefully. Keep the operation instructions handy for later use. If the appliance is sold or passed on, ensure that the new owner always receives this operation instructions.
-
Page 2: Table Of Contents
CONTENTS SAFETY INSTRUCTIONS Safety Instructions ............INSTALLATION Product Description ............Installation ..............OPERATIONS Quick Start ..............Before Each Washing ............ Detergent Dispenser ............ Control Panel ..............Programmes..............Option................Other Functions............. Instructions to Connection with TSmartLife App... MAINTENANCES Cleaning and Care ............Trouble Shooting ............ -
Page 3: Safety Instructions
SAFETY INSTRUCTIONS Safety Instructions For your safety,the information in this manual must be followed to minimize the risk offire or explosion, electric shock, or to prevent property damage, personal injury or loss of life. Explanation of the symbols: Warning! This combination of symbol and signal word indicates a potentially dangerous situation which may result in death or serious injuries unless it’s avoided. - Page 4 SAFETY INSTRUCTIONS • Before maintenance, unplug the appliance. • This appliance must be grounded. In the event of Malfunction or breakdown , grounding will reduce the risk of electric shock by providing a path of least resistance for electric current. •...
- Page 5 SAFETY INSTRUCTIONS RISK TO CHILDREN • This appliance is not intended for use by persons (including children) with reduced physical,sensory or mental capabilities or lack of experience and knowledge unless they have been given supervision or instruction concerning use of the appliance by a person responsible for their safety.
- Page 6 SAFETY INSTRUCTIONS RISK OF EXPLOSION • Do not wash articles that have been cleaned in, washed in, soaked in, or spotted with combustible or explosive substances(such as wax, oil, paint, gasoline, degreasers,dry-cleaning solvents, kerosene, etc.) This may result in fire or explosion. •...
-
Page 7: Installation
SAFETY INSTRUCTIONS INSTALLATION • Remove all packaging material and transport bolts before using the appliance. Otherwise, serious damage may result. • This appliance is equipped with a single inlet valve and can be connected to the cold water supply only. •... - Page 8 SAFETY INSTRUCTIONS WATER CONNECTIONS • Check the connections of the water inlet hose, the water tap and the outlet hose for possible problems due to changes of water pressure. If the connections loosen or leak close the water tap and get it repaired.
- Page 9 SAFETY INSTRUCTIONS OPERATION AND MAINTENANCE • Never stop the washer dryer before the end of the drying cycle unless all items are quickly removed and spread out so that the heat can dissipate. • The washer dryer is not to be used if industrial chemicals have been used for cleaning.
- Page 10 SAFETY INSTRUCTIONS • Always unplug the appliance and close the water tap before cleaning and maintenance and after each use. • Never pour water over the appliance for cleaning purpose. Risk of electric shock! • Repairs shall only be carried out by the manufacturer, its service agent or similarly qualified persons in order to avoid a hazard.
- Page 11 SAFETY INSTRUCTIONS ENVIRONMENT Disposal of old appliances For use in EU contries This appliance is labelled in accordance with the European Directive 2012/19/EU on waste electrical and electronic equipment (WEEE). The directive provides the framework for the EU-wide take-back and recycling of waste equipment. The devices marked with this symbol must not be disposed of in household waste! For use in other contries...
-
Page 12: Product Description
INSTALLATION Product Description Top cover Water inlet hose Control panel Power supply cord Detergent dispenser Drum Door Drain pump filter Drain hose Note! • The product line chart is for reference only, please refer to real product as standard. Accessories Screw(optional) Transport Water inlet hose... -
Page 13: Installation
INSTALLATION Installation Installation area Warning! • Stability is important to prevent the product from wandering! • Make sure that the product should not stand on the power cord. W 20mm > Before installing the machine, the location characterized as follows shall be selected: 1.Rigid, dry, and level surface 2.Avoid direct sunlight 3.Room temperature is above 5 °C... - Page 14 INSTALLATION Levelling the Washer Dryer Warning! • Check with the gradienter if the machine placement is balanced and steady. • If there is no gradienter, check the balance as per the following method. 1.If it’s balanced from left to right. •...
- Page 15 INSTALLATION Levelling the Washer Dryer Warning! • The lock nuts on all four feet must be screwed tightly against the housing. Check if the legs are closely attached to the cabinet. If not, please turn them to their original positions and tighten the nuts. 2.Loosen the lock nut and turn the feet until it closely contacts with the floor.
- Page 16 INSTALLATION Connect the other end of water inlet hose to the inlet valve at the backside of product and fasten the hose tightly clockwise. water inlet hose water Inlet valve Drain Hose Warning! • Do not kink or protract the drain hose. •...
-
Page 17: Operations
OPERATIONS Quick Start Caution! • Before washing, please make sure it’s installed properly. • Before washing at first time, the washer dryer shall be operated in one round of the whole procedures without clothes in as follows. The suggested program is “DRUM CLEAN”. Calibration It’s recommended to calibrate the washer dryer, so that provide the best performance. - Page 18 OPERATIONS 1. Before Washing earth terminal Manual single delivery Detergent Softener Close door Plug in Open tap Load Add detergent 2. Washing Power On Select Programme Select function Start up or default Note! • If default is selected, step 3 can be skipped. 3.
-
Page 19: Before Each Washing
OPERATIONS Before Each Washing • The working condition of the washer dryer should be 5°C-40°C. If used under 0°C, the inlet valve and draining system may be damaged. If the machine is placed under condition of 0°C or less, then it should be transferred to normal ambient temperature to ensure the water inlet hose and drain hose are not frozen before use. -
Page 20: Detergent Dispenser
OPERATIONS Detergent Dispenser Fill liquid detergent and fabric softener to dispenser to use automatic dispensing function. Manual single Liquid Detergent (MAX:≈850ml) delivery Softener (MAX:≈390ml) Liquid Detergent Softener Caution! • When you add powder detergent manually, turn off automatic dispensing function. Programme Programme TIME DRY... -
Page 21: Control Panel
OPERATIONS Control Panel Note! • The chart is for reference only, Please refer to real product as standard. On/Off Start/Pause Product is switched on or off. Press the button to start or pause the washing cycle. Option Programmes Available according to the laundry type. This allows you to select an additional function and will light when selected. - Page 22 OPERATIONS Programmes Default Programme Washing Load / Dry Load(kg) Time Funciton 9.5 / 7.0 10.5 / 7.0 11.5 / 8.0 12.5 / 8.0 1:18 COTTON 9.5 / 7.0 10.5 / 7.0 11.5 / 8.0 12.5 / 8.0 3:47 GREATWAVES 9.5 / 7.0 10.5 / 7.0 11.5 / 8.0 12.5 / 8.0...
-
Page 23: Programmes
OPERATIONS Programmes Programmes are available according to the laundry type. Programmes COTTON Hard-wearing textiles, heat-resistant textiles made of cotton or linen. This programme is to dry clothes for the time set manually. TIME DRY Mixed load consisting of textiles made of cotton and synthetics. This programme is suitable for energy saving wash ECO WASH This procedure is suitable for washing few and not very dirty clothes... - Page 24 OPERATIONS Option Default spin Default Cycle Optional Functions Temp.(°C) speed in rpm 1400 COTTON 1000 GREATWAVES 1000 1000 ECO WASH – SPIN ONLY 1000 DRUM CLEAN MEMORY 1000 cold QUICK 12' – 1200 TIME DRY – DRY ONLY 1200 WOOL ANTI-ALLERGY Note! •...
-
Page 25: Other Functions
OPERATIONS Other Functions RELOAD Cloths can be added after strating washing process. Please follow the steps as bellow: 1. Press [Start/Pause] for 3 seconds. 2. Wait until the drum stops rotation. 3. The door is unlocked. 4. Add cloths into drum. 5. - Page 26 OPERATIONS DELAY END Set the Delay end function: 1. Select a programme 2.Press the DELAY END button to choose the time(the delaying end time is 1-24 H.) 3.Press [Start/Pause] to commence the delay operation DELAY Setting time Start On/Off Choose the Programme Cancel the Delay function: Press the [DELAY END]button until the display be 0H.It should be pressed before starting the programme.
- Page 27 OPERATIONS Press the Dry button continuously to choose the dry level: 1.Normal Dry 2.Strong Dry 3.Timed Dry Timed Dry:Drying your laundry and finish within given time. (30/60/90/120/180 minutes) Note! • Drying hints - Thoroughly spin you laundry before drying. - To ensure proper drying, please sort your laundry according to the fabric type and drying temperature.
- Page 28 OPERATIONS SPEED SPEED Press the [SPEED] button to change the spin speed. Speed:0-600-800-1000-1200-1400 TEMP. TEMP. Press the button to change water temperature. The display show "--" means the temperature is cold. MUTE THE BUZZER Press the [DELAY END] and [FAST WASH] button for 3sec.,the buzzer is mute. To activate the buzzer function, press the button again for 3 seconds.
-
Page 29: Instructions To Connection With Tsmartlife App
OPERATIONS Instructions to Connection with TSmartLife App Before you start, make sure that: 1. Your smartphone is connected to home WiFi network,and you know the network password. 2. Make sure you are near the home appliance. 3. The 2.4GHz band wireless signal is enabled on your wireless router. Follow the below steps to enter the remote control state Download the TSmartLife App On an app market (Google Play Store, Apple App Store), search for... - Page 30 OPERATIONS 4:If a message of "Smart devices discovered nearby" appears, click to add. 5:If no message appears, select " + " on the page and select your device in the list of nearby devices available. If your device is not listed, please add your device manually by the device category and device model.
- Page 31 OPERATIONS WiFi Status Light Slowly flashing Waiting for connection Connecting Quickly flashing Quickly flashing solid Connected to your wireless router Notes Make sure your devices are powered on. Keep your mobile phone close enough to your device when you are connecting network to your device. Connect your mobile phone to the wireless network at home, and make sure you know the password of the WiFi.
-
Page 32: Maintenances
MAINTENANCES Cleaning and Care Warning! • Before your maintenance starts, please unplug the machine and close the tap. Cleaning the Cabinet Proper maintenance on the washing machine can extend its working life. The surface can be cleaned with diluted non-abrasive neutral detergents when necessary. If there is any water overflow, use the dry cloth to wipe it off immediately. - Page 33 MAINTENANCES Cleaning the Inlet Filter Note! • Inlet filter must be cleaned if water reduces than before. Washing the filter in the water inlet hose 1.Close the tap. 2.Remove water inlet hose from the tap. 3.Clean the filter. 4.Reconnect the water inlet hose. Washing thefilter in washing machine: Screw off the water inlet hose from the backside of the machine.
- Page 34 MAINTENANCES Cleaning the Drain Pump Filter Warning! • Be careful of the hot water! • Wait until the water cools down. • Unplug the machine to avoid electrical shock before maintenance. • Drain pump filter can filter the lints and small foreign matters from the washing.
-
Page 35: Trouble Shooting
MAINTENANCES Trouble Shooting The start of the appliance does not work or it stops during operation. First try to find a solution to the problem, If not, contact the service centre. Description Reason Solution Washing machine Restart after the door is closed Door is not closed properly can not start up Check if the clothes is stuck... -
Page 36: Technical Specifications
MAINTENANCES Technical Specifications Power Supply 220-240V~,50Hz MAX.Current Standard Water Pressure 0.05MPa~1MPa Dimension Rated Power Dry Power Model Net Weight Washing Capacity (W*D*H mm) TWD-BM105GF4 Series 9.5kg 66kg 595*585*850 2000W 1350W TWD-BM115GF4 Series 10.5kg 66kg 595*585*850 2000W 1350W 2000W 1350W TWD-BM125GF4 Series 11.5kg...