Table of Contents
Quick Links
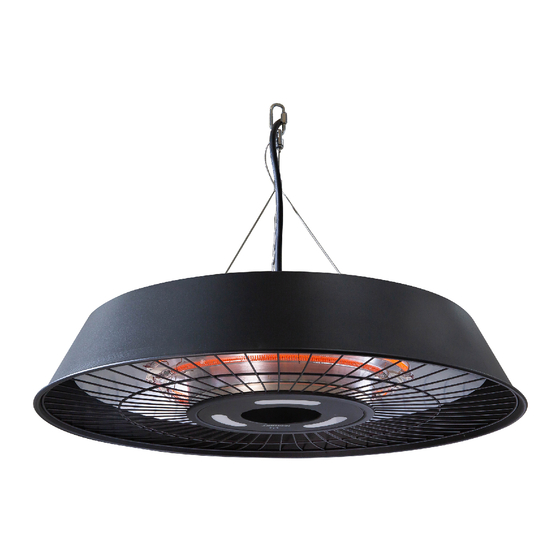
ZHPTH1 Hanging Heater Manual &
Safety Instructions
WARNING: PLEASE ENSURE YOU HAVE READ THROUGH THE
SAFETY AND OPERATING INSTRUCTIONS BEFORE USE.
PLEASE RETAIN INSTRUCTIONS FOR FUTURE REFERENCE
For Customer Services & Spare Parts please call 0330 1230 597
Please scan the QR code for step by step video
assembly instructions. Alternatively, you can visit:
zanussiheatingandcooling.uk. From here, please select
the product that you are looking to build and view the
'How To' video located at the bottom of the page.
Or visit us at zanussiheatingandcooling.uk
Table of Contents

Related Manuals for Zanussi ZHPTH1

Summary of Contents for Zanussi ZHPTH1
- Page 1 ZHPTH1 Hanging Heater Manual & Safety Instructions WARNING: PLEASE ENSURE YOU HAVE READ THROUGH THE SAFETY AND OPERATING INSTRUCTIONS BEFORE USE. PLEASE RETAIN INSTRUCTIONS FOR FUTURE REFERENCE Please scan the QR code for step by step video assembly instructions. Alternatively, you can visit: zanussiheatingandcooling.uk.
-
Page 2: Table Of Contents
PATIO HEATER Safety Instructions Parts List & Feature Diagram 10-14 Installation Instructions 15-17 Operating Instructions Maintenance & Care Instructions Troubleshooting Specification Guarantee and Customer Services 21-23 Notes Revision 1.2... -
Page 3: Safety Instructions
SAFETY INSTRUCTIONS WARNING: IMPORTANT SAFETY INSTRUCTIONS READ CAREFULLY AND KEEP FOR FUTURE REFERENCE Before you start to build and use your patio heater, please read these instructions thoroughly: • Please dispose of all plastic bags carefully and keep them away from children. •... - Page 4 • CAUTION - Risk of Electric Shock. DO NOT open or try to repair the heater yourself. • Please do not use substitute parts. Use only additional or replacement parts supplied by Zanussi. • In the unlikely event that this product has missing or damaged parts, please visit our website zanussiheatingandcooling.uk...
- Page 5 • Do not use any other tools other than those recommended to build this product. • Caution: Some parts of this product can become very hot and cause burns. Particular attention must be given where children, vulnerable people and animals are present.
- Page 6 • DO NOT touch the heater head when in use. • DO NOT leave turned on and unattended especially when children and or animals are in the vicinity. • The indication of the different positions of switches shall be visible from a distance of 1M. •...
- Page 7 • DO NOT attempt to repair or adjust any electrical or mechanical functions on this unit. Doing so will void your warranty. The inside of the unit contains no user serviceable parts. Servicing / Repair should only be performed by a qualified electrician or qualified service centre.
- Page 8 • Use only for intended household use as described in this manual. Any other use not recommended by the manufacturer may cause fire, electric shock, or injury to persons. The use of attachments not recommended or sold by unauthorized dealers may cause hazards. •...
-
Page 9: Parts List & Feature Diagram
WHAT’S INCLUDED? Here’s everything you need 1. Wire rope 2. Power cord 3. Heater cover 4. Safety net 5. LED light 6. Power switch 7. Power touch control 8. Remote control Revision 1.2... -
Page 10: Installation Instructions
INSTALLATION INSTRUCTIONS • Place the heater on a firm, level ceiling surface. Installation of the heater must be to a strong rigid • support (such as strong wooden beam, metal rail, etc.). The hook on the ceiling hanging the patio heater •... - Page 11 INSTALLATION INSTRUCTIONS STEP 1 Pull the wire and power cord upwards, and then • adjust the length of the wire to the appropriate height (please check the minimum required distances on the previous page). • To adjust the height of the wire please see the next step.
- Page 12 INSTALLATION INSTRUCTIONS STEP 2 Pull the metal toggle and the wire through the • bracket to reduce the length of the wire. To increase the length, then press the release valve and pull the wire through the bracket in the opposite direction. •...
- Page 13 INSTALLATION INSTRUCTIONS STEP 3 • Unscrew the nut in the direction of the arrow. • Then place the clip onto the required hook that has been installed in your ceiling. Revision 1.2...
- Page 14 INSTALLATION INSTRUCTIONS STEP 4 • Tighten the nut in the direction of the arrow to secure your patio heater. Note: • The heater must be installed to a strong rigid support (such as strong wooden beam, metal rail, etc.). • The hook on the ceiling hanging the patio heater must be able to take a weight 3 or 4 times that of the heater itself.
-
Page 15: Operating Instructions
OPERATING INSTRUCTIONS • Connect the power cable to a 220-240V, 13 amp supply that is located in a safe, dry area. • The heater must be properly installed before it is used. • Only operate the heater when it is in the upright position. •... - Page 16 OPERATING INSTRUCTIONS Remote Control • The patio heater comes with a button cell CR2450 battery provided in the same plastic wallet as the instruction manual. • To use the remote for the first time, remove the battery cover at the back of the remote, and insert the battery with the positive side facing up, and replace the battery cover.
- Page 17 OPERATING INSTRUCTIONS • WARNING: Chemical Burn Hazard – Keep batteries away from children. • This product contains a lithium button/coin cell battery. If a new or used lithium button/cell battery is swallowed or enters the body, it can cause severe internal burns and can lead to death in as little as 2 hours.
-
Page 18: Maintenance & Care Instructions
MAINTAINANCE & CARE INSTRUCTIONS WARNING: Ensure the appliance is cold before storing. • Unplug the unit and let it cool completely. • When disconnected from the electrical supply, clean the outside of the patio heater with a damp cloth. Never use corrosive or solvent cleaners or immerse in water. -
Page 19: Specification
SPECIFICATION Power supply: 220-240V, 50-60Hz Wattage: 2500W (max) Insulation class: IP rating IP45 Dimensions (CMs) 10(H) x 61(W) x 61(D) Revision 1.2... -
Page 20: Guarantee And Customer Services
GUARANTEE AND CUSTOMER SERVICES This product is guaranteed for 12 months from the date of the original purchase. If any defect arises due to faulty materials or workmanship, the faulty product must be returned to the place of purchase. Refund or replacement is at the discretion of the retailer. -
Page 21: Notes
NOTES This page is intentionally blank. Revision 1.2... - Page 22 NOTES This page is intentionally blank. Revision 1.2...
- Page 23 NOTES This page is intentionally blank. Revision 1.2...
- Page 24 ZANUSSI is a registered trademark used under license from AB Electrolux (publ). Made by Product Care Trading Limited, Wigan, WN2 4AY/ PCT (NI) Ltd, Belfast, BT5 5AD. For Customer Services & Spare Parts please call: 0330 1230 597 Or visit us at zanussiheatingandcooling.uk The ‘wheelie bin’...