Table of Contents
Quick Links
Table of Contents

Related Manuals for Haier CA0065EANR


Summary of Contents for Haier CA0065EANR
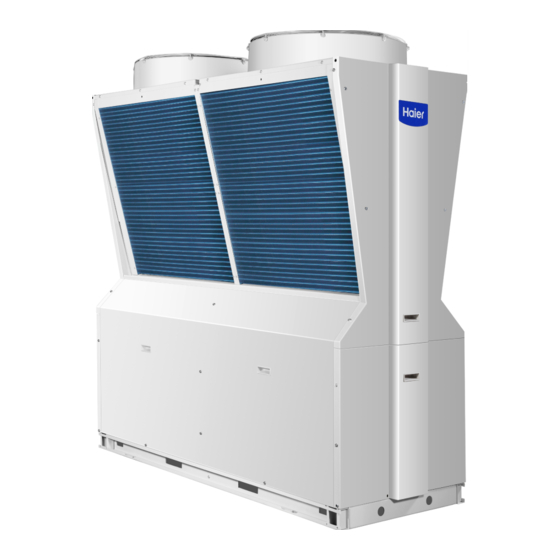
- Page 1 INVERTER MODULAR CHILLER Service Manual SYJS-11-2018 REVA Edition: 2018-11...
-
Page 2: Table Of Contents
CONTENTS 1. Nomenclature ................................ 1 2. Feature .................................. 1 2.1 Product feature ..............................1 2.2 High Efficiency ..............................2 2.3 Easy Installation ..............................2 2.4 Comfort ................................4 2.5 High Reliability ..............................5 3. Specification ................................7 4. Dimension................................9 5. -
Page 3: Nomenclature
1. Nomenclature Code Explanation for chiller 3 4 5 6 Capacity (for Chiller Unit Suitable Compressor type Centrifugal Product type Design number system character voltage chiller: Rt; other: kW) 100-115V, Fixed Centrifugal chiller C 1 0 6 9 frequency A-G cooled 60Hz Water... -
Page 4: High Efficiency
2.2 High Efficiency EC Fans Condenser Coils DC Inverter Rotary Driver Module Compressor Motor The unit adopts full DC inverter rotary Low sound power level EC fans, compressor, driven by high-efficiency together with high efficiency DC inverter permanent magnet DC motor to improve motor,greatly reducing the power the energy efficiency greatly. - Page 5 DC Inverter Rotary DC Inverter Rotary Modbus function MODBUS interface is reserved for units, which can be connected to building automation systems for centralized control, easy to realize intelligent management and remote control. 485-232/485-USB Converter Modbus Standard flow switch Standard flow switch in the product, installer no need to purchase flow switch.
-
Page 6: Comfort
2.4 Comfort Precise temperature control EXV adopts PID control, accurate control refrigerant distribution, outlet water temp. ±5% of the set temperature . Temp. Comfort Inverter unit,Quick ±0.5℃ cooling Indoor temp. Inverter unit, Small Cold temperature drop Operation time Start Cooling mode Quick start With new inverter technology, quick start within 5s, maintain ultra high frequency operation within 1 hour to ensure the room temperature can reach the set temperature as soon as possible. -
Page 7: High Reliability
Quick start, hyper cooling and heating Power cut memory function Maintain ultra high frequency operation within 1 hour The system will record the operating state before the power cut. When the power supply is restored, the system will automatically return to the state Quick start within 5s before the power cut without setting again. - Page 8 Backup operation function The system has three modules, the actual operation of just two module, if one module malfunction another module will start automatically according to the water temperature. service operation stop operation operation malfunction stop...
-
Page 9: Specification
3. Specification Model CA0065EANR Cooling capacity Cooling(T1) Power input Running current Cooling capacity Cooling(T3) Power input 20.5 Running current Heating capacity Heating Power input 19.4 Running current 36.8 (T1) 3.00 (T3) 2.24 3.35 3.85 Max.Power input 31.6 Max. running current... - Page 10 Model CA0065EANR Type Shell and tube heat exchanger Rated water flow m³/h 10.32 Inlet/outlet pipe R2'' Water side heat exchanger Water dirt coefficient m2.°C/KW 0.018 Standard pressure Water resistance Sound pressure level dB(A) Unit length 2060 External dimension Unit width...
-
Page 11: Dimension
4. Dimension Water Outlet Water Inlet Electric control cabinet Draining Valve Unit Base Diagram Reference Position of Base 1.The foundation load is designed according to the weight of the unit during operation. 2.The foundation can be channel steel (designed by the user according to the unit size) or concrete structure. -
Page 12: Refrigerant System Diagram
5. Refrigerant system diagram... -
Page 13: Installation
6. Installation 6.1 Symbol precautions Symbol description Dear user, For the better understanding of this Manual and the proper operation of the chiller, the marks and symbols used in this Manual are described as follows: It is likely to cause death, serious injury and other severe accidents if the user fails WARNING to do as required. - Page 14 ■ Electrical installation must have dedicated lines and be installed by professional electricians. The electrical part must be protected from moisture, otherwise it will cause electric shock, fire and other accidents. ■ The leakage protector must be set correctly. Leakage circuit breakers must be installed in accordance with electrical codes, and incorrect installation may result in electric shock.
-
Page 15: Installation
6.2 Installation ■ Pre-installation Preparation ■ Cargo inspection All units are firmly bolted on wood trays, subject to ex-factory inspection and filled with accurate amount of R410a refrigerant and refrigeration oil for the unit operation. Upon the receipt, you shall carefully inspect cargoes for any damage during transport and confirm all ordered parts and accessories are delivered. - Page 16 Installation Space 1. Diagram of installation space for single chiller unit (Unit:mm) Guiding device 2. Diagram of installation space for multiple chiller units (Unit:mm) >450 >1500 >1500...
- Page 17 3. Diagram of arrangement of multiple chiller units (Unit:mm)
-
Page 18: Water Pipe Connection
6.3 Water pipe connection ■ Water Pipe Connection 1. External water pipe system must be equipped with flexible joints, water filter, electronic cleaner, check valve, drain valve, exhaust valve, shutoff valve, expansion tank, etc.. The expansion tank shall be located at 1-1.5 m above the highest point of the system;... - Page 19 WARNING Never connect unclean pipe to the unit! ■ If the unit is to idle for a long time, the water in the water system shall be drained to prevent the plate heat exchanger being iced. ■ If the unit is to idle for a short time, the power-off is not allowed, because the unit has automatic anti-freezing function.
- Page 20 ■ Overall Nozzle Dimensions during Module Combination (Maximum 16 modules combined) Number of modules Overall nozzle dimensions (mm) Basic requirements The chilled water pipelines may be connected as per relevant procedure when the unit is installed in place. Such pipelines shall be free from any foreign matter, and must conform to local piping regulations and rules. Before unit operation, thoroughly flush all chilled water pipelines to ensure that they are free from any foreign matter.
- Page 21 Air conditioning piping system design ■ The air conditioning piping system should have sufficient conveying capacity. For exam ple, in the central air conditioning system, the water system is used to ensure that the circulating water volume of each air conditioning unit or fan coil air conditioner reaches the designed flow to ensure the normal operation of the unit;...
- Page 22 Water system volume calculation example Assume that two CA0065EANR module units are installed in a water system, and the return water temperature is set to 12 degrees. The main pipe diameter is DN65. The total length of the inlet and outlet pipes is 80m. Eight of the end wind disks remain normally open.
-
Page 23: Electrical Connection Precautions
Users must not remove and add control components privately. Haier Company shall not be liable for any damage to the unit and personal injury caused by failure to operate in accordance with these Rules. - Page 24 Electric control ■ Control of auxiliary electric heating The start of electrical heating is to provide an auxiliary heating function at low temperatures. The inlet and outlet of the auxiliary electric heating are connected in series to the total outlet pipe of the air-cooling module unit, and the control node for auxiliary electric heating is provided in the electric control cabinet of the main module of the unit (only 220V output control signal is provided, and the electric heating control part is provided by the user).
- Page 25 Maximum current Starting current cross section CA0065EANR 5X10mm Note: The working voltage of the unit must be within ±10% of the rated working voltage. If the wiring distance of the power supply line is too long, the power cable diameter should be increased. It is recommended to refer to the technical information of the cable manufacturer under the guidance of a professional electrician.
- Page 26 WARNING It is forbidden to drive the water through the main unit before the water system is adjusted. The setting of the address switch must be carried out under the condition that the unit is powered off. It is strictly forbidden to toggle the address switch when the unit is powered.
- Page 27 The internal device schematic diagram of the electrical box Main control board Power terminal block Interface board 1 Interface board 2 Compressor drive module Capacitor plate Lightning protection board Refrigerant heat sink Reactance...
-
Page 28: Debugging And Running
The highest and lowest values of the reference standard are judged as the reference standard for the maximum working condition and the minimum working condition of the unit. If the unit is stable and exceeds the reference standard, please consult your local dealer and Haier for sale. -
Page 29: Regular Inspection Of The Project
6.6 Regular inspection of the project Before delivery, the unit has been rigorously tested and inspected to ensure that the product has good performance after leaving the factory. In order to ensure long-term good operation of the unit, the user should carry out regular maintenance and maintenance. -
Page 30: Maintenance
6.7 Maintenance During the use of the unit, certain routine inspections must be carried out to ensure the performance of the unit. This is also to avoid unnecessary downtime routine inspections including the following items: Item details Per month Each quarter Half a year One year Base on needs... -
Page 31: Controller Operation Instruction
7. Controller Operation Instruction Wired Controller Instruction Appearance Main Interface Display: 2016/01/06 18:00 SUN Operation status: Mode: Cool Set water temp: 25°C Water inlet temp: 25°C Error code: none... - Page 32 Display Information Year/Month/Hour/Min/Week. Energy saving icon will display after the energy-saving function was set. operation status, ON/OFF operation mode. If the linkage switch is off, Icon will display. If the linkage switch is on, Icon will not display. Setting water temp. Child lock icon will display after this function was set. Water inlet temp., Timing will be displayed after this function was set.
- Page 33 Wired Controller Function Functions Initialization interface When the wired controller is connecting with the unit, the interface display is as follows: After the wired controller connected with the unit, the interface display is as follows (only valid for part of models)* The password contains 4 numbers and please contact aftermarket personnel for the initial password.
- Page 34 Menu interface Press button to enter the menu interface, the interface display is as follows: Press button to select the function options, then press button to confirm the selection. System settings Under Menu interface, press button to select "system setting" item, press button to enter the following system setting interface: 1.
- Page 35 Press button to switch the location of the time setting. Press button to adjust the number. Press button to confirm your setting and back to system setting interface. 2. Timing setting Under the System setting interface, press button to select *Timing* item, and then press [ok] button to enter into setting status.
- Page 36 a)The adjust method for this function is the same as the above weekly timing setting method. b)After you finished the setting, it will switch on or switch off by the cycle timing instructions which you set. ③ Daily timing function a)The adjust method for this function is the same as the weekly timing setting method.
- Page 37 a)There are 6 temp. timing options. Press button to select the one you want to set, then press button to enter to set. Press button to switch between time and temp. Press button to adjust time. Press button to confirm your setting operation. b)The default operation of setting temp.
- Page 38 Error code inquiry function Back to Menu interface, press button to select "Error code inquiry" item and click button to enter the following error code inquiry interface: 1.Current error: Under the above interface, press button to select *Current error*, click button to enter the following current error interface display: Cautions:...
- Page 39 3.Display setting: Under Menu interface, press button to select *Display setting* item, press button to enter the following Display setting interface: Under the above interface, press button to switch the function options, press button to select the item, press button to adjust the values and press button to confirm your setting.
- Page 40 Under the above interface, press button to switch the function options, press button to select the item, use button to adjust the options, and press button to confirm your operation. 5. Child lock function: Under the backlight lighting, press button for 5s to set or cancel the Child lock function. If the function was set, the icon will be displayed.
- Page 41 2.Connect the wiring as follows. Wiring color Line terminal White Green Black...
-
Page 42: Wiring Diagram
8. Wiring diagram... -
Page 43: Pcb Photo And Address Code Setting
Slave 10 Slave 11 Slave 12 Slave 13 Slave 14 Slave 15 Remark: 1. The wiring diagram for module CA0065EANR ; 2. Dial code setting: Factory Setting, BM1-BM2 dial code setting; BM1 dial code setting DIP1-DIP4 DIP5 DIP6 DIP7 DIP8... -
Page 44: Fault Code
10. Fault code (1 represents the A system ,2 represents the B system) Fault code Fault description Remarks Fault in air-condition flow switch One lock Compressor module three-phase AC input phase (- 1/2/ ) 4 times in 60min, locked. sequence mission protection Three-phase AC input phase sequence error protection One lock Fault in return water temperature sensor... - Page 45 Fault code Fault description Remarks ( ) E47 -1/2 Compressor reverse phase detection protection One lock ( ) -1/2 Fault in overcurrent protection of system fan One lock 3 times in 60min, ( ) -1/2 High-pressure protection of system locked. 3 times in 60min, (...
-
Page 46: Trouble Shooting
11. Trouble shooting Fault description Possible cause Troubleshooting Remarks 1.Air or non-condensable gas found in the system Discharge and empty, if necessary, the Cooling/heating non-condensable gas 2.High suction pressure Refer to “High Suction Pressure" Cooling/heating 3.Undesirable high-pressure switch Replace the high-pressure switch Cooling/heating 4.Dirty or clogged fin of the condenser Clean the air-side heat exchanger... - Page 47 Fault description Possible cause Troubleshooting Remarks 1.Air found in the water system Discharge air via the exhaust valve 2.Water-side heat exchanger scaling or with foreign Clean up the incrustation scale matters inside 3.Poor switch Replace the target flow switch Fault in flow Cooling/heatin switch Adjust the flow in water pipelines via the...
-
Page 48: Unit Operating Range And Service Condition
12. Unit operating range and service condition 12.1 Unit operating range 12.2 Unit operating conditions Item Contents Power supply voltage Within ±10% of the rated voltage Power supply frequency Within ±1% of rated frequency Voltage difference between two phases of the power supply is less than Phase imbalance 2% of the rated voltage Chilled water flow... -
Page 49: Technical Parameters
13. Technical parameters Frequency conversion module parameters Cooling: Ambient temperature (°C) Water outlet temperature (°C) Cooling Power Cooling Power Cooling Power Cooling Power Cooling Power Cooling Power Cooling Power capacity input capacity input capacity input capacity input capacity input capacity input capacity input... -
Page 50: Sensor Charistic
14. Sensor charistic Model Discharging temp.sensor Ambient temp.sensor R100=6.5K±3% R25=5K±3% B25/50=3470K±3% CA0065EANR B0/100=4010K±3% -30℃~ 105℃ -30℃~ 130℃... -
Page 51: Appendixi Table For Manual Updated Information
15. Appendixi table for manual updated information Version Updated information SYJS-2020.B Updated the datas of 13.Technical parameters... - Page 52 Haier Commercial Air Condition Web: Http://www.haier.com Haier reserves the right to make change without any notice.