LG LGES-5048 User Manual
Hide thumbs
Also See for LGES-5048:
- Quick installation instructions (4 pages) ,
- User manual (18 pages) ,
- Quick installation manual (18 pages)
Table of Contents
Quick Links
Table of Contents

Related Manuals for LG LGES-5048


Summary of Contents for LG LGES-5048
- Page 1 LGES-5048 LGES-5048-NS Hybrid Inverter User Manual...
-
Page 2: Table Of Contents
2.5 DRED & Remote Shutdown Device Connection ........17 2.6 WiFi & WiFi/LAN Module Connection ............18 2.7 Earth Fault Alarm Connection ..............18 03 MANUAL OPERATION ..........21 3.1 Wi-Fi Configuration .................21 3.2 Startup/Shutdown Procedure ..............22 3.3 LGES PV Master App ................23 3.4 LG RESU Home Monitor App ..............23... - Page 3 04 OTHER ..............24 4.1 Error Messages..................24 4.2 Troubleshooting ..................26 4.3 Disclaimer ....................28 4.4 Technical Parameters ................30...
-
Page 4: Introduction
01 Introduction LGES-5048 is a hybrid or bidirectional solar inverter, applicable to solar systems connected to the utility grid and LG Energy Solution RESU 48V batteries. The Inverter should not be installed in multiple phase combinations The energy produced by the PV system is used to power household loads, charge the battery, and export excess energy to the utility grid. -
Page 5: Safety And Warning
1.2 Safety and Warning LGES-5048 from LG Energy Solution Ltd strictly complies with related safety rules for product design and testing. Please read and follow all the instructions and cautions on the inverter or user manual during installation, operation or maintenance. Improper operation might cause personal or property damage. - Page 6 Safety Warnings Installation and operation of the inverter must be performed by qualified electricians, in compliance with all local standards, wiring rules and requirements of local grid authorities, e.g. AS 4777 and AS/NZS 3000 in Australia. Before any wiring connection or electrical operation on inverter, all battery and AC power must be disconnected from inverter for at least 5 minutes to make sure inverter is totally isolated to avoid electric shock.
-
Page 7: Product Overview
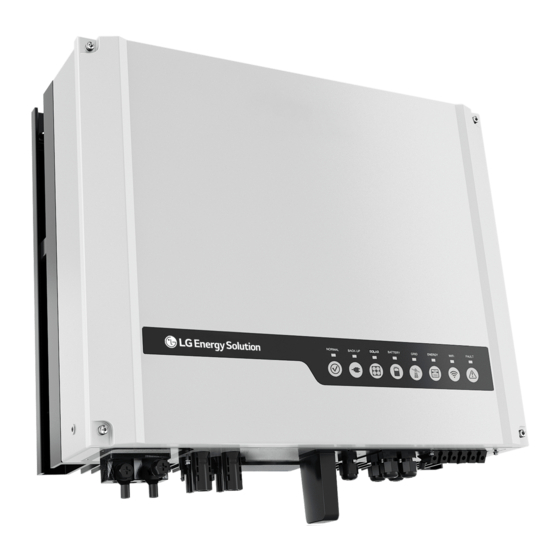
Heat Sink 15. PE Terminal If the inverter is not equipped with a DC switch (LGES-5048-NS), an external DC breaker shall be added. The external DC breaker shall be AU/NZ certified; Complied to AS60947.3:2018; Be classified as DC-PV 2; With ratings and properties suitable for the intended application conditions such as... - Page 8 LED Indicators Indicator Status Explanation ON = System is ready. SYSTEM BLINK = System is starting. OFF = System is not operating. ON = Back-up is ready / power available. BACK-UP OFF = Back-up is off / no power available. ON = Solar inputs #1 and #2 are active.
-
Page 9: Installation Instructions
02 Installation Instructions 2.1 Unacceptable Installations Please avoid the following installations which will damage the system or the Inverter. The following installations should be avoided. Any damage caused will not be covered by the warranty policy. Back-Up Back-Up On-Grid Load For the general version, backup cannot connect in parallel. -
Page 10: Mounting
2.3 Mounting 2.3.1 Select Mounting Location For inverter's protection and convenient maintenance, mounting location for inverter should be selected carefully based on the following rules Rule 1. Any part of this system shouldn't block the switch and breaker from disconnecting the inverter from DC and AC power. -
Page 11: Mounting
2.3.2 Mounting Remember that this inverter is heavy! Please be careful when lifting out from the package. The inverter is suitable for mounting on concrete or other non-combustible surfaces only. Please use the mounting bracket as a template to drill 4 holes in the correct positions (10mm in diameter and 80mm in depth). -
Page 12: Electrical Wiring Connection
The inverters can be locked for anti-theft purposes if this is necessary for individual requirements. The lock is not included in the package and can be purchased by the user. 2.4 Electrical Wiring Connection 2.4.1 PE Cable Connection L=L1+(1~2)mm ≥4 Copper, 1.5~2N·m •... -
Page 13: Pv Wiring Connection
2.4.2 PV Wiring Connection Before connecting PV panels/strings to inverter, please make sure requirements are followed as below • The total short-circuit current of a PV string must not exceed the inverter's max DC current. • The minimum impedance to earth of the PV module shall be greater than R. R=Max.Input Voltage (V)/30mA, i.e. -
Page 14: Battery Wiring Connection
Make sure there is an external DC breaker (125A) connected to the battery circuit. Make sure that the breaker is off and battery is LG Energy Solution RESU 6.5/10/12/13 48V nominal battery only before connecting battery to inverter. Make sure inverter is totally isolated from PV and AC power. -
Page 15: On-Grid&Back-Up Connection
The requirements for the on-grid AC breaker are shown below. Inverter Model AC Breaker Specification LGES-5048 40A / 230V (e.g. DZ47-60 C40) LGES-5048-NS 40A / 230V (e.g. DZ47-60 C40) Note: The absence of AC breaker will lead to inverter damage if an electrical short circuit happens on grid side. - Page 16 Prepare the terminals and AC cables according to the right table. Grade Description Value Outside diameter 13-18 mm Separated wire length 20-25 mm Conductor wire length 7-9 mm Conductor core section 4-6 mm Put AC cable through terminal cover as shown in the figure.
- Page 17 Acceptable Loads Are As Below: LGES-5048 series inverter is able to supply a continuous 4600VA output or maintain a 6900VA output less than 10 seconds on back-up side to support loads. The inverter also has self-protection against de-rating at high ambient temperature.
-
Page 18: Smart Meter & Ct Connections
Note For convenient maintenance, please install a SP3T switch on back-up and on-grid side. Then it is adjustable to support load by back-up or by grid or default settings. 1. Back-up load is supplied from back-up side. Back-Up 2. Back-up load is isolated. On-Grid 3. - Page 19 • For Three Phase Grid Grid Power Meter CT C CT B To Smart Meter CT A connect to L1 CT A CT B connect to L2 CT C connect to L3 Load Note: 1. CT cable is 3m as default, please do not extend. 2.
-
Page 20: Dred & Remote Shutdown Device Connection
2.5 DRED & Remote Shutdown Device Connection DRED (Demand response enabling device) is used for Australia safety requirements. Inverter integrates control logic and provides an interface for DRED. The DRED is not provided by inverter manufacturer. Detailed connection of DRED & Remote Shutdown are shown below. Screw this plate off from the inverter. -
Page 21: Wifi & Wifi/Lan Module Connection
For Remote Shutdown 1. Put the cable through the plate. 2. Wiring from the No. 5 and 6 holes respectively Screw Cap Function REFGEN COM /DRMO Insulator Screw Single hole Cable RS485 seal ring communication board Connect DRED terminal to the right position onto the inverter. 2.6 WiFi &... - Page 22 Wiring System For The Hybrid Inverter Note: This diagram indicates the wiring structure of the hybrid inverter, not the electric wiring standard. DC Breaker AC Breaker AC Breaker AC Breaker...
- Page 23 System Connection Diagrams Note: According to Australian safety requirements, the neutral cables of the on-grid side and backup- side must be connected at the neutral bar of the distribution box. Otherwise, the backup function will not work. Distribution box Backup Loads Battery Back-Up...
-
Page 24: Manual Operation
03 MANUAL OPERATION 3.1 Wi-Fi Configuration This part shows configuration on web page. You can also complete the configuration with LGES PV Master App. Wi-Fi configuration is absolutely necessary for online monitoring and maintenance. Preparation: 1. The inverter must be powered up with battery or grid power. 2. -
Page 25: Startup/Shutdown Procedure
Note: 1. Please make sure the password, Encryption method / algorithm is the same as the router's. 2. Under normal operation, the Wi-Fi LED on inverter will change from double blink to quadruple blink then to solid status, which means Wi-Fi has connected to the server successfully. 3. -
Page 26: Lges Pv Master App
After completing the installation of communication connection, you can also access www.lgresuhomemonitor.com. Please contact technical support for more operation of LG RESU Home Monitor or download the App User Manual via QR code below. LG RESU HOME App... -
Page 27: Other
04 OTHER 4.1 Error Messages. The error messages below will be displayed on LGES PV Master App or reported by e-mail if an error occurs. ERROR EXPLANATION REASON SOLUTIONS MESSAGE Utility Loss Public grid power Inverter does 1. Check (use multi-meter) if AC side is not available not detect the has voltage . - Page 28 Isolation failure 1. Use multi-meter to check if the could be caused by resistance between earth & inverter multiple reasons frame is close to zero. If it's not, please like that the PV ensure that the connection is well. panels are not 2.
-
Page 29: Troubleshooting
4.2 Troubleshooting For PC https://www.lgessbattery.com/au/home-battery/product-info.lg?sn=362 For Mobile https://www.lgessbattery.com/m/au/home-battery/product-info.lg?sn=362 User Manual Download Link Questions & Answers (Q & A) About the Wi-Fi Configuration Q: Why can't I find the Solar-Wi-Fi* signal on mobile devices? A: Normally Solar-WiFi* signal can be found right after inverter has powered up. - Page 30 A: Generally, no, because the communication protocol is integrated into inverter and Smart Meter, other brand meters cannot communicate. Also any manual setting change could cause Meter communication failure. An exception is when using an LG Energy Solution approved meter for VPP operations.
-
Page 31: Disclaimer
Other Questions Q: Is there a quick way to make the system work? A: For the shortest resolution, please refer to "LGES Quick Installation Instructions" and to the "LGES PV Master App Instructions". Q: What kind of load can I use to connect to the backup side? A: Please refer to User Manual on page 14. - Page 32 Maintenance Maintaining Item Maintaining Method Maintaining Period Check the heat sink, air intake, and air outlet System Clean Once 6-12 months for foreign matter or dust. Turn the DC switch on and off ten DC Switch consecutive times to make sure that it is Once a year working properly.
-
Page 33: Technical Parameters
4.4 Technical Parameters Technical Data LGES-5048* Battery Input Data Battery Type Li-Ion Nominal Battery Voltage (V) Battery voltage range (V) 40~60 Max. Charging Voltage (V) ≤60 (Configurable) Max. Charging Current (A) Max. Discharging Current (A) Max charge power (W) 4600... - Page 34 Max. Apparent Power from Utility Grid (VA) 9200 Nominal Output Voltage (V) Output Voltage Range (V) 0~300 Nominal Output Frequency (Hz) 50/60 AC Grid Frequency Range (Hz) 45~65 Max. AC Current Output to Utility Grid (A) 24.5 Max. AC Current From Utility Grid (A) Max.
- Page 35 Protection Anti-islanding Protection Integrated PV String Input Reverse Polarity Protection Integrated Insulation Resistor Detection Integrated Residual Current Monitoring Unit Integrated Output Over Current Protection Integrated Output Short Protection Integrated Output Over Voltage Protection Integrated General Data Operating Temperature Range (℃) -25~60 Relative Humidity 0~95%...
- Page 36 *7: 4600 for VDE 0126-1-1 &VDE-AR-N4105 &NRS 097-2-1, 4600 for CEI 0-21 *8: FOR AUSTRALIA ONLY. Model LGES-5048-NS inverters are designed without built in DC switch. For inverters designed with built in DC switch, the model name should be LGES-5048.
- Page 37 LG Energy Solution Australia Pty Ltd Unit 12, 35 Dunlop Rd, Mulgrave, VIC 3170 Support Tel. : 1300 178 064 [AEST Business hours] Support email : [email protected] www.lghomebattery.com.au www.lgessbattery.com/au https://www.lgensol.com V1.1-2022-04-06 340-00783-00...