Table of Contents
Quick Links
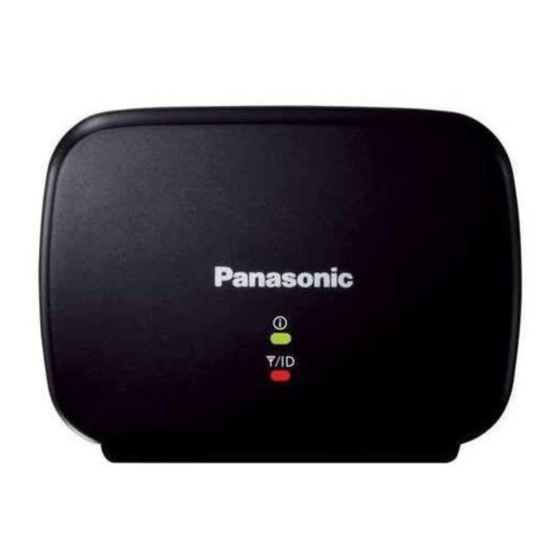
KX-TGA407B
By installing this unit, you can extend the range of your phone system to include
areas where reception was previously not available.
The unit extends the range in all directions, allowing several floors to be covered.
Important:
L This unit is an accessory unit for use with a Panasonic Digital Cordless phone.
For more details, visit our Web site:
http://shop.panasonic.com/support
L You must register this unit with your base unit before it can be used.
L For assistance, visit our Web site:
http://shop.panasonic.com/support for customers in the U.S.A.
Accessory information
Supplied accessories
Accessory item/Part number
AC adaptor/PNLV226-0X
For best performance
Placement
L Install the unit within base unit range in an indoor environment. We recommend
installing the unit in a raised position (such as on a wall).
L Avoid positioning the unit close to objects that will interfere with reception, such as
thick walls, radiators, metal shelving, etc.
L For maximum distance noise-free operation, place the unit away from electrical
appliances such as TV, radio, personal computer, or other telephone equipment.
Installation Guide
Range Extender
KX-TGA407
Model No.
Quantity
PNQX8636ZA
Printed in Malaysia
1
PP0118ZU0
Table of Contents

Related Manuals for Panasonic KX-TGA407B


Summary of Contents for Panasonic KX-TGA407B
- Page 1 The unit extends the range in all directions, allowing several floors to be covered. Important: L This unit is an accessory unit for use with a Panasonic Digital Cordless phone. For more details, visit our Web site: http://shop.panasonic.com/support L You must register this unit with your base unit before it can be used.
- Page 2 Green On 2 handsets are communicating with the base unit Flashing through this unit. (Signal strength is strong) Rapidly Amber On 2 handsets are communicating with the base unit through this unit. (Signal strength is weak) For assistance, please visit http://shop.panasonic.com/support...
- Page 3 Installation/Registering the range extender to the base unit Range extender: Connect the AC adaptor to a power outlet. L Use only the supplied Panasonic AC adaptor PNLV226. L When the unit is turned on, the STATUS indicator and w indicator light amber for about 2 seconds.
-
Page 4: Wall Mounting
Drive the screws (not supplied) into the wall. Mount the unit, then slide it down. Note: L Make sure that the wall is strong enough to support the weight of the unit. Screws 37.0 mm inches) For assistance, please visit http://shop.panasonic.com/support... -
Page 5: Troubleshooting
L Unplug the product from power outlets if it emits smoke, an abnormal smell, or makes an unusual noise. These conditions can cause fire or electric shock. Confirm that smoke has stopped emitting and contact us at http://shop.panasonic.com/support L Unplug from power outlets and never touch the inside of the product if its casing has been broken open. -
Page 6: Important Safety Instructions
SAVE THESE INSTRUCTIONS For best performance Range extender location/avoiding noise The range extender and other compatible Panasonic units use radio waves to communicate with each other. L For maximum coverage and noise-free communications, place your range extender: – at a convenient, high, and central location with no obstructions between the handset and range extender in an indoor environment. -
Page 7: Other Information
0 C – 40 C (32 F – 104 F), 20 % – 80 % relative air humidity (dry) Note: L Design and specifications are subject to change without notice. L The illustrations in these instructions may vary slightly from the actual product. For assistance, please visit http://shop.panasonic.com/support... -
Page 8: Fcc And Other Information
L This product may not be collocated or operated in conjunction with any other antenna or transmitter. Notice L FCC ID can be found on the back of the unit. For assistance, please visit http://shop.panasonic.com/support... -
Page 9: Graphical Symbols For Use On Equipment And Their Descriptions
Double Insulation or Reinforced Insulation) Direct current (D.C.) “ON” (power) Protective earth “OFF” (power) Protective bonding Stand-by (power) earth Functional earth “ON”/“OFF” (power; push-push) For indoor use only Caution, risk of electric shock For assistance, please visit http://shop.panasonic.com/support... -
Page 10: Customer Services Directory
Customer services Shop Accessories! for all your Panasonic gear Go to h p://shop.panasonic.com/support Get everything you need to get the most out of your Panasonic products Accessories & Parts for your Camera, Phone, A/V products, TV, Computers & Networking, Personal Care, Home Appliances, Headphones, Ba eries, Backup Chargers &... -
Page 11: Limited Warranty (Only For U.s.a.)
If your product does not work properly because of a defect in materials or workmanship, Panasonic Corporation of North America (referred to as “the warrantor”) will, for the length of the period indicated on the chart below, which starts with the date of original purchase (“warranty period”), at its option either (a) repair your product with new or refurbished parts,... - Page 12 Service Center. If the problem is not handled to your satisfaction, then write to: Consumer Affairs Department Panasonic Corporation of North America 661 Independence Pkwy Chesapeake, VA 23320 PARTS AND SERVICE, WHICH ARE NOT COVERED BY THIS LIMITED WARRANTY, ARE YOUR RESPONSIBILITY.
- Page 13 Notes For assistance, please visit http://shop.panasonic.com/support...
- Page 14 Notas Para obtener ayuda, visite http://shop.panasonic.com/support (solo en inglés)
- Page 15 Two Riverfront Plaza, Newark, NJ 07102-5490 © Panasonic Corporation 2018 Para obtener ayuda, visite http://shop.panasonic.com/support (solo en inglés)
-
Page 16: Montaje En La Pared
L Oprimió {PROGRAM}. La unidad se encuentra en ESTADO continúa modo de programación. Para salir, oprima parpadee en verde {PROGRAM} de nuevo. No presione {PROGRAM}, durante un tiempo. excepto al registrar o cancelar el registro de la unidad. Para obtener ayuda, visite http://shop.panasonic.com/support (solo en inglés) - Page 17 L Después de que se complete la cancelación del registro, el indicador de ESTADO y el indicador w se encenderán de color ámbar durante 2 segundos. A continuación, el indicador w se apagará. Para obtener ayuda, visite http://shop.panasonic.com/support (solo en inglés)
- Page 18 Extensor de alcance: Conecte el adaptador para corriente a una toma de corriente. L Utilice sólo el adaptador de CA Panasonic PNLV226 que se suministra. L Cuando la unidad base está encendida, el indicador de ESTADO y el indicador de w se iluminan en ámbar durante aproximadamente 2 segundos.
- Page 19 (La señal es fuerte) Ámbar 1 auricular está comunicándose con la unidad encendido base por medio de esta unidad. (La señal es débil) Apagado La unidad se encuentra en modo de registro. Para obtener ayuda, visite http://shop.panasonic.com/support (solo en inglés)
-
Page 20: Guía De Instalación
L Debe registrar esta unidad en su unidad base antes de poder usarla. L Para obtener ayuda, visite nuestro sitio web: http://shop.panasonic.com/support para clientes de EE. UU. (solo en inglés). Información de los accesorios Accesorios que se suministran Accesorio/Pieza número...