Table of Contents
Quick Links
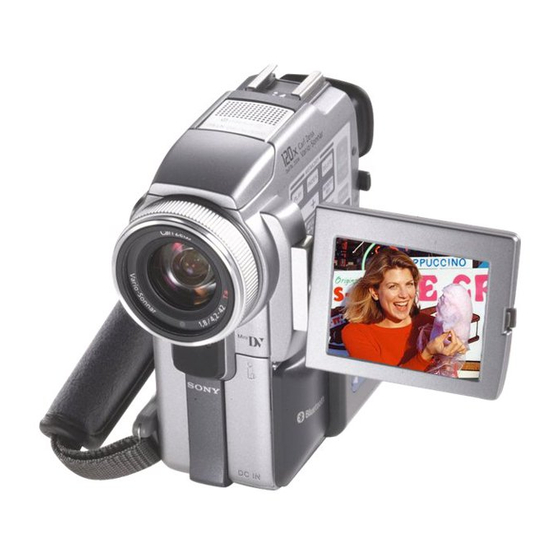
Digital
Video Camera
Recorder
Operating Instructions
Before operating the unit, please read this manual thoroughly,
and retain it for future reference.
Owner's Record
The model and serial numbers are located on the bottom. Record the
serial number in the space provided below. Refer to these numbers
whenever you call upon your Sony dealer regarding this product.
Model No. DCR-PC
Serial No.
DCR-PC120BT
DCR-PC115/PC120BT
©2001 Sony Corporation
3-070-602-11 (1)
Model No. AC-
Serial No.
TM
SERIES
Table of Contents

Related Manuals for Sony DCRPC120


Summary of Contents for Sony DCRPC120
- Page 1 Owner’s Record The model and serial numbers are located on the bottom. Record the serial number in the space provided below. Refer to these numbers whenever you call upon your Sony dealer regarding this product. Model No. DCR-PC Model No. AC- Serial No.
- Page 2 Welcome! Congratulations on your purchase of this Sony Handycam. With your Handycam, you can capture life’s precious moments with superior picture and sound quality. Your Handycam is loaded with advanced features, but at the same time it is very easy to use. You will soon be producing home video that you can enjoy for years to come.
- Page 3 Class B digital If you have any questions about this product, you may call: device, pursuant to Part 15 of the FCC Rules. Sony Customer Information Center 1-800-222- These limits are designed to provide SONY (7669) reasonable protection against harmful The number below is for the FCC related interference in a residential installation.
-
Page 4: Main Features
Main Features Taking moving or still images, and playing them back •Recording a moving picture on a tape (p. xx) •Recording a still image on a tape (p. xx) •Playing back a tape (p. xx) •Recording still images on “Memory Stick”s (p. xx) •Recording moving pictures on “Memory Stick”s (p. -
Page 5: Checking Supplied Accessories
Checking supplied accessories Make sure that the following accessories are supplied with your camcorder. 1 AC-L10A/L10B/L10C AC power 9 Lens hood (1) (p. xx) adaptor (1), Power cord (1) (p. xx) q; “Memory Stick” (1) (p. xx) 2 A/V connecting cable (1) (p. xx, xx) qa CD-ROM (SPVD-004 USB Driver) (1) 3 USB cable (1) (p. -
Page 6: Table Of Contents
Table of contents Main Features .......... 4 Advanced Playback Checking supplied accessories ....5 Operations Quick Start Guide ......Playing back a tape with picture effects ............57 Getting started Playing back a tape with digital effects ............58 Using this manual ......... 10 Enlarging images recorded on tapes Step 1 Preparing the power supply ... - Page 7 Table of contents Recording moving pictures on “Memory Stick”s – MPEG movie recording .... 125 Recording a picture from a tape as a moving picture ......127 Recording edited pictures as a moving picture – Digital program editing (to a “Memory Stick”) ....131 Copying still images from a tape –...
-
Page 8: Quick Start Guide
Quick Start Guide This chapter introduces you to the basic features of your camcorder. See the page in parentheses “( )” for more information. Pull down the Holding Grip to hold your camcorder as illustrated. Holding Grip Connecting the power cord (p. - Page 9 Recording a picture (p. xx) Remove the lens cap. Set the POWER switch to CAMERA while pressing the small green button. Viewing a picture with the viewfinder POWER Close the LCD panel, LOCK and pull out the viewfinder. Press OPEN to open the LCD panel.
-
Page 10: Getting Started
— Getting started — Using this manual The instructions in this manual are for the two models listed in the table below. Before you start reading this manual and operating your camcorder, check the model number by looking at the bottom of your camcorder. (DCR-PC120BT is marked as DCR-PC120 on the bottom of this unit.) The DCR-PC120BT is the model used for illustration purposes. - Page 11 Using this manual Note on TV color systems TV color systems differ from country to country. To view your recordings on a TV, you need an NTSC system-based TV. Copyright precautions Television programs, films, video tapes, and other materials may be copyrighted. Unauthorized recording of such materials may be contrary to the provision of the copyright laws.
-
Page 12: Step 1 Preparing The Power Supply
Step 1 Preparing the power supply Installing the battery pack (1) While sliding BATT RELEASE in the direction of the arrow 1, slide the battery terminal cover in the direction of the arrow 2. (2) Insert the battery pack in the direction of the arrow until it clicks. To remove the battery pack The battery pack is removed in the same way as the battery terminal cover. -
Page 13: Charging The Battery Pack
Step 1 Preparing the power supply Charging the battery pack Use the battery pack after charging it for your camcorder. Your camcorder operates only with the “InfoLITHIUM” battery pack (M series). See page xxx for details of “InfoLITHIUM” battery pack. (1) Open the jack cover and connect the AC power adaptor supplied with your camcorder to the DC IN jack with the plug’s v mark facing up. - Page 14 Step 1 Preparing the power supply Charging time Battery pack Full charge NP-FM50 (supplied) NP-FM70 NP-FM90 NP-FM91 The charging time may increase if the battery’s temperature is extremely high or low because of the ambient temperature. Approximate minutes at 25°C (77°F) to charge an empty battery pack Recording time Recording with Recording with...
- Page 15 “InfoLITHIUM” battery. “InfoLITHIUM” M series battery packs have the mark. SERIES “InfoLITHIUM” is a trademark of Sony Corporation. Connecting to a wall outlet When you use your camcorder for a long time, we recommend that you power it from a wall outlet using the AC power adaptor.
-
Page 16: Step 2 Setting The Date And Time
Step 2 Setting the date and time Set the date and time settings when you use your camcorder for the first time. “CLOCK SET” will be displayed each time that you set the POWER switch to CAMERA or MEMORY unless you set the date and time settings. If you do not use your camcorder for about three months, the date and time settings may be released (bars may appear) because the built-in rechargeable battery installed in your camcorder will have been discharged (p. - Page 17 Step 2 Setting the date and time MA NU A L S E T S E T U P ME NU P ROGR AM A E C L OC K S E T – – : – –:– – P E F F E C T L T R S I Z E D E F F E C T D EMO MOD E...
-
Page 18: Step 3 Inserting A Cassette
Step 3 Inserting a cassette (1) Install the power source. (2) Slide OPEN/Z EJECT in the direction of the arrow and open the lid. The cassette compartment automatically lifts up and opens. (3) Push the middle portion of the back of the cassette to insert. Insert the cassette in a straight line deeply into the cassette compartment with the window facing out. -
Page 19: Recording - Basics
— Recording – Basics — Recording a picture Your camcorder automatically focuses for you. (1) Remove the lens cap by pressing both knobs on its sides and pull the lens cap string to fix it. (2) Install the power source and insert a cassette. See “Step 1” to “Step 3” for more information (p. - Page 20 Recording a picture Note on the LOCK switch When you slide the LOCK switch to the left, the POWER switch can no longer be set to MEMORY accidentally. LOCK switch is set to the right as a default setting. To enable smooth transition Transition between the last scene you recorded and the next scene is smooth as long as you do not eject the cassette even if you turn off your camcorder.
- Page 21 Recording a picture Adjusting the LCD screen The LCD panel moves about 90 degrees to the viewfinder side and about 180 degrees to the lens side. 180° 90° When closing the LCD panel, set it vertically, and swing it into the camcorder body. Note When using the LCD screen except in the mirror mode, the viewfinder automatically turns off (p.
- Page 22 Recording a picture Adjusting the viewfinder If you record pictures with the LCD panel closed, check the picture with the viewfinder. Adjust the viewfinder lens to your eyesight so that the indicators in the viewfinder come into sharp focus. Pull out the viewfinder and move the viewfinder lens adjustment lever. Viewfinder backlight You can change the brightness of the backlight.
- Page 23 Recording a picture Using the zoom feature Move the power zoom lever a little for a slower zoom. Move it further for a faster zoom. Using the zoom function sparingly results in better-looking recordings. “T” side: for telephoto (subject appears closer) “W”...
- Page 24 Recording a picture Shooting with the Mirror Mode This feature allows the camera subject to view him-or herself on the LCD screen. The subject uses this feature to check his or her own image on the LCD screen while you look at the subject in the viewfinder.
- Page 25 Recording a picture Indicators displayed in the recording mode The indicators are not recorded on tapes. Remaining battery time Cassette memory This appears when using a tape with cassette memory. Recording mode STBY/REC Time code/Tape counter 0:00:01 45min Remaining tape This appears after you insert a cassette and record or play back for a while.
-
Page 26: Shooting Backlit Subjects - Back Light
Recording a picture Shooting backlit subjects – BACK LIGHT When you shoot a subject with the light source behind the subject or a subject with a light background, use the backlight function. Set the POWER switch to CAMERA or MEMORY, press BACK LIGHT. The . - Page 27 Recording a picture Using Super NightShot The Super NightShot mode makes subjects more than 16 times brighter than those recorded in the NightShot mode. (1) Set the POWER switch to CAMERA, slide NIGHTSHOT to ON. “NIGHTSHOT” indicators flash on the screen. (2) Press SUPER NIGHTSHOT.
-
Page 28: Self-Timer Recording
Recording a picture Self-timer recording Recording with the self-timer starts in 10 seconds automatically. You can also use the Remote Commander for this operation. (1) Press (self-timer) in the standby mode. The (self-timer) indicator appears on the screen. (2) Press START/STOP. Self-timer starts counting down from ten with a beep sound. -
Page 29: Checking The Recording
Checking the recording – END SEARCH / EDITSEARCH / Rec Review You can use these buttons to check the recorded picture or shoot so that the transition between the last recorded scene and the next scene you record is smooth. EDIT SEARCH SERCH... -
Page 30: Playback - Basics
— Playback – Basics — Playing back a tape You can monitor the playback picture on the screen. If you close the LCD panel, you can monitor the playback picture in the viewfinder. You can control playback using the Remote Commander supplied with your camcorder. (1) Install the power source and insert the recorded tape. -
Page 31: To Display The Screen Indicators - Display Function
Playing back a tape If you leave the power on for a long time Your camcorder gets warm. This is not a malfunction. When you open or close the LCD panel Open or close the LCD panel vertically. To display the screen indicators – Display function Press DISPLAY. - Page 32 Playing back a tape Various settings Various settings is your camcorder’s information when you have recorded. In the recording mode, the various settings will not be displayed. When you use the data code function, bars (-- -- --) appear if: –...
- Page 33 Playing back a tape To view the picture frame-by-frame Press C on the Remote Commander in the playback pause mode. For frame-by-frame playback in the reverse direction, press c. To resume normal playback, press N. To search the last scene recorded (END SEARCH) Press END SEARCH in the stop mode.
-
Page 34: Viewing The Recording On Tv
Viewing the recording on TV Connect your camcorder to your TV with the A/V connecting cable supplied with your camcorder to watch the playback picture on the TV screen. You can operate the video control buttons in the same way as when you monitor playback pictures on the screen. When monitoring the playback picture on the TV screen, we recommend that you power your camcorder from a wall outlet using the AC power adaptor (p. -
Page 35: Advanced Recording Operations
— Advanced Recording Operations — Recording a still image on a tape – Tape Photo recording You can record an still image like a photograph. You can record about 510 images in the SP mode and about 765 images in the LP mode on a 60-minute tape. - Page 36 Recording a still image on a tape – Tape Photo recording Recording images with the flash The flash pops up automatically. The default setting is auto (no indicator). To change the flash mode, press the (flash) repeatedly until the flash mode indicator appears on the screen.
- Page 37 Recording a still image on a tape – Tape Photo recording When you record images with the flash The possible shooting distance using the built-in flash is shorter than when you record on “Memory Stick”s. When playing back images recorded with the flash on other equipment These images may flicker.
- Page 38 Recording a still image on a tape – Tape Photo recording Self-timer recording You can record still images on tapes with the self-timer. You can also use the Remote Commander for this operation. (1) Press (self-timer) in the standby mode. The (self-timer) indicator appears on the screen.
-
Page 39: Adjusting The White Balance Manually
Adjusting the white balance manually You can manually adjust and set the white balance. This adjustment makes white subjects look white and allows more natural color balance. Normally white balance is automatically adjusted. (1) Set the POWER switch to CAMERA or MEMORY. Press MENU, then select and decide upon WHT BAL in with the control button (p. -
Page 40: Using The Wide Mode
Using the wide mode You can record a 16:9 wide picture to watch on the 16:9 wide-screen TV (16:9WIDE). Black bands appear on the screen during recording in 16:9WIDE mode [a]. The picture during a playback on a normal TV [b] or on a wide-screen TV [c] is compressed in the widthwise direction. -
Page 41: Using The Fader Function
Using the fader function You can fade in or out to give your recording a professional appearance. STBY FADER M. FADER (mosaic) BOUNCE 1) 2) OVERLAP WIPE STBY MONOTONE When fading in, the picture gradually changes from black-and-white to color. When fading out, the picture gradually changes from color to black-and-white. - Page 42 Using the fader function (1) When fading in [a] In the standby mode, press FADER until the desired fader indicator flashes. When fading out [b] In the recording mode, press FADER until the desired fader indicator flashes. The indicator changes as follows: FADER t M.
- Page 43 Using the fader function While using the bounce function, you cannot use the following functions: – Focus – Zoom – Picture effect – Exposure Note on the bounce function The BOUNCE indicator does not appear in the following mode or functions: –...
-
Page 44: Using Special Effects - Picture Effect
Using special effects – Picture effect You can digitally process images to obtain special effects like those in films or on TV. NEG. ART [a] : The color and brightness of the picture are reversed. SEPIA : The picture gets sepia. B&W : The picture appears in monochrome (black-and-white). -
Page 45: Using Special Effects - Digital Effect
Using special effects – Digital effect You can add special effects to recorded pictures using the various digital functions. The sound is recorded normally. STILL You can record a still image so that it is superimposed on a moving picture. FLASH (FLASH MOTION) You can record still images successively at constant intervals. - Page 46 Using special effects – Digital effect (1) Set the POWER switch to CAMERA. Press MENU, then select and decide upon D EFFECT in with the control button (p. xx). (2) Select and decide upon the desired digital effect mode with the control button. The bars appear.
- Page 47 Using special effects – Digital effect Notes •The following functions do not work during digital effect: – Fader – Low lux of PROGRAM AE (The indicator flashes.) – Tape photo recording – Super NightShot •The PROGRAM AE function does not work in the slow shutter mode. •The following functions do not work in the old movie mode: –...
-
Page 48: Using The Program Ae Function
Using the PROGRAM AE function You can select PROGRAM AE (Auto Exposure) mode to suit your specific shooting requirements. Spotlight This mode prevents peoples’ faces, for example, from appearing excessively white when shooting subjects lit by strong light in the theater. Soft portrait This mode brings out the subject while creating a soft background for subjects such as people or flowers. - Page 49 Using the PROGRAM AE function (1) Set the POWER switch to CAMERA or MEMORY. Press MENU select and decide upon PROGRAM AE in in the menu settings with the control button (p. xx). (2) Select and decide upon the desired PROGRAM AE mode with the control button.
- Page 50 Using the PROGRAM AE function While WHT BAL is set to AUTO in the menu settings The white balance is adjusted even if the PROGRAM AE function is selected. Even if the PROGRAM AE function is selected You can adjust the exposure. If you are recording under a discharge tube such as a fluorescent lamp, sodium lamp or mercury lamp Flickering or changes in color may occur in the following modes.
-
Page 51: Adjusting The Exposure Manually
Adjusting the exposure manually You can manually adjust and set the exposure. Normally exposure is automatically adjusted. Adjust the exposure manually in the following cases: – The subject is backlit – Bright subject and dark background – To record dark pictures (e.g. night scenes) faithfully (1) Set the POWER switch to CAMERA or MEMORY, press EXPOSURE. -
Page 52: Focusing Manually
Focusing manually You can gain better results by manually adjusting the focus in the following cases. Normally, focus is automatically adjusted: •The autofocus mode is not effective when shooting: – subjects through glass coated with water droplets – horizontal stripes –... - Page 53 Focusing manually To focus precisely It is easier to focus on the subject if you adjust the zoom to shoot at the “W” (wide- angle) after focusing at the “T” (telephoto) position. When you shoot close to the subject Focus at the end of the “W” (wide-angle) position. 9 changes as follows: when recording a distant subject when the subject is too close to focus on...
-
Page 54: Interval Recording
Interval recording You can make a time-lapse recording by Example setting the camcorder to automatically record and standby sequentially. You can achieve an 9 min 59 s 9 min 59 s excellent recording for flowering, emergence, etc., with this function. 10 min 10 min [a] REC TIME... - Page 55 Interval recording POWER LOCK CAMERA SET CAMERA SET D ZOOM D ZOOM 16 : 9W I DE 16 : 9W I DE STEADYSHOT STEADYSHOT N. S. L I GHT N. S. L I GHT FRAME REC FRAME REC I NT. REC I NT.
-
Page 56: Frame By Frame Recording - Cut Recording
Frame by frame recording – Cut recording You can make a recording with a stop-motion animated effect using cut recording. To create this effect, alternately move the subject a little and make a cut recording. We recommend that you use a tripod, and operate the camcorder using the Remote Commander after step 4. -
Page 57: Advanced Playback Operations
— Advanced Playback Operations — Playing back a tape with picture effects During playback, you can process a scene using the picture effect functions: NEG. ART, SEPIA, B&W and SOLARIZE. (1) In the playback or playback pause mode, press MENU, then select and decide upon P EFFECT in with the control button (p. -
Page 58: Playing Back A Tape With Digital Effects
Playing back a tape with digital effects During playback, you can process a scene using the digital effect functions: STILL, FLASH, LUMI. and TRAIL. (1) In the playback or playback pause mode, press MENU, then select and decide upon D EFFECT in with the control button (p. -
Page 59: Enlarging Images Recorded On Tapes - Tape Pb Zoom
Enlarging images recorded on tapes – Tape PB ZOOM You can enlarge playback images recorded on tapes. Besides the operation described here, your camcorder can enlarge still images recorded on “Memory Stick”s (p. xxx). (1) In the playback or playback pause mode, press PB ZOOM on your camcorder. The center of the image is enlarged to twice its size. -
Page 60: Quickly Locating A Scene Using The Zero Set Memory Function
Quickly locating a scene using the zero set memory function Your camcorder goes forward or backward to automatically stop at a desired scene having a tape counter value of “0:00:00”. Use the Remote Commander for this operation. (1) In the playback mode, press DISPLAY. (2) Press ZERO SET MEMORY at the point you want to locate later. -
Page 61: Searching The Boundaries Of Recorded Tape By Title - Title Search
Searching the boundaries of recorded tape by title – Title search If you use a tape with cassette memory, you can search for the boundaries of recorded tape by title. Use the Remote Commander for this operation. Before operation Set CM SEARCH in to ON in the menu settings (p. -
Page 62: Searching A Recording By Date
Searching a recording by date – Date search You can automatically search for the point where the recording date changes and start playback from that point (Date search). Use a tape with cassette memory for convenience. Use the Remote Commander for this operation. Use this function to check where recording dates change or to edit the tape at each recording date. - Page 63 Searching a recording by date – Date search Note If one day’s recording is less than two minutes, your camcorder may not accurately find the point where the recording date changes. If a tape has a blank portion between recorded portions The date search function may not work correctly.
-
Page 64: Searching For A Photo
Searching for a photo – Photo search/Photo scan You can search for a still image you have recorded on a tape (photo search). You can also search for still images one after another and display each image for five seconds automatically regardless of cassette memory (photo scan). Use the Remote Commander for these operations. - Page 65 Searching for a photo – Photo search/Photo scan Searching for a photo without using cassette memory (1) Set the POWER switch to VCR. (2) Press MENU, then select and decide upon CM SEARCH in to OFF with the control button (p. xx). (3) Press SEARCH MODE on the Remote Commander repeatedly until the PHOTO SEARCH indicator appears.