Table of Contents
Quick Links
Table of Contents

Summary of Contents for Haier XShuai HXS-C3
-
Page 3: Table Of Contents
HXS-C3 Thank you for purchasing, wish you have a happy experience. Contents 1. “Huiba”App Operation Guide... 2-3 6. Product Maintenance…..14-17 6.1 Clean the Main Body 2. Safety Instruction..... 4-6 6.2 Clean the Dustbin 2.1 Use Notes 6.3 Clean the Main Brush 2.2 Safety Precautions 6.4 Clean the Side Brush 2.3 About Child Safety... -
Page 4: Huiba"App Operation Guide
1. “Huiba”App Operation Guide Download & Install “ Huiba” App *Scan the QR Code below or search “ Huiba ” in App Store or Google Play. *App can read 10 countries language ,including English,German,French, Spanish,Chinese,Russian,Portuguese,Japanese,Hebrew,Italian. Google Play Huiba 1.2 Register Step 1. - Page 5 1.3 Add The Robot 1. Enter into App "Huiba", click "+" on home page to get into add robot interface, operating based on guiding steps on the App interface. 2. If you want to add multiple robots, click"+" in the upper right corner of the contacts, operating based on guiding steps on the App interface.
-
Page 6: Safety Instruction
2. Safety Instruction 2.1 Use Notes Please observe the following safety precautions before using the product: * Read the User Manual carefully, and use the product according to the instruction. * Keep the User Manual carefully for the f uture reference. * If you want to send the product to others, please send it together with the User Manual. -
Page 7: About Child Safety
Attention Please remove all the fragile This product is only used Water, oil or other liquid Please clean up the wire in indoor. shall be prevented from the wire in the floor, or it will objects. damaging the XSmart. hinder the working of the machine. -
Page 8: Wireless Device Warning
2.5 Wireless Device Warning This device contains transmitter module, FCC ID: 2ALRN-HXS-C3 This device complies with Part 15 of the FCC rules . Operation is subject to the following two conditions: (1) This device may not cause harmful interference. (2) This device must accept any interference received, including interference that may cause undesired operation. -
Page 9: Product Formation
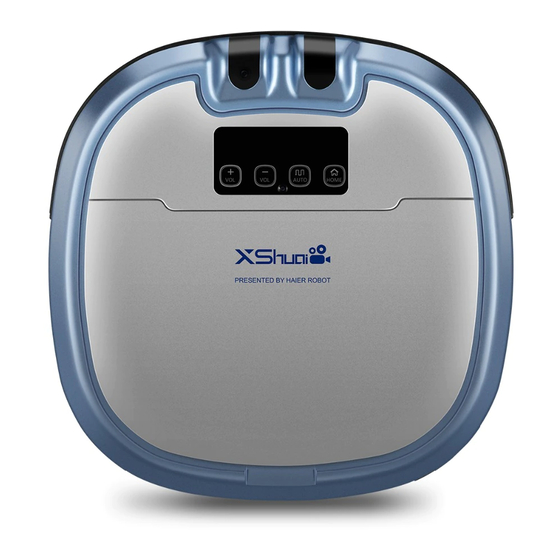
3. Product Formation 3.1 Main Body and Accessories Battery Charging Station Adapter Main Body HOME AUTO SPOT ZIGZAG EDGE VACUUM Water Tank Remote control suction Side Brush Clean Brush User Manual components 3.2 Accessories Introduction Front View Camera Optical Window Top Cover Sensors Window Mechanical induction bar... -
Page 10: Product Installation
Bottom View Ground Detection Sensors Front Wheel Charging Electrodes Battery Pack Middle Bristle Brush Left Wheel Right Wheel Trailing Bar Assembly 4.Product Installation 4.1 Main Body Danger! Electric shock. OFF/ON 1. If you do not use the machine, please turn off the power switch, or else it will damage the battery. 2. -
Page 11: Charging Station
4.2 Charging Station Danger! 0.5m Electric shock! 0.5m 1.Put charging station on the 2.Connect charging station to 3.Do not cover the signal flat floor against the wall and power socket. window of the docking sta- tion, otherwise the function keep any obstacles away of auto-charging will be in- from the charging sation in valid. -
Page 12: Product Usage
5.Product Usage 5.1 Main Body Hour unit Minute decade Hour decade Minute unit Wi-Fi configuration light Week digit Camera light Battery Recharge Button AUTO HOME Volume Buttons Auto Button Icon Buttons' Instruction Press this button and release, and then hear "tip", the volume of the machine will increase. - Page 13 Standby Auto Charging OFF/ON 2. XSmart will automatically return to its Make sure the robot has enough power, docking station for self-recharging when turn on the power switch, wait for 25 the battery is low. Connect the App on seconds hear the "tip", the program starts, in standby mode.
-
Page 14: Remote Control
5.2 Remote Control HOME AUTO SPOT ZIGZAG EDGE VACUUM 1.“POWER” button Under the operating mode,the machine stops cleaning by pressing this button. 2.“OK” button A.Under the standby mode,the machine starts advanced zigzag cleaning by pressing this button. B.Under the operating mode,the machine stops cleaning by pressing this button. 3.Direction buttons A.“... -
Page 15: Charging Station
5.3 Charging Station Charging Station Instruction Danger! Electric shock. No obstacle here. Usage: 1.Install the charging station according to the method from page 8, as shown on the top right photo. Name Function When the adapter is connected power supply, the red indicator light Charging indicator is on. -
Page 16: Product Maintenance
5.4.2 Auto charging AUTO HOME 1.Auto-charging by smart phone App: 2. Auto charging: 3. Auto-charging: Firstly install the app, then open the When the battery power is low during XSmart will return to charging station for controlling interface, click the “charge” the cleaning, XSmart will emit the sound charging after press button and XSmat will find the... -
Page 17: Clean The Main Brush
6.2.3 Clean the filter P ULL 1.Remove the HEPA 2.Use the brush to brush the filter 6.2.4 Clean the HEPA P ULL trash can Pat the HEPA 2.Install the HEPA 6.3 Clean the Main Brush 6.3.1 Assemble and Disassemble the Main Brush 3.Please push the buckle to open the main 4.Grasp the middle bristle brush and fill it up. -
Page 18: Clean The Side Brush
6.3.2 Clean the Middle Bristle Brush 1.Please follow the above pictures illustrate to 2.Please clean the hair and cloth wrapped clean the main brush by clean brush. around the side brush. 6.4 Clean the Side Brush 1.Take out the screw with a 2.Take out the side brush,clean 3.Put the side brush in the hole, screwdriver on the side brush. -
Page 19: Clean The Sensors
6.7 Clean the Sensors Please wipe the sensor window by dry cloth or clean it by brush. 6.8 Clean the Trailing Bar Assembly Tips: The trailing bar assembly is an accessory that is suitable to the flat floor, please use it according to the house environment. -
Page 20: General Error
7.General Error 7.1 Alarm and Prompt Facility 1. If the machine stops working, the display will show the error code. 2.Please check the display failure prompt, according to the following tips to clear the exception. Error Code Faults performance Solution Remarks Obstacles on the sensors Clean the ground detection... -
Page 21: Technical Parameters
8.Technical Parameters Main Body Parameters Accessories Parameters Adapter Working Voltage DC14.8 V Rated Power 28 W Input Voltage AC100-240V Battery Li-lon Output Current 1000mA Battery Capacity 2600mAh Charging Time About 4-5H Docking Station DC 24V Cleaning Time 90-120 M Input Voltage Output Current 1000mA Video &... -
Page 22: Attachment
Attachment “Huiba”App Operation Guide - 20 - Product website: xshuairobot.com... - Page 23 1.“ Huiba ” App Remote Control XSmart Login “ Huiba ” App and click “Robot” icon to enter the main function interface. XSmart Remote Control Interface: Press direction icons to control XSmart back and forth, left and right. It’s available to adjust the camera angle 45° up or down by sliding screen with finger.
- Page 24 2.Add Family Members and Accessories “ Huiba ” Contacts Interface: 1、Click “+” icon at the top right corner, two options available: Enter Mobile Phone No. & Add From Contacts. You can select any way to add contacts to be your family members. (P.S. the contacts must have downloaded and registered “Huiba”...
- Page 25 3.Reservation Cleaning Click the Reservation Cleaning to make an appointment with an cleaning at a certain moment in one day.As the pictures show to select a time , after the scheduled time the cleaning robot will start work. - 23 - Product website: xshuairobot.com...
- Page 26 Warning: This device complies with Part 15 of the FCC rules. Operation is subject to the following two conditions: (1) this device may not cause harmful interference, and (2) this device must accept any interference received, including interference that may cause undesired operation. The manufacturer is not responsible for any radio or TV interference caused by unauthorized modifications or change to this equipment.