Table of Contents
Table of Contents

Related Manuals for AEG DualSense 7000


Summary of Contents for AEG DualSense 7000
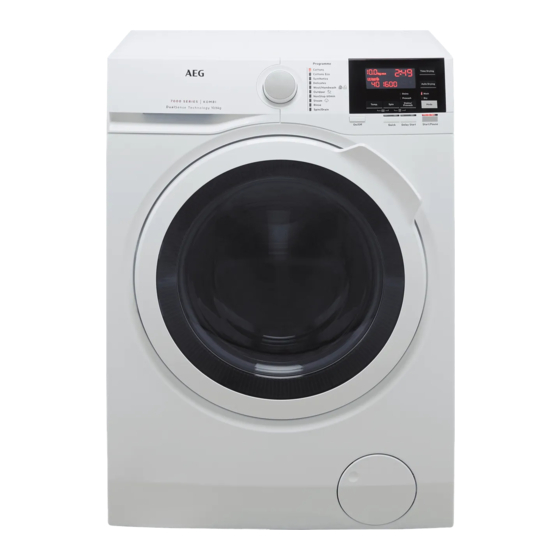
- Page 1 L7WEG161R User Manual Washer Dryer USER MANUAL...
-
Page 2: Table Of Contents
19. CONSUMPTION VALUES................47 FOR PERFECT RESULTS Thank you for choosing this AEG product. We have created it to give you impeccable performance for many years, with innovative technologies that help make life simpler – features you might not find on ordinary appliances. Please spend a few minutes reading to get the very best from it. -
Page 3: Safety Information
ENGLISH SAFETY INFORMATION Before the installation and use of the appliance, carefully read the supplied instructions. The manufacturer is not responsible for any injuries or damage that are the result of incorrect installation or usage. Always keep the instructions in a safe and accessible location for future reference. - Page 4 1.2 General Safety Do not change the specification of this appliance. • This appliance is intended to be used in household • and similar applications such as: staff kitchen areas in shops, offices and other – working environments; by clients in hotels, motels, bed & breakfast and –...
- Page 5 ENGLISH Do not exceed the maximum load of 10 kg (refer to the • "Programme chart" chapter). The appliance must be connected to the water mains • using the new supplied hose sets, or other new hose sets supplied by the Authorised Service Centre. Old hose sets must not be reused.
-
Page 6: Safety Instructions
Do not use high pressure water sprays and/or steam • to clean the appliance. Clean the appliance with a moist cloth. Use only • neutral detergents. Do not use abrasive products, abrasive cleaning pads, solvents or metal objects. Before any maintenance operation, deactivate the •... - Page 7 ENGLISH 2.4 Use consequences and might void the guarantee. WARNING! • The following spare parts will be Risk of injury, electric shock, available for 10 years after the model fire, burns or damage to the has been discontinued: motor and appliance.
-
Page 8: Product Description
3. PRODUCT DESCRIPTION 3.1 Appliance overview 11 12 Worktop Drain hose Detergent dispenser Inlet hose connection Control panel Mains cable Door handle Transit bolts Rating plate Hose support Drain pump filter Feet for levelling the appliance The rating plate reports the model name (A), product number (B), electrical ratings (C) and serial number (D). -
Page 9: Accessories
If you install the appliance on a plinth that is not an accessory supplied by To raise your appliance and make AEG, secure the appliance in the fixing loading and unloading laundry easier. plates. The drawer can be used for laundry Read carefully the instructions supplied storage e.g.: towels, cleaning products... -
Page 10: Installation
6. INSTALLATION 4. Open the door and remove the WARNING! polystyrene piece from the door seal Refer to Safety chapters. and all the items from the drum. 6.1 Unpacking WARNING! Remove all the packaging and the transit bolts before installing the appliance. - Page 11 ENGLISH We recommend that you 9. Remove the power supply cable and keep the packaging and the the drain hose from the hose holders. transit bolts for any movement of the appliance. It is possible to see 6.2 Installation on suspended water flowing from the flooring drain hose.
- Page 12 45º 45º 20º 20º The appliance must be level and stable. Make sure that the inlet hose is not in vertical position. A correct adjustment of the appliance level prevents the 3. If necessary, loose the ring nut to set vibration, noise and the it in the correct position.
- Page 13 ENGLISH If this occurs, close the water tap and contact the authorized service centre to replace the hose. Make sure that the drain 6.6 Water drainage hose end is not immersed in the water. There may be a The drain hose should be positioned at a return of dirty water into the height of not less than 60 cm and not appliance.
- Page 14 5. Without the plastic hose guide, to The rating plate and the 'Technical Data' a sink spigot - Put the drain hose in chapter indicate the necessary electrical the spigot and tighten it with a clamp. ratings. Make sure that they are Refer to the illustration.
-
Page 15: Control Panel
ENGLISH 7. CONTROL PANEL 7.1 Control panel description 11 10 Programme dial Start and pause touch button (Start/ Pause) Display Option touch button (Stains/Prewash) Drying time touch button (Time Drying) Delay Start touch button (Delay Start) Drying level touch button (Auto Time Saving touch button (Quick) Drying) Spin reduction touch button (Spin) - Page 16 Maximum laundry indicator. It flashes when the laundry load exceeds the maximum declared load of the selected programme. If you run a programme when the drum is overloaded, also flashes at the end of the programme. Drying time indicator.
-
Page 17: Dial And Buttons
ENGLISH 8. DIAL AND BUTTONS 8.1 Introduction When the display shows the indicators , the appliance does not heat When pressing a key the water. combination, do not tilt your fingers downwards . The 8.5 Spin sensors of the underneath buttons are sensitive and When you set a programme, the may interfere with Your... - Page 18 Each time you touch this button the time The options can increase the value increases by 5 minutes. programme duration. You cannot set all time 8.7 Delay Start values for different types of fabrics. With this option you can delay the start of a programme in a more convenient time.
-
Page 19: Programmes
ENGLISH 9. PROGRAMMES 9.1 Programme Chart Programme Reference Maxi‐ Programme description Default tempera‐ spin speed ture Spin speed load Temperature range range 1600 rpm 1600 rpm - Eco 40-60 (Wash 400 rpm only mode) 10 kg 40 °C 60 °C - 30 °C White cotton and fast-coloured cotton. - Page 20 Programme Reference Maxi‐ Programme description Default tempera‐ spin speed ture Spin speed load Temperature range range 1200 rpm Do not use fabric softener 1200 rpm - Outdoor and make sure that there is 400 rpm no softener residue in the de‐...
- Page 21 ENGLISH Programme Reference Maxi‐ Programme description Default tempera‐ spin speed ture Spin speed load Temperature range range Steam programmes Steam Steam can be used for dried, washed or worn once laundry. These programmes can reduce creases and odours and make your laundry softer.
- Page 22 Programme Reference Maxi‐ Programme description Default tempera‐ spin speed ture Spin speed load Temperature range range 1600 rpm All fabrics, except woollens and delicate 1600 rpm - fabrics. To spin the laundry and to drain the 10 kg Spin/Drain water in the drum.
- Page 23 ENGLISH Programme options compatibility Options ■ ■ ■ ■ ■ ■ ■ ■ Spin No Spin ■ ■ ■ ■ Stains ■ ■ ■ Prewash ■ ■ ■ ■ ■ ■ Extra Rinse ■ ■ ■ ■ ■ Quick ■ ■...
- Page 24 Programme Universal Liquid Uni‐ Liquid for Delicates Special versal coloureds woollens powder NonStop ▲ ▲ 60min 1) At temperature higher than 60 °C the use of powder detergent is recommended. ▲ = Recommended Company for the washing of wool garments labelled as "hand wash"...
- Page 25 ENGLISH Dryness Level Type of fabric Load Cottons and Linen up to 6 kg (bathrobes, bath towels, etc) Cupboard Dry For items to be stored Synthetics and mixed fab‐ up to 4 kg rics (jumpers, blouses, under‐ wear, household and bed lin‐ Delicate fabrics up to 2 kg (acrylics, viscose and deli‐...
-
Page 26: Settings
Dryness Level Type of fabric Load Spin Suggested (kg) spee duration (mins) (rpm) Cupboard Dry Cottons and Linen 1600 235 - 255 For items to be (bathrobes, bath towels, etc) 1600 155 - 175 stored 1600 115 - 125... -
Page 27: Before First Use
ENGLISH add one extra rinse. appears on If you deactivate the the display. acoustic signals, they • Simultaneously touch the Temp. continue operate when the button and the Spin button twice to appliance has a malfunction. add two extra rinses. appears on 10.4 Permanent Extra Rinse the display. - Page 28 Always follow the instructions that you find on the packaging of the detergent products, but we recommend that you do not exceed the maximum indicated level ( ). This quantity will however guarantee the best washing results. After a washing cycle, if...
- Page 29 ENGLISH 4. To use liquid detergent, turn the flap The indicator of the Start/Pause button down. flashes. The display shows the maximum declared load for the programme, the default temperature, the maximum spin speed, the washing phase indicators (when available) and an indicative programme duration.
- Page 30 At the end of the load detection, in case The ProSense estimation starts at the end of the of drum overload, the indicator countdown. flashing in the display: Cancelling the delay start In this case, for 30 seconds, it is possible...
- Page 31 ENGLISH 12.10 Interrupting a 2. Open the appliance door. If necessary, add or remove the items. programme and changing the 3. Close the door and touch the Start/ options Pause button. The programme or the delay start When the programme is running, you continues.
-
Page 32: Daily Use - Washing & Drying
• You do not use the appliance for 5 Turn the programme dial to set a new minutes before you touch the Start/ cycle. Pause button. If you set a programme or an Press the On/Off button to activate option that ends with water the appliance again. -
Page 33: Daily Use - Drying Only
ENGLISH drying, calculated on a default load In the display the door locked size. indicator comes on and the indicator of the running phase starts flashing. To have a good drying by The display also shows the remaining using less energy and in a programme time. -
Page 34: Fluff In The Fabrics
14.2 Drying - Automatic Each time you tap on this button the time value increases by 5 minutes. The levels display shows the set new time value. 2. Touch the Start/Pause to start the 1. Tap on the Auto Drying button programme. -
Page 35: Hints And Tips
ENGLISH To remove the fluff inside the drum, • Touch the Start/Pause button to start proceed as follows: the programme. • Empty the drum. If the appliance is frequently • Clean the drum, the gasket and the used, carry out the CLE door with a wet cloth. - Page 36 • mould in the appliance. Excessive detergent may cause: • sudsing, • reduced washing effect, • inadequate rinsing, • a greater impact for the environment. 16.4 Ecological hints To save water, energy and to help 16.3 Detergent type and...
-
Page 37: Care And Cleaning
ENGLISH 16.9 Drying cycle duration • For the maximum laundry load of the drying programmes, refer to the The drying time can change depending drying programmes table. • speed of the last spin 16.7 Items not suitable for • dryness level drying •... - Page 38 17.4 Descaling Clean detergent dis‐ Every two months If the water hardness in your penser area is high or moderate, we recommend that you use a Clean drain pump Twice a year water descaling product for filter washing machines.
- Page 39 ENGLISH 17.8 Cleaning the detergent dispenser To prevent possible deposits of dried detergent or clotted fabric softener and/or formation of mould in the detergent dispenser drawer, once in a while carry out the following cleaning procedure: 1. Open the drawer. Press the catch downwards as indicated in the Clean it when needed, using ammonia picture and pull it out.
- Page 40 WARNING! • Do not remove the filter while the appliance operates. • Do not clean the pump if the water in the appliance is hot. Wait until the water cools down Proceed as follows to clean the pump: 1. Open the pump cover.
- Page 41 ENGLISH 11. Put the filter back into the special guides by turning it clockwise. Make sure that you tighten the filter correctly to prevent leakages. 5. When the bowl is full of water, turn the filter back and empty the container.
- Page 42 1. Remove the inlet hose from the tap and clean the filter. 45° 20° 17.11 Emergency drain If the appliance cannot drain the water, carry out the same procedure, described 2.
-
Page 43: Troubleshooting
ENGLISH 18. TROUBLESHOOTING WARNING! Refer to Safety chapters. 18.1 Alarm Codes and Possible failures The appliance does not start or it stops during operation. First try to find a solution to the problem (refer to the tables). WARNING! Deactivate the appliance before carrying out any check. With some problems, the display shows an alarm code and the Start/Pause button may flash continuously: If the appliance is overloaded, remove some items... - Page 44 • Make sure that the sink spigot is not clogged. • Make sure that the drain hose has no kinks or bends. The appliance does • Make sure that the drain filter is not clogged. Clean the filter, if not drain the water.
- Page 45 ENGLISH Problem Possible solution The spin phase does • Make sure that the drain filter is not clogged. Clean the filter, if not operate or the necessary. Refer to "Care and cleaning". washing cycle lasts • Adjust manually the items in the tub and start the spin phase longer than usual.
- Page 46 Problem Possible solution The fabrics washed in the previous cycle released fluff of a differ‐ ent colour: • The drying phase helps to eliminate some fluff. The laundry is full of • Clean the clothes with a fluff remover.
-
Page 47: Consumption Values
ENGLISH 19. CONSUMPTION VALUES 19.1 Introduction This user manual reports two different tables in order to favour a gradual passage from a regulation to the other: • Directive 96/60/EC, valid up to 28th of February 2021, is related to an energy label reporting the Energy Efficiency classes from A to G for washing and drying cycles. - Page 48 19.3 According to Commission Regulation Eu 2019/2023 Washing only Eco 40-60 pro‐ Litres h:mm °C gramme Full load 1.080 3:50 1551 Half load 0.740 2:50 1551 Quarter load 0.380 2:50 1551 1) Maximum spin speed. Wash and dry cycle Eco 40-60 pro‐...
- Page 49 ENGLISH Programme Litres h:mm °C Cottons 1.70 3:50 1600 60°C Cottons 0.35 3:00 1600 20°C Synthetics 0.80 2:15 1200 40°C Delicates 0.40 1:05 1200 30°C Wool 0.30 1:05 1200 30°C 1) Reference indicator of the spin speed. 2) Suitable for washing heavily soiled textiles. 3) Suitable for washing lightly soiled cottons.
- Page 52 www.aeg.com/shop...