Makita DLS112 Instruction Manual
Cordless slide compound miter saw
Hide thumbs
Also See for DLS112:
- Instruction manual (252 pages) ,
- Instruction manual (128 pages) ,
- Instruction manual (41 pages)

Related Manuals for Makita DLS112


Summary of Contents for Makita DLS112
- Page 1 INSTRUCTION MANUAL Cordless Slide Compound Miter Saw DLS110 DLS112 Read before use.
-
Page 2: Specifications
SPECIFICATIONS Model: DLS110 DLS112 Blade diameter European countries 260 mm Countries other than Europe 255 mm - 260 mm Hole diameter European countries 30 mm Countries other than Europe 25.4 mm Max. kerf thickness of the saw blade 3.2 mm Max. -
Page 3: Safety Warnings
Sound power level (L ) : 102 dB (A) liquids, gases or dust. Power tools create sparks Uncertainty (K) : 3 dB(A) which may ignite the dust or fumes. Model DLS112 Keep children and bystanders away while Sound pressure level (L ) : 92 dB(A) operating a power tool. Distractions can cause... - Page 4 Remove any adjusting key or wrench before Maintain power tools and accessories. Check for turning the power tool on. A wrench or a key left misalignment or binding of moving parts, break- attached to a rotating part of the power tool may age of parts and any other condition that may result in personal injury.
-
Page 5: Safety Instructions For Mitre Saws
Do not use the saw until the table is clear of all Safety instructions for mitre saws tools, wood scraps, etc., except for the work- piece. Small debris or loose pieces of wood or Mitre saws are intended to cut wood or wood- other objects that contact the revolving blade can like products, they cannot be used with abra- be thrown with high speed. - Page 6 21. Only use the saw blades that are marked with 18. Before using the tool on an actual workpiece, a speed equal or higher than the speed marked let it run for a while. Watch for vibration or on the tool. wobbling that could indicate poor installation or a poorly balanced blade.
-
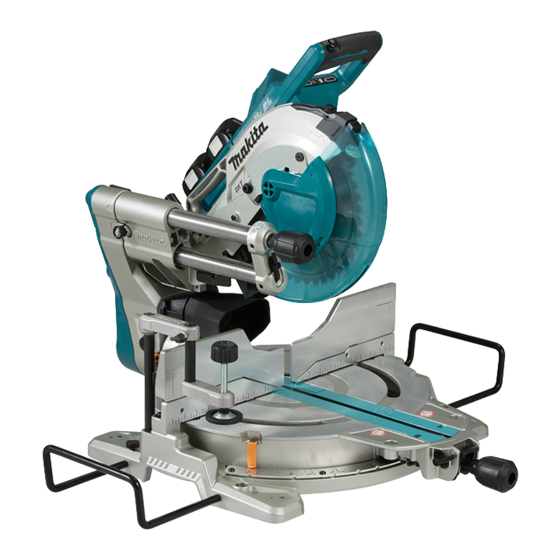
Page 7: Parts Description
Only use genuine Makita batteries. Use of non-genuine Makita batteries, or batteries that have been altered, may result in the battery bursting causing fires, personal injury and damage. It will also void the Makita warranty for the Makita tool and charger. PARTS DESCRIPTION Slide pole Stopper pin (for carriage... -
Page 8: Installation
Switch trigger Lock-off button Hole for padlock Switch (for laser line) (For DLS112 only) Battery indicator Mode indicator Check button Hose (for dust extraction) Stopper pin (for carriage Guide fence (lower Guide fence (upper Dust bag elevation) fence) fence) 0° adjusting bolt (for Bevel angle scale Releasing lever (for 48°... -
Page 9: Bench Mounting
This tool should be bolted with four bolts to a level and Installing the dust extraction hose stable surface using the bolt holes provided in the tool's base. This will help prevent tipping and possible injury. Connect the dust extraction hose to the tool as illustrated. Make sure that the elbow and the sleeve fit properly to the ports of the tool. ► 1 . Bolt WARNING: Ensure that the tool will not move on the supporting surface. -
Page 10: Functional Description
Tool / battery protection system FUNCTIONAL DESCRIPTION The tool is equipped with a tool/battery protection sys- tem. This system automatically cuts off power to the motor to extend tool and battery life. The tool will auto- WARNING: matically stop during operation if the tool or battery is Always be sure that the tool is placed under one of the following conditions: switched off and the battery cartridge is removed before adjusting or checking the functions on Overload protection the tool. -
Page 11: Blade Guard
NOTE: Depending on the conditions of use and the Battery indicator status Remaining battery ambient temperature, the indication may differ slightly capacity from the actual capacity. Blinking Automatic speed change function 50% to 100% 20% to 50% 0% to 20% Charge the battery Indicating the remaining battery... - Page 12 Do not remove spring holding blade guard. If guard becomes discolored through age or UV light exposure, contact a Makita service center for a new guard. DO NOT DEFEAT OR REMOVE GUARD. ► 1 . Left bevel cut 2. Straight cut 3. Right bevel cut 4.
- Page 13 Maintaining maximum cutting capacity This tool is factory adjusted to provide the maximum cutting capacity for a 260 mm saw blade. When installing a new blade, always check the lower limit position of the blade and if necessary, adjust it as follows: First, remove the batteries. Turn the stopper lever to engaged position. ► 1 . Top surface of turn base 2. Periphery of blade 3. Guide fence With the batteries removed, rotate the blade by hand ► 1 .
-
Page 14: Adjusting The Bevel Angle
NOTE: If you depress the releasing lever, you can move the turn base without holding down the lock lever. Tighten the grip at your desired position. This miter saw employs positive stop function. You can set 0°, 15°, 22.5°, 31.6°, 45°, and 60° right/left miter angle quickly. To use this function, move the turn base close to your desired positive stop angle while holding down the lock lever. Then release the lock lever and move the turn base forward until the turn base is locked. Adjusting the bevel angle NOTICE: Always remove the upper guide fences... -
Page 15: Slide Lock
Match the pointer with your desired angle on the scale by moving the carriage then tighten the knob. ► 1 . Releasing lever This miter saw employs positive stop function. You can set 22.5° and 33.9° angle to both right and left quickly. Set the latch lever in the position as illustrated and tilt the carriage. To change the angle, pull the latch lever and tilt the carriage. ► 1 . -
Page 16: Switch Action
Laser beam action trigger actuates properly and returns to the "OFF" position when released. Do not pull the switch For DLS112 only trigger hard without pressing in the lock-off but- ton. This can cause switch breakage. Operating a CAUTION: Never look into the laser beam. -
Page 17: Removing And Installing Saw Blade
WARNING: Use only the Makita wrench pro- vided to install or remove the blade. Failure to use the wrench may result in overtightening or insufficient tightening of the hex socket bolt and serious personal injury. -
Page 18: Removing The Blade
Removing the blade Installing the blade Loosen the hex bolt holding the center cover using the Mount the blade carefully onto the spindle, making hex wrench. Raise the blade guard and center cover. sure that the direction of the arrow on the surface of the blade matches the direction of the arrow on the blade case. -
Page 19: Securing Workpiece
Connecting a vacuum cleaner When you wish to perform clean cutting operation, con- nect a Makita vacuum cleaner to the dust nozzle using a front cuffs 24 (optional accessory). ► 1 . Fastener Securing workpiece WARNING: It is extremely important to always ► 1 . - Page 20 Guide fences WARNING: Before operating the tool, make sure that the upper fence is secured firmly. WARNING: Before bevel-cutting, make sure that no part of the tool, especially the blade, con- tacts the upper and lower fences when fully low- ering and raising the handle in any position and while moving the carriage through its full range of travel.
-
Page 21: Operation
Horizontal vise Optional accessory WARNING: Always rotate the vise nut clock- wise until the workpiece is properly secured. If the workpiece is not properly secured the material may move during the cutting operation causing possible damage to the blade, causing the material to be thrown and loss of control resulting in serious personal injury. -
Page 22: Miter Cutting
Workpieces up to 68 mm high and 160 mm wide can be cut in the following manner. ► 1 . Stopper pin Push the carriage toward the guide fence until it stops and lock it with the stopper pin. Secure the workpiece with the proper type of vise. ► 1 . -
Page 23: Bevel Cut
When the cut is completed, switch off the tool and Bevel cut wait until the blade has come to a complete stop before returning the blade to its fully elevated position. WARNING: After setting the blade for a bevel Compound cutting cut, ensure that the carriage and blade will have free travel throughout the entire range of the Compound cutting is the process in which a bevel... - Page 24 In the case of left bevel cut (a) (b) (c) (d) 1. Inside corner 2. Outside corner 1. Inside corner 2. Outside corner Measuring Table (A) Measure the wall width, and adjust the width of the workpiece according to it. Always make sure that width – Molding Bevel angle Miter angle of the workpiece's wall contact edge is the same as wall position 52/38°...
- Page 25 In the case of right bevel cut Crown molding stopper Optional accessory Crown molding stoppers allow easier cuts of crown molding without tilting the saw blade. Install them on the turn base as shown in the figures. At right 45° miter angle (a) (b) (c) (d) 1.
-
Page 26: Groove Cutting
Cutting aluminum extrusion ► 1 . Guide fence 2. Crown molding stopper ► 1 . Vise 2. Spacer block 3. Guide fence 4. Aluminum extrusion 5. Spacer block When securing aluminum extrusions, use spacer blocks or pieces of scrap as shown in the figure to prevent deformation of the aluminum. Use a cutting lubricant when cutting the aluminum extrusion to prevent build-up of the aluminum material on the blade. -
Page 27: Maintenance
MAINTENANCE WARNING: Always be sure that the tool is switched off and batteries are removed before attempting to perform inspection or maintenance. Failure to removing the batteries and switch off the tool may result in accidental start up of the tool which may result in serious personal injury. -
Page 28: Bevel Angle
► 1 . Triangular rule 2. Saw blade 3. Top surface of ► 1 . Triangular rule turn base Bevel angle Check if the side of the blade squares with the turn base surface once again. Loosen the screw on the pointer. 0° bevel angle Align the pointer with 0° position in the bevel angle scale and then tighten the screw. Push the carriage toward the guide fence and lock the sliding movement by the stopper pin. - Page 29 Beware that impacts to the tool. It may cause the laser line to be misaligned or may cause damage to the laser, shortening its life. NOTICE: Have the tool repaired by a Makita authorized service center for any failure on the laser unit. The movable range of laser line is decided by the range adjustment screws on both sides. Perform following...
-
Page 30: Optional Accessories
Misuse of periodically. an accessory or attachment may result in serious personal injury. If you need any assistance for more details regard- ing these accessories, ask your local Makita Service Center. • Steel & Carbide-tipped saw blades • Vertical vise •... - Page 32 Makita Europe N.V. Jan-Baptist Vinkstraat 2, 3070 Kortenberg, Belgium Makita Corporation 3-11-8, Sumiyoshi-cho, Anjo, Aichi 446-8502 Japan 885601A229 www.makita.com 20170414...