
Related Manuals for Samsung SMX-F40SP


Summary of Contents for Samsung SMX-F40SP
-
Page 1: User Manual
User Manual Memory Camcorder www.samsung.com/register SMX-F40BP/SMX-F40SP/SMX-F40RP/SMX-F40LP SMX-F400BP/SMX-F400SP/SMX-F400RP/SMX-F400LP SMX-F401BP/SMX-F401SP/SMX-F401RP/SMX-F401LP SMX-F43BP/SMX-F43SP/SMX-F43RP/SMX-F43LP SMX-F44BP/SMX-F44SP/SMX-F44RP/SMX-F44LP... - Page 2 High-resolution colour widescreen LCD (2.7” WIDE TFT LCD) Samsung memory camcorder utilizes a 2.7-inch 230k pixel Widescreen LCD which allows bright and clear monitoring. In addition, the LCD Enhancer adjusts colour and brightness to the screen lighting conditions for better monitoring under strong sunlight.
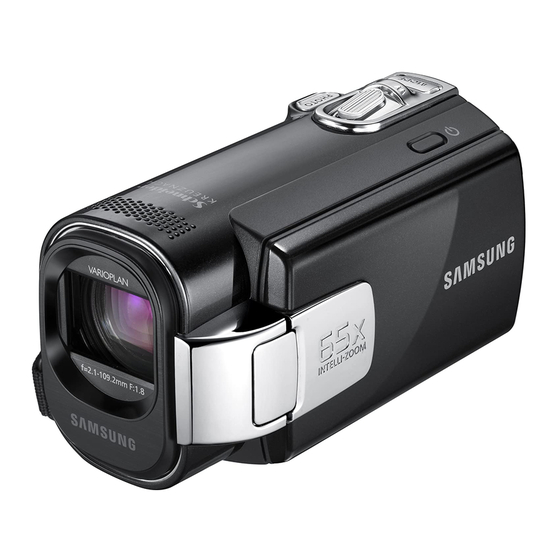
- Page 3 Capture visions further than the eye can see : 52x Optical Power Zoom, 65x Intelli- Zoom, and 2200x Digital Zoom Samsung's powerful optical zoom lenses bring the world closer without losing image quality. In addition, Digital Zoom Interpolation enables clearer digital zooming, with less distortion than previous types of digital zooms.
-
Page 4: Before Reading This User Manual
before reading this user manual SAFETY WARNINGS What the icons and signs in this user manual mean; Means that there is a potential risk of death or serious injury. WARNING Means that there is a potential risk of personal injury or damage to the product. - Page 5 • The recorded contents cannot be compensated for: - Samsung cannot compensate for any damage caused when a recording cannot be played back because of a defect in the camcorder or memory card. Samsung cannot be responsible for your recorded video and audio.
- Page 6 Notes regarding trademarks • All the trade names and registered trademarks mentioned in this manual or other documentation provided with your Samsung product are trademarks or registered trademarks of their respective holders. • The SD logo is a trademark. The SDHC logo is a trademark.
- Page 7 (Applicable in the European Union and other European countries with separate battery return systems) This marking on the battery, manual or packaging indicates that the batteries in this product should not be disposed of with other household waste at the end of their working life. Where marked, the chemical symbols Hg, Cd or Pb indicate that the battery contains mercury, cadmium or lead above the reference levels in EC Directive 2006/66.
-
Page 8: Safety Information
safety information The safety precautions illustrated below are to prevent personal injury or material damages. Heed all instructions carefully. WARNING Means that there is a potential risk of serious personal injury. CAUTION Means that there is a potential risk of personal injury or damage to the product WARNING Do not overload outlets or... - Page 9 There is a risk of electric shock. If the camcorder makes an abnormal sound, or smell or smokes, unplug the power-cord immediately and request service from a Samsung service centre. There is a risk of fire or personal injury.
- Page 10 safety information CAUTION Do not press the surface of the LCD with force, or hit it with a sharp object. If you push the LCD surface, display unevenness may occur. Do not use the camcorder near direct sunlight or heating equipment.
- Page 11 Other manufacturers of optional accessories compatible with this camcorder is responsible for their own products. Use the optional accessories according to the safety instructions. Samsung shall not be responsible for any malfunction and risk of fire, electric shock and damages occurred by using unauthorized accessories.
-
Page 12: Table Of Contents
contents qUICK START GUIDE GETTING TO KNOW THE CAMCORDER IDENTIFYING THE SCREEN DISPLAYS BASIC OPERATION OF THE CAMCORDER ABOUT THE STORAGE MEDIA BASIC RECORDING BASIC PLAYBACK You can record videos in H.264 format! What's included with your camcorder Location of controls LCD screen indicators Attaching the grip belt PREPARATION... - Page 13 RECORDING OPTIONS PLAYBACK OPTIONS SYSTEM SETTING Changing the menu settings Menu items iSCENE Video Resolution Photo Resolution 16:9 Wide White Balance Aperture Shutter Speed EV (Exposure Value) C.Nite Focus Anti-Shake(HDIS) Digital Effect Fader Wind Cut Zoom Type Time Lapse REC Guideline Menu items Multi View Option...
- Page 14 contents CONNECTING TO A TV DUBBING VIDEOS USING WITH A WINDOWS COMPUTER TROUBLESHOOTING MAINTENANCE & ADDITIONAL INFORMATION SPECIFICATIONS LCD Colour Auto LCD Off Menu Design Transparency Beep Sound Shutter Sound Auto Power Off PC Software TV Display Default Set Version Language Demo Connecting to a normal (standard definition)
-
Page 15: Quick Start Guide
quick start guide This quick start guide introduces the basic operation and features of your camcorder. See the reference pages for more information. You can record videos in H.264 format! You can record videos in H.264 format that is convenient to email and share with your friends and family. You can also take photos with your camcorder. - Page 16 quick start guide STEP2: Record with your camcorder Recording start/ stop button Recording videos with H.264 format Your camcorder uses advanced H.264 compression technology to realize the clearest video quality. page 47 1. Open the LCD screen and press the Power ) button to turn on the camcorder.
-
Page 17: Viewing On A Tv
STEP3: Play back videos or photos Viewing the LCD screen of your camcorder You can fi nd your desired recordings quickly by using the thumbnail index view. 1. Press the MODE button to select the Play mode. • The thumbnail index view appears. The thumbnail of the latest created or played fi le is highlighted. - Page 18 quick start guide Viewing the videos/photos from your PC 1. Launch the Intelli-studio programme by connecting the camcorder to your PC via the USB cable. • A new file saving screen appears with the Intelli-studio main window. Click “Yes,” the uploading procedure will start. 2.
-
Page 19: Getting To Know The Camcorder
• The contents may vary depending on the sales region. • Parts and accessories are available for purchase at your local Samsung dealer. SAMSUNG is not responsible for reduced battery life time or malfunctions caused by any unauthorized use of accessories such as the AC adaptor or the batteries. -
Page 20: Location Of Controls
getting to know the camcorder LOCATION OF CONTROLS Front & Left View VARIOPLAN f=2.1-109.2mm F:1.8 ❶ ❷ ❸ ❹ Lens MENU button Control joystick (////OK), Zoom (W/T) joystick Recording start/stop button LCD screen Memory card/Jack cover ⓐ USB jack ( ⓑ... - Page 21 Right Top & Bottom View ❶ ❷ ❸ 1 Zoom lever (W/T) 2 PHOTO button 3 Grip belt 4 Grip belt hook Be careful not to cover the internal microphone and lens during recording. Rear View 1 Mode indicator : Record mode (Video/Photo) : Play mode 2 Recording start/stop button 3 Battery pack slot...
-
Page 22: Identifying The Screen Displays
identifying the screen displays The available functions vary depending on the selected operation mode, and different indicators appear depending on the setting values. LCD SCREEN INDICATORS Video and Photo record mode PRECHECK! • This On Screen Display (OSD) is shown in Record ( •... - Page 23 0:00:00 [475Min] STBY SCENE 0:00:00 [475Min] STBY SCENE • The illustration above shows the EV (Exposure Value) screen. • Functions marked with * will not be kept when the camcorder restarts. • The shortcut menu (OK guide) represents the most frequently accessed functions according to the selected mode.
- Page 24 identifying the screen displays Video Play mode PRECHECK! • This On Screen Display (OSD) is shown in Video play ( • Press the MODE button to select the Play ( Normal View 0:00:55 Photo 0:00:00/0:00:55 01/JAN/2010 00:00 ) mode only. ) mode.
- Page 25 SCENE 0:00:00/0:00:55 Multi View 0:00:00/0:00:55 01/JAN/2010 00:00 Video Play mode : Shortcut menu (OK Guide) 100-0001 Video Play mode : Single (Volume) 100-0001 Forward playback search page 42 (Skip/Search/Slow motion/ Frame-by-frame) Volume Down Play () / Pause ( ❙ ❙ Reverse playback search page 42 (Skip/Search/Slow motion/ Frame-by-frame)
-
Page 26: Photo Play Mode
Photo play mode PRECHECK! • This On Screen Display (OSD) is shown in Photo Play ( • Press the MODE button to select the Play ( Normal View 100-0001 Video Multi View ) mode only. ) mode. page 24 1/10 Move Full View SCENE... -
Page 27: Preparation
preparation This section provides information that you should know before using this camcorder: such as how to use the provided accessories, how to charge the battery, and how to setup the operation mode and initialise setup. ATTACHING THE GRIP BELT Adjust the length of grip belt so that the camcorder is stable when you press the Recording start/stop button with your thumb. -
Page 28: Connecting A Power Source
• Use only Samsung-approved battery packs. Do not use batteries from other manufacturers. Otherwise, there is a danger of overheating, fi re or explosion. • Samsung is not responsible for problems occurring due to using unapproved batteries. -
Page 29: Charging The Battery
Charging the battery You can charge the battery using the AC power adaptor or USB cable. PRECHECK! • Charge the battery pack before using the camcorder. • Use only the provided battery pack and AC power adaptor. 1. Press the Power ( ) button to turn off the camcorder. -
Page 30: Checking The Battery State
preparation CHECKING THE BATTERY STATE You can check the charging state and remaining battery capacity. To check the charging state The colour of the CHG lamp indicates the power or charging state. Charging (CHG) lamp The colour of the charging indicator shows the charging state. Charging state LED colour Battery Level Display... - Page 31 The recording time is affected by temperature and environmental conditions. • We recommend only using the original battery pack that is available from your Samsung retailer. When the battery reaches the end of its life, please contact your local dealer. The batteries have to be dealt with as chemical waste.
- Page 32 preparation About the running time • Times measured when using the camcorder at 25˚C (77˚F). As the environmental temperature and conditions vary, the actual battery time may differ form the approximate times given in the table. • The recording and playback time will be shorter depending on the conditions under which you use your camcorder.
-
Page 33: Basic Operation Of The Camcorder
basic operation of the camcorder This chapter introduces you to the basic operation procedures of this camcorder, such as turning the power on/off, switching modes, and setting on-screen indicators. TURNING YOUR CAMCORDER ON/OFF 1. Open the LCD screen and press the Power ( to turn on the camcorder. -
Page 34: Setting The Operation Modes
basic operation of the camcorder SETTING THE OPERATION MODES You can switch the operating mode in the following order each time you press the MODE button. Record mode ( Record mode ( • Each time the operation mode changes, the respective mode indicator lights on. -
Page 35: Using The Back Light Touch Button
USING THE BACK LIGHT TOUCH BUTTON When a subject is lit from behind, this function will compensate for lighting so that the subject is not too dark. Touch the Back Light ( ) touch button to display ) icon on the screen. To cancel, touch the Back Light ( ) touch button again. -
Page 36: Shortcut Menu (Ok Guide)
basic operation of the camcorder SHORTCUT MENU (OK GUIDE) The Shortcut menu (OK guide) represents the most frequently accessed functions according to the selected mode. ✪ For example: Setting EV (Exposure Value) in the Record mode using the Shortcut menu (OK guide). 1. -
Page 37: Shortcut Function Using The Control Jotsticks
SHORTCUT FUNCTION USING THE CONTROL JOTSTICKS Button Record ( ) mode SCENE - Access the shortcut menu - Confirm selection - Exit the shortcut menu - iSCENE - Zoom (wide) - Focus - Zoom (tele) DOWN LEFT Quick View RIGHT SCENE Play ( ) mode... -
Page 38: Setting The Time Zone And Date/Time For The First Time
basic operation of the camcorder SETTING THE TIME ZONE AND DATE/TIME FOR THE FIRST TIME Set the date and time of your local area when turning on this camcorder for the fi rst time. Open the LCD screen and press the Power ( camcorder. -
Page 39: Selecting The Languages
SELECTING THE LANGUAGES You can select the language that appears on the menu screen. The language setting is retained when the camcorder is powered off. 1. Press the MENU button Control joystick (/) “Settings.” 2. Move the Control joystick (/) to select “Language,” and then press the OK button. -
Page 40: About The Storage Media
about the storage media SELECTING THE STORAGE MEDIA (SMX-F43/F44 only) • You can record on the built-in memory or a memory card, so the desired storage media needs to be selected before starting recording or playback. • You can use SD and SDHC cards on your camcorder. (Some cards are not compatible depending on a memory card manufacturer and memory card type.) •... -
Page 41: Inserting And Removing A Memory Card (Not Supplied)
INSERTING AND REMOVING A MEMORY CARD (NOT SUPPLIED) To insert a memory card 1. Turn the camcorder off. 2. Open the memory card/jack cover as shown in the diagram. 3. Insert a memory card into the memory card slot until it softly clicks in the direction of the arrow shown in the diagram. -
Page 42: Selecting A Suitable Memory Card
about the storage media SELECTING A SUITABLE MEMORY CARD Compatible memory cards • This camcorder can be used with SD (Secure Digital) and SDHC (Secure Digital High Capacity) cards. It is recommended to use an SDHC (Secure Digital High Capacity) card. SD cards up to 2GB are supported with this camcorder. -
Page 43: Notes On Use
• Be careful to keep the memory card out of the reach of children, who might swallow Notes on use • Samsung is not responsible for data loss due to misuse. • We recommend using a memory card case to avoid losing data from moving and static electricity. - Page 44 about the storage media Recordable time available for video Media Capacity TV Super Fine 720x576(50i) TV Fine ( 720x576(50i) 720x576(50i) TV Normal ( 640x480(25p) Web Fine ( Web Normal 640x480(25p) Recordable number of photos Media Capacity Mode Resolution 800x600 1600x1200 848x480 16:9 1696x960...
-
Page 45: Basic Recording
• If power is interrupted or an error occurs during recording, the video may not be recorded/edited. • Samsung is not responsible for any damage occurred by a failure of normal recording or playback operation because of memory card error. -
Page 46: Taking Photos
basic recording TAKING PHOTOS You can take photos and store them on the storage media. Set the desired resolution before recording. page 48 PRECHECK! • Open the LCD screen and press the Power ( • Set the appropriate storage media. page 30 (SMX-F43/F44 only) (If you want to record on a memory card, insert a memory card.) •... -
Page 47: Quick View Function In The Record Mode
qUICK VIEW FUNCTION IN THE RECORD MODE Using the Quick View function, you can view the most recently recorded video or photo image right after your recording. 1. Press the OK button in STBY mode right after your recording. • Shortcut menu (OK guide) is displayed on the LCD screen. -
Page 48: Recording With Ease For Beginners (Smart Auto Mode)
basic recording RECORDING WITH EASE FOR BEGINNERS (SMART AUTO MODE) User-friendly SMART AUTO optimises your camcorder to the recording conditions automatically, providing beginners with the best performance. PRECHECK! Select the Record ( 1. Touch the SMART AUTO ( • The SMART AUTO ( screen at the same time. -
Page 49: Zooming
ZOOMING Use the zoom function for close-up or wide-angle recording. This camcorder allows you to record using 52x optical power zoom, 65x Intelli-zoom and 2200x digital zoom. To zoom in Slide the Zoom lever towards T (telephoto). (Or move the Control joystick () on the LCD panel.) To zoom out Slide the Zoom lever towards W (wide-angle). -
Page 50: Basic Playback
basic playback • You can view recorded videos and photos in thumbnail index view and play them in various ways. In the thumbnail index view, you can directly select and display a desired image without using fast forwarding and rewinding. •... -
Page 51: Playing Back Videos
PLAYING BACK VIDEOS You can preview recorded videos in a thumbnail index view. Find your desired video quickly, and playback directly. PRECHECK! • This function works only in Video Play ( • You can fi nd a desired video image quickly using the thumbnail index view. 1. -
Page 52: Various Playback Operations
basic playback Various playback operations Still playback (pause) (/ ) • Press the OK button during playback. To resume normal playback, press the OK button again. Search playback ( • During playback, move and hold the Control joystick () for forward search, or to the left for reverse search. -
Page 53: Viewing Photos
VIEWING PHOTOS You can view recorded photos by using various playback functions. PRECHECK! • This function works only in Photo Play ( • You can fi nd and view desired photos quickly using the thumbnail index view. 1. Open the LCD screen and press the Power ( the camcorder. -
Page 54: Recording Options
recording options CHANGING THE MENU SETTINGS You can change the menu settings to customize your camcorder. This chapter uses "Aperture" function in the Record mode as an example. Using the MENU button 1. Open the LCD screen and press the Power ( the camcorder. -
Page 55: Menu Items
MENU ITEMS • Accessible items in menu vary depending on the operating mode. • For operation details, see the corresponding page. Recording menu items Items Record ( iSCENE Video Resolution Photo Resolution 16:9 Wide White Balance Aperture Shutter Speed C.Nite Focus Anti-Shake(HDIS) Digital Effect... -
Page 56: Iscene
recording options iSCENE This camcorder automatically sets the shutter speed and aperture according to the subject and brightness for optimum recording. You can also specify one of various modes depending on subject conditions, recording environment or purpose of fi lming. PRECHECK! Select the Record ( 1. -
Page 57: Submenu Item
Video Resolution You can select the resolution of a video to be recorded. This camcorder can record in “TV Super Fine,” “TV Fine,” “TV Normal,” “Web Fine” and “Web Normal” modes. The “TV Fine” mode is set as the factory default. PRECHECK! Select the Record ( ) mode by pressing the MODE button. -
Page 58: Photo Resolution
recording options Photo Resolution You can select the quality of photo images to be recorded. PRECHECK! Select the Record ( 1. Press the MENU button Control joystick (/) “Photo Resolution.” 2. Select the desired submenu item with the Control joystick (/), and then press the OK button. -
Page 59: 16:9 Wide
16:9 Wide You can select the desired LCD display aspect ratio for recording or playback (16:9 Wide/4:3 aspect ratio). PRECHECK! Select the Record ( ) mode by pressing the MODE button. page 24 1. Press the MENU button Control joystick (/) “16:9 Wide.” 2. -
Page 60: White Balance
recording options White Balance This camcorder automatically adjusts the colour of the subject. You can record in natural colours depending on the subject and lighting conditions. PRECHECK! Select the Record ( 1. Press the MENU button Control joystick (/) “White Balance.”... -
Page 61: To Set The White Balance Manually
To set the white balance manually 1. Select “Custom WB.” • The indicator ( ) and the message “Set White Balance.” are displayed. 2. Frame a white object such as a piece of paper so that it fi lls the screen. -
Page 62: Aperture
recording options Aperture The camcorder adjusts the aperture automatically depending on the subject and recording conditions. You can also manually adjust the Aperture to your preference. PRECHECK! Select the Record ( 1. Press the MENU button Control joystick (/) “Aperture”. 2. -
Page 63: Shutter Speed
Shutter Speed The camcorder automatically sets the shutter speed depending on the scene's brightness. You can also manually adjust the shutter speed according to the scene conditions. PRECHECK! Select the Record ( ) mode by pressing the MODE button. page 24 1. - Page 64 recording options Recommended shutter speed when recording: shutter speed 1/50 1/120 1/250, 1/500, 1/1000 1/2000, 1/4000, 1/10000 Outdoor sports such as golf and tennis. Do not aim at the sun. Doing so might cause your camcorder to malfunction. Take images of the sun only in low light conditions, such as at dusk.
-
Page 65: Ev (Exposure Value)
EV (Exposure Value) The camcorder usually adjusts the exposure automatically. You can also manually adjust the exposure depending on the recording conditions. PRECHECK! Select the Record ( ) mode by pressing the MODE button. page 24 1. Press the MENU button Control joystick (/) “EV.” 2. - Page 66 recording options C.Nite You can adjust the shutter speed when recording a slow moving object, or record a brighter image in dark places without a compromise in colours. PRECHECK! Select the Record ( 1. Press the MENU button Control joystick (/) “C.Nite.” 2.
-
Page 67: Focus
Focus The camcorder usually focuses on a subject automatically (auto focus). When the camcorder is turned on, auto-focus will be always set. You can also manually focus a subject depending on the recording conditions. PRECHECK! Select the Record ( ) mode by pressing the MODE button. page 24 1. - Page 68 recording options Focusing manually during recording: This camcorder automatically focuses a subject from close-up to infi nity. However, the correct focus may not be obtained depending on the recording conditions. In this case, use the manual focus mode. 1. Move the Control joystick (/) to select “Manual Focus.” •...
-
Page 69: Anti-Shake(Hdis)
Anti-Shake(HDIS) Use the Anti-Shake (HDIS) function to compensate for unstable images caused by shaking movements when holding the camcorder. PRECHECK! Select the Record ( ) mode by pressing the MODE button. page 24 1. Press the MENU button Control joystick (/) “Anti-Shake (HDIS).”... -
Page 70: Digital Effect
recording options Digital Effect Using the digital effect function gives your recording a creative look. PRECHECK! Select the Record ( 1. Press the MENU button Control joystick (/) “Digital Effect.” 2. Select the desired submenu item with the Control joystick (/), and then press the OK button. -
Page 71: Fader
Fader You can give your recording a professional look by using special effects such as fade in at the beginning of a sequence or fade out at the end of a sequence. PRECHECK! Select the Record ( ) mode by pressing the MODE button. page 24 1. -
Page 72: Wind Cut
recording options Wind Cut Using the Wind Cut function, you can reduce wind noise when recording sound from the built-in microphone. PRECHECK! Select the Record ( 1. Press the MENU button Control joystick (/) “Wind Cut.” 2. Select the desired submenu item with the Control joystick (/), and then press the OK button. -
Page 73: Zoom Type
Zoom Type The memory camcorder offers three types of zoom: optical, intelligent and digital zoom when recording videos. PRECHECK! Select the Record ( ) mode by pressing the MODE button. page 24 1. Press the MENU button Control joystick (/) “Zoom Type.”... -
Page 74: Time Lapse Rec
recording options Time Lapse REC Using the time lapse feature, your camcorder can be programmed to automatically record a number of frames over a period of time or with a certain time interval between each frame. For instance, a camcorder on a tripod (not supplied) in time lapse mode could be set up to shoot frames of a fl ower opening or a bird building a nest. - Page 75 Example of Time Lapse Recording The Time Lapse Recording function records image frames at the predefi ned interval over the total recording time to produce a time-lapse video. For example, the Time Lapse Recording is useful for fi lming in the following situations: - Blooming fl owers - A bird building a nest - Clouds rolling by in the sky...
-
Page 76: Guideline
recording options Guideline This camcorder provides 3 types of guidelines to help you to set a balanced image composition on the screen. PRECHECK! Select the Record ( 1. Press the MENU button Control joystick (/) “Guideline.” 2. Select the desired submenu item with the Control joystick (/), and then press the OK button. -
Page 77: Playback Options
playback options MENU ITEMS • Accessible items in the menu vary depending on the operation mode. • See pages 40~43 for playback information and button operation. • See pages 67~78 for details on menu items during playback. Playback menu items Items Multi View Option (Thumbnail index view only) -
Page 78: Multi View Option
playback options Multi View Option Multi View Option provides sorting thumbnails of recorded videos or photos by different display options. PRECHECK! • Press the MODE button to select the Play( • Select the Video or Photo thumbnail index view screen. page 40 1. -
Page 79: Play Option
Play Option You can set a specifi c playback style according to your preference. PRECHECK! • Press the MODE button to select the Play( • Select the Video thumbnail index view screen. page 40 1. Press the MENU button Control joystick (/) “Play Option.”... -
Page 80: Delete
playback options Delete You can erase your recordings one by one, or all at once. PRECHECK! • Press the MODE button to select the Play( • Select the Video or Photo thumbnail index view screen. page 40 1. Press the MENU button Control joystick (/) “Delete.” 2. -
Page 81: Protect
Protect • You can protect saved important videos (or photos) from accidental deletion. • Protected images will not be deleted unless you release the protection or format the memory. PRECHECK! • Press the MODE button to select the Play( • Select the Video or Photo thumbnail index view screen. page 40 1. -
Page 82: Story-Board Print
playback options Story-Board Print This function captures 16 still images arbitrarily from the selected video and saves them into the storage media. It presents a quick overview of your video, helping you to understand the overall topic. PRECHECK! • Press the MODE button to select the Play( •... -
Page 83: Using View
Using VIEW This function provides a preview of the 16 image storyboard from a selected video. PRECHECK! • Press the MODE button to select the Play( • Select the Video thumbnail index view screen. page 40 1. Use the Control joystick (///) to select the desired videos, and then touch the VIEW touch button. -
Page 84: Copy (Smx-F43/F44 Only)
playback options Copy (SMX-F43/F44 only) • Movies and photos stored in the built-in memory can be copied to the external fl ash memory card. • Copying to the memory card does not delete originals in the built-in memory. PRECHECK! • Press the MODE button to select the Play( •... -
Page 85: Edit (Divide)
Edit (Divide) You can divide a video clip as many times as you want in order to delete a section you no longer need. The videos will be divided in groups of two. PRECHECK! • Press the MODE button to select the Play( •... -
Page 86: Edit (Combine)
playback options Edit (Combine) You can combine two different video clips. PRECHECK! • Press the MODE button to select the Play( • Select the Video thumbnail index view screen. page 40 1. Press the MENU button Control joystick (/) “Edit” Control joystick (//OK) ... -
Page 87: Slide Show
Slide Show You can playback all the photos stored in the storage media automatically. PRECHECK! • Press the MODE button to select the Play( • Select the Photo thumbnail index view screen. page 40 1. Press the MENU button Control joystick (/) “Slide Show”... -
Page 88: Slide Show Option
playback options Slide Show Option You can enjoy a slide show with various effects. PRECHECK! • Press the MODE button to select the Play( • Select the Photo thumbnail index view screen. page 40 1. Press the MENU button Control joystick (/) “Slide Show Option.”... -
Page 89: System Setting
system setting MENU ITEMS ( You can setup the date/time, OSD language and display settings of the camcorder. Setting menu items ( Record (Thumbnail index screen) Items mode Storage Type * Storage Info Format File No. Time Zone ... -
Page 90: Storage Type (Smx-F43/F44 Only)
system setting Storage Type (SMX-F43/F44 only) You can record videos (or photos) on the built-in memory or a memory card, so you should select the desired storage media before starting recording or playback. 1. Press the MENU button Control joystick (/) “Settings” Control joystick (//OK) ... -
Page 91: Format
Format Use this function if you want to delete all fi les completely or to correct problems on the storage media. PRECHECK! After formatting, the speed of the storage media becomes more stable. However, ensure that formatting can delete all fi les on the storage media including protected fi les and all settings can be restored. 1. -
Page 92: Time Zone
system setting File No. File numbers are assigned to recorded fi les in the order they were recorded. 1. Press the MENU button Control joystick (/) “Settings” Control joystick (//OK) “File No.” 2. Select the desired submenu item with the Control joystick (/), and then press the OK button. - Page 93 Setting the clock to the local time (“Visit”) You can easily set the clock to the local time zone when travelling. 1. Move the Control joystick (/) to select the “Time Zone” in Settings mode, and then press the OK button. •...
-
Page 94: Date/Time Set
system setting Date/Time Set By setting the date and time, you can display the date and time of the recording during playback. 1. Press the MENU button Control joystick (/) “Settings” Control joystick (//OK) “Date/Time Set.” 2. -
Page 95: Time Type
Time Type You can set the display type for the time set according to the selected option. 1. Press the MENU button Control joystick (/) “Settings” Control joystick (//OK) “Time Type.” 2. Select the desired submenu item with the Control joystick (/), and then press the OK button. -
Page 96: Lcd Brightness
system setting LCD Brightness You can adjust the brightness of the LCD screen to compensate for ambient lighting conditions. 1. Press the MENU button Control joystick (/) “Settings” Control joystick (//OK) “LCD Brightness.” 2. Move the Control joystick (//OK) to adjust the LCD brightness from -15 to 15. -
Page 97: Auto Lcd Off
Auto LCD Off To reduce power consumption, the brightness of the LCD screen is automatically dimmed if the camcorder is idle for more than 2 minutes. 1. Press the MENU button Control joystick (/) “Settings” Control joystick (//OK) “Auto LCD Off.” 2. -
Page 98: Transparency
system setting Transparency You can select the desired transparency to display the menu. 1. Press the MENU button Control joystick (/) “Settings” Control joystick (//OK) “Transparency.” 2. Select the desired submenu item with the Control joystick (/), and then press the OK button. -
Page 99: Shutter Sound
Shutter Sound You can turn the shutter sound on or off when pressing the PHOTO button. 1. Press the MENU button Control joystick (/) “Settings” Control joystick (//OK) “Shutter Sound.” 2. Select the desired submenu item with the Control joystick (/), and then press the OK button. -
Page 100: Pc Software
system setting PC Software If you set PC Software to On, you can simply use the PC software by connecting the USB cable between the camcorder and your PC. You can download the stored video and photo images on the camcorder to your PC’s hard disk. -
Page 101: Tv Display
Language You can select a desired language to display the menu and messages. page 29 STBY 0:00:00 [475Min] SCENE Settings PC Software TV Display Default Set Exit Select Version Samsung Electronics Co., LTD. S/W 1.00, Dec 18 2009, 19:42:27 Exit... -
Page 102: Demo
system setting Demo Demo mode automatically shows you the major functions that are included with your camcorder so that you may use them more easily. 1. Press the MENU button Control joystick (/) “Settings” Control joystick (//OK) “Demo.” 2. -
Page 103: Connecting To A Tv
connecting to a TV You can view the recorded videos and photos on a large screen by connecting the camcorder to a TV. CONNECTING TO A NORMAL (STANDARD DEFINITION) TV (16:9/4:3) To playback your recordings, the television must be PAL-compatible. We recommend that you use the AC power adaptor as a power source for the camcorder. -
Page 104: Viewing On A Tv Screen
connecting to a TV VIEWING ON A TV SCREEN 1. Turn on your TV and set the TV's input selector(source) to the input the camcorder is connected to. page 93 • The TV jacks are connected with the right cables? •... -
Page 105: Dubbing Videos
dubbing videos DUBBING TO VCR OR DVD/HDD RECORDERS You can dub images played back on your camcorder to other recording devices, such as VCRs or DVD/HDD recorders. This is a convenient way of distributing the dubbed media. Connect the device as the following way. -
Page 106: Using With A Windows Computer
using with a Windows computer CHECKING YOUR COMPUTER TYPE This chapter explains how to connect the camcorder to a computer using the USB cable. Check your computer type before using!!! To view your recordings on a computer, you need to check your computer type first. And then, take the steps below according to your computer type. -
Page 107: What You Can Do With A Windows Computer
WHAT YOU CAN DO WITH A WINDOWS COMPUTER You can enjoy the following operations by connecting your camcorder to your Windows computer by using a USB cable. Main Functions • By using the built-in editing software, ‘Intelli-studio’ on your camcorder, you can enjoy the following operations. -
Page 108: Using The Intelli-Studio Programme
CD-ROM drive that has the Intelli-studio programme in My Computer and run iStudio.exe. • When a USB cable is connected, if you have EmoDio (Samsung's MP3 player software) installed on your computer, the EmoDio software may load fi rst. - Page 109 Displays videos and photos in various ways. • Thumbnail: Displays video and photo thumbnails Intelli-studio program is built in both Samsung camcorders and Samsung digital cameras. Some functions on the program may not work depending on the product. ❷ ❸...
- Page 110 using with a Windows computer Step 3. Playing back the videos (or photos) • You can play back the recordings conveniently using the Intelli-studio application. 1. Run the Intelli-studio programme. page 98 Click the desired folder to display your recordings. •...
- Page 111 Step 5. Sharing the video/photos online Share your contents with the world, by uploading photos and videos directly to a web site with one click. 1. Select the desired videos or photos to share. 2. Click ( ) on the browser. •...
-
Page 112: Using As A Removable Storage Device
(SMX-F43/F44 only) 3. Connect the camcorder to the PC with the USB cable. page 96 • The “Removable Disk” or “Samsung” window appears on the PC’s screen after a moment. • The removable disk appears when connecting a USB. -
Page 113: Image Format
Structure of folders and fi les on the storage media • The folder and fi le structure for built-in memory or memory card is as follows. • Don’t arbitrarily change or remove the folder or fi le name. It may not be playable. Videos (H.264) ①... -
Page 114: Troubleshooting
TROUBLESHOOTING ✪ Before contacting a Samsung authorised service centre, perform the following simple checks. They may save you the time and expense of an unnecessary call. Warning indicators and messages Power source Message Low Battery Check authenticity of the battery. - Page 115 Message Icon Informs that... formatted. Format The format of the file is not the Card? supported by this camcorder. (Format the Internal Memory?) Low speed card. The memory card does Please not have enough speed to record record. a lower resolution.
-
Page 116: Symptoms And Solutions
When recording outdoors in hot weather after being indoors or inside a car where the air conditioner was running. Note before sending your camcorder for repair. If these instructions do not solve your problem, contact your nearest Samsung authorised service • centre. - Page 117 Symptom Is “Auto Power Off” set to “5 Min” ? • If no button is pressed for about 5 minutes, the camcorder is The power automatically turned off (“Auto Power Off”). To disable this option, automatically turns change the setting of “Auto Power Off” to “Off.” off.
- Page 118 (SDHC memory card, etc.), if any. Copy all important recorded files to your PC before formatting. Samsung shall not be responsible for any loss of data. (It is recommended that you copy the data to your PC or other storage media.)
- Page 119 Recording Symptom There is not enough free space to record on the the storage media. • Make sure the memory card is inserted and write-protect tab is set to • Pressing the unlock. Recording start/ The internal temperature of your camcorder is unusually high. •...
- Page 120 troubleshooting Symptom When the screen is exposed to direct sunlight • during recording, the screen turns red or black for an instant. During recording, the date/time does • not display. • The beep sound is • not heard. • There is a time difference between the point where you press...
-
Page 121: Adjusting The Image During Recording
Adjusting the image during recording Symptom Set “Focus” to “Auto.” page 57 • The recording conditions are not suitable for auto focus. • Focus does not Adjust the focus manually. page 58 adjust automatically. The lens is dusty on the surface. Clear the lens and check the focus. •... -
Page 122: Connecting To A Computer
troubleshooting Connecting to a computer Symptom When using the videos, a computer • does not recognise your camcorder. • • Cannot play a video file properly on a PC. • • • • Intelli-studio does not • function properly. • •... - Page 123 General operations Symptom The date and time Has the camcorder been left unused for a long period of time? • are incorrect. The backup built-in rechargeable battery may be discharged. page 28 Pressing a button will not turn on Remove the battery pack or unplug the AC power adaptor, and reconnect •...
-
Page 124: Maintenance & Additional Information
maintenance & additional information MAINTENANCE Your camcorder is a product of superior design and craftsmanship and should be treated with care. The suggestions below will help you fulfill any warranty obligations and allow you to enjoy this product for many years. •... -
Page 125: Additional Information
- Do not store the storage media in locations with high temperature or high humidity. - Do not touch the metal parts. • Copy the recorded files to your PC. Samsung shall not be responsible for any lost data. (It is recommended that you copy the data from your PC to other media for storage.) -
Page 126: Using Your Camcorder Abroad
TV or an external device and have the appropriate Audio/Video jacks. Otherwise, you may need to use a separate video format transcoder (PAL-NTSC format converter). The format transcoder is not provided by Samsung. PAL-compatible countries/regions Australia, Austria, Belgium, Bulgaria, China, CIS, Czech Republic, Denmark, Egypt, Finland,... -
Page 127: Specifications
Model name SMX-F40BP/SMX-F40SP/SMX-F40RP/SMX-F40LP SMX-F400BP/SMX-F400SP/SMX-F400RP/SMX-F400LP SMX-F401BP/SMX-F401SP/SMX-F401RP/SMX-F401LP SMX-F43BP/SMX-F43SP/SMX-F43RP/SMX-F43LP SMX-F44BP/SMX-F44SP/SMX-F44RP/SMX-F44LP Video signal Picture compression format Audio compression format Recording resolution System Image device Lens Focal length Filter diameter Size/dot number LCD screen LCD screen method Composite video out Connectors Audio output USB output... - Page 128 SAMSUNG world wide If you have any questions or comments relating to Samsung products, please contact the samsung customer care centre. Region Country CANADA North America MEXICO U.S.A ARGENTINE BRAZIL CHILE COLOMBIA COSTA RICA DOMINICA ECUADOR EL SALVADOR GUATEMALA...
- Page 129 RoHS compliant Our product complies with “The Restriction Of the use of certain Hazardous Substances in electrical and electronic equipment”, and we do not use the 6 hazardous materials- Cadmium(Cd), Lead (Pb), Mercury (Hg), Hexavalent Chromium (Cr +6), Poly Brominated Biphenyls (PBBs), Poly Brominated Diphenyl Ethers(PBDEs)- in our products.