Bosch 800 Series Installation Manual
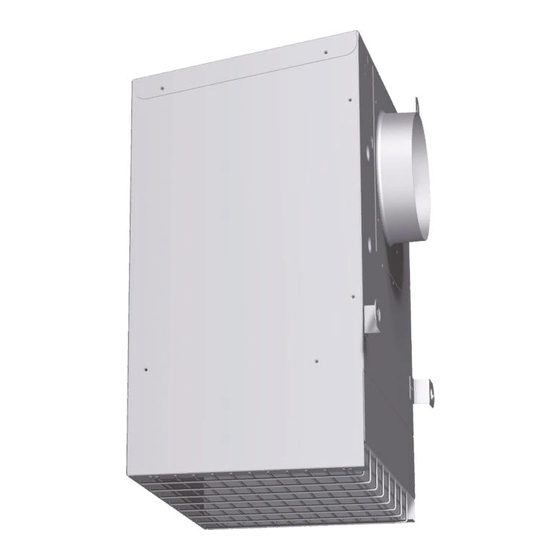
Ventilation blower motor
Hide thumbs
Also See for 800 Series:
- User manual ,
- Installation instructions manual (56 pages) ,
- Use and care manual (40 pages)
Table of Contents
Available languages
Available languages
Quick Links
Chapters
Table of Contents

Related Manuals for Bosch 800 Series


Summary of Contents for Bosch 800 Series
- Page 1 Ventilation Blower Motor DHG6023RUC...
-
Page 2: Table Of Contents
This indicates that minor or moderate injuries may occur as a Additional information on products, accessories, result of non-observance of this warning. replacement parts and services can be found at www.bosch- home.com and in the online shop www.bosch-home.com/us/ store. NOTICE: This indicates that damage to the appliance or property may occur as a result of non-compliance with this advisory. -
Page 3: Safety
Safety IMPORTANT SAFETY INSTRUCTIONS READ AND SAVE THESE INSTRUCTIONS INSTALLER: Save these instructions for the local electrical WARNING inspector’s use. Please leave these instructions with this unit for the owner. Show the owner the location of the TO REDUCE THE RISK OF FIRE, ELECTRIC SHOCK, circuit breaker or fuse. - Page 4 IMPORTANT SAFETY INSTRUCTIONS READ AND SAVE THESE INSTRUCTIONS WARNING DO NOT repair or replace any part of the appliance unless specifically recommended in the manuals. Improper installation, service or maintenance can cause injury or property damage. Refer to the Installation Manual for guidance. All servicing should be done by a qualified technician.
-
Page 5: Installation
Installation Step 1: EXHAUST-AIR MODE If the air intake is inadequate, there is a risk of carbon monoxide poisoning from combustion gases which are drawn back into the room. Equipment Needed An air-intake/exhaust-air wall box by itself is no guarantee that the limiting value will not be exceeded. - Page 6 Step 3: INSTALLATION min. Ø ¾" min. Ø ¾" 1. Hold the blower on the wall. (19 mm) (19 mm) Note the direction of the air conduction. ½" ½" 2. Mark the 4 mounting boreholes. (12.7 mm) (12.7 mm) • At least one screw must be installed through a stud.
- Page 7 NOTE: The unit can also be installed on the roof in combination with a roof plate accessory (RFPLT600P or RFPLT1000P). Ask your retailer or contact the Bosch Customer Service Team at 1-800-944-2904. Page. 6...
- Page 8 Wire Diagram speed 1 (red) speed 2 (blue) speed 3 (orange) speed 4 (brown) (white) brown (green/yellow) green/yellow orange blue white (N) Page. 7...
- Page 9 Vous trouverez des informations supplémentaires concernant les produits, accessoires, pièces de rechange et services sur Internet sous: www.bosch-home.com et la NOTICE : Ceci indique que la non-conformité à cet avis de boutique en ligne: www.bosch-eshop.com sécurité...
-
Page 10: Sécurité
Sécurité CONSIGNES DE SÉCURITÉ IMPORTANTES LISEZ ET CONSERVEZ CES INSTRUCTIONS INSTALLATEUR : Conservez ces instructions pour AVERTISSEMENT l’inspecteur de la société gazière de votre localité. Veuillez laisser ces instructions d’installation avec l’appareil pour le Cet appareil électroménager doit être mis à la terre. propriétaire. - Page 11 CONSIGNES DE SÉCURITÉ IMPORTANTES LISEZ ET CONSERVEZ CES INSTRUCTIONS Si le Code national de l’électricité (ou le code canadien de Disposition de la Proposition 65 de l'État de la l’électricité) l’exige, cet appareil doit être installé sur un Californie circuit de dérivation séparé. ADVERTENCIA AVERTISSEMENT Ce produit vous exposez à...
-
Page 12: Step 3: Installation
Installation Étape 1 : MODE On peut y parvient en acheminant l'air requis pour la combustion à travers des ouvertures non obturables D'ÉVACUATION DE L'AIR aménagées par exemple dans les portes ou les fenêtres, et en association avec des ventouses d'admission/ d'évacuation de l'air fixées au mur ou grâce à... -
Page 13: Étape 3 : Installation
Étape 3 : INSTALLATION min. Ø ¾" min. Ø ¾" 1. Maintenez le ventilateur en place sur le mur. (19 mm) (19 mm) Notez le sens de la conduction de l'air. ½" ½" 2. Marquez les 4 trous de fixation à percer. (12.7 mm) (12.7 mm) •... - Page 14 étanche dans le mur, p. ex. les vis, les raccords de tuyauterie, l'ouverture murale, etc. REMARQUE : L'appareil peut également être installé sur le toit en association avec un accessoire supplémentaire. informez-vous auprès de votre détaillant ou communiquez avec le service à la clientèle de Bosch au 1-800-944-2904. Page. 13...
-
Page 15: Schéma De Câblage
Schéma de câblage speed 1 (red) speed 2 (blue) speed 3 (orange) speed 4 (brown) (white) brown (green/yellow) green/yellow orange blue white (N) Page. 14... - Page 16 Esto indica que pueden producirse lesiones leves o moderadas si no se cumple con esta advertencia. Encontrará más información sobre productos, accesorios, piezas de repuesto y servicios en internet: www.bosch- home.com y también en la tienda online: www.bosch- NOTA: Esto indica que puede producirse un daño al home.com/us/store.
-
Page 17: Seguridad
Seguridad INSTRUCCIONES IMPORTANTES DE SEGURIDAD LEA Y GUARDE ESTAS INSTRUCCIONES INSTALADOR: Guarde estas instrucciones para el ADVERTENCIA inspector de la empresa proveedora de gas de su localidad. Deje esas instrucciones de instalación junto con Para reducir el riesgo de incendio, descarga el aparato para el propietario. - Page 18 INSTRUCCIONES IMPORTANTES DE SEGURIDAD LEA Y GUARDE ESTAS INSTRUCCIONES ADVERTENCIA No repare ni reemplace ninguna pieza del aparato a menos que el presente manual lo recomiende expresamente. La instalación, reparación y el mantenimiento incorrectos del aparato pueden causar lesiones a personas, daños a la propiedad, o anular la garantía del producto.
-
Page 19: Instalación
Instalación Paso 1: MODO DE AIRE DE Esto es posible si el aire de combustión puede circular a través de aberturas que no puedan trabarse, como ser SALIDA puertas y ventanas, y a través de cajas de entrada/salida de aire en la pared, o mediante otras medidas técnicas, como enclavamiento recíproco, etc. -
Page 20: Paso 3: Instalación
Paso 3: INSTALACIÓN min. Ø ¾" min. Ø ¾" 1. Sostenga el ventilador en la pared. (19 mm) (19 mm) Observe la dirección de la conducción del aire. 2. Marque los 4 agujeros de montaje. ½" ½" (12.7 mm) (12.7 mm) •... - Page 21 NOTA: La unidad también puede instalarse en el techo junto con un accesorio adicional (RFPLT600P o RFPLT1000P). Pregunte a su vendedor o póngase en contacto con atención al cliente de Bosch al 1-800-944- 2904. Página. 20...
-
Page 22: Diagrama De Cableado
Diagrama de cableado speed 1 (red) speed 2 (blue) speed 3 (orange) speed 4 (brown) (white) brown (green/yellow) green/yellow orange blue white (N) Página. 21... - Page 23 1901 Main Street, Suite 600, Irvine, CA 92614 • 800-944-2904 • www.boschappliances.com 9001315675 • Rev. A • © 2018 BSH Home Appliances Corporation...