Table of Contents
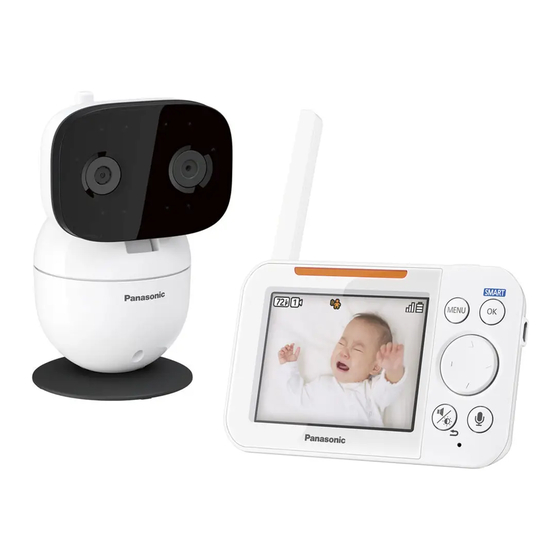
Model shown is KX-HN4001.
Before initial use, see "Getting Started"
on page 9.
Thank you for purchasing a Panasonic product.
Please read these operating instructions before using the unit and save them for
future reference.
Consulte "Guía Rápida Española", página 31.
For assistance, please contact us at 1-800-272-7033 or visit our Web site:
http://shop.panasonic.com/support for customers in the U.S.A.
Please register your product: http://shop.panasonic.com/support
Operating Instructions
Model No.
(
Camera Model No.
(
Monitor Model No.
Baby Monitor
KX-HN4001
KX-HN4101
KX-HN4102
KX-HN1032
KX-HNC300)
KX-HNM300)
Table of Contents

Related Manuals for Panasonic KX-HN4001


Summary of Contents for Panasonic KX-HN4001
- Page 1 Model shown is KX-HN4001. Before initial use, see “Getting Started” on page 9. Thank you for purchasing a Panasonic product. Please read these operating instructions before using the unit and save them for future reference. Consulte “Guía Rápida Española”, página 31.
-
Page 2: Table Of Contents
Table of Contents Introduction Specifications ..........30 About the baby monitor ........3 Guía Rápida Española Model composition ........3 Guía Rápida Española .......31 Accessory information ........3 Appendix Important Information FCC and other information ......35 Graphical symbols for use on equipment and Other notices and information (for their descriptions ..........5 Canada) .............36 About this system .........5... -
Page 3: About The Baby Monitor
No. Accessory item/Part number KX-HN4001/ KX-HN4102/ KX-HN4101 KX-HN1032 AC adaptor for the camera unit/PNWYAC300W00 AC adaptor for the monitor unit/PNWYAM300W00 Wall mounting adaptor for the camera unit/ PNWYAC300W01 Rechargeable battery for the monitor unit/ PNWYBM300W00 For assistance, please visit http://shop.panasonic.com/support... - Page 4 Camera unit (optional): KX-HNC301 You can expand your baby monitor system by registering up to the following number of optional camera units (4 units max. in total including the camera unit supplied in KX-HN4001/ KX-HN4101/KX-HN4102/KX-HN1032) to the monitor unit. KX-HN4001/KX-HN4101: 3 optional camera units...
-
Page 5: Important Information
R Regularly remove any dust, etc. from the situations cannot be guaranteed. AC adaptor/power plug by pulling it from Panasonic will not be held responsible for injury the power outlet, then wiping with a dry or damage to property that occurs in the event of cloth. - Page 6 25 mm (1 inch) thick, etc. authorized service center. Lithium Ion (Li-Ion) Polymer battery Medical R Use only the specified battery. R Consult the manufacturer of any personal R Insert the battery correctly. medical devices, such as pacemakers or For assistance, please visit http://shop.panasonic.com/support...
-
Page 7: Important Safety Instructions
R Do not put your ear(s) near the speaker, as another location for better reception. loud sounds emitted from the speaker may cause hearing impairment. Environment R Keep the product away from electrical noise generating devices, such as fluorescent lamps and motors. For assistance, please visit http://shop.panasonic.com/support... -
Page 8: Other Information
(i.e., backlighting). – Image quality may be reduced in dark locations. When the subject is lit by sunlight or halogen lights, black areas of the image may appear purplish. This is not a malfunction. For assistance, please visit http://shop.panasonic.com/support... -
Page 9: Getting Started
You can use the LED indicator to confirm the camera unit’s status. Check the color of the LED indicator after connecting the camera unit (page 12). Indicator Status No power Green, lit Normal operation Green, blinking slowly Registration mode Green, blinking quickly Device malfunction For assistance, please visit http://shop.panasonic.com/support... -
Page 10: Setting Up The Camera Unit
If the area that you wish to view is not visible even after adjusting the pan/tilt, change the Range of visibility: 37° location or position of the camera unit so that it can be viewed. Range of movement: 309° For assistance, please visit http://shop.panasonic.com/support... - Page 11 5 seconds after pan/tilt operations. these situations. R The sound sensor may not function as R Panasonic takes no responsibility for any desired when the camera unit is placed in injury or damage caused by the use of the noisy environments.
- Page 12 Attach the wall mounting adaptor to the Placing the camera unit on a flat camera unit. surface The camera unit can be placed on a flat surface, however make sure to choose a stable location. For assistance, please visit http://shop.panasonic.com/support...
- Page 13 31 mm (1 / inches) Drive the supplied screw into the camera unit. Mount the camera unit to the wall. Screws 31 mm (1 inches) Supplied screw (page 9) For assistance, please visit http://shop.panasonic.com/support...
-
Page 14: Setting Up The Monitor Unit
Insert the tabs (A) into the slots, and R It is normal for the monitor unit to feel warm then close the battery cover (B). during charging. R The monitor unit resets if the AC adaptor is disconnected when charging. For assistance, please visit http://shop.panasonic.com/support... - Page 15 3 minutes when the battery needs Attach and insert the replacement battery. charging. BLK: black Lithium Ion (Li-Ion) Polymer battery performance (supplied battery) Operation Operating time In continuous use 5 hours max. Not in use (standby) 13 hours max. For assistance, please visit http://shop.panasonic.com/support...
-
Page 16: Turning The Power On/Off
Status color color Camera unit number No detections The battery is charging. White Normal operations (page 14) The battery is fully charged. only) Night vision mode is active. (page 19) Mute is on. For assistance, please visit http://shop.panasonic.com/support... -
Page 17: Confirming The Usage Area
R When the motion detection feature is Note: triggered, is displayed on the is displayed on the monitor unit when monitor unit screen in green or amber the camera unit is out of range. For assistance, please visit http://shop.panasonic.com/support... - Page 18 M N, and talk into the monitor unit while someone is listening to the camera unit. Note: R Make sure to adjust the camera unit’s speaker volume to a suitable level when testing the speaker (page 20). For assistance, please visit http://shop.panasonic.com/support...
-
Page 19: Using The Baby Monitor
MFN or MEN to adjust the pan range and camera unit (page 20). MCN or MDN to adjust the tilt range. R Sound from the camera unit will not be heard on the monitor unit while talking. For assistance, please visit http://shop.panasonic.com/support... -
Page 20: Adjusting The Speaker Volume
MbN: “Units” a MOKN MbN: Select the desired setting. a MOKN Adjusting the brightness of a MMENUN repeatedly to exit. camera images Configuring the alert range While viewing images from the camera MMENUN unit, press M For assistance, please visit http://shop.panasonic.com/support... -
Page 21: Playing/Canceling Lullabies Manually
R If the monitor unit is turned off while selecting lullabies, the lullaby will continue to play from camera unit for the specified time. Selecting a lullaby play time You can specify the time that lullabies play for. MMENUN For assistance, please visit http://shop.panasonic.com/support... -
Page 22: Programming
Smart Sound –Screen lit only Motion – Screen lit only Auto Lullaby Sound List – 1. Lullaby1 - 10. Heart beat Random For assistance, please visit http://shop.panasonic.com/support... -
Page 23
Area Sound – High : all sounds Sensitivity
Low : all sounds High : baby sounds Mid : baby sounds Low : baby *6, *7 sounds Temperature Units °C Sensor <°F> For assistance, please visit http://shop.panasonic.com/support... - Page 24 – when your baby and the camera unit are separated – when monitoring newborn babies When sound is detected, the smart LED indicator is only lit in amber. For assistance, please visit http://shop.panasonic.com/support...
-
Page 25: Smart Features
MbN: “Sound List” a MOKN MbN: Select the desired setting. R To turn off sound notifications: MbN: Select the desired lullaby. MbN: “OFF” R To turn off lullabies: MOKN a MMENUN repeatedly to exit. MbN: “OFF” For assistance, please visit http://shop.panasonic.com/support... -
Page 26: Sensors
MMENUN repeatedly to exit. cell to disable detection for. a MOKN This feature can only be selected when a R Repeat for each cell to be disabled. lullaby is selected for “Sound List” (page 25). For assistance, please visit http://shop.panasonic.com/support... -
Page 27: Timer
MMENUN MbN: “Camera Management” a MOKN Managing camera units MbN: “Delete Camera” a MOKN N: “Yes” a MOKN Registering a camera unit Monitor unit: MMENUN For assistance, please visit http://shop.panasonic.com/support... -
Page 28: Useful Information
(page 20). R Place the camera unit in a different location or position. Images are flickering. R AC (alternating current) lights such as fluorescent lights may cause flickering in dark environments. (This is not a malfunction.) For assistance, please visit http://shop.panasonic.com/support... - Page 29 R The temperature for the charging conditions is too low or too charged. high. Charge the battery within the specified charging condition range (page 30). R The battery may not be installed. Install the battery (page 14). R The battery may be deteriorated. Please visit http://shop.panasonic.com/support For assistance, please visit http://shop.panasonic.com/support...
-
Page 30: Specifications
Fixed (0.4 m (1.3 feet) – infinity) R Angular field of view (camera angle) Horizontal: approx. 37° Vertical: approx. 28° R Motion detection method Visual sensor R Detection range Motion sensor: Horizontal: approx. 37° Vertical: approx. 28° For assistance, please visit http://shop.panasonic.com/support... -
Page 31: Guía Rápida Española
Inserte el enchufe del adaptador de corriente (1) firmemente en el conector micro-USB de la unidad del monitor. Conecte el adaptador de corriente (2) a la toma de corriente. Cargue aproximadamente durante 8 horas. Para obtener ayuda, visite http://shop.panasonic.com/support (solo en inglés) - Page 32 Presione {<}, {>}, {^}, o {V} . N Para ajustar el zoom: {SMART} s { }: Seleccione la configuración deseada. s {MENU} N Para ajustar el brillo: Presione { }.s { }: Seleccione la configuración deseada. s {OK} Para obtener ayuda, visite http://shop.panasonic.com/support (solo en inglés)
- Page 33 Conecte de nuevo el adaptador de corriente a la unidad de la cámara. L La cámara no se ha registrado en la unidad del monitor. Registre la cámara. Para obtener ayuda, visite http://shop.panasonic.com/support (solo en inglés)
- Page 34 ¿Por qué no se escucha sonido de L El volumen del altavoz está apagado. Ajuste el la unidad del monitor o de la cámara? volumen del altavoz. Para obtener ayuda, visite http://shop.panasonic.com/support (solo en inglés)
-
Page 35: Appendix
TV technician for help. Some devices operate at frequencies that may cause interference to nearby TVs and VCRs. To minimize or prevent such interference, this device should not be placed near or on top of For assistance, please visit http://shop.panasonic.com/support... -
Page 36: Other Notices And Information (For Canada)
R To comply with ISED RF exposure requirements, the device must be installed and operated 20 cm (8 inches) or more between product and all person’s body. For assistance, please visit http://shop.panasonic.com/support... -
Page 37: Customer Services
Appendix Customer services Shop Accessories! for all your Panasonic gear Go to http://shop.panasonic.com/support Get everything you need to get the most out of your Panasonic products Accessories & Parts for your Camera, Phone, A/V products, TV, Computers & Networking, Personal Care, Home Appliances, Headphones, Ba eries, Backup Chargers &... -
Page 38: Limited Warranty (Only For U.s.a.)
If your product does not work properly because of a defect in materials or workmanship, Panasonic Corporation of North America (referred to as “the warrantor”) will, for the length of the period indicated on the chart below, which starts with the date of original purchase (“warranty period”), at its option either (a) repair your product with new or refurbished parts,... - Page 39 Service Center. If the problem is not handled to your satisfaction, then write to: Consumer Affairs Department Panasonic Corporation of North America 661 Independence Pkwy Chesapeake, VA 23320 PARTS AND SERVICE, WHICH ARE NOT COVERED BY THIS LIMITED WARRANTY, ARE YOUR RESPONSIBILITY.
- Page 40 Remove and then reinsert the monitor unit's battery. Turn the monitor unit on. Read the troubleshooting section in the Operating Instructions. Visit our Web site: http://shop.panasonic.com/support • FAQ and troubleshooting hints are available. For your future reference We recommend keeping a record of the following information to assist with any repair under warranty.