
Related Manuals for Sharp AM-900


Summary of Contents for Sharp AM-900
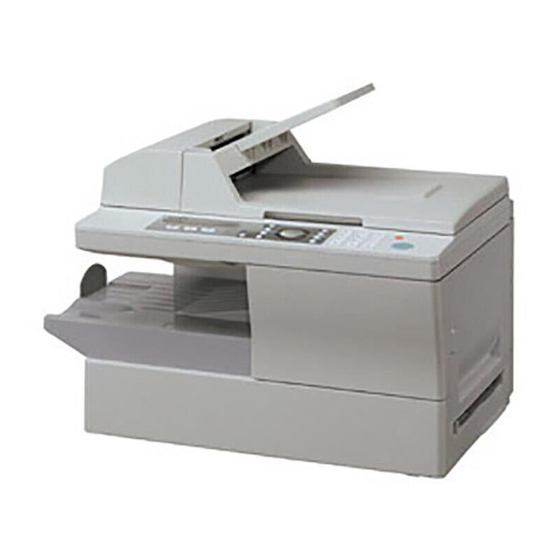
- Page 1 MODEL AM-900 DIGITAL MULTIFUNCTIONAL SYSTEM ONLINE GUIDE 1. Installation 2. Copying 3. Sending Faxes 4. Receiving Faxes 5. Special Fax Functions 6. Printing 7. Scanning 8. Printing Lists 9. Maintenance 10. Troubleshooting...
- Page 2 Declaration of Conformity SHARP DIGITAL MULTIFUNCTIONAL SYSTEM, AM-900 This device complies with Part 15 of the FCC rules. Operation is subject to the following two conditions: (1) This device may not cause harmful interference, and (2) this device must accept any interference received, including interference that may cause undesired operation.
- Page 3 Introduction Welcome, and thank you for choosing a Sharp MFP! The MFP is a combination monochrome printer, copier, fax, and color scanner. The features and specifications of the MFP are shown below. Print specifications Printer type Toner cartridge yield* (continuous printing,...
- Page 4 Transmission time* Communication method Compression scheme Memory size* Resolution Halftone Reception modes *Based on Sharp Standard Chart at standard resolution, excluding time for protocol signals (i.e., ITU-T phase C time only). Scanning specifications Scanner type Resolution Scan speed (TWAIN scanning using the auto document feeder;...
- Page 5 Power consumption Dimensions Weight As a part of our policy of continuous improvement, SHARP reserves the right to make design and specification changes for product improvement without prior notice. The performance specification figures indicated are nominal values of production units.
- Page 6 Important safety information • Do not disassemble this machine or attempt any procedures not described in this manual. Refer all servicing to qualified service personnel. • Do not install or use the machine near water, or when you are wet. For example, do not use the machine near a bath tub, wash bowl, kitchen sink or laundry tub, in a wet basement, or near a swimming pool.
- Page 7 Trademark information • Sharpdesk is a trademark of Sharp Corporation. • Microsoft, Windows and Internet Explorer are trademarks of Microsoft Corporation in the U.S.A. and other countries. • Acrobat and Adobe are trademarks of Adobe Systems Incorporated. • Eastman Software is a trademark of Eastman Kodak Company.
-
Page 8: Table Of Contents
Table of Contents A Look at the Operation Panel 1. Installation Unpacking Checklist ........10 Installation . - Page 9 5. Special Fax Functions Distinctive Ring (Requires Subscription to Service) ... . . 98 Polling (Requesting a Fax Transmission) ....100 6.
-
Page 10: A Look At The Operation Panel
A Look at the Operation Panel COPY SCAN DUPLEX SCAN HELP Display This displays messages and prompts to help you operate the machine. ZOOM key Press this key to select an enlargement or reduction setting when making a copy (page 54). E-SORT key Press this key when making multiple copies to have the copies collated (sorted into sets with the pages ordered 1, 2, 3..., 1, 2, 3..., etc.) (page 56). - Page 11 Stop key Press this key to cancel an operation before it is completed. COPY key Press this key to select copy mode (page 51). SCAN key Press this key to select scan mode (page 124). HELP (FAX key and SCAN key) Press the FAX key and SCAN key simultaneously to print the HELP list, a brief guide to the operation of the machine.
-
Page 12: Installation
1. Installation Unpacking Checklist Before setting up, make sure you have all of the following items. If any are missing, contact your dealer or retailer. Telephone Toner cartridge line cord Output tray Document feeder tray Points to keep in mind when setting up Do not place the Do not place the machine near... -
Page 13: Installation
Installation Attaching the trays Attach the document feeder tray. Slide the output tray into the machine as shown. When it stops, lift the end slightly and push in so that the tray locks in place. If you will be using legal paper, pull out the tray extension Important:... - Page 14 Installation Releasing the scanner Before plugging in the power cord, pull the scanner release toward you to release the scanner lock. Caution: Plugging in the power cord without releasing the scanner lock may damage the machine. If you need to move the machine: In the event that you need to move the machine to a new location, disconnect the telephone line cord before unplugging the power cord.
-
Page 15: Connecting The Power Cord
Connecting the power cord Plug the power cord into a 120 V, 60 Hz, grounded AC (3-prong) outlet. Caution: Make sure the scanner has been released as explained on the previous page before plugging in the power cord. Do not plug the power cord into any other kind of outlet. This will damage the machine and is not covered under the warranty. -
Page 16: Connecting The Telephone Line Cord
Installation Connecting the telephone line cord Insert one end of the line cord into the socket on the back of the machine marked TEL. LINE. Insert the other end into a wall telephone socket. Make sure that the line cord is inserted into the TEL LINE jack. - Page 17 Important: The facsimile function of this machine is not designed for use on a line which has call waiting, call forwarding, or certain other special services offered by your telephone company. If you attempt to use the facsimile function in conjunction with any of these services, you may experience errors during transmission and reception of facsimile messages.
-
Page 18: Installing The Toner Cartridge And Drum Cartridge
The starter toner cartridge included with the machine can print approximately 1,500 letter-size pages at 5% page coverage. When replacing the toner cartridge, use a SHARP AM-90ND toner cartridge. One cartridge can print about 3,000 letter-size pages at 5% coverage. - Page 19 Installing the Toner Cartridge and Drum Cartridge Remove the new drum cartridge from its packaging. Insert the drum cartridge into the print compartment, sliding it along the guides. Do not touch or allow other objects to contact the drum (the green cylinder). This may damage the drum.
- Page 20 Installing the Toner Cartridge and Drum Cartridge Grasp the cartridge handle and insert the toner cartridge into the print compartment, sliding it along the guides. After inserting the cartridge, press on the arrow mark to make sure it “clicks” into place. Do not touch the roller in the toner cartridge.
-
Page 21: Resetting The Drum Counter
Installing the Toner Cartridge and Drum Cartridge If you installed a new toner cartridge, press to select YES (this will reset the toner counter to zero). If you temporarily removed and then replaced an old toner cartridge for maintenance or other reason, press toner count. - Page 22 Installing the Toner Cartridge and Drum Cartridge Manually resetting the toner counter When a new toner cartridge is installed, the toner counter is reset in Step 7 on the previous page. The procedure below is normally not necessary; however, it can be used in the event that you need to reset the toner counter manually. MENU Press and then...
-
Page 23: Loading Printing Paper
Loading Printing Paper You can load up to 250 sheets of letter or legal paper (max. 20 lbs.) in the paper tray. Caution! Do not use the blank side of paper that has already been printed on. Remove the output tray. Insert a stack of paper into the tray, print side up. -
Page 24: Setting The Paper Size
Loading Printing Paper Replace the output tray. If you loaded legal size paper (or you changed the paper size), change the paper size setting as explained below. Setting the paper size The machine has been set at the factory to use letter size paper. If you loaded legal size paper, you must change the paper size setting to LEGAL. -
Page 25: Installing The Software
Installing the Software To use the machine as a printer and scanner for your computer, you must install the software and connect a USB cable. The CD-ROM that comes with the machine contains the following software: MFP Drivers: These consist of the printer driver that allows the machine to be used as a printer, and the scanner driver that allows you to scan using TWAIN and WIA compliant applications. - Page 26 If the USB cable is connected, a Plug and Play window will appear. Click the Cancel button to close the window and disconnect the cable. Insert the Sharp CD-ROM into your computer’s CD-ROM drive. In Windows XP, click the start button, click My Computer, and then double- click the CD-ROM icon.
- Page 27 Double-click the setup icon ( If the Language Selection window appears, select the language that you wish to use and click Next (the language selections will vary depending on your country or region). Follow the instructions in the windows that appear. When the Setup Type Selection window appears, select Standard to install all software components (this should normally be selected).
- Page 28 Installing the Software When the Finish window appears to indicate that the selected packages have been installed, click Close. If the installation was a Standard installation, the following window will appear. Click OK. If you installed the MFP drivers using a Custom installation and did not install Sharpdesk, the following window will appear.
- Page 29 The Search Setup Wizard will appear. Follow the on-screen instructions to create an index database for Sharpdesk. Make sure that the power cord of the machine is not plugged in (the machine is powered off), and then connect the USB cable. Insert one end of the USB cable into the USB port on the machine and the other end into your computer’s USB port.
- Page 30 Installing the Software Comments: Do not connect the AM-900 to a hub to which another AM-900 is connected. If this is done, the AM-900 will not operate correctly. If you find that your computer does not recognize the machine or operation is unstable, try connecting the USB cable to a different USB port on your computer, or try a different USB cable (use the shortest possible cable).
-
Page 31: Removing The Software
Open the Control Panel and select Add or Remove Programs (or Add/ Remove Programs). Select SHARP AM-900 Series MFP Driver (or Sharpdesk) from the list, and click the Change/Remove button (or the Add/Remove button). Click OK to confirm the removal. -
Page 32: Using The Machine As A Shared Printer On A Network
Windows or a version that is older than the server. Configuring settings on the server Follow the appropriate procedure below for the server’s operating system. Windows XP Click the start button and click Printers and Faxes. Right-click the SHARP AM-900 icon and select Sharing. - Page 33 Using the Machine as a Shared Printer on a Network The following window will appear. Click Network Setup Wizard to run the wizard. After running the wizard, the following window will appear. Select Share this printer. If you would like to change the name, enter a new name (this must be 8 characters or less to allow sharing with Windows Me computers).
- Page 34 Windows 2000 Click the Start button, point to Settings, and select Printers. Right-click the SHARP AM-900 icon and select Sharing. The following window will appear. Click Shared as. If you would like to change the name, enter a new name (this must be 8 characters or less to allow sharing with Windows Me computers).
- Page 35 Using the Machine as a Shared Printer on a Network Windows Me Click the Start button, point to Settings, and select Control Panel. Double-click the Network icon. The Network dialog box will appear. On the Configuration tab, see if File and Printer Sharing for Microsoft Networks appears in the list of installed network components.
- Page 36 You will be prompted to restart your computer. Click OK to restart. Click the Start button, point to Settings, and select Printers. Right-click the SHARP AM-900 icon and select Sharing. Select Shared As on the Sharing tab. If you would like to change the name, enter a new name (this must be 8 characters or less).
- Page 37 Each client can only print to one AM-900 printer. It is not possible to install printer drivers for multiple AM-900 printers connected to the network (or directly to the client) and switch between those printers.
- Page 38 Using the Machine as a Shared Printer on a Network Select Browse for a printer and click Next. Select the AM-900 from the list of shared printers and click Next. Select Yes if you would like to use the AM-900 as the default printer and click Next. Click Finish.
- Page 39 Select Type the printer name, or click Next to browse for a printer and click Next. Select the AM-900 from the list of shared printers and click Next. Select Yes if you would like to use the AM-900 as the default printer. Click Next. Click Finish.
- Page 40 Double-click the Add Printer icon. Click Next in the Add Printer Wizard. The following window will appear. Select Network printer and click Next. The following window will appear. Click Browse. Select the AM-900 from the list of shared printers and click Next.
- Page 41 Using the Machine as a Shared Printer on a Network If the server is running Windows XP or 2000, the dialog box below will appear. Click Have Disk and click Next. If the server is running Windows Me, go to Step 10. Click Browse.
- Page 42 Using the Machine as a Shared Printer on a Network The following window will appear. Click Next. Select Yes if you would like to use the AM-900 as the default printer and click Next. Select Yes if you would like the printer to print a test page. Click Finish.
-
Page 43: Entering Your Name And Fax Number
Entering Your Name and Fax Number Before you can begin sending faxes, you must enter your name and fax (telephone) number. You also need to set the date and time. Once you enter this information, it will automatically appear at the top of each fax page you send. - Page 44 Enter your name by pressing number keys for each letter as shown in the chart below. Up to 24 characters can be entered. Example: SHARP = 7777 44 2 777 SPACE = To enter two letters in succession that require the same key, press after entering the first letter.
-
Page 45: Setting The Date And Time
Setting the Date and Time The date and time appear in the fax mode display and are printed at the top of every page you fax. Set the date and time as explained below. If you will not be using fax mode, the date and time do not need to be set. Note that the date and time will need to be reset if the machine is unplugged or a power failure occurs. - Page 46 Setting the Date and Time Enter a two-digit number for the day (“01” to “31”). Example: the 5 Enter the year (four digits). Example: 2005 Enter a two-digit number for the hour (“01” to “12”) and a two-digit number for the minute (“00” to “59”). Example: 9:25 Press to select A.M.
-
Page 47: Daylight Saving Time
Daylight Saving Time If desired, you can set the clock to move forward and backward automatically at the beginning and end of Daylight Saving Time. Follow these steps: Make sure that the date and time display of fax mode appears (if needed press ) and then press Press... -
Page 48: General Machine Settings
General Machine Settings General Machine Settings Ringer Like a telephone, the machine will ring to alert you when a call comes in. To adjust the volume of the ringer or turn it off, follow the steps below. Make sure that the date and time display of fax mode appears (if needed press ) and then press... - Page 49 Alarm volume The machine sounds a three-beep alarm to alert you when an error occurs during fax transmission or reception. To adjust the volume of the alarm or turn it off, follow the steps below. Make sure that the date and time display of fax mode appears (if needed press ) and then press...
-
Page 50: Auto Clear
General Machine Settings Auto clear After a copy job or fax job is completed, the machine will automatically return all temporary copy settings or all temporary fax settings to the default settings if 60 seconds elapses without any keys being pressed on the operation panel. If desired, you can change the amount of time that must elapse to 30 seconds or 120 seconds, or turn auto clear off so that temporary settings are never automatically cleared. - Page 51 Key tone off The machine normally sounds a beep (key tone) each time you press a key on the operation panel. If you wish to turn off the key tone, follow the steps below. COPY SCAN Press ) and then Press Press to turn on the key tone or...
-
Page 52: Selecting The Display Language
General Machine Settings Selecting the display language If desired, you can change the language used in the display, reports and lists. COPY SCAN Press ) and then Press Press until the desired language appears and then press ENTER The selections that are available vary by country. Press repeatedly to exit. -
Page 53: Copying
2. Copying Making a Copy To make a copy, you can place the original on the document glass or insert it into the auto document feeder. The auto document feeder allows you to load up to 20 letter-size originals at once. COPY Press to select copy mode. - Page 54 Making a Copy Place the original on the document glass or in the auto document feeder. Using the document glass: Open the document glass cover and place the original face down on the glass with the top edge against the document guide. Make sure the center of the original is aligned with the center mark on the document guide, and then close the...
- Page 55 Contrast: Medium (bar at mid-point) (Note: The default contrast setting can be changed as explained on page 59.) E-Sort (collating sets of copies): OFF Duplex Scan: OFF Note: After temporary copy settings are selected, the settings will revert to the above default settings if the auto clear time elapses without any keys being pressed on the operation panel (see page 48).
-
Page 56: Selecting Temporary Copy Settings
Selecting Temporary Copy Settings If MEMORY IS FULL appears... If the memory becomes full while multiple originals are being scanned using the auto document feeder, MEMORY IS FULL will appear in the display. Press if you want to make copies of only the originals that have already been scanned. -
Page 57: Number Of Copies
Number of Copies If you wish to make more than one copy of the original (or of each original if you have loaded multiple originals in the auto document feeder), press the number keys to enter the number of copies. The maximum number is 99. -
Page 58: Duplex Scan
Selecting Temporary Copy Settings E-Sort (collating sets of copies) To sort the copies as shown below under “Sorted”, first set the number of copies per original (at least “2” copies must be set), and then press once or twice so that “E-SORT ON” appears. E-SORT ON Example: Two copies each of... -
Page 59: Permanent Copy Settings
Permanent Copy Settings The following copy settings remain in effect until they are changed. These settings do not revert to the default settings when the auto clear time elapses or when is pressed. Default copy quality setting The default quality setting (page 55) is “TEXT” (this is the setting that is used if you do not make a selection). -
Page 60: Copy Resolution
Permanent Copy Settings Copy resolution The copy resolution is initially set to 300 dpi. If you need a sharper image, follow the steps below to change the setting to 600 dpi. MENU Press and then until the display at right appears. Press Select the resolution setting: 300 DPI:... - Page 61 Default copy contrast setting The default contrast setting (page 55) is medium (this is the setting that is used if you do not make a selection). If desired, you can change the default contrast to a higher or lower level. MENU Press and then...
-
Page 62: Using The Auto Document Feeder
Using the Auto Document Feeder Using the Auto Document Feeder Size and weight of originals that can be fed through the auto document feeder Minimum document size: Minimum size Minimum weight 5.8" (148 mm) 7.2" (182 mm) Maximum document size: The maximum size and weight of documents that you can load in the document feeder depend on how many sheets you load. -
Page 63: Loading The Document
Other restrictions The scanner cannot recognize yellow, greenish yellow, or light blue ink. Ink, glue, and correcting fluid on documents must be dry before they pass through the document feeder. All clips, staples, and pins must be removed from documents before loading in the feeder. -
Page 64: Copying Onto Envelopes And Cards
Copying onto Envelopes and Cards Insert the document face up into the document feeder. The top edge of the document should enter the feeder first. DOCUMENT READY will appear briefly in the display. You can now continue with a copy, fax, or scan operation. - Page 65 Place the original on the document glass or in the auto document feeder. Using the document glass: Open the document glass cover and place the original face down on the glass with the top edge against the document guide. Make sure the center of the original is aligned with the center mark on the document guide, and then close the cover.
- Page 66 Copying onto Envelopes and Cards Insert the sheet or envelope into the bypass tray as shown with the print side face down. When inserting an envelope, the flap should be positioned on the left side as shown. Note: If you find it necessary to remove the sheet or envelope, press this release and open the side cover first.
-
Page 67: Sending Faxes
3. Sending Faxes Sending a Fax Follow the steps below to send a fax. To dial the fax number of the receiving machine, you can either directly enter the number with the number keys (Direct Keypad Dialing), or press number (Speed Dialing). To use a Speed Dial number, you must first store the number in the machine as explained on page 70. - Page 68 Sending a Fax Place the original on the document glass or in the auto document feeder. Using the document glass: Open the document glass cover and place the original face down on the glass with the top edge against the document guide. Make sure the center of the original is aligned with the center mark on the document guide, and then close the...
- Page 69 The default temporary fax settings are as follows. To change a setting, see Selecting Temporary Fax Settings on page 75. Resolution: STANDARD (Note: The default resolution setting can be changed as explained on page 82.) Contast: NORMAL Duplex Scan: OFF Line monitor: OFF (Note: The default Line Monitor setting can be changed as explained on page 83.)
- Page 70 Sending a Fax Check the display. If the name or number shown is correct, press If you made a mistake when entering a number, press and clear one digit at a time, and then re-enter the correct digit(s). Scanning of the original(s) will begin. If you are using the auto document feeder: After the originals are scanned, the machine will dial the receiving machine and send the fax.
-
Page 71: If The Memory Becomes Full
If the memory becomes full... If the memory becomes full while the document is being scanned, MEMORY IS FULL will appear in the display. Press if you want to transmit the pages which have been stored up to that point in memory. If you are using the auto document feeder, the remaining pages will feed out without being scanned. -
Page 72: Storing A Number For Speed Dialing
Storing a Number for Speed Dialing Storing a Number for Speed Dialing You can dial a fax number by pressing This is called Speed Dialing. To use Speed Dialing, you must first store the full fax number in the machine and select a two-digit Speed Dial number for it. One hundred Speed Dial numbers are available (00 to 99). - Page 73 Up to 20 characters can be entered. (If you do not wish to enter a name, go directly to Step 8.) Example: SHARP = 7777 44 2 777 SPACE = To enter two letters in succession that require the same key, press after entering the first letter.
- Page 74 Storing a Number for Speed Dialing Press if you want the machine to use Super G3 mode (the fastest transmission mode) when using this number. Press if you do not want the machine to use Super G3 mode. Press for OFF if line errors frequently result when Super G3 mode is used.
- Page 75 Editing and deleting auto-dial numbers If you need to make changes to a previously stored auto-dial number, or clear a number, follow these steps: Make sure that the date and time display of fax mode appears (if needed press ) and then press Press Press Press...
- Page 76 Storing a Number for Speed Dialing Press ENTER Make the desired changes to the name. To move the cursor to the right, press that you wish to change, press the appropriate number key repeatedly until the desired letter appears (see Step 7 on page 71). The new letter will replace the old letter.
-
Page 77: Selecting Temporary Fax Settings
Selecting Temporary Fax Settings You can adjust one or more of the following temporary fax settings before pressing to begin transmission. Resolution The following resolution settings are available for faxing: STANDARD FINE SUPER FINE HALF TONE To select a resolution setting, press the display and then press Note: The resolution and contrast settings are only effective for sending a document. -
Page 78: Line Monitor
Selecting Temporary Fax Settings Duplex Scan Duplex Scan provides a convenient method for faxing multiple two-sided originals using the auto document feeder. When this setting is selected, after the stack of originals is fed through the auto document feeder the first time, you simply turn the stack over (do not change the order of the pages or remove any pages), insert it into the auto document feeder again, and press to scan the back side of the originals. -
Page 79: Other Fax Transmission Settings
Other Fax Transmission Settings Checking and canceling stored fax jobs Follow the steps below to check the fax jobs that are waiting in memory for transmission. You can also use this procedure to cancel a stored fax job. Make sure that the date and time display of fax mode appears (if needed press ) and then press... - Page 80 Other Fax Transmission Settings Automatic redialing when the line is busy If you use Direct Keypad Dialing, Speed Dialing, or Search Dialing to send a fax and the line is busy, the machine will automatically redial the number. The machine will make two redial attempts at intervals of five minutes. To cancel a job that is waiting for automatic redialing, follow the procedure in Checking and canceling stored fax jobs on page 77.
- Page 81 Recall times for automatic redialing when the line is busy If desired, you can change the maximum number of automatic redialing attempts made when the line is busy. The initial setting is “02” times. Make sure that the date and time display of fax mode appears (if needed press ) and then press...
- Page 82 Other Fax Transmission Settings Automatic redialing after a line error If you use Direct Keypad Dialing, Speed Dialing or Search Dialing to send a fax and a line error occurs during the transmission, the machine will automatically redial the number and attempt to complete the transmission. Retransmission will begin from the page which was being transmitted when the error occurred.
- Page 83 Press the numeric keys to enter the desired interval in minutes (any 2-digit number from 01 to 15). Example: 1 minute Press repeatedly to exit. Recall times for automatic redialing after a line error occurs You can select “0” or “1” for the number of automatic redialing attempts after a line error occurs.
- Page 84 Other Fax Transmission Settings Default resolution for faxing The default resolution for faxing is initially set to STANDARD. If desired, you can change the default resolution to FINE or SUPER FINE. Make sure that the date and time display of fax mode appears (if needed press ) and then press Press...
-
Page 85: Using An Extension Phone To Send A Fax
Default Line Monitor setting The default setting for Line Monitor (listening to the line and fax tones through the speaker during a fax transmission) is initially MONITOR OFF. If desired, you can change the default setting to MONITOR ON. Make sure that the date and time display of fax mode appears (if needed press ) and then press... - Page 86 Using an Extension Phone to Send a Fax Place the original on the document glass or in the auto document feeder. If the document glass is used, only one page can be transmitted. If needed, select the resolution and/or contrast. Pick up the extension phone, listen for the dial tone, and dial the fax number of the receiving machine using the keypad of the extension phone.
-
Page 87: Broadcasting (Sending A Fax To Multiple Destinations)
Broadcasting (Sending a Fax to Multiple Destinations) Broadcasting (Sending a Fax to Multiple Destinations) This function allows you to send the same fax to as many as 100 different destinations in just one operation. When sending to multiple destinations, only destinations that have been stored as Speed Dial numbers can be selected (full fax numbers cannot be dialed). -
Page 88: Broadcasting Using A Group Key
Broadcasting (Sending a Fax to Multiple Destinations) Repeat Steps 4 and 5 for each of the other destinations to which you wish to send the fax (maximum of 100). To check your selected destinations, press delete a destination, scroll to the destination and then press When you are ready to begin transmission, press A Transaction Report is automatically printed out after Broadcasting is completed. -
Page 89: Storing Numbers In A Group
Broadcasting (Sending a Fax to Multiple Destinations) Storing numbers in a Group Groups allow you to send a fax to a group of fax machines by simply specifying the appropriate Group. To store a group of numbers in a Group, follow the steps below. -
Page 90: Deleting A Group
Broadcasting (Sending a Fax to Multiple Destinations) Repeat Steps 5 and 6 for each of the other destinations that you want to include in the Group (maximum of 100). To check your selected destinations, press delete a destination, scroll to the destination and then press When you have finished storing the destinations, press Press repeatedly to exit. -
Page 91: Timer Transmission
Press repeatedly to exit. Timer Transmission The Timer function allows you to store a fax job to be transmitted automatically at a specified time. Up to four timer fax jobs can be stored at once, and the time of each can be specified up to a week in advance. You can use this function to take advantage of off-peak rates without having to be there when the fax is sent. - Page 92 Timer Transmission Press to select SET. Note which Timer number (Timer 1, 2, 3, or 4) appears in the display. This is the number of the Timer job you are storing. Enter the time at which you want the fax to be sent. Example: 9:25 Press to select A.M.
- Page 93 Select a destination using one of the methods below: SPEED Press , enter the 2-digit Speed Dial number of the destination, and press ENTER Press until the name of the destination appears in the display (if no name was stored, the number will appear), and press Enter the full fax number of the destination and press If needed, select temporary fax settings such the the resolution and contrast.
- Page 94 Timer Transmission Canceling a timer job If you need to cancel a timer job before it is performed, follow the steps below. You will need to know the timer number assigned to the job in order to cancel it. If you don’t remember the number (it appears in the display when you store the job), print out the Timer List.
-
Page 95: Receiving Faxes
4. Receiving Faxes Selecting the Reception Mode The machine has two modes for receiving faxes: FAX ONLY mode: Select this mode when you only want to receive faxes on your line. The machine will automatically answer all calls on one ring and receive incoming faxes. -
Page 96: Using Fax Only Mode
Using FAX ONLY Mode Using FAX ONLY Mode When the reception mode is set to FAX ONLY, the machine will automatically answer all calls on one ring and receive incoming faxes. The number of rings on which the machine answers can be changed as explained below. -
Page 97: Using Ext. Tel Mode
Using EXT. TEL Mode When the reception mode is set to EXT. TEL, you must answer all calls (even faxes) by picking up the extension phone that is connected to the machine. When the machine and extension phone ring, make sure that the date and time display of fax mode appears (if needed press machine) and then pick up the extension phone. -
Page 98: Reception Ratio
Using EXT. TEL Mode Reception Ratio The machine has been set at the factory to automatically reduce the size of received documents to fit the size of the printing paper. This ensures that data on the edges of the document are not cut off. If desired, you can turn this function off and have received documents printed at full size. -
Page 99: Substitute Reception To Memory
Substitute Reception to Memory In situations where printing is not possible, such as when the machine runs out of paper, the toner cartridge needs replacement, or the paper jams, incoming faxes will be received to memory. Incoming faxes will also be received to memory if a sheet of paper or envelope is inserted in the bypass tray (fax reception cannot take place on paper in the bypass tray). -
Page 100: Special Fax Functions
5. Special Fax Functions Distinctive Ring (Requires Subscription to Service) Important: To use distinctive ring, you must subscribe to a distinctive ring service from your local phone company. Note that the machine may not be compatible with some distinctive ring services. - Page 101 Distinctive Ring (Requires Subscription to Service) Press a number from 1 to 3 (1 to 5 in Canada) to select the ring pattern below that matches your second number’s ring pattern. To have the machine automatically answer your normal telephone number, press 6. To turn off the distinctive ring function, press 7.
-
Page 102: Polling (Requesting A Fax Transmission)
Polling (Requesting a Fax Transmission) Polling (Requesting a Fax Transmission) Polling allows you to call another fax machine and have it send a document (previously loaded in the machine’s feeder or stored in memory) to your machine without assistance from the operator of the other machine. Hint: Polling is useful when you want the receiving fax machine, not the transmitting fax machine, to bear the cost of the call. - Page 103 Your machine will call the other machine and receive the fax. Being polled (Memory polling) To let another fax machine poll your machine, you must first store the document in memory using the following procedure. Transmission will take place when the other fax machine calls your machine and activates polling. You can choose whether to allow polling only once, or an unlimited number of times.
- Page 104 Polling (Requesting a Fax Transmission) If needed, select the resolution and/or contrast (otherwise, skip this step). Press The document is scanned into memory. Make sure the reception mode is set to FAX ONLY (see page 93). (When the polling fax machine calls, the machine must answer automatically in order to transmit the document.) Clearing a memory polling document To clear a memory polling document from memory, follow these steps:...
-
Page 105: Printing
Properties, Setup, or Printer in the Print dialog box (the name of the button varies depending on the application). The SHARP AM-900 Printing Preferences (“SHARP AM-900 Properties” in some versions of Windows) appear. Adjust the settings as desired (see page 104), and then click OK. -
Page 106: Selecting Print Settings
The print settings are selected in the SHARP AM-900 Printing Preferences (“SHARP AM-900 Properties” in some versions of Windows). To make temporary changes to the print settings, open the SHARP AM-900 Printing Preferences from an application as explained in Step 2 on page 103. -
Page 107: Page Setup Tab
Page Setup tab Select the Paper Size and Paper Source. When the Paper Source is set to Tray, the Paper Size can be set to Letter or Legal. When the Paper Source is set to BypassTray, the Paper Size can be set to Letter, Legal, A4, A5, Envelope #10 (4 1/8”... -
Page 108: Advanced Tab
Selecting Print Settings Advanced tab The Advanced tab is used to specify how the printed image is scaled to the paper. Normally Match Page Size is selected so that the image size matches the paper size selected on the Page Setup tab (the image is not reduced). - Page 109 Selecting Print Settings If you wish to scale the image to a smaller size, select Auto Scaling. The paper size setting on the Page Setup tab will appear in Current Page Size. Select the size to which you wish to scale the image in Output Size. The amount of the reduction will be shown in the page image.
-
Page 110: Printing On Envelopes And Cards
Be sure to select the correct envelope or paper size in the Page Setup tab of the SHARP AM-900 Printing Preferences (or “Properties”) before printing. (Select Properties, Setup, or Printer from the Print dialog box to open the SHARP AM-900 Printing Preferences.) Adjust the document guides on the bypass tray to the width of the sheet or envelope. - Page 111 Click “Properties”, “Setup”, or “Printer” (the name of the button varies depending on the application) in the dialog box to open the SHARP AM-900 Printing Preferences (or “Properties”). Set the “Paper Source” to “Bypass Tray” on the “Page Setup” tab and then select the appropriate paper size.
-
Page 112: Scanning
7. Scanning The machine can be used to scan documents to your computer. Both color and black and white scanning are possible. You can either begin scanning from a TWAIN- or WIA-compliant software program, or from the operation panel of the machine. To use the machine as a scanner, the machine must be connected to your computer with a USB cable, and the scanner driver and utility software (Sharpdesk) must be installed on your computer (see page 23). - Page 113 Using the auto document feeder: Adjust the document guide to the width of your original(s), and then insert the originals face up into the feeder. Up to 20 letter-size sheets can be inserted at once. Note that some applications may only allow you to scan one page at a time.
- Page 114 Scanning From a TWAIN Application In the dialog box that appears, select “SHARP MFP TWAIN I” and click the Select button. Note: The selection WIA-SHARP AM-900 is for WIA applications and is explained in the following section. Click the File menu and select “Acquire Image”.
- Page 115 Scanning From a TWAIN Application If you are using the auto document feeder, select Use Automatic Document Feeder. If you wish to use the standard preset scanning settings, click Photo or Document as appropriate for the original in the Standard Preset field. The Advanced Controls can be adjusted as needed.
-
Page 116: Scanning From A Wia Application (Windows Xp/Me Only)
Scanning From a WIA Application (Windows XP/Me only) Scanning From a WIA Application (Windows XP/Me only) If you are using Windows XP or Windows Me, you can scan a document into Paint or any other WIA-compliant application. The auto document feeder cannot be used to scan a document into a WIA application. - Page 117 Click the File menu and select “From Scanner or Camera”. The File menu of Paint is shown below. If you have WIA drivers for other devices installed on your system, the “Select Device” window will appear. Select “WIA-SHARP AM-900” and click the OK button.
- Page 118 Scanning From a WIA Application (Windows XP/Me only) The following window will appear. Select the desired scan settings and then click the Scan button to begin scanning. To view a preview of the scanned image using the selected settings, click the Preview button.
-
Page 119: Scanning From The Scanner Wizard (Windows Xp/Me Only)
Start button, point to Settings, select Control Panel, and then double-click Scanners and Cameras). In the window below, right-click the SHARP AM-900 icon and select Get picture using Scanner Wizard (select Use Wizard in Windows Me). The Scanner and Camera Wizard will open. Follow the instructions in the... -
Page 120: Scanning From The Operation Panel
Follow the appropriate procedure below for your operating system to link programs to scan menus. Windows XP . Click the start button, click Control Panel, click Printers and Other Hardware, and then click Scanners and Cameras. . Right-click the SHARP AM-900 icon and select Properties. - Page 121 . The SHARP AM-900 Properties appear. Click on the Events tab. . Select SC1 (scan menu SC1) from the Select an event list. Scanning From the Operation Panel...
- Page 122 Scanning From the Operation Panel . In the Actions field, select Start this program and then select the program that you wish to link to scan menu SC1 from the list of programs. Microsoft Scanner and Camera Wizard is selected as an example in the window below.
- Page 123 . In the Control Panel, double-click Scanners and Cameras. . Select SHARP AM-900 and click the Properties button. . Click the Events tab in the SHARP AM-900 Properties. . Select SC1 from the Scanner events list. . In Send to this application, select the program that you wish to link to scan menu SC1 (make sure only one program is selected).
- Page 124 Control Panel options. . Right-click the SHARP AM-900 icon and select Properties. . The SHARP AM-900 Properties appear. Click on the Events tab. . Select SC1 (scan menu SC1) from the Select an event list. . In the Actions field, select Prompt for which program to run.
- Page 125 . When you begin scanning after selecting one of the scan menus on the operation panel, the following window will appear on your computer. Select the program that you wish to link to scan menu from the list of programs. In addition, to stop the window from appearing each time you use that scan menu, select Always use this program for this action.
- Page 126 Scanning From the Operation Panel Scanning a document from the operation panel SCAN Press to select scan mode. Place the original on the document glass or in the auto document feeder. Using the document glass: Open the document glass cover and place the original face down on the glass with the top edge against the document guide.
- Page 127 Press until the desired scan menu appears in the display. Example: Press once for SC2: Press The program linked to the selected scan menu starts on your computer. Respond appropriately as prompted by the program to complete the scan. Scanning From the Operation Panel SCAN : SC2...
-
Page 128: Printing Lists
8. Printing Lists You can print lists showing settings and information entered in the machine, and recent fax transactions. The lists are described below. To print a list, follow these steps. MENU Press and then until the display at right appears. Press ENTER Press... -
Page 129: Telephone Number List
Telephone Number List This list shows the fax numbers that have been stored for automatic dialing. Group List This list shows the fax numbers that have been stored in each Group Key. Setup List This list shows your current selections for the MENU key settings. The list also shows your name and fax number as entered in the machine, and a sample of the header printed at the top of every page you transmit (HEADER PRINT). -
Page 130: Transaction Report
Printing Lists Transaction Report This report is printed out automatically after an operation is completed to allow you to check the result. The machine is set at the factory to print out the report only when an error occurs. The Transaction report cannot be printed on demand. Headings in the Transaction Report SENDER/ The name or fax number of the other machine involved in the... - Page 131 Transaction Report print condition You can change the condition under which a Transaction Report is printed out. Follow the steps below. Make sure that the date and time display of fax mode appears (if needed press ) and then press Press Press Press a number from...
- Page 132 Printing Lists Auto print-out of Activity List You can set the Activity List to print automatically whenever information on 30 fax transactions has accumulated. (The Activity List can still be printed on demand at any time.) Follow these steps: Make sure that the date and time display of fax mode appears (if needed press ) and then press...
-
Page 133: Maintenance
9. Maintenance Cleaning the Scanning Glasses and Rollers Any dirt, fingerprints, or other small debris on the scanning glasses will degrade the quality of copies, faxes, and scanned images, and increase scanning time. Clean the document glass and the scanning glass in the auto document feeder regularly as explained below. -
Page 134: Cleaning The Document Glass
Maintenance Close the auto document feeder cover, pressing down on both sides to make sure it clicks into place. Cleaning the document glass Open the document glass cover and clean the document glass by wiping it with a soft, dry cloth (be sure not to use a cloth that will scratch the glass). If needed, moisten the cloth with isopropyl alcohol or denatured alcohol. -
Page 135: Cleaning The Housing
Cleaning the print rollers Clean the print rollers frequently to prevent smudges or other dirt from appearing on your output. To clean the rollers, press the side cover release to open the side cover, and then clean the rollers indicated below with a clean cloth. -
Page 136: Cleaning The Paper Feed Roller
Maintenance Cleaning the paper feed roller In order to avoid multi-feeds (multiple sheets of paper feeding at once) and paper jams, clean the paper feed roller regularly as shown below. Press the side cover release ➋. open the side cover Press the center roller with your finger to make it rotate a half turn back into the machine. -
Page 137: Replacing The Toner Cartridge
Once a fax is received, it will be held in memory and printing will no longer be possible. Replace the toner cartridge with the following cartridge: Sharp AM-90ND toner cartridge Press the side cover release ➌... -
Page 138: Replacing The Drum Cartridge
Maintenance Continue from Step 4 on page 17 to install the new toner cartridge. Replacing the Drum Cartridge Viewing the total number of pages printed To maintain excellent printing quality, we recommend that you replace the drum cartridge after 20,000 pages have been printed. Follow these steps to view the total number of pages printed: MENU Press... - Page 139 Replacing the drum cartridge When 20,000 pages have been printed, DRUM LIFE OVER will appear in the display. Replace the drum cartridge with the following cartridge: Sharp AM-90DR drum cartridge Press the side cover release ➌ the front cover Caution! The fusing unit inside the print compartment becomes very hot during operation.
- Page 140 Maintenance Grasp the drum cartridge handle and gently pull the old cartridge out of the machine. Remove the new drum cartridge from its packaging. Insert the drum cartridge into the print compartment, sliding it along the guides. Do not touch or allow other objects to contact the drum (the green cylinder).
-
Page 141: Troubleshooting
10. Troubleshooting Problems and Solutions If you have any problems with the machine, first refer to the following troubleshooting guide. If you cannot solve the problem, call Sharp's Customer Assistance Center at 1-877-794-8675 (U.S.A. only). Line error Problem LINE ERROR appears in A line error occurs when your machine cannot the display. - Page 142 Problems and Solutions Dialing and fax transmission problems Problem No dial tone when you • Make sure that the telephone line is properly pick up an extension connected to both the TEL. LINE jack and the wall phone connected to the jack (see page 14).
- Page 143 A distorted image is • Noise on the telephone line may cause distortion. Try received at the other end. sending the document again. • Make a copy of the document on your machine. If the copy is also distorted, your machine may need service.
-
Page 144: Copying Problems
Problems and Solutions When a fax is received, • Make sure that the paper size setting is correct (see the size of the printed page 22). document image does not match the size of the • Make sure that an appropriate reception ratio setting paper. -
Page 145: General Problems
General problems Problem Nothing appears in the • Make sure the power cord is properly plugged into a display. power outlet. • Connect another electrical appliance to the outlet to see if it has power. The machine does not • If a beep sound is not made when you press the keys, respond when you press unplug the power cord, wait at least 5 seconds, and any of its keys. -
Page 146: Messages And Signals
Messages and Signals Messages and Signals Display messages ADD PAPER Check the printing paper. If the tray is empty, add paper. If there is paper in the tray, make sure it is inserted correctly (take out the stack, align the edges evenly, and then reinsert it in the tray). - Page 147 DRUM LIFE OVER This appears when the drum cartridge needs replacement. FAX RX IN MEMORY A fax has been received in memory because the toner cartridge needs replacement, you have run out of printing paper, the paper is jammed, or paper is inserted in the bypass tray.
-
Page 148: Audible Signals
10 seconds, and then plug it back in. If the “XX”) message still appears, unplug the power cord and call SHARP’s Customer Assistance Center at at 1-877- 794-8675 (U.S.A. only). SET BYPASS PAPER / Paper must be inserted in the bypass tray for a print SIZE: XXXX job or copy job that requires use of the bypass tray. -
Page 149: Clearing Paper Jams
Clearing Paper Jams Clearing a jammed document If the original document doesn’t feed properly during transmission or copying, or DOCUMENT JAMMED appears in the display, first try pressing the document doesn't feed out, open the auto document feeder cover and remove it. - Page 150 Clearing Paper Jams Close the auto document feeder cover, pressing down on both sides to make sure it clicks into place. Press down on the marks...
-
Page 151: Clearing Jammed Printing Paper
Clearing jammed printing paper Press the side cover release Push the two heater roller release levers down to release the heater roller. Caution! The fusing unit (indicated in white at right) becomes very hot during operation. Do not touch the fusing unit. If the jammed page is protruding from the side of the machine, gently pull it out. - Page 152 Clearing Paper Jams If the jammed page cannot be pulled out directly, open the front cover and rotate the white knob direction shown to feed the jammed page out into the output tray. After the jammed page has been removed, push the two heater roller release levers back up.
-
Page 153: Ordering Parts (U.s.a. Only)
Ft. Lauderdale, FL 33309 Fox International, Ltd. 23600 Aurora Road Bedford Heights, OH 44146 Andrews Electronics 25158 Avenue Stanford Santa Clarita, CA 91355 Sharp Accessories and Supply Center 2130 Townline Road Peoria, IL 61615 Ordering Parts (U.S.A. only) TCADH3738XHZZ LPCTP3344XHSA... -
Page 154: Fcc Regulatory Information
If trouble is experienced with this equipment, or for repair or warranty information, please contact Sharp’s Customer Assistance Center. The number is 1-877-794-8675. If the equipment is causing harm to the telephone network, the telephone company may request that you disconnect the equipment until the problem is resolved. - Page 155 S H A R P MATERIAL SAFETY DATA SHEET (1/4) Section 1. Product and Company Identification Product Name : Toner Cartridge of AM-900, AM-700, AM-90ND, DUNT-29LDXH01 Supplier Identification : Sharp Corporation 22-22 Nagaike-cho, Abeno-ku, Osaka, Japan Local suppliers are listed below. Please contact the nearest supplier for additional information...
- Page 156 S H A R P MATERIAL SAFETY DATA SHEET (2/4) Section 5. Fire-Fighting Measures Suitable Extinguishing Media: , water spray, foam and dry chemical Extinguishing Media to Avoid: Full water jet Fire and Explosion Hazards: If dispersed in air, like most finely divided organic powders, may form an explosive mixture.
- Page 157 S H A R P MATERIAL SAFETY DATA SHEET (3/4) Section 10. Stability and Reactivity Stability: Stable except above 200°C (392°F). Hazardous Reactions: Dust explosion, like most finely divided organic powders. Conditions to avoid: Electric discharge, throwing into fire. Materials to Avoid: Oxidizing materials. Hazardous Decomposition Products: CO, CO Hazardous Polymerization : Will not occur.
- Page 158 This information relates only to the specific material designated as supplied by the manufacturer. This information is supplied to us by the manufacturer and Sharp offers no warranties as to its accuracy and accepts no responsibilities for any typographical errors which may appear on these sheets.
-
Page 159: Index
Index Activity List, 126 Activity List, Auto Print Out, 130 Alarm volume, 47 Audible signals, 146 Auto clear, 48 Auto document feeder Document restrictions, 61 Document sizes, 60 Loading document, 61 Automatic redialing Line busy, 78 Line error, 80 Broadcasting, 85 Canceling a fax job, 77 Canceling a print job, 103 Cards... - Page 160 Index Key tone off, 49 Language used in display, 50 Letters, entering, 42, 71 Line error, 139 Line Monitor, 76 Loading printing paper, 21 Memory, substitute reception to, 97 Number of rings in FAX ONLY reception mode, 94 Ordering parts, 151 Paper feed roller, cleaning, 134 Paper jams, clearing, 147 Paper size setting, 22...
- Page 161 SHARP ELECTRONICS CORPORATION Sharp Plaza, Mahwah, New Jersey 07430-1163 SHARP ELECTRONICS OF CANADA LTD SHARP ÉLECTRONIQUE DU CANADA LTÉE 335 Britannia Road East, Mississauga, Ontario L4Z 1W9 http://www.sharp.ca SHARP CORPORATION Ver 1.1...