Table of Contents
Table of Contents

Related Manuals for Honeywell SRX2


Summary of Contents for Honeywell SRX2
- Page 1 Wireless headsets Product Guide...
- Page 2 Disclaimer WARNING Honeywell International Inc. (“HII”) reserves the right to make changes in specifications and other information contained in this document without prior notice, and the reader should in all cases consult HII to determine whether any such changes have been made. The information in this publication does not represent a commitment on the part of HII.
-
Page 3: Table Of Contents
Product Use and Care General Safety Guidelines Statement of Agency Compliance Honeywell Battery Safety Chapter 3 - Wireless Headsets SRX2 and SRX3 Industrial Use Headsets SRX2/SRX3 Modular Design Sharing the SRX3 Headset Operator Profiles and Shared Headsets SRX3 User Guide - Preliminary... - Page 4 Attaching the SRX2/SRX3 to a Hard Hat Wearing the SRX2/SRX3 Hard-Hat Headset Storing the SRX2/SRX3 Hard-Hat Headset Replacing an Earpad on the SRX2/SRX3 Hard-Hat or High-Noise Headset SRX2/SRX3 High-Noise Headset Replacing an Earpad on the SRX2/SRX3 Hard-Hat or High-Noise Headset...
- Page 5 Pairing an SRX2/SRX3 Headset Pairing an SRX2/SRX3 Headset with an A700/A700x Device Using TouchConnect™ Auto Pairing an SRX2/SRX3 Headset with an A500, A700, or A700x Talkman Device Manually Pairing an SRX2/SRX3 Headset with an A500, A700, or A700x Talkman Device...
- Page 6 SRX2/SRX3 Headset Battery Charger Headset Battery Charger Wall Mount Mounting the SRX2/SRX3 battery chargers About LED Indicators SRX2/SRX3 and A700/A700x Battery Charger LED Indicators Chapter 5 - Troubleshooting Equipment Problems I Can't Hear Anything Through the Headset My Headset Won't Stay On...
-
Page 7: Chapter 1 - Customer Support
Japan and Korea: E-mail: [email protected] Phone: +813 3769 5601 Honeywell - Vocollect Customer Service Contact Honeywell - Vocollect Customer Service for order placement, order status, returns, Return Material Authorization (RMA) status, or other customer service issues: SRX3 User Guide - Preliminary... - Page 8 Japan and Korea: Email: [email protected] Phone: +813 6730 7234 Honeywell - Vocollect RMA To return equipment for repair contact Honeywell - Vocollect RMA to request an RMA number. Email: [email protected] Sales and General Inquiries For sales or any other inquiry, email [email protected]...
- Page 9 Phone: +44 (0) 1628 55 2900 [email protected] Honeywell Vocollect Solutions Asia-Pacific 21/F Honeywell Tower Olympia Plaza 255 King's Road North Point, Hong Kong Phone (Hong Kong): +852 2331 9133 Phone (China): +86 186 1698 7028 Phone (Australia): +61 409 527 201 [email protected]...
-
Page 10: Product Service And Repair
Product Service and Repair Honeywell International Inc. provides service for all of its products through service centers throughout the world. To obtain warranty or non-warranty service, please visit www.honeywellaidc.com and select >Support > Contact Service and Repair to see your region's instructions on how to obtain a Return Material Authorization number (RMA #). -
Page 11: Chapter 2 - Introduction
CHAPTER INTRODUCTION Talkman Devices and Headsets Vocollect Talkman™ devices are wearable terminals used with Vocollect headsets to enable voice-directed work. Operators listen to instructions from these devices to perform tasks such as warehouse order picking and factory floor inspection, and then speak simple phrases to enter data. All Talkman devices leave the operator's hands free to inspect items, pick products, drive vehicles, or repair defects. -
Page 12: Product Use And Care
Always use pads and windscreens with Honeywell headsets to protect the equipment and ensure optimum speech recognition performance. Honeywell recommends changing headset windscreens every 90 days to ensure the best performance. -
Page 13: Statement Of Agency Compliance
Honeywell Vocollect Solutions devices and wireless headsets are designed to be compliant with the rules and regulations in the locations into which they are sold and are labeled as required. Honeywell devices are type approved and do not require the user to obtain license or authorization before using them. - Page 14 Honeywell shall not be held responsible for any damages caused by equipment malfunction when used with non-Honeywell batteries. Honeywell shall not be held responsible for any damages caused by equipment malfunction when using a non-Honeywell charger. Powering Off When a battery is expected not to be used for a long period of time, take it out the equipment or device and store at room temperature with normal humidity.
-
Page 15: Chapter 3 - Wireless Headsets
In deciding which headset to purchase, it may be beneficial for workers to try several different models to find the best fit for their jobs and environments. SRX3 SRX3 SRX3 Usage SRX2 SRX2 SRX-SL SRX2 Hard Hat High Noise General use headset... -
Page 16: Srx2 And Srx3 Industrial Use Headsets
The Bluetooth word mark and logos are owned by the Bluetooth SIG, Inc. and any use of such marks by Honeywell is under license. Other trademarks and trade names are those of their respective owners. SRX2 and SRX3 Industrial Use Headsets The SRX2 and SRX3 share a similar design. -
Page 17: Srx2/Srx3 Modular Design
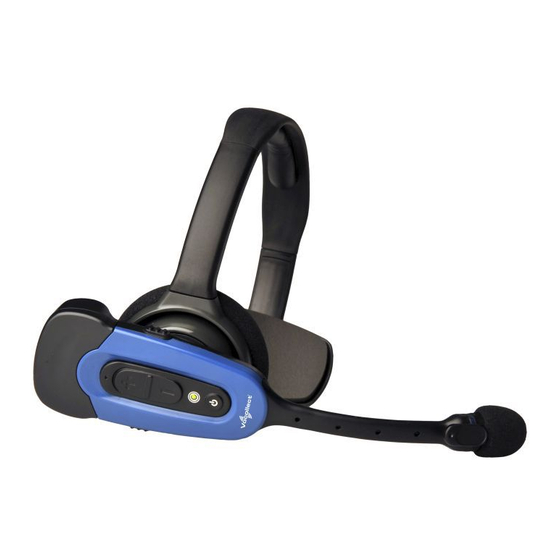
Honeywell SRX3 Headset Honeywell SRX2 Headset SRX2/SRX3 Modular Design The SRX3 and SRX2 Wireless Headsets feature a modular design. The potential for shared use of electronics modules across multiple shifts can lower the cost per user. To avoid passing germs between operators when sharing headsets, Honeywell recommends sharing only the electronics module. -
Page 18: Sharing The Srx3 Headset
Vocollect Voice Software (VoiceClient and VoiceCatalyst), along with VoiceConsole provide a feature called Automatic Operator Load. This feature enables a Honeywell device to recognize and load the profile of the operator who last used the headset, based on the unique ID of the electronics module. -
Page 19: Removing The Electronics Module From A Headband
SRX2 Honeywell has tested the SRX2 Wireless Headset with the following devices and Vocol- lect Voice Software versions. Support and compatibility of the SRX2 headset is not lim- ited to these products, but the customer assumes risks related to untested configurations. -
Page 20: Srx2 Headset Battery
VoiceClient MP 2.1 and newer VoiceClient MP 2.0 and newer Motorola® MC9500, MC9190 VoiceCatalyst MP 1.0 and newer Zebra® MC32N0 VoiceCatalyst MP 2.2 and newer SRX2 Headset Battery NOTE The SRX3 and SRX2 headsets use the same battery. SRX3 User Guide - Preliminary... -
Page 21: Charging Srx2/Srx3 Wireless Headset Batteries
The SRX3 and SRX2 headsets use the same battery. WARNING Once an SRX3 or SRX2 battery is placed on a port in the charger, it must remain in the charger for a minimum of five seconds. This allows the charger sufficient time to analyze the state of the battery. Removing the battery during this five second interval may cause the LED indicator on the charger to display an incorrect battery status. -
Page 22: Inserting A Battery Into The Srx2 Wireless Headset
Remove the battery, and mount it on the port again. NOTE See the chart on SRX2/SRX3 battery charger LED Indicators for more information on LED patterns . 6. When the ring LED indicator turns a solid green, the battery is fully charged. -
Page 23: Removing A Battery From An Srx2/Srx3 Wireless Headset
Removing a Battery from an SRX2/SRX3 Wireless Headset IMPORTANT Do not remove the battery from the SRX3 or SRX2 headset until the LED indicator on the headset is off. 1. Power off the headset by pressing and holding the Power button on the electronics module for one second. -
Page 24: Wearing An Srx2/Srx3 Wireless Headset
It should be facing your upper lip, and not touching anything (for example, clothing, skin, or facial hair). Installing the Stability Strap on the SRX2/SRX3 Wireless Headset 1. Hold the headset so that the earpad faces you and the electronics module faces away. - Page 25 the hole. 4. Turn the headset so that the t-bar pad faces you. 5. Locate the slot on the end of the headband near the t-bar. 6. Align the knob at the free end of the strap with the slot on the headband. SRX3 User Guide - Preliminary...
-
Page 26: Replacing An Earpad On The Srx2/Srx3 Headset
Replacing an Earpad on the SRX2/SRX3 Headset 1. Hold the headset so that the earpad faces you and the electronics module faces away. -
Page 27: Headset Functions And Led Patterns For Srx2/Srx3
5. Place the new earpad and earpad plate assembly onto the headset earpiece. 6. Rotate the assembly to the right pressing gently into the earpiece until the assembly locks into place. >Headset Functions and LED Patterns for SRX2/SRX3 Headset Function SRX3 User Guide - Preliminary... - Page 28 Power on User Action Press Power button for half a second Headset Mode Headset powers up in low power pairing mode LED Pattern Solid green Tone High pitch double beep Power off User Action Hold Power button for one second Headset Mode Headset powers off LED Pattern...
- Page 29 When using the headset with Guide Work, only the tones are played. Mute NOTE This applies to the SRX3 Headset only. This feature is not available on the SRX2 Headset. User Action Flip microphone boom up 90 degrees (vertical) Headset Mode...
- Page 30 Tone Unmute NOTE This applies to the SRX3 Headset only. This feature is not available on the SRX2 Headset. User Action Flip microphone down to mouth level. Headset Mode LED Pattern Tone Force disconnect for manual pairing in low power mode...
- Page 31 NOTE This mode is recommended only if low power pairing fails. IMPORTANT Honeywell does not recommend this pairing mode for Talkman devices. This mode greatly increases the likelihood that your headset will pair with the wrong device. LED Pattern Rapid flash, then solid green Tone No tone when entering mode.
-
Page 32: Srx3 Flip To Mute Feature
Three descending tones when the connection to the master device is dropped Update headset software User Action Connect headset to computer running Honeywell Accessory Update Utility (HAUU) NOTE HAUU V3.0 or greater is required for the SRX3 Headset and recommenced for all accessory updates. -
Page 33: Srx2/Srx3 Hard-Hat Headset
SRX2/SRX3 Hard-Hat Headset In environments where operators must wear hard hats, the standard over-the- head headset is not a viable option. The SRX2/SRX3 Hard-Hat headset has a built-in clip that attaches the headset earpiece, electronics module, and microphone to most industrial hard hats. The Hard-Hat headset supports most hard-hat models commonly used in the United States, Europe, and Japan. -
Page 34: Installing The Srx2/Srx3 Hard-Hat Clip
Installing the SRX2/SRX3 Hard-Hat Clip The SRX2/SRX3 Hard-Hat headset attaches to the side of a hard hat using a clip that must be mounted on the hard hat. Honeywell offers two clip styles, one designed to insert in a hard-hat slot and one that mounts over the side brim of a non-slotted hard hat. - Page 35 The angle of the clip should follow the contour of the hard hat with the rubber stops on the back side of the clip facing the hard hat. Align the tab of the clip to fit into the slot. Slide the clip into the slot until the tab clicks in place and it is firmly seated.
-
Page 36: Attaching The Srx2/Srx3 To A Hard Hat
Attaching the SRX2/SRX3 to a Hard Hat With an SRX2/SRX3 Hard-Hat Headset clip mounted on the side of a hard hat, the head- set's fork and disk assembly snaps securely onto the hat. 1. Insert the disk into the hard-hat clip from the top. -
Page 37: Storing The Srx2/Srx3 Hard-Hat Headset
5. Insert the SRX2/SRX3 electronics module into the pocket on the earcup by aligning the notches on the speaker and earcup pocket. -
Page 38: Replacing An Earpad On The Srx2/Srx3 Hard-Hat Or High-Noise Headset
4. Rotate the headset n the hard-hat clip until the earcup rests against the side of the hat. Replacing an Earpad on the SRX2/SRX3 Hard-Hat or High-Noise Headset 1. Remove the electronics module from the earcup. -
Page 39: Srx2/Srx3 High-Noise Headset
6. Push sections together until they click into place. SRX2/SRX3 High-Noise Headset The SRX2/SRX3 High-Noise headset is a headset with a single ear cup that fits entirely over the operator's ear to allow him or her to hear voice instructions clearly in areas of high environmental noise. -
Page 40: Replacing An Earpad On The Srx2/Srx3 Hard-Hat Or High-Noise Headset
6. Push sections together until they click into place. Options for Hearing Impaired Users Honeywell products are designed for persons with average levels of hearing. Operators who use assistive hearing devices may need to consider some adjustments when using Honeywell headsets in a production warehouse environment. -
Page 41: About Pairing Wireless Headsets
Hearing loss is a medical condition that requires the attention of a qualified audiologist. The audiologist should be made aware of the options that Honeywell products offer with pitch, volume, and sidetone so that he or she can make appropriate recommendations that may benefit the user without possible side effects. -
Page 42: Pairing Versus Connecting
Pairing versus Connecting Pairing is not the same as connecting. Two Bluetooth devices, once paired, can connect and disconnect many times. With a pairing in memory, the two devices can reconnect easily and will make repeated attempts to establish a connection. In this way, a headset and device pairing allows for increased user mobility. -
Page 43: Srx2/Srx3 Headset Pairing Methods
Bluetooth-enabled device. These pairings can be accomplished using a variety of methods. NOTE The SRX2 headset must be in high power pairing mode to pair with a handheld device. To place the SRX2 headset in high power pairing mode, momentarily press the Plus (+) and Minus (-). - Page 44 The user determines when to pair a device and headset by pressing buttons on the device. NOTE The SRX2 or SRX3 headset can perform either manual or auto pairing for its first pairing. Recommended for: VoiceCatalyst users on A500 devices...
-
Page 45: Pairing An Srx2/Srx3 Headset
SRXHeadsetEnable is set to 1 (Enabled), the default the parameter SrxAutoPairEnable is set to 0 (Disabled), the default For best performance when using an SRX2 or SRX3 headset with a Talkman A700 or A700x device, use the latest headset software version. Obtain the latest headset software from your Honeywell portal or reseller and use the Honeywell Accessory Update Utility to upgrade your headset. - Page 46 If the device state indicator blinks red, the NFC read was not successful, and you should attempt to perform the read again. Using TouchConnect to Obtain Using TouchConnect to Pair an Operator Information from the SRX2 or SRX3 with an A700 or Headband A700x Device SRX3 User Guide - Preliminary...
-
Page 47: Auto Pairing An Srx2/Srx3 Headset With An A500, A700, Or A700X Talkman Device
When the device starts the task, VoiceConsole recognizes the pairing. Auto Pairing an SRX2/SRX3 Headset with an A500, A700, or A700x Talkman Device Prerequisites: The headset is powered off. There is no wired headset connected to the Talkman device. The Talkman device is Bluetooth ready with Bluetooth connection features enabled. -
Page 48: Manually Pairing An Srx2/Srx3 Headset With An A500, A700, Or A700X Talkman Device
6. Press the Play/Pause button on the Talkman device to confirm the number. 7. Press the Play/Pause button again to begin working. Manually Pairing an SRX2/SRX3 Headset with an A500, A700, or A700x Talkman Device Prerequisites: The headset is powered off. -
Page 49: Handheld Device Pairing Status Icons
Prerequisites: The headset is powered off. The handheld device is not in a charger, and there is no wired headset connected to it. The device is in sleep mode — not in use running an application. The device is Bluetooth ready with Bluetooth connection features enabled. 1. -
Page 50: Pairing A Headset By Voiceconsole Pairing
When the device powers up or goes into sleep mode, the paging process begins. 3. Place the headset in pairing mode. The SRX2 and SRX3 headsets are automatically in pairing mode after being powered on. -
Page 51: Placing Headsets In Pairing Modes
TouchConnect You can pair an A700 or A700x device and an SRX2 or SRX3 headset by touching them. This method essentially eliminates the chance of cross pairing and it is quicker and easier than the other methods. -
Page 52: Headset Pairing Faq
Headset Pairing FAQ Q: My device accidentally paired with a different headset. What can I do? A: If you are using an SRX2 or SRX3 headset, press the + and - buttons simultaneously to clear the pairing. Q: The users at my site do not have assigned headsets and devices, so they could get a different headset at every shift. -
Page 53: Supervisor Audio With Srx2/Srx3 Headsets
If your users share headsets and devices, use auto pairing so that pairing hardware at each shift will complete faster. Supervisor Audio with SRX2/SRX3 Headsets Supervisor Audio is a feature that will allow a second party to listen to the conversation between a Bluetooth-enabled device and a user with an SRX2/SRX3 headset. -
Page 54: Headset Parameters
Under normal operations, you cannot have a wired headset attached to the device when using an SRX2 or SRX3 headset. This parameter overrides this requirement when enabled. To avoid disconnecting the wireless headset, pair and connect the device to the headset first, then connect a wired headset. -
Page 55: Cleaning Plastics
A final alcohol wipe after this should ensure a clean contact. Never bend or manipulate battery contacts. Contact an authorized Honeywell Service Center to repair or replace contacts that are extremely corroded, bent, or missing. Care and Use of Headsets and Microphones The headsets and microphones used with the Voice system are delicate pieces of electronic equipment. -
Page 56: Product Use And Care
For maximum hygiene, Honeywell discourages sharing headsets among operators. The design of the SRX2, SRX3, and SRX-SL headsets features an electronics module that can be removed from the headband and windscreen. The electronics module can be shared among operators over multiple shifts, providing some level of hygiene while potentially reducing costs. -
Page 57: Cleaning Windscreens
If the headset plays a "headset maintenance is needed message" when used in the freezer environment, contact your support representative for information. Do not return the headset to Honeywell unless directed to do so by your representative. Cleaning Windscreens Honeywell recommends that you change windscreens every 90 days for optimum speech recognition performance. -
Page 58: Cleaning Headsets
Cleaning the Headband Pad NOTE Honeywell strongly recommends that you leave the headband pad in place when cleaning it. If you must remove the entire pad to clean it, use care to line up the head- band pad with the topmost part of the headband when you place it back on the head- band. -
Page 59: Chapter 4 - Chargers
Honeywell recommends that a protective device, such as an uninterruptible power supply with surge protection and lightning arrestor capability, be used with battery chargers. SRX2/SRX3 Headset Battery Charger The SRX2/SRX3 20-bay or 6- bay battery charger can be used with SRX2 or SRX3 batteries. SRX3 User Guide - Preliminary... - Page 60 Each battery port has LED lights that indicate battery charge status and battery health. SRX2 headset battery chargers are designed to be placed on a desktop or mounted on a wall using a DIN rail. Customer with multiple chargers must...
-
Page 61: Headset Battery Charger Wall Mount
Mounting the SRX2/SRX3 battery chargers You will need: DIN rail, slotted steel 35 mm X 15 mm, Honeywell Part #CM-1000-20-101 or customer-supplied DIN rail meeting the following specifications Number of Minimum cut lengths... -
Page 62: About Led Indicators
Screw driver 1. Install the DIN rail on the wall in the desired location. Ensure that the secure installation, supporting surface, and mounting hardware will safely support the weight of a fully loaded charger, at 25 lbs. per linear foot (37.2 kg/m) of DIN rail. -
Page 63: Srx2/Srx3 And A700/A700X Battery Charger Led Indicators
Indicated by LED. SRX2/SRX3 and A700/A700x Battery Charger LED Indicators The SRX2/SRX3 battery chargers and the A700/A700x battery chargers have an LED indicator light, located at the bottom right of the charger face, that signals the status of the charger. - Page 64 Ring LED (Charge Status) Alert LED (Battery Health) Battery Status Solid Green Battery is fully charged Solid Yellow Battery is charging Blinking Red Charging fault detected Solid Green Solid Red Battery alert condition; fully charged Solid Yellow Solid Red Battery alert condition; charging Blinking Red Solid Red Battery alert condition;...
-
Page 65: Chapter 5 - Troubleshooting Equipment Problems
5. Turn the device off and then back on again. 6. Reboot the device. 7. If you are using an SRX2 or SRX3 headset, make sure your headset is paired with your device. 8. If the headset is broken, send it back to Honeywell for repair. - Page 66 2. Clean the contacts, if necessary. Use an isopropyl alcohol (isopropanol) swab or soft cloth dampened with isopropyl alcohol to clean metal connection points. If dirt or residue cannot be removed with the alcohol swab or cloth, use a soft, non-abrasive rubber eraser to clean metal connection points. You can also use a three-row toothbrush style, general cleaning brush with natural hog hair bristles to gently brush away dirt on the contacts.
-
Page 67: Appendix A - Specifications
APPENDIX SPECIFICATIONS SRX3 Wireless Headset Specifications Specification Detail 1.95 oz (55.4 g) Emodule only Weight 3.00 oz (85.0 g) Emodule and battery 3.89 oz (110.4 g) Standard headband only Operating -22 °F to 122 °F (-30 °C to 50 °C) temperature Storage temperature -40 °F to 158 °F (-40 °C to 70 °C) -
Page 68: Srx3 High Noise Headset Specifications
NOTE Packaging varies for product shipments. Generally, packing materials are about 15% of the total shipment weight. SRX3 High Noise Headset Specifications Specification Details Weight 5.08 oz (144 g) High noise headband only Operating -22 °F to 122 °F (-30 °C to 50 °C ) temperature Storage -40 °F to 158 °F (-40 °C to 70 °C) -
Page 69: Srx3 Hard-Hat Headset Specifications
SRX3 Hard-Hat Headset Specifications Specification Detail 2.94 oz (70 g) Hardhat headband only Weight 0.37 oz (10.6 g) Slotted hardhat mount clip 1.01 oz (28.5 g) Non-slotted hardhat mount clip Operating -22 °F to 122 °F (-30 °C to 50 °C ) temperature Storage temperature -40 °F to 158 °F (-40 °C to 70 °C) -
Page 70: Srx2 Wireless Headset Specifications
≥10.5 dB Rating NOTE Packaging varies for product shipments. Generally, packing materials are about 15% of the total shipment weight. SRX2 Wireless Headset Specifications Specification Details 6.84 oz (194 g) with stability strap Weight 6.46 0z (183 g) without strap Operating -22 °F to 122 °F (-30 °C to 50 °C) -
Page 71: Srx2 High Noise Headset Specifications
Noise Reduction Not applicable Rating NOTE Packaging varies for product shipments. Generally, packing materials are about 15% of the total shipment weight. SRX2 High Noise Headset Specifications Specification Details Weight 3.74 oz (106 g) Operating -22 °F to 122 °F (-30 °C to 50 °C ) -
Page 72: Srx2 Hard-Hat Headset Specifications
Noise Reduction ≥ 10.5 dB Rating NOTE Packaging varies for product shipments. Generally, packing materials are about 15% of the total shipment weight. SRX2 Hard-Hat Headset Specifications Specification Details Weight 2.47 oz (70 g) Operating -22 °F to 122 °F (-30 °C to 50 °C ) -
Page 73: Srx2/Srx3 Battery Specifications
Noise Reduction ≥10.5 dB Rating NOTE Packaging varies for product shipments. Generally, packing materials are about 15% of the total shipment weight. SRX2/SRX3 Battery Specifications NOTE The SRX3 and SRX2 headsets use the same battery. SRX3 User Guide - Preliminary... -
Page 74: Electrical Specifications
The battery pack contains custom electronics that provide performance, temperature, and pack identification to the device. This information is made available to voice management software. Battery Charging: The battery pack must be charged only in a Honeywell designated charger. Mechanical and Environmental Specifications Drop-test specifications: The battery meets the transient drop criteria. -
Page 75: Srx2/Srx3 Headset Battery Charger Specifications
SRX2/SRX3 Headset Battery Charger Specifications 12-Bay 6-Bay 20-Bay Charger 6-Bay Charger 2.5 lbs. (1.14 kg) with 6 batteries 8 lbs (3.63 kg) with 20 batteries Weight 2.1 lbs. (0.96 kg.) 6.38 lbs. (2.89 kg.) without batteries without batteries Width Approximately 55 cm (21.65 in.) Approximately 26.67 cm (10.5 in.) - Page 76 20-Bay Charger 6-Bay Charger Power supply output Power supply output power: 80W max power: 20W max Less than 40W Less than 10W required to charge 20 required to charge 6 batteries from fully batteries from fully depleted to fully depleted to fully charged.
-
Page 77: Chapter B - Regulatory Compliance
Honeywell devices and wireless headsets are designed to be compliant with the rules and regulations in the locations into which they are sold and are labeled as required. Honeywell devices are type approved and do not require the user to obtain license or authorization before using them. - Page 78 SRX3 User Guide - Preliminary...