
Related Manuals for Toshiba F Series


Summary of Contents for Toshiba F Series
- Page 1 FILE NO. 400-200503 SERVICE MANUAL HDD AUDIO PLAYER MEGF60,MEGF40 MEGF20,MEGF10 (UK) (MEGF60) Jun., 2005...
- Page 2 Precautions Safety Precautions for Service This section provides critical information for safety. Be sure to observe the content. Meaning of each indication is as follows: Death or serious injury may be caused to service personnel and/or surrounding people or users due to incorrect work by neglecting the following instructions or due to WARNING resulting defects of the product.
- Page 3 Precautions for discarding built-in battery The gigabeat uses a built-in rechargeable lithium-ion battery. Follow the government regulations when discarding the battery. Precautions for built-in hard disk This product has a built-in hard disk. If the disk is subjected to impact, vibration or change in the environment, such as temperature change, it may result in damage to the unit, malfunction and/or data loss.
-
Page 4: Table Of Contents
CONTENTS 1. Product overview ........................... 2 1.1. Product outline ............................2 2. Block diagram ..........................5 2.1. Logic circuit block diagram ........................5 2.2. Power circuit block diagram ........................6 3. Cautions on repair ......................... 7 3.1. Tell the owner that the contents of the HDD may be erased..............7 3.2. -
Page 5: Product Overview
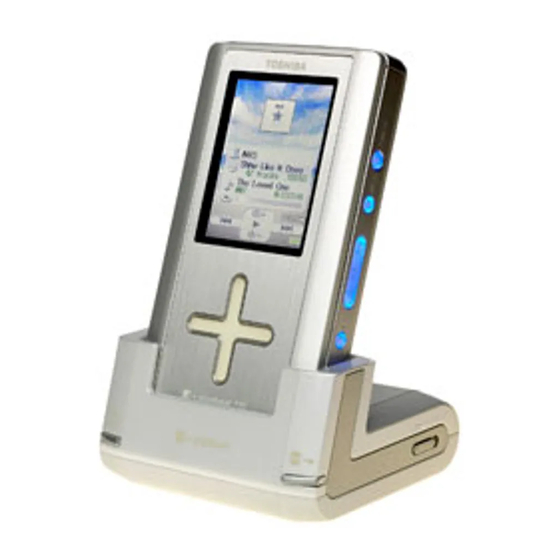
1. Product overview The Toshiba HDD Audio Player gigabeat F Series is a family of portable audio players incorporating a built-in HDD of 10 to 60GB. F40 and F60 are thick because the HDD they incorporate is thick. The main features are as follows:... - Page 6 Transfer (copy) musical data (WMA/MP3/WAV format) stored in the PC to the HDD by using a PC application, TOSHIBA gigabeat room. This transfer is possible via USB. Data transferred is encrypted in the SAT format (Toshiba's unique format) to prevent reproduction of a reproduction.
- Page 7 USB mass storage device (a USB large-capacity storage device). Copying musical data on the PC by using the TOSHIBA gigabeat room will encrypt the data on the PC. The encrypted data will then be sent to the gigabeat via USB.
-
Page 8: Block Diagram
2. Block diagram 2.1. Logic circuit block diagram... -
Page 9: Power Circuit Block Diagram
2.2. Power circuit block diagram... -
Page 10: Cautions On Repair
Before disassembly, be sure to remove the AC adaptor and set the BATTERY switch to "OFF." The gigabeat F series is such that its LCD and almost all ICs are powered even if the unit is turned off, if it is powered by the AC adaptor or battery. -
Page 11: When Replacing The Hdd
3.3. When replacing the HDD 3.3.1. Protect the HDD from impact Note that the HDD is vulnerable to impact. Merely falling the HDD from a vertical position would give an impact exceeding the specifications. 3.3.2. Holding the HDD When holding the HDD, hold it at the following position: Do not hold it at the following position:... - Page 12 2) Start "Computer Management" and select "Disk Management." 3) Make sure that the USB cable is connected to the PC, then connect the USB cable to the gigabeat F series. 4) Connect the AC adaptor to the gigabeat F series.
- Page 13 7) Right-click "Not Initialized" displayed on "Computer Management." Then click "Initialize Disk." 8) Confirm that Disk (in this case, Disk 1) of the gigabeat F series is checked. Then click OK.
- Page 14 9) Right-click "Unallocated" displayed on "Computer Management." Then click "New Partition.."...
- Page 15 10) The screen displays "Welcome to the New Partition Wizard." Click "Next>." 11) In "Select Partition Type," confirm that "Primary partition" is selected. Then click "Next>."...
- Page 16 12) In "Specify Partition Size," confirm that the partition size is set to the maximum (in this case, 38139). Then click "Next>." (Confirm that the default is set to the maximum. Click "Next>.")
- Page 17 13) In "Assign Drive Letter or Path," confirm that "Assign the following drive letter:" is selected. Then click "Next>." The "drive letter:" may be set to any value (in this case, E:). (Confirm that the default is set to "Assign the following drive letter:". Then click "Next>.")
- Page 18 14) In "Format Partition," select "Do not format this partition." Then click "Next>." (The default is set to "Format this partition with the following settings." Select "Do not format this partition." Then click "Next.>")
- Page 19 15) The screen displays "Completing the New Partition Wizard." Click "Finish." A new partition will be created in about five seconds. 16) Execute GBFormat.exe. GBFormat.exe is in C:¥Program Files¥TOSHIBA¥gigabeat room.
- Page 20 17) Set "Drive" to the drive letter assigned in "Assign Drive Letter or Path" (in this case, E:). Set Allocation unit size to the default value (32KB). Confirm that "Perform a quick format" is checked. Then click "Format." 18) The screen displays a warning message. Click "OK." 19) The formatting will be complete in about 15 seconds.
- Page 21 21) In "Computer Management," click "Refresh" Or you may press the F5 key.
- Page 22 22) Confirm that the disk is formatted with FAT32. Confirm that the disk capacity is equal to the partition size (in this case, 37.25GB).
- Page 23 31) Turn off the BATTERY switch. 32) While holding down the POWER and MENU buttons, connect the AC adaptor to the gigabeat F series. This startup method updates the firmware. During the update, do not pull out the AC adaptor.
- Page 24 42) Open the command prompt, execute the commands specified below, and add the SYSTEM and HIDDEN attributes to the ¥GBSYSTEM. attrib +S +H -R E:¥GBSYSTEM¥* /S /D attrib +S +H -R E:¥GBSYSTEM 43) Close the command prompt. 44) Execute 27) to 29) above and remove the USB cable from the gigabeat F series.
-
Page 25: When Replacing The Main Board
2) Connect the AC adapter to the gigabeat F series. 3) Hold down the POWER button to turn on the gigabeat F series. When the date configuration screen is displayed, press the middle of the Plus Touch to exit the date configuration screen. - Page 26 Connect the gigabeat F series to the PC. 23) Start the Explorer. If the HDD of the gigabeat F series contains the ¥update folder, delete it. 24) Open the command prompt, execute the commands specified below, and add the SYSTEM and HIDDEN attributes to the ¥GBSYSTEM.
-
Page 27: Replacing The Base
3.5. Replacing the base 3.5.1. Replacing the serial label The base has a serial label indicating the manufacturer's serial number of the unit. In replacing the base, remove the serial label and attach it to the new base. 3.5.2. Installing the strap holder Fix the strap holder to the base with hot melt as shown in the figure below. -
Page 28: Replacing The Frame
3.6. Replacing the frame 3.6.1. Attaching the SW flexible cable and sheet switch Attach the SW flexible cable to the frame. On top of it, attach the sheet switch. -
Page 29: Replacing The Lcd And Lcd Backlight Unit
3.7. Replacing the LCD and LCD backlight unit 3.7.1. Incorporating them into the LCD frame Peel off the protective film from the LCD and LCD backlight, then incorporate them into the LCD frame. Guard against fingerprints and dust. -
Page 30: Replacing The Lithium-Ion Battery
3.8. Replacing the lithium-ion battery 3.8.1. Attaching the two RUB BATs Attach the two RUB BATs to the bottom (the side in contact with the Venetian main PCB assembly) of the lithium-ion battery as illustrated below. 3.9. Replacing the cradle Note that the cradle comes in two types according to the thickness of the unit (the capacity of the built-in HDD). -
Page 31: Troubleshooting
4. Troubleshooting Shown below is the defect analysis procedure as a maintenance service. Before a repair (parts replacement), be sure to see "3. Cautions on repair. " 4.1. Anticipated defects 1) The unit will not turn on. 2) No sound comes out. 3) The sound is odd. -
Page 32: Defect Analysis Procedure As A Maintenance Service
4.2. Defect analysis procedure as a maintenance service 4.2.1. The unit will not turn on. Reset the unit. (See "Resetting" in "Troubleshooting" in the Owner's Manual.) Set the BATTERY switch to "ON." (See "Charging the built-in battery" in the Owner's Manual.) Connect the AC adaptor to the unit. - Page 33 Continued from the previous page If the unit turns on successfully, the owner may have set the BATTERY switch to "OFF" or have the battery discharged. Therefore leave (recharge) the battery for at least four hours as it is, then remove the AC adaptor and try turning on the unit.
- Page 34 4.2.2. No sound comes out. Reset the unit. (See "Resetting" in " Troubleshooting " of the Owner's Manual.) Connect the AC adaptor to the unit. Release the Hold switch, then turn on the unit (by holding down the POWER button for at least two seconds).
- Page 35 4.2.3. The sound is odd. Check with the owner whether the sound heard when played back on the unit deviates from the sound heard when the source data is played back on the PC. (Check if the data on the PC is normal.) Is the sound normal on the PC? Replace the main PCB assembly, headphones,...
- Page 36 4.2.8. The battery cannot be recharged. (When battery-powered, the unit plays back only for a short time.) Conduct a hearing of how the owner has been using the unit. If he or she is suspected of having repeated at least 500 recharge-discharge operations, the battery may have come to the end of its service life.
- Page 37 4.2.9. HDD is not recognized Turn on the unit, then check the error message displayed. Check the error message. If the message says "Cannot access the If the message says "The disk format is not HDD" supported." Replace either the HDD flexible cable or Format the HDD.
- Page 38 4.2.10. The unit cannot be recharged with the cradle. Set the BATTERY switch to "ON." (See "Charging the built-in Battery" in the Owner's Manual.) Connect the AC adaptor to the unit. (Try recharging the unit without the cradle.) Check if the LCD displays the charging icon (a picture of a power plug).
-
Page 39: Procedure To Confirm The Firmware Version
5. Procedure to confirm the firmware version Take the following steps to display the firmware version. 1) Hold down the POWER button. (The unit will turn on.) 2) If the main menu is not displayed, press the POWER button. (The top menu will be displayed.) 3) In the MAIN MENU, touch the top or bottom of the Plus Touch and select "SETUP", then touch the right of the Plus Touch. -
Page 40: Disassembling/Reassembling Procedures
7. Disassembling/Reassembling Procedures Be sure to disconnect the AC adapter and turn OFF the BATTERY button before disassembling the gigabeat. As long as power is supplied to the gigabeat by the AC adapter or BATTERY, the LCD and almost all the ICs are powered even during power OFF. -
Page 41: Disassembling Procedures
7.1. Disassembling Procedures Photo Description Note Step Tool Turn off the battery switch of the main unit indicated by the arrow. Insert the flathead Screwdriver screwdriver between the (blade side panel and top panel. width: about Lift up the top panel by 1.8mm) pushing the screwdriver. - Page 42 Step Photo Description Note Tool A view of the bottom side after removing the bottom panel. Remove four screws Phillips fixing the front and rear screwdriver panels. Hold the side panel, slide the front panel in the bottom direction (indicated by the arrow), and then release the lock.
- Page 43 Step Photo Description Note Tool Disconnect the backlight Lift up the lock lever on Flathead cable (CN6). the side opposite to the screwdriver cable insertion direction, and release the lock. Lift up the PJ2 Flathead connector with the screwdriver flathead screwdriver, and disconnect it.
- Page 44 Step Photo Description Note Tool Disconnect the cable Lift up the lock lever of from the connector, and CN1 and release the remove the HDD. lock. A view of the HDD removed from the chassis frame. Remove the P.C. Board. Phillips Remove two screws screwdriver...
-
Page 45: Reassembling Procedures
7.2. Reassembling Procedures Step Photo Description Note Tool Fix the P.C. Board to Tighten six screws. Phillips two frames. screwdriver Tighten two screws to fix the frame. Insert the HDD cable Confirm that the lock and push the lock lever lever is lifted up. - Page 46 Step Photo Description Note Tool Connect the battery to Draw the battery cable the connector CN5. not to touch the screw fixing the P.C. Board. Install the LCD Assembly. Position and insert the Insert it fully. cable PJ2 from the LCD.
- Page 47 Step Photo Description Note Tool Install the side panel. Slide the side panel in the direction indicated by the arrow with the lock guide aligned, and then fix it. Install the rear cover. Slide the rear cover in the direction indicated by the arrow with the lock guide aligned, and then fix it.
-
Page 48: Exploded View
8. Exploded view (MEGF10/20) (MEGF40/60) (MEGF40/60) (MEGF40/60) 110 111 113... -
Page 49: Parts List
9. Parts List gigabeat-UK (MEGF 10S/20S/40S/60S) Location P-Sevice Parts Description Model Remarks P000441140 AM0006271340 COVER ASSY-PMMR SILVER-A P000441080 AM0006271110 COVER ASSY-HAIR-S P000441090 AM0006271120 COVER ASSY-HAIR-GO P000441100 AM0006271130 COVER ASSY-HAIR-GR P000441580 PM0019226500 BASE-A-10C-UK P000441590 PM0019226510 BASE-A-20C-UK P000441670 PM0019546500 BASE-A-40C-UK P000441680 PM0019546510 BASE-A-60C-UK P000441180 AM0006397300... -
Page 50: Specifications
Specifications Built-in battery Rechargeable lithium-ion battery Weight MEGF60 and MEGF40 Approx. 170 g (main unit only) MEGF20 and MEGF10 Approx. 160 g (main unit only) External dimensions MEGF60 and MEGF40 Approx. 63 mm x 19 mm x 106 mm (width x height x depth), excluding projections MEGF20 and MEGF10 Approx. - Page 51 Specifications (Continued from the previous page) * 1 Gigabyte = 1 billion bytes when referring to hard drive capacity. The available storage capacity will also be less because the product includes pre-installed firmware and some sample contents. ** These values are for reference purposes only and may vary. ***The colour LCD is made with extremely high-precision technology.
- Page 52 ● Available hard disk space: 100 MB, excluding tracks ● USB port ● CD-ROM drive ● Internet Explorer 5.01 or later (This is correct as of February 2005. TOSHIBA cannot assure that gigabeat room will function properly with future Internet Explorer releases.) ● Windows Media ®...
- Page 53 1 1, SHIBAURA 1 CHOME, MINATO KU, TOKYO 105 8001, JAPAN...