
Related Manuals for Sony ODS-D280U


Summary of Contents for Sony ODS-D280U
- Page 1 OPTICAL DISC ARCHIVE DRIVE UNIT ODS-D280U ODS-D280F SERVICE MANUAL Corrected on March 13, 2020 1st Edition (Revised 2)
- Page 2 Pour toute réparation faire appel à une personne compétente uniquement. 注意 外装部品を外した状態で,電源を入れないでください。 外装部品がない状態で電源を入れると,けがや感電,レーザー光による障害の原因となります。 CAUTION Do not turn on the power with cabinet parts removed. Turning on the power without any of exterior parts may cause injury, electric shock, or failure due to laser light. ODS-D280U/ODS-D280F...
- Page 3 The use of optical instruments with this product will increase eye hazard. CLASS 1 LASER PRODUCT LASER KLASSE 1 PRODUKT LUOKAN 1 LASERLAITE KLASS 1 LASER APPARAT This Optical Disc Archive Drive Unit is classified as a CLASS 1 LASER PRODUCT. ODS-D280U/ODS-D280F...
-
Page 5: Table Of Contents
Measures to Be Taken when the Drive Cannot Be Recognized from the Connected Equipment......1-4 1-4-1. Measures to Be Taken when ODS-D280U Cannot Be Recognized from the Connected Equipment....1-4 1-4-2. - Page 6 CA Middle Loader Assembly....................4-42 ODS-D280U/ODS-D280F...
- Page 7 OPTICAL......................6-19 ODS-D280U/ODS-D280F...
- Page 8 UPLOAD TO BF (ODS-D280F)/UPLOAD TO BI (ODS-D280U)........
- Page 9 Frame Wiring......................... .10-3 Revision History ODS-D280U/ODS-D280F...
-
Page 11: Manual Structure
The following manual is provided for this unit in addition to this “Service Manual”. • Operation Guide (Supplied with this unit) • Operation Manual CD-ROM (Supplied with this unit. As for ODS-D280U, this manual is included in CD-ROM.) This manual contains information required to operate and use the unit. -
Page 13: Service Overview
Do not tilt it more than 5 degrees back and forth. • When using this unit vertically: Within 3 degrees Do not tilt it more than 3 degrees back and forth. CAUTION If the unit is used at a slant, secure it to prevent it from slipping down. ODS-D280U/ODS-D280F... -
Page 14: Supplying Power
1-2. Supplying Power Connect the specified AC adapter and the power cord to the DC power input connector on the rear of the ODS-D280U/ D280F to supply power. CAUTION Using any other AC adapter may cause a failure of the unit or electric shock. -
Page 15: Connection To Personal Computer
• QLogic's product: - QLE2560/2562 - QLE2690/2692 - QLE2740/2742 • Emulex's product: - LPe12000/12002 - LPe31000/31002 - LPe32000/32002 FC connector FC connector FC board FC cable ODS-D280F For details on the connection of ODS-D280U and PC, refer to the operation manual. ODS-D280U/ODS-D280F... -
Page 16: Measures To Be Taken When The Drive Cannot Be Recognized From The Connected Equipment
For Windows Check (1) Open Device Manager and check that “SONY ODS-D280U USB Device” is shown in the “Disk drive” field. Check (2) Check that “USB Mass Storage Device” is shown in the “Universal serial bus controller” field from Device Manager in the same way as Check (1). - Page 17 Restart the PC, and then check the indication of system information. Replace the USB cable, and then check the indication of system information. For Linux Check Open the terminal, execute the following command, and then check that “ODS-D280U” is shown in the “Model” field. ODS-D280U/ODS-D280F...
- Page 18 # cat /proc/scsi/scsi Attached devices: Host: scsi9 Channel: 00 Id: 00 Lun: 00 Vendor: SONY Model: ODS-D280U Rev: 1300 Type: Optical Device ANSI SCSI revision: 00 Check: ODS-D280U Measures If indication cannot be checked in Check, perform the following procedure to check whether indication in the “Model”...
-
Page 19: Measures To Be Taken When Ods-D280F Cannot Be Recognized From The Connected Equipment
Linux”. For Windows Check (1) Open Device Manager and check that “SONY ODS-D280F SCSI Optical Device” for connected devices is shown in the “Disk drive” field. Check (2) Check that the fibre channel HBA product name installed in the PC is shown in the “Memory area controller” field from Device Manager in the same way as Check (1). - Page 20 Check (1): SONY ODS-D280F SCSI Optical Device Check (2): Fibre channel HBA product name Measures If indication cannot be checked in Check (1) and Check (2) or when a [!], [?], or [x] mark is attached in the device list, perform the following procedure to check whether the indication of Device Manager becomes normal.
- Page 21 Open the terminal, execute the following command, and then check that “ODS-D280F” for connected devices is shown in the “Model” field. # cat /proc/scsi/scsi Attached devices: Host: scsi9 Channel: 00 Id: 00 Lun: 00 Vendor: SONY Model: ODS-D280F Rev: 1300 Type: Optical Device...
-
Page 22: Recommended Power Cord
• Fully insert the plug and connector of the power cord into an electric outlet and the AC inlet of the AC adapter respectively. If you have questions on the use of the above Power Cord/Appliance Connector/Plug, please contact your local Sony Sales Office/Service Center. -
Page 23: Accessories
• SFP module (1) • ODA control cable (1) • Drive DC cable (1) • +B3 x 6 screw (1) ODS-D280U • Operation guide: SY destination (6), CN destination (1) • Operation manual CD-ROM (1) • Serial number sheet (1) •... -
Page 24: Cables
LC connectors or 62.5-micron multi- mode optical fibre cable with LC connec- tors ODS CONTROL Cable with connector (DD2) 1-848-006-1x (ODA control cable) 19.5 V Drive DC cable 1-849-819-1x ODS-D280U Panel Indication Applicable Cable Part Number USB cable 1-839-351-1x USB3.2 5Gbps 1-12 ODS-D280U/ODS-D280F... -
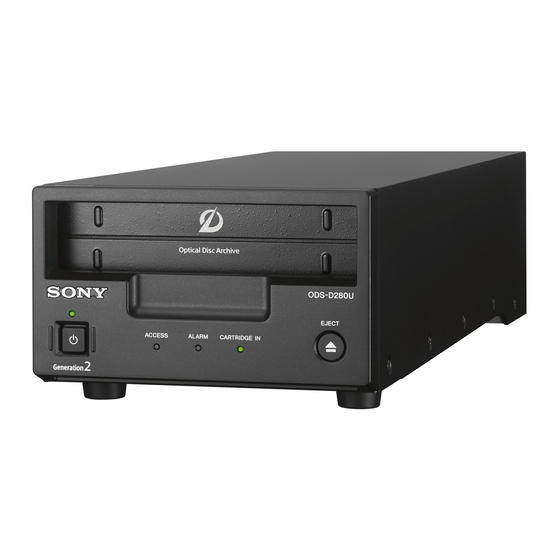
Page 25: Location Of Main Parts
Circuit Function BF-92 (ODS-D280F) • 8ch Drive bridge • Loader Control • DC/DC converter • FC-PCIe bridge • Fibre channel interface BI-353 (ODS-D280U) • 8ch Drive bridge • Loader Control • DC/DC converter • USB-SATA bridge • USB interface DR-683... -
Page 26: Location Of Main Mechanical Parts
CA motor assembly CA motor (V) assembly CA upper BU assembly (Side 1) CA middle loader assembly CA lower BU assembly (Side 0) DC fan (S) DC fan (L) Select loader assembly Select motor assembly Optical block assembly 3 Continued 1-14 ODS-D280U/ODS-D280F... - Page 27 Location No. Board Name Optical block assembly 2 Optical block assembly 1 Optical block assembly 0 Sub base assembly Main base assembly Spindle motor CA upper assembly 1-15 ODS-D280U/ODS-D280F...
-
Page 28: Location Of Sensors And Their Functions
SM-48 board (Side A) Board name Name Ref. No. Function SM-45 Home Detects the disc waiting position of carry loader. Load End Detects the loading completion position of carry loader. V Motor FG Detects the slider position of carry loader. Continued 1-16 ODS-D280U/ODS-D280F... - Page 29 Disc Carry Detect (Load) Detects the completion of carrying disc in the loading direction. Disc Carry Detect (Un Detects the completion of carrying disc in the unloading direction. Load) SM-51 Up/Down Position_Ref Detects the reference position of disc select. 1-17 ODS-D280U/ODS-D280F...
-
Page 30: How To Eject The Cartridge (Ods-D280F)
Tool such as screwdriver CARTRIDGE IN indicator If a cartridge is loaded in the drive unit while the drive unit is turned on, the CARTRIDGE IN indicator lights green. When the cartridge is ejected, the CARTRIDGE IN indicator goes out. 1-18 ODS-D280U/ODS-D280F... -
Page 31: How To Eject The Cartridge Manually
Assembly”.) Remove the MC top reinforcing plate. (Refer to “4-4. MC Top Reinforcing Plate”.) Remove the FR front panel assembly. (ODS-D280U) (Refer to “4-5. FR Front Panel Assembly (ODS-D280U)”.) Remove the FR front block assembly. (Refer to “4-6. FR Front Block Assembly”.) - Page 32 (1) Rotate the CA transmission gear of the CA motor (V) assembly in the counterclockwise direction to move the CA side slider R to the position (home position) shown in the illustration. (The upper and lower base units are separated, and the disc becomes unchuck state.) 1-20 ODS-D280U/ODS-D280F...
- Page 33 Check the positioning procedure in the previous section again. CA transmission gear CA motor (V) assembly CA gear (upper) (large) CA motor assembly Rear side CA side slider R Locate the bearing in this position. CA side slider R 1-21 ODS-D280U/ODS-D280F...
- Page 34 Observe the lower shell of the cartridge from the front of this unit, and check that the discs are returned to the blank slot in aligned state.) CA transmission gear CA motor (V) assembly Rear side CA side slider R CA side slider R 1-22 ODS-D280U/ODS-D280F...
- Page 35 (1) Rotate the CA transmission gear of the CA motor (V) assembly in the clockwise direction to move the CA side slider R to the position shown in the illustration. CA transmission gear CA motor (V) assembly Rear side Locate the bearing in this position. CA side slider R CA side slider R 1-23 ODS-D280U/ODS-D280F...
- Page 36 The SE rail plate is pulled by the spring. If a force in the direction opposite to the worm wheel is applied to the tip of the worm gear, the tooth skipping of the gear may easily occur. Therefore, carefully rotate the worm gear. 1-24 ODS-D280U/ODS-D280F...
- Page 37 Rotate the worm gear of the top motor assembly in the clockwise direction using the screwdriver and remove the cartridge. Screwdriver Worm gear Cartridge Front side Attach the MC front dust-proof cabinet with the two screws. 10. Assemble this unit. 1-25 ODS-D280U/ODS-D280F...
-
Page 38: Circuit-Protection Part List
If it blew, turn off the main power of the equipment, inspect inside of the equipment, and remove the cause of excessive current. After that, replace the fuse. Board Name Ref. No. Part No. Part Name PP-62 (Suffix: -11) Fuse (SMD) 7 A/125 V 1-523-292-21 PP-62 (Suffix: -12) Fuse (32V11CF) 6.3 A/32 V 1-004-584-11 PP-62 board (Side A) 1-26 ODS-D280U/ODS-D280F... -
Page 39: Equipment And Fixtures List For Check/Adjustment
For checking the operation of loader and spindle motor – Commercially available FC cable For connecting ODS-D280F and PC To obtain the item, refer to the Sony professional products website. To obtain the item, contact your local Sony Sales Office/Service Center. 1-27 ODS-D280U/ODS-D280F... -
Page 40: Sub Parts Package (A-5015-818-A)
50 pcs MC top reinforcing plate, front cover and carry loader as- sembly 4-685-746-01 CA BU spring 10 pcs Four helical extension springs used in CA upper assembly and CA lower BU assembly 7-621-775-10 B2.6×4 50 pcs Exterior screw 1-28 ODS-D280U/ODS-D280F... -
Page 41: Cautions On Handling The Optical Block Assembly
• Be careful so that any foreign matter does not enter the clearance of the actuator cover. • When removing and replacing the optical block assembly, be sure to use the fingerstall. Touching the optical block assembly with bare hands may result in oxidation. 1-29 ODS-D280U/ODS-D280F... - Page 42 Keep away a screwdriver Objective lens Actuator Hold the shaded portions. 1-30 ODS-D280U/ODS-D280F...
-
Page 43: Replacement Of Carry Loader Assembly
1-15. Replacement of Carry Loader Assembly When removing and replacing the carry loader assembly, place this unit on the box of the cartridge because it is not stable. Empty box of cartridge 1-31 ODS-D280U/ODS-D280F... -
Page 44: Service Action After Replacing Blocks And Mounted Boards
“6-7-5. UPLOAD TO BF (ODS-D280F)/UPLOAD TO BI (ODS-D280U)”) After the BI-353 board (ODS-D280U) or BF-92 board (ODS-D280F) has been replaced with a new one, the package version may be indicated as “PCKG: *.**”. Correct version is shown by upgrading the firmware. - Page 45 After the DR-683 board has been replaced with a new one, the package version may be indicated as “PCKG: *.**”. Correct version is shown by upgrading the firmware. Note When replacing the DR-683 board and BI-353 board (ODS-D280U) or BF-92 board (ODS-D280F) at the same time, replace these in the following procedures. Replacing DR-683 board (Refer to “4-14-2.
-
Page 46: Flexible Flat Cable And Coaxial Cable
Locking tab are conductive surface.) 90˚ 0˚ Connector Flexible flat cable Disconnecting Turn off the power. Slide or lift up the locking tab in the direction of the arrow to unlock and pull out the flexible flat cable. 1-34 ODS-D280U/ODS-D280F... -
Page 47: Disconnecting/Connecting Fine-Wire Coaxial Cable
Hold both sides of the fine-wire coaxial cable connector, and pull the connector in the arrow direction to disconnect Connecting Both sides of connector Fine-wire coaxial cable Insert the connector of fine-wire coaxial cable in the arrow direction to connect it. Note Insert firmly the connector of fine-wire coaxial cable in the interior. 1-35 ODS-D280U/ODS-D280F... -
Page 48: Removal/Installation Of Power Harness
Portion A Power harness Connector Insert the power harness straight in the direction of the arrow and press the portion A to fit in the connector. Note Insert the power harness firmly into the deep end of the connector. 1-36 ODS-D280U/ODS-D280F... -
Page 49: Error Messages
This unit has a self-diagnosis function to detect internal errors. When an error is detected in ODS-D280U, the ALARM indicator on the front panel blinks. An interval of 0.25 seconds of the ALARM indicator means an emergency, and an interval of 1 second means a warning. -
Page 50: Error 0X, Error 1X
Ch-0A. (On side 0) ○ ○ 0.25 sec. Optical block assembly Ch-0B is recording data with the maxi- mum laser output. (On side 0) ○ ○ 0.25 sec. Optical block assembly Ch-0B detected a laser output error. (On side 0) Continued ODS-D280U/ODS-D280F... - Page 51 (On side 1) ○ ○ 0.25 sec. Optical block assembly Ch-2A detected a laser output error. (On side 1) ○ ○ 0.25 sec. Laser drive overcurrent was detected in optical block assembly Ch-2A. (On side 1) Continued ODS-D280U/ODS-D280F...
-
Page 52: Error 2X
(On side 1) ○ ○ 0.25 sec. The SA actuator of optical block assembly Ch-3B cannot detect the reference position. (On side 1) 2-1-2. Error 2X When a loader assembly error is detected, one of the following error codes is displayed. ODS-D280U/ODS-D280F... - Page 53 ○ ○ 0.25 sec. Displacement of standard position was detected during vertical movement to upper direction of the select mechanism. ○ ○ 0.25 sec. Abnormality was detected in initialization of the loader. Continued ODS-D280U/ODS-D280F...
-
Page 54: Error 3X, Error 4X
The time is coming to replace the cartridge. ○ ○ 1 sec. This media can not be used. For more details, contact your local Sony Sales Office/Service Center. ○ Two or more accesses were frequently done to the cartridge at the same time. 2-1-3. -
Page 55: Error 5X, Error 7X
○ ○ 0.25 sec. A comparison error between the media type in the cartridge memory and the actual media type was detected. Continued For discs that can be read and written in this unit, refer to the Operation Manual. ODS-D280U/ODS-D280F... -
Page 56: Error 6X, Error 8X
The time is coming to replace the cartridge. ○ ○ 1 sec. This media can not be used. For more details, contact your local Sony Sales Office/Service Center. ○ ○ 1 sec. Startup adjustment or OPC cannot be finished in optical block assembly Ch-0A. -
Page 57: Error 91, Error 92
(ODS-D280U)/BF-92 (ODS-D280F) board) and FPGA (IC700 internal: BI-353 (ODS-D280U)/BF-92 (ODS-D280F) board) cannot be established during startup. ○ ○ 0.25 sec. Failure in SYCPU (IC700 internal: BI-353 (ODS-D280U)/ BF-92 (ODS-D280F) board) firmware upgrade was detected during startup. ○ ○ 0.25 sec. - Page 58 (On side 0) ○ ○ 0.25 sec. Communication between Disc Drive LSI 1a (Base Drive) and BRIDGE (IC700 internal: BI-353 (ODS-D280U)/BF-92 (ODS- D280F) board) cannot be established during startup. (On side 0) ○ ○ 0.25 sec. Failure in Disc Drive LSI 1a (Base Drive) firmware upgrade was detected during startup.
- Page 59 Cycle ○ ○ 0.25 sec. Communication between Disc Drive LSI 3b (Base Drive) and BRIDGE (IC700 internal: BI-353 (ODS-D280U)/BF-92 (ODS- D280F) board) cannot be established during startup. (On side 1) ○ ○ 0.25 sec. Failure in Disc Drive LSI 3b (Base Drive) firmware upgrade was detected during startup.
- Page 60 No data can be read from FeRAM (IC201: BI-353 board (ODS- D280U)/BF-92 board (ODS-D280F)). ○ ○ 1 sec. An FeRAM (IC201: BI-353 board (ODS-D280U)/BF-92 board (ODS-D280F)) error was detected. ○ ○ 0.25 sec. An FeRAM (IC201: BI-353 board (ODS-D280U)/BF-92 board (ODS-D280F)) loading information data error was detected.
- Page 61 1 sec. Disc Drive LSI 1b (Base Drive) cannot write data to the FLASH (Base Drive). (On side 0) ○ ○ 0.25 sec. A system error was detected in Disc Drive LSI 1b (Base Drive). (On side 0) Continued 2-13 ODS-D280U/ODS-D280F...
- Page 62 0.25 sec. A system error was detected in Disc Drive LSI 3b (Base Drive). (On side 1) ○ ○ 0.25 sec. A servo firmware communication error was detected in Disc Drive LSI 3b (Base Drive) (On side 1). 2-14 ODS-D280U/ODS-D280F...
-
Page 63: Error Remedy Method
(OP-0). • reached the end of replacement cycle: It is likely laser in optical block as- sembly (OP-0) reached to the end of its life cycle. Replace optical block assembly (OP-0). Continued 2-15 ODS-D280U/ODS-D280F... - Page 64 (OP-1). • reached the end of replacement cycle: It is likely laser in optical block as- sembly (OP-1) reached to the end of its life cycle. Replace optical block assembly (OP-1). Continued 2-16 ODS-D280U/ODS-D280F...
- Page 65 (OP-0). • reached the end of replacement cycle: It is likely laser in optical block as- sembly (OP-0) reached to the end of its life cycle. Replace optical block assembly (OP-0). Continued 2-17 ODS-D280U/ODS-D280F...
- Page 66 In the case the error occurs: Drive trouble is likely. Check the carry loader assembly installation status. Note If the carry loader assembly is abnormally installed, disc chucking is not performed successfully and focus servo may fail. Continued 2-18 ODS-D280U/ODS-D280F...
- Page 67 Check the flexible flat cable connection be- tween the main base assembly and the DR-683 board. If this problem still remains, any abnormality may be present in the slider of the optical block assem- bly (OP-0) or the DR-683 board may be defective. Continued 2-19 ODS-D280U/ODS-D280F...
- Page 68 When an error occurs, go to step 3) in Measures. Check the flexible flat cable connection be- tween the main base assembly and the DR-683 board. If this problem still remains, the optical block as- sembly (OP-1) or the DR-683 board may be de- fective. Continued 2-20 ODS-D280U/ODS-D280F...
- Page 69 (OP-2). • reached the end of replacement cycle: It is likely laser in optical block as- sembly (OP-2) reached to the end of its life cycle. Replace optical block assembly (OP-2). Continued 2-21 ODS-D280U/ODS-D280F...
- Page 70 (OP-3). • reached the end of replacement cycle: It is likely laser in optical block as- sembly (OP-3) reached to the end of its life cycle. Replace optical block assembly (OP-3). Continued 2-22 ODS-D280U/ODS-D280F...
- Page 71 (OP-3). • reached the end of replacement cycle: It is likely laser in optical block as- sembly (OP-3) reached to the end of its life cycle. Replace optical block assembly (OP-3). Continued 2-23 ODS-D280U/ODS-D280F...
- Page 72 (OP-3). • reached the end of replacement cycle: It is likely laser in optical block as- sembly (OP-3) reached to the end of its life cycle. Replace optical block assembly (OP-3). Continued 2-24 ODS-D280U/ODS-D280F...
- Page 73 In the case the error occurs: Drive trouble is likely. Check the carry loader assembly installation status. Note If the carry loader assembly is abnormally installed, disc chucking is not performed successfully and focus servo may fail. Continued 2-25 ODS-D280U/ODS-D280F...
- Page 74 When an error occurs, go to step 3) in Measures. Check the flexible flat cable connection be- tween the sub base assembly and the DR-683 board. If this problem still remains, the optical block as- sembly (OP-2) or the DR-683 board may be de- fective. Continued 2-26 ODS-D280U/ODS-D280F...
- Page 75 When an error occurs, go to step 3) in Measures. Check the flexible flat cable connection be- tween the sub base assembly and the DR-683 board. If this problem still remains, the optical block as- sembly (OP-3) or the DR-683 board may be de- fective. 2-27 ODS-D280U/ODS-D280F...
-
Page 76: Error 2X Error Remedy Method
4) in Measures. For how to handle the defective car- tridge, contact your local Sony Sales Office/Service Center. Insert the same cartridge and check whether this error occurs again. - Page 77 4) in Measures. For how to handle the defective car- tridge, contact your local Sony Sales Office/Service Center. Check the cartridge insertion method, and then insert the cartridge.
- Page 78 4) in Measures. For how to handle the defective car- tridge, contact your local Sony Sales Office/Service Center. Insert the same cartridge and check whether this error occurs again.
- Page 79 4) in Measures. For how to handle the defective car- tridge, contact your local Sony Sales Office/Service Center. Insert the same cartridge and check whether this error occurs again.
- Page 80 4) in Measures. For how to handle the defective car- tridge, contact your local Sony Sales Office/Service Center. Insert the same cartridge and check whether this error occurs again.
- Page 81 4) in Measures. For how to handle the defective car- tridge, contact your local Sony Sales Office/Service Center. Insert the same cartridge and check whether this error occurs again.
- Page 82 4) in Measures. For how to handle the defective car- tridge, contact your local Sony Sales Office/Service Center. Insert the same cartridge and check whether this error occurs again.
- Page 83 4) in Measures. For how to handle the defective car- tridge, contact your local Sony Sales Office/Service Center. Insert the same cartridge and check whether this error occurs again.
- Page 84 4) in Measures. For how to handle the defective car- tridge, contact your local Sony Sales Office/Service Center. Insert the same cartridge and check whether this error occurs again.
- Page 85 4) in Measures. For how to handle the defective car- tridge, contact your local Sony Sales Office/Service Center. Insert the same cartridge and check whether this error occurs again.
- Page 86 4) in Measures. For how to handle the defective car- tridge, contact your local Sony Sales Office/Service Center. Insert the same cartridge and check whether this error occurs again.
- Page 87 4) in Measures. For how to handle the defective car- tridge, contact your local Sony Sales Office/Service Center. Insert the same cartridge and check whether this error occurs again.
- Page 88 4) in Measures. For how to handle the defective car- tridge, contact your local Sony Sales Office/Service Center. Insert the same cartridge and check whether this error occurs again.
- Page 89 4) in Measures. For how to handle the defective car- tridge, contact your local Sony Sales Office/Service Center. Insert the same cartridge and check whether this error occurs again.
- Page 90 4) in Measures. For how to handle the defective car- tridge, contact your local Sony Sales Office/Service Center. Insert the same cartridge and check whether this error occurs again.
- Page 91 4) in Measures. For how to handle the defective car- tridge, contact your local Sony Sales Office/Service Center. Insert the same cartridge and check whether this error occurs again.
- Page 92 4) in Measures. For how to handle the defective car- tridge, contact your local Sony Sales Office/Service Center. Insert the same cartridge and check whether this error occurs again.
- Page 93 4) in Measures. For how to handle the defective car- tridge, contact your local Sony Sales Office/Service Center. Insert the same cartridge and check whether this error occurs again.
- Page 94 4) in Measures. For how to handle the defective car- tridge, contact your local Sony Sales Office/Service Center. Insert the same cartridge and check whether this error occurs again.
- Page 95 “6-4-4. LOADER AUTO mechanism. ger. TEST” For how to handle the defective car- tridge, contact your local Sony Sales Office/Service Center. Startup the maintenance menu and perform LOADER AUTO TEST. Note To clear this error, perform LOADER AUTO TEST Use another cartridge.
- Page 96 • If an abnormality (such as bulge) is found, do not use the cartridge any longer and go to step 4) in Measures. LOADER AUTO TEST. For how to handle the defective cartridge, contact your local Sony Sales Office/Service Center. Note 3.
- Page 97 It is recommended to copy data to another cartridge ― end of its use cycle. at your earliest convenience. 21-100 This media is not available. For more details, contact your local Sony Sales ― Office/Service Center. 22-001 Two or more accesses were Following operation is averted.
-
Page 98: Error 3X, 4X Error Remedy Method
If this problem still remains, go to the next measure. Check the flexible flat cable connections. Between SM-47 board and SM-48 board Between SM-48 board and BI-353 board (ODS-D280U) or BF-92 board (ODS- D280F) • Improper connection (half insertion or oblique insertion) •... - Page 99 Check the carry loader assembly installation status. Check the flexible flat cable connections. Between SM-45 board and PP-61 board Between PP-61 board and BI-353 board (ODS-D280U) or BF-92 board (ODS- D280F) • Improper connection (half insertion or oblique insertion) •...
- Page 100 Press the EJECT button to eject the car- “1-9. Location of Sensors and (IC202 or IC203: BI-353 Their Functions” tridge. board (ODS-D280U) /BF-92 “1-10. How to Eject the Car- If the cartridge is not ejected, take the fol- board (ODS-D280F)) detec- tridge (ODS-D280F)”...
- Page 101 • Damage or contamination at connect- ing parts (Unplug flexible flat cables.) Check the installation status of the heatsink on the BI-353 board (ODS-D280U) /BF-92 board (ODS-D280F). Check the air filter. • If the air filter is significantly conta- minated, replace it.
- Page 102 • Damage or contamination at connect- ing parts (Unplug flexible flat cables.) Check the installation status of the heatsink on the BI-353 board (ODS-D280U) /BF-92 board (ODS-D280F). Check the air filter. • If the air filter is significantly conta- minated, replace it.
- Page 103 For details about correct orientation, refer to the operation manual or the installation man- ual. Check the BI-353 board (ODS-D280U)/ BF-92 board (ODS-D280F) installation sta- tus. 3E-501 The drive is not placed in the Check whether the drive is placed in the cor- “4-19.
- Page 104 • Damage or contamination at connect- ing parts (Unplug flexible flat cables.) Check the installation status of the heatsink on the BI-353 board (ODS-D280U) /BF-92 board (ODS-D280F). Check the air filter. • If the air filter is significantly conta- minated, replace it.
- Page 105 • Damage or contamination at connect- ing parts (Unplug flexible flat cables.) Check the installation status of the heatsink on the BI-353 board (ODS-D280U) /BF-92 board (ODS-D280F). Check the air filter. • If the air filter is significantly conta- minated, replace it.
-
Page 106: Error 5X Error Remedy Method
PIC area data is invalid. Eject a cartridge. ― Insert another cartridge. • In the case no error occurs: The ejected cartridge is likely to be faulty. • In the case the error occurs: A drive fault is likely. Continued 2-58 ODS-D280U/ODS-D280F... - Page 107 When an error occurs, go to step 3) in Measures. Insert another cartridge. • In the case no error occurs: The ejected cartridge is likely to be faulty. • In the case the error occurs: Drive trouble is likely. Continued 2-59 ODS-D280U/ODS-D280F...
- Page 108 When an error occurs, go to step 3) in Measures. Insert another cartridge. Perform finalize. • In the case no error occurs: The ejected cartridge is likely to be faulty. • In the case the error occurs: Drive trouble is likely. Continued 2-60 ODS-D280U/ODS-D280F...
-
Page 109: Error 6X, 8X Error Remedy Method
• In the case the error occurs: Drive trouble is likely. Check the carry loader assembly installation status. Note If the carry loader assembly is abnormally installed, disc cannot be chucked normally and the eccentricity may increase. Continued 2-61 ODS-D280U/ODS-D280F... - Page 110 6D-000 The time is coming to replace Eject a cartridge. ― the cartridge. Promptly transfer data to another cartridge (recommended). 6D-001 This media is not available. For more details, contact your local Sony Sales ― Office/Service Center. Continued 2-62 ODS-D280U/ODS-D280F...
- Page 111 When an error occurs, go to step 3) in Measures. Insert another cartridge. • In the case no error occurs: The ejected cartridge is likely to be faulty. • In the case the error occurs: Drive trouble is likely. Continued 2-63 ODS-D280U/ODS-D280F...
- Page 112 • In the case the error occurs: Drive trouble is likely. Check the carry loader assembly installation status. Note If the carry loader assembly is abnormally installed, disc cannot be chucked normally and the eccentricity may increase. Continued 2-64 ODS-D280U/ODS-D280F...
- Page 113 When an error occurs, go to step 3) in Measures. Insert another cartridge. • In the case no error occurs: The ejected cartridge is likely to be faulty. • In the case the error occurs: Drive trouble is likely. Continued 2-65 ODS-D280U/ODS-D280F...
- Page 114 When an error occurs, go to step 3) in Measures. Insert another cartridge. • In the case no error occurs: The ejected cartridge is likely to be faulty. • In the case the error occurs: Drive trouble is likely. Continued 2-66 ODS-D280U/ODS-D280F...
-
Page 115: Error 91, 92 Error Remedy Method
Acquire the drive/driver log. software side. Re-insert the cartridge and continue work. If the same error occurs repeatedly, send the acquired drive/driver log to your local Sony Sales Office/Service Center. 91-553 A READ error of this unit Eject a cartridge. - Page 116 • When the main base assembly or the DR-683 “1-8. Location of Main Parts” Disc Drive LSI 0a (Base board or the BI-353 board (ODS-D280U)/ “1-14. Cautions on Handling the Drive) and BRIDGE (IC700 BF-92 board (ODS-D280F) has been re- Optical Block Assembly”...
- Page 117 • When the main base assembly or the DR-683 “1-8. Location of Main Parts” Disc Drive LSI 1b (Base board or the BI-353 board (ODS-D280U)/ “1-14. Cautions on Handling the Drive) and BRIDGE (IC700 BF-92 board (ODS-D280F) has been re- Optical Block Assembly”...
- Page 118 • When the main base assembly or the DR-683 “1-8. Location of Main Parts” Disc Drive LSI 2a (Base board or the BI-353 board (ODS-D280U)/ “1-14. Cautions on Handling the Drive) and BRIDGE (IC700 BF-92 board (ODS-D280F) has been re- Optical Block Assembly”...
- Page 119 • When the sub base assembly or the DR-683 “1-8. Location of Main Parts” Disc Drive LSI 3a (Base board or the BI-353 board (ODS-D280U)/ “1-14. Cautions on Handling the Drive) and BRIDGE (IC700 BF-92 board (ODS-D280F) has been re- Optical Block Assembly”...
- Page 120 Communication between • When the sub base assembly or the DR-683 “1-8. Location of Main Parts” SYCPU (IC700 internal: board or the BI-353 board (ODS-D280U)/ “1-14. Cautions on Handling the BI-353 (ODS-D280U)/ BF-92 board (ODS-D280F) has been re- Optical Block Assembly”...
-
Page 121: Error 95, 96 Error Remedy Method
• Damage or contamination at connect- ing parts (Unplug flexible flat cables.) Check the installation status of the heatsink on the BI-353 board (ODS-D280U) /BF-92 board (ODS-D280F). Check the air filter. • If the air filter is significantly conta- minated, replace it. - Page 122 No data can be read from the Acquire the drive/driver log. ― SPI-EEPROM (IC206: If the same error occurs repeatedly, send the BI-353 (ODS-D280U)/ acquired drive/driver log to your local Sony BF-92 (ODS-D280F) Sales Office/Service Center. board). Turn off and on the power. 95-511 An SPI-EEPROM (IC206: Acquire the drive/driver log.
- Page 123 • Damage or contamination at connect- ing parts (Unplug flexible flat cables.) Check the installation status of the heatsink on the BI-353 board (ODS-D280U) /BF-92 board (ODS- on the BF-92 board (ODS-D280F). D280F). Check the air filter. •...
- Page 124 Acquire the drive/driver log. ― of the acceleration sensor If the same error occurs repeatedly, send the (IC202 or IC203: BI-353 acquired drive/driver log to your local Sony (ODS-D280U)/BF-92 Sales Office/Service Center. (ODS-D280F) board) cannot Turn off and on the power.
- Page 125 Acquire the drive/driver log. ― nal: BI-353 (ODS-D280U)/ If the same error occurs repeatedly, send the BF-92 (ODS-D280F) board) acquired drive/driver log to your local Sony firmware error was detected. Sales Office/Service Center. Turn off the power. 95-660 A system error was detected Acquire the drive/driver log.
- Page 126 Drive) cannot write data to take necessary actions. placing Blocks and Mounted the FLASH (Base Drive). Check the main base assembly installation Boards” (On side 0) status. “4-30. Main Base Assembly” “5. Adjustment of Optical Drive System” Continued 2-78 ODS-D280U/ODS-D280F...
- Page 127 Upgrade the drive firmware to the latest ver- sion. • If the same error occurs repeatedly, send the acquired drive/driver log to your local Sony Sales Office/Service Center. 95-961 A servo firmware communi- Eject a cartridge. ― cation error was detected in Acquire the drive/driver log.
- Page 128 Upgrade the drive firmware to the latest ver- sion. • If the same error occurs repeatedly, send the acquired drive/driver log to your local Sony Sales Office/Service Center. 95-A61 A servo firmware communi- Eject a cartridge. ― cation error was detected in Acquire the drive/driver log.
- Page 129 Upgrade the drive firmware to the latest ver- sion. • If the same error occurs repeatedly, send the acquired drive/driver log to your local Sony Sales Office/Service Center. 95-B61 A servo firmware communi- Eject a cartridge. ― cation error was detected in Acquire the drive/driver log.
- Page 130 Upgrade the drive firmware to the latest ver- sion. • If the same error occurs repeatedly, send the acquired drive/driver log to your local Sony Sales Office/Service Center. 95-C61 A servo firmware communi- Eject a cartridge. ― cation error was detected in Acquire the drive/driver log.
- Page 131 Upgrade the drive firmware to the latest ver- sion. • If the same error occurs repeatedly, send the acquired drive/driver log to your local Sony Sales Office/Service Center. 96-961 A servo firmware communi- Eject a cartridge. ― cation error was detected in Acquire the drive/driver log.
- Page 132 Upgrade the drive firmware to the latest ver- sion. • If the same error occurs repeatedly, send the acquired drive/driver log to your local Sony Sales Office/Service Center. 96-A61 A servo firmware communi- Eject a cartridge. ― cation error was detected in Acquire the drive/driver log.
- Page 133 Upgrade the drive firmware to the latest ver- sion. • If the same error occurs repeatedly, send the acquired drive/driver log to your local Sony Sales Office/Service Center. 96-B61 A servo firmware communi- Eject a cartridge. ― cation error was detected in Acquire the drive/driver log.
- Page 134 Upgrade the drive firmware to the latest ver- sion. • If the same error occurs repeatedly, send the acquired drive/driver log to your local Sony Sales Office/Service Center. 96-C61 A servo firmware communi- Eject a cartridge. ― cation error was detected in Acquire the drive/driver log.
-
Page 135: Periodic Inspection And Maintenance
*1: The counting of counter varies depending on the type and record/playback rate of the cartridge to be used. *2: The hours meter data can be reset with the PDWTerminal. Refer to “6-7-8. RESET HOURS” for the hours meter data reset. ODS-D280U/ODS-D280F... -
Page 136: Periodic Inspection And Replacement Parts List
The hours meter data of (9) cannot be reset with the PDWTerminal. For details on the resetting procedure, refer to the installation manual supplied with the air filter for replacement. (3), (4), (5), (6) and (10) recommends simultaneous replacement. ODS-D280U/ODS-D280F... - Page 137 *1: The replacement cycle of the optical block assembly of several lots from the initial shipping is 6,700. For more details, contact your local Sony Sales Office/Service Center. *2: When replacing the optical device assembly (RP) (parts number: A-2167-948-A), perform the procedure below.
-
Page 138: Cleaning
To be cleaned To be cleaned 3-2-3. Cleaning the Carry Loader Assembly Note • The carry loader assembly consists of precision parts. Be very careful not to damage or apply excessive force to such parts when cleaning the loader assembly. ODS-D280U/ODS-D280F... - Page 139 (Brush or dry cotton swab) CA middle base assembly Rubber chips adhered to center of front support arm rollers (Brush or dry cotton swab) Rubber chips adhered to groove of front support arm rail (Brush or dry cotton swab) ODS-D280U/ODS-D280F...
-
Page 140: Cleaning The Spindle Motor
(or cotton swab) dampened with the cleaning liquid. CA upper BU assembly Chucking pulley Disc guides Rear support arm roller Front support arm L roller Roller gears Support arm roller Front support arm R roller Slide the optical block assembly in the direction of arrow A. ODS-D280U/ODS-D280F... -
Page 141: Cleaning After Operation In Special Environment
If a cleaning cloth with oil is used, the oil may adhere to unnecessary parts. Tools • Vacuum cleaner • Cleaning cloth (or cotton swab) • Cleaning fluid (alcohol) Procedure Clean the connectors on the rear of the unit. ODS-D280U/ODS-D280F... - Page 142 - Exhaust air vent - FC connector - DC power input connector - ODS CONTROL connector Front Rear ODS CONTROL connector Cartridge slot Exhaust air vent DC power input connector Exhaust air vent FC terminal Lower Intake air vent ODS-D280U/ODS-D280F...
-
Page 143: Cleaning Of Optical Block Assembly Lens Portion
• ODS-D280U: - Power button - EJECT button - Cartridge slot - Intake air vent - Exhaust air vent - DC power input connector - USB connector Front Rear Cartridge slot Exhaust air vent DC power input connector Power button... - Page 144 Do not turn off the power until the acquisition of OPC RESULT is completed. Insert ODC3300R and check that the cartridge is recognized normally by Optical Disc Archive Utility. Record the several MB file once. Eject ODC3300R. Display the maintenance menu referring to “6-2. Starting the Maintenance Menu”. 3-10 ODS-D280U/ODS-D280F...
- Page 145 11. Press the [RIGHT] button. 12. Move the cursor to “OPC RESULT” using [UP]/[DOWN] buttons. 13. The confirmation screen waiting for the [SET] button input is displayed. The “OPC RESULT” screen of each CH is displayed. 14. Close the maintenance menu. 3-11 ODS-D280U/ODS-D280F...
- Page 146 • When comparing “OPC RESULT” before and after the cleaning, compare the value of the same place of the same OP. Compare the value of the same OP. The value that can be acquired is one portion per page. 3-12 ODS-D280U/ODS-D280F...
- Page 147 • Removal of CA upper BU assembly: Refer to “4-14-2. CA Upper BU Assembly” • Removal of CA middle loader assembly: Refer to “4-15. CA Middle Loader Assembly” Rear side Lens portions CA loader BU assembly Rear side Lens portions CA upper BU assembly 3-13 ODS-D280U/ODS-D280F...
- Page 148 Then, push the cleaner pusher (280) so that there is no clearance between the lens cleaning base (280) assembly and the cleaner pusher (280). Repeat step 3, and push the cleaner pusher (280) to the other portion of the lens cleaning base (280) assembly. 3-14 ODS-D280U/ODS-D280F...
- Page 149 Remove the cleaner pusher (280), and check that the lens cleaners are attached to the lens cleaning base (280) assembly and lens cleaning base (280) as shown in the illustration. If the lens cleaners are not attached to the correct position, perform steps 3 to 5 again. Before attaching cleaners After attaching cleaners 3-15 ODS-D280U/ODS-D280F...
- Page 150 (280) assembly into the positioning holes of the lens cleaning base (280). Combine the lens cleaning bases. Positioning hole Lens cleaning base (280) Positioning hole Positioning pin Lens cleaner attached surface Combined lens cleaning base Lens cleaning base (280) assembly Positioning pin 3-16 ODS-D280U/ODS-D280F...
- Page 151 Align the positioning hole and convex portion of the CA lower BU assembly with the convex portion and hole of the lens cleaning base. Place the base without any looseness. Combined lens cleaning base Hole of lens cleaning base Convex portion of lens cleaning base Convex portion CA lower BU assembly Positioning hole 3-17 ODS-D280U/ODS-D280F...
- Page 152 CA upper BU assembly View on arrow B View on arrow A Convex portion M2 x 2.7 Hole Convex portion of lens cleaning base M2 x 2.7 Combined lens cleaning base CA lower BU assembly Hole of lens cleaning base 3-18 ODS-D280U/ODS-D280F...
- Page 153 Be careful not to pinch the flexible flat cable and fine-wire coaxial cable. (Refer to Installation of carry loader assembly: “4-11-2. Installation”) Carry loader assembly B2.6 x 4 M2.6 x 4 12. Attach the power supply block with the two screws. (Refer to “4-8. Power Supply Block”) 3-19 ODS-D280U/ODS-D280F...
- Page 154 Flexible flat cable BI-353/BF-92 board CN45 CN683 CN45 PP-61 board Do not connect the flexible flat cable shown in the above illustration. Also, do not connect CN195 CN61 Flexible wiring board it to the connector (CN45) on the PP-61 board. 3-20 ODS-D280U/ODS-D280F...
- Page 155 Top cover assembly PP-61 board 15. Turn on the power of this unit. 16. Display the maintenance menu referring to “6-2. Starting the Maintenance Menu”. 17. Move the cursor to “CHECK” using [UP]/[DOWN] buttons. 18. Press the [RIGHT] button. 3-21 ODS-D280U/ODS-D280F...
- Page 156 • Remove the used lens cleaners and be sure to dispose of them. • If the lens cleaner is used more than once, the cleaning effects cannot be obtained, and the dirt attached to the lens cleaner portion may adhere to the lens again. 3-22 ODS-D280U/ODS-D280F...
- Page 157 As for this unit in which the 6F-Exx error has occurred or “OPC RESULT” in “Preparation” could not be acquired before cleaning, if no error occurs and “OPC RESULT” could be acquired after cleaning, the error may be eliminated by the cleaning effects. 3-23 ODS-D280U/ODS-D280F...
-
Page 159: Replacement Of Main Parts
0.20 ±0.02 N·m Shoulder screw 0.30 ±0.03 N·m M1.4 x 1.6 0.10 ±0.02 N·m M1.7 x 3 0.10 ±0.02 N·m When using the torque driver with the notation of cN·m, interpret it as follows. Example: 0.8 N·m = 80 cN·m ODS-D280U/ODS-D280F... -
Page 160: Top Cover Assembly
Front side Reference of hook inside of top cover assembly Top cover assembly Transport caution label B2.6 x 4 B2.6 x 4 Front panel The illustration shows ODS-D280U. Install the removed parts by reversing the steps of removal. ODS-D280U/ODS-D280F... -
Page 161: Bottom Plate Assembly
B2.6 x 4 MC bottom packing R MC bottom packing L Upper side Install the removed parts by reversing the steps of removal. 4-3-2. Bottom Plate (U) Assembly (ODS-D280U) Preparation Remove the top cover assembly. (Refer to “4-2. Top Cover Assembly”.) ODS-D280U/ODS-D280F... - Page 162 B2.6 x 4 B2.6 x 14 B2.6 x 4 LO feet B2.6 x 4 LO bottom spacers Bottom plate (U) assembly MC bottom packing R MC bottom packing L Upper side Install the removed parts by reversing the steps of removal. ODS-D280U/ODS-D280F...
-
Page 163: Mc Top Reinforcing Plate
Remove the five screws (B2.6 x 4) and two screws (M2 x 2.7), then remove the MC top reinforcing plate. B2.6 x 4 MC top reinforcing plate M2 x 2.7 The illustration shows ODS-D280U. Install the removed parts by reversing the steps of removal. ODS-D280U/ODS-D280F... -
Page 164: Front Panel Assembly (Ods-D280U)
4-5. FR Front Panel Assembly (ODS-D280U) Preparation Remove the top cover assembly. (Refer to “4-2. Top Cover Assembly”.) Remove the bottom plate assembly. (Refer to “4-3. Bottom Plate Assembly”.) Procedure Remove the screw. Remove the four hooks, then remove the front panel. -
Page 165: Front Block Assembly
Remove the bottom plate assembly. (Refer to “4-3. Bottom Plate Assembly”.) Remove the MC top reinforcing plate. (Refer to “4-4. MC Top Reinforcing Plate”.) Remove the FR front panel assembly. (ODS-D280U) (Refer to “4-5. FR Front Panel Assembly (ODS-D280U)”.) 4-6-1. Removal Procedure Remove the two screws, then remove the MC front dust-proof cabinet. - Page 166 Disconnect the flexible flat cable from the connector (CN761) on the SM-48 board. (ODS-D280U) Note • When rotating the worm gear using the screwdriver, be careful not to cause the tooth skipping of the gear due to excessive rotation. • The SE rail plate is pulled by the spring. If a force in the direction opposite to the worm wheel is applied to the tip of the worm gear, the tooth skipping of the gear may easily occur.
-
Page 167: Installation
Secure the FR front block assembly temporarily with the two screws. (Refer to step 4 in “Removal” in this section.) Connect the flexible flat cable to the connector (CN761) on the SM-48 board. (ODS-D280U only) If the connector (CN761) on the SM-48 board is hidden, rotate the worm gear of the select loader in the clockwise direction to move the rail plate to the position where the connector can be seen. - Page 168 SE rail plate Screwdriver Upper side Worm gear The illustration shows ODS-D280U. The bearing position is on the front side Front side The bearing position is on the rear side Loosen the two screws of step 1, then align the phase of FR lid gear (lower) and SE lid gear arm.
- Page 169 SE lower holder detection plate SE CM antenna holder Lid (upper) Lid (lower) Notes on installation FR lid gear (lower) SE lid gear arm FR front block assembly 1st teeth SE lower holder detection plate The illustration shows ODS-D280U. B2.6 x 4 4-11 ODS-D280U/ODS-D280F...
-
Page 170: Re Rear Assembly
(1) Remove the five screws, then remove the JS connector holder (USB)/JS connector holder (FC) in the direction of the arrow. (2) Remove the RE rear assembly. B2.6 x 4 B2.6 x 4 JS connector holder (USB): ODS-D280U/ JS connector holder (FC): ODS-D280F Portion C B2.6 x 4 Precaution for installation... -
Page 171: Power Supply Block
“4-2. Top Cover Assembly”) Remove the bottom plate assembly. (Refer to “4-3. Bottom Plate Assembly”) Remove the MC top reinforcing plate. (Refer to “4-4. MC Top Reinforcing Plate”) Remove the RE rear assembly. (Refer to “4-7. RE Rear Assembly”) 4-13 ODS-D280U/ODS-D280F... - Page 172 Connector (ODS-D280F) BI-353 board: ODS-D280U BF-92 board: ODS-D280F The illustration shows ODS-D280U. Note When attaching the tape AS, be careful that the harnesses do not protrude from the upper end of the JS fan fixing holder. If the radiation sheet is adhered to the JS BF heat sink, attach it to the BI-353/BF-92 board.
- Page 173 Harness Front side CN121 CN120 CN121 PP-61 board CN45 Be sure that the height of the connected PP-61 board harnesses is lower than the upper surfaces Upper side CN683 of the fan fixing holder. Flexible flat cables 4-15 ODS-D280U/ODS-D280F...
- Page 174 Remove the two screws, then remove the power supply block. Power block 2 x 5 Install the removed parts by reversing the steps of removal. 4-16 ODS-D280U/ODS-D280F...
-
Page 175: Fan 40 Assembly (Rp) And Fan 60 Assembly (Rp)
PP-61 board JS fan S dust-proof sheet Note • When attaching the fan 40 assembly (RP), pay attention to the positions of the label and harness. • Be careful that the JS cushions (FAN) are not peeled off. 4-17 ODS-D280U/ODS-D280F... - Page 176 View on arrow A Flexible wiring board Harness CN92 PP-61 board CN62 Flexible wiring board Groove of fan fixing holder When connecting the flexible wiring board, check that it passes through the groove of the fan fixing holder. 4-18 ODS-D280U/ODS-D280F...
- Page 177 Fan 60 assembly (RP) Label side Note • When attaching the fan 60 assembly (RP), pay attention to the positions of the label and harness. • Be careful that the JS cushions (blower FAN) side are not peeled off. 4-19 ODS-D280U/ODS-D280F...
-
Page 178: Select Loader Assembly
“4-3. Bottom Plate Assembly”.) Remove the MC top reinforcing plate. (Refer to “4-4. MC Top Reinforcing Plate”.) Remove the FR front panel assembly. (ODS-D280U) (Refer to “4-5. FR Front Panel Assembly (ODS-D280U)”.) Remove the RE rear assembly. (Refer to “4-7. RE Rear Assembly”.) - Page 179 Remove the two screws, then remove the select loader assembly in the direction of the arrow. Select loader assembly B2.6 x 4 Notch Hook Remove the notch from the hook. B2.6 x 4 Do not touch this screw. If it is accidentally rotated, replace it with a new select loader assembly. Upper side 4-21 ODS-D280U/ODS-D280F...
-
Page 180: Installation
Bearing position when the SE rail plate is moved approx. 10 mm. Bearings are located on the front side. Reference Reference Front side Approx. 10 mm Bearings are located on the rear side. SE rail plate SM-48 board Screwdriver Worm gear CN761 Upper side 4-22 ODS-D280U/ODS-D280F... - Page 181 Do not touch this screw. If it is accidentally rotated, replace it with a new select loader assembly. Upper side Rib of master plate stepped boss Carry loader assembly Rib of master plate stepped boss Hole Gate plate Hole Select loader assembly 4-23 ODS-D280U/ODS-D280F...
- Page 182 Tighten the two screws (M2.6 x 4) in the front portion of the carry loader assembly and two screws (M2 x 2.7) in the upper portion of the carry loader assembly. M2 x 2.7 M2.6 x 4 M2 x 2.7 Carry loader assembly M2.6 x 4 4-24 ODS-D280U/ODS-D280F...
- Page 183 Therefore, carefully rotate the worm gear. SE rail plate Screwdriver Worm gear Upper side Bearings are located on the front side Front side Bearings are located on the rear side 4-25 ODS-D280U/ODS-D280F...
- Page 184 SE REC INHI switch arm may hit against the cartridge and become damaged. Assemble this unit in the reverse order of preparation. Reset all corresponding hours meters after replacing the parts. (Refer to “1-16-2. Select Loader Assembly, CA Middle Loader Assembly and Carry Loader Assembly”.) 4-26 ODS-D280U/ODS-D280F...
-
Page 185: Carry Loader Assembly
Tape AS from CA lower BU assembly Connector Flexible flat cables Connected from CN683 BI-353 board: ODS-D280U CA upper BU BF-92 board: ODS-D280F assembly Fine-wire coaxial cable (long) CN61 Be careful that the fine-wire coaxial cables do not ride on the connectors. - Page 186 CA transmission gear CA motor assembly Rear side CA side slider R Put the bearing in the concave portion of groove. CA side slider R Note Be sure to remove or install the carry loader assembly in this position. 4-28 ODS-D280U/ODS-D280F...
-
Page 187: Installation
M2.6 x 4 M2 x 2.7 M2.6 x 4 B2.6 x 4 The illustration shows ODS-D280U. 4-11-2. Installation Procedure Remove the two screws (M2.6 x 4) in the front portion of the new carry loader assembly and two screws (M2 x 2.7) in the upper portion of the carry loader assembly. - Page 188 M2 x 2.7 M2.6 x 4 Select loader assembly Carry loader assembly Shaft of master plate View on arrow B Carry loader assembly Fine-wire coaxial cable CA lower BU assembly Flexible flat cable Shaft of master plate Master plate 4-30 ODS-D280U/ODS-D280F...
- Page 189 Connect the harness and cable in the reverse order of steps 1 and 2 of removal procedure. Reset all corresponding hours meters after replacing the parts. (Refer to “1-16-2. Select Loader Assembly, CA Middle Loader Assembly and Carry Loader Assembly”.) 4-31 ODS-D280U/ODS-D280F...
-
Page 190: Ca Motor Assembly
Then, tighten the screws. Install the removed parts by reversing the steps of removal. Note After replacement, reset the Carry Motor (H) Counter. (Refer to “6-7-8. RESET HOURS”.) 4-32 ODS-D280U/ODS-D280F... -
Page 191: Ca Motor (V) Assembly
Tape AS Flexible flat cable Flexible flat cable CA motor (V) assembly CN50 CN61 CA motor (V) assembly Upper side Rear side Clamper Clamper SM-45 board Note Be careful not to damage the flexible flat cable when handling it. 4-33 ODS-D280U/ODS-D280F... - Page 192 When connecting the harness, connect it so that the heat-shrinkable tube fits between the clampers. CA motor (V) assembly SM-45 board Clamper Clamper Heat-shrinkable tube Note After replacement, reset the Carry Motor (V) Counter. (Refer to “6-7-8. RESET HOURS”.) 4-34 ODS-D280U/ODS-D280F...
-
Page 193: Ca Upper Assembly
“4-4. MC Top Reinforcing Plate”.) Remove the RE rear assembly. (Refer to “4-7. RE Rear Assembly”.) Remove the power supply block. (Refer to “4-8. Power Supply Block”.) Remove the carry loader assembly. (Refer to “4-11. Carry Loader Assembly”.) 4-35 ODS-D280U/ODS-D280F... - Page 194 1/2 size of a grain of rice) to the two CA lower plate rollers. When attaching the CA side slider R, insert (e) to (h) of the carry loader assembly into (a) to (d) of the CA side slider R. 4-36 ODS-D280U/ODS-D280F...
- Page 195 Therefore, slide the portions (g) on both sides in the direction of the arrow to put the return arm inside of the CA middle loader assembly, then continue the procedure. CA middle loader assembly Return arm (popped out state) (g) portion 4-37 ODS-D280U/ODS-D280F...
- Page 196 CA middle loader assembly, then continue the procedure. • Be careful when handling the CA upper BU assembly because it becomes unstable in the state that the CA upper assembly is removed. 4-38 ODS-D280U/ODS-D280F...
-
Page 197: Ca Upper Bu Assembly
“4-2. Top Cover Assembly”.) Remove the bottom plate assembly. (Refer to “4-3. Bottom Plate Assembly”.) Remove the MC top reinforcing plate. (Refer to “4-4. MC Top Reinforcing Plate”.) Remove the RE rear assembly. (Refer to “4-7. RE Rear Assembly”.) 4-39 ODS-D280U/ODS-D280F... - Page 198 CA upper BU assembly Bearing CA upper BU assembly Remove the CA upper BU assembly in the direction of the arrow being careful not to be caught by the portion (A). Groove of CA lower plate R side Optical head portions 4-40 ODS-D280U/ODS-D280F...
- Page 199 CA middle loader assembly Front side Groove on R side of CA lower plate Return arm Portion (g) CA gear (floor through) Note Be careful when handling the CA upper BU assembly because it is attached in unstable state. 4-41 ODS-D280U/ODS-D280F...
-
Page 200: Ca Middle Loader Assembly
If the return arm is popped out, put it inside of the CA middle loader assembly. (Refer to step 2 in “4-14-2. CA Upper BU Assembly”.) Resets all hours meter data corresponding to the part after the replacement of parts. (Refer to “1-16-2. Select Loader Assembly, CA Middle Loader Assembly and Carry Loader Assembly”.) 4-42 ODS-D280U/ODS-D280F... -
Page 201: Ca Lower Bu Assembly
Remove the CA middle loader assembly. (Refer to “4-15. CA Middle Loader Assembly”.) Procedure Remove the four helical extension springs. Remove the CA lower BU assembly. CA lower BU assembly Helical extension springs Helical extension spring CA lower plate assembly Helical extension spring 4-43 ODS-D280U/ODS-D280F... - Page 202 Fine-wire View on arrow A coaxial Helical extension cable spring Harness Groove Helical extension spring CA lower plate assembly Be careful not to pass the Groove harness through the wrong hole. CA lower plate assembly Helical extension springs 4-44 ODS-D280U/ODS-D280F...
-
Page 203: Board
Disconnect the two harnesses from the connectors (CN1 and CN2) on the SM-45 board. Remove the screw, then remove the SM-45 board. Flexible flat cables M2 x 2.7 SM-45 board CN50 CN61 Harness Harness Upper side Rear side Install the removed parts by reversing the steps of removal. 4-45 ODS-D280U/ODS-D280F... - Page 204 CA middle arm plate assembly CA middle slider L assembly Portion (g) CA middle slider R assembly CA middle base assembly Portion (g) When attaching the CA middle arm plate assembly, tighten the screws in the order from (a) to (d). 4-46 ODS-D280U/ODS-D280F...
- Page 205 When attaching the CA middle arm plate assembly, check that the guide shafts are put in the grooves of the CA middle base assembly. View on arrow A View on arrow B Guide shaft CA middle base assembly Grooves Guide shaft 4-47 ODS-D280U/ODS-D280F...
-
Page 206: Bi-353/Bf-92 Board
4-19. BI-353/BF-92 Board 4-19-1. BI-353 Board (ODS-D280U) The following parts cannot be reused. Prepare the new parts. • Tape AS: 1 pc • Tape AS 1/2: 1 pc Preparation Remove the top cover assembly. (Refer to “4-2. Top Cover Assembly”.) Remove the bottom plate assembly. -
Page 207: Board (Ods-D280F)
Remove the three screws, then remove the BI-353 board. The following parts are not available as service parts. If damaged or contaminated, replace them. If required, contact your local Sony Sales Office/Service Center. • JS KINTEX shell • JS radiation sheet KINTEX2... - Page 208 BF-92 board Fine-wire coaxial assembly Harness cable (long) CN45 Be careful that the fine-wire coaxial cables do not ride on the connectors and chip parts. Rear side Flexible flat cable Upper side BF-92 board CN401 CN48 CN400 CN195 4-50 ODS-D280U/ODS-D280F...
- Page 209 Remove the three screws, then remove the BF-92 booard. The following parts are not available as service parts. If damaged or contaminated, replace them. If required, contact your local Sony Sales Office/Service Center. • JS KINTEX shell • JS radiation sheet KINTEX2...
-
Page 210: Board
Harness the power supply block, then insert the portion B into the lower portion of the rib 2. PP-61 board M2 x 2.7 Rib 1 Power supply block Install the removed parts by reversing the steps of removal. 4-52 ODS-D280U/ODS-D280F... - Page 211 JS power GND plate CN62 PP-61 board PP-61 board Be sure that the height of the connected harness is lower than the upper surfaces of the fan fixing holder. Install the removed parts by reversing the steps of removal. 4-53 ODS-D280U/ODS-D280F...
-
Page 212: Board (Ods-D280U)
4-22. KY-761 Board (ODS-D280U) The following part cannot be reused. Prepare the new part. • Tape AS: 1 pc Preparation Remove the top cover assembly. (Refer to “4-2. Top Cover Assembly”.) Remove the bottom plate assembly. (Refer to “4-3. Bottom Plate Assembly”.) -
Page 213: Ca Anti-Static Brush Assembly/Ca Anti-Static Brush Assembly 2
• The CA middle loader assembly (A-2167-949- ) with the suffix earlier than “-C” or the unit assembled by the parts equivalent to it does not have the CA anti-static brush assembly 2. In this case, it is no problem even if the CA anti-static brush assembly 2 is not provided. 4-55 ODS-D280U/ODS-D280F... -
Page 214: Roller Gear Assembly
CA middle slider R assembly Portion Return arm Be careful not to deform the return arm. Portion Remove the four screws, then remove the CA middle arm plate assembly. Remove the two screws, then remove the CA arm R lower cover. 4-56 ODS-D280U/ODS-D280F... - Page 215 To install, reverse the removal procedure. (Refer to step 4 in “4-18. SM-50 Board”.) When attaching the CA middle arm plate assembly to the CA middle base assembly, tighten the screws in the order from (a) to (d). 4-57 ODS-D280U/ODS-D280F...
- Page 216 CA middle arm plate assembly operates. CA middle slider L assembly CA middle slider L assembly CA middle slider R assembly CA middle slider R assembly Note After replacement, reset the Disc Guide Counter. (Refer to “6-7-8. RESET HOURS”.) 4-58 ODS-D280U/ODS-D280F...
-
Page 217: Ca Arm L Cover Assembly
M2 x 2.7 CA middle arm plate assembly CA arm L cover assembly Upper side Install the removed parts by reversing the steps of removal. Note After replacement, reset the Disc Guide Counter. (Refer to “6-7-8. RESET HOURS”.) 4-59 ODS-D280U/ODS-D280F... -
Page 218: Air Filter
• To prevent the damage to the screw head, do not tighten the filter lid set screws with the torque value higher than specified. • After replacement, reset Air Filter Parameter. (Refer to the Installation Manual supplied with the air filter for replacement.) 4-60 ODS-D280U/ODS-D280F... -
Page 219: Spindle Motor
Remove the CA upper BU assembly. (Refer to “4-14-2. CA Upper BU Assembly”.) Remove the CA middle loader assembly. (Refer to “4-15. CA Middle Loader Assembly”.) 10. Remove the CA lower BU assembly. (Refer to “4-16. CA Lower BU Assembly”.) 4-61 ODS-D280U/ODS-D280F... - Page 220 When attaching the spindle motor, check that the position of the flexible wiring board is as shown in the illustration. Slide the optical block assembly OP-0 and optical block assembly OP-1 to both ends. Optical block assembly OP-0 Optical block assembly OP-1 Tray 4-62 ODS-D280U/ODS-D280F...
- Page 221 (2) Remove the three screws (PSW2 x 6), then remove the spindle motor. Note When removing the spindle motor, hold the portions A. M1.7 x 3 (0.1 ±0.02 N·m) PSW2 x 6 (0.2 ±0.02 N·m) Spindle motor Tray Install the removed parts by reversing the steps of removal. 4-63 ODS-D280U/ODS-D280F...
-
Page 222: Se Anti-Static Brush Assembly
Assembly”.) Remove the MC top reinforcing plate. (Refer to “4-4. MC Top Reinforcing Plate”.) Remove the FR front panel assembly (ODS-D280U). (Refer to “4-5. FR Front Panel Assembly (ODS-D280U)”.) Remove the FR front block assembly. (Refer to “4-6. FR Front Block Assembly”.) -
Page 223: Sub Base Assembly
“4-8. Power Supply Block”.) Remove the carry loader assembly. (Refer to “4-11. Carry Loader Assembly”.) Remove the CA upper assembly. (Refer to “4-14-1. CA Upper Assembly”.) Remove the CA upper BU assembly. (Refer to “4-14-2. CA Upper BU Assembly”.) 4-65 ODS-D280U/ODS-D280F... - Page 224 M2 Flexible wiring boards Special head screw M2 DR-683 board and radiation plate integrated block PSW2 x 6 BU thread guard 2 CN900 CN903 DR-683 board Connectors Flexible wiring boards Flexible wiring board Flexible wiring board Connectors 4-66 ODS-D280U/ODS-D280F...
- Page 225 Remove the two screws from the new sub base assembly (RP), then remove the two protection sheets. Note The two screws and two protection sheets are not used in this unit because they are the protection parts. Protection sheet Screw Screw Protection sheet Sub base assembly (RP) 4-67 ODS-D280U/ODS-D280F...
-
Page 226: Attaching Of Bu Thread Guard 2
Peel the release paper (side) and attach together. Move the BU thread guard 2 back and forth to check that it moves freely. Move the BU thread guard in the direction of the arrow until it hits the JS DR radiation plate. 4-68 ODS-D280U/ODS-D280F... -
Page 227: Attaching Of Js Bu Harness Retaining Sheet
The end of BU thread guard 2 Harness (12V-DR) should ride on the DR board. A clearance should be provided between the BU thread guard 2 and sub base assembly. BU thread guard 2 4-29-2. Attaching of JS BU Harness Retaining Sheet 4-69 ODS-D280U/ODS-D280F... - Page 228 (Outer periphery of caulking portion) JS BU harness retaining sheet . Secure the sheet at the position of chassis bending portion and provided clearance. . Attach the sheet so that the raised portion of harness becomes minimum without deflection. 4-70 ODS-D280U/ODS-D280F...
-
Page 229: Main Base Assembly
Disconnect the three flexible wiring boards from the connectors (CN900, CN901 and CN903) on the DR-683 board. When disconnecting the flexible wiring board from CN901, insert a bamboo skewer as shown in the illustration. Remove the BU thread guard 2. Remove the four screws (PSW 2 x 6). 4-71 ODS-D280U/ODS-D280F... - Page 230 Flexible wiring board Remove the flexible wiring board from the hole of the Connectors main base assembly. Bamboo DR-683 Flexible wiring skewer C901 board boards Flexible wiring board Flexible wiring board Flexible wiring boards Front side Connectors Main base assembly 4-72 ODS-D280U/ODS-D280F...
- Page 231 The two screws and two protection sheets are not used in this unit because they are the protection parts. Protection sheet Screw Screw Protection sheet Main base assembly (RP) Install the removed parts by reversing the steps of removal. Note For service action after replacement, refer to “5. Adjustment of Optical Drive System”. 4-73 ODS-D280U/ODS-D280F...
-
Page 232: Attaching Of Bu Thread Guard 2
BU thread guard 2 and motor. The end of BU thread guard 2 Harness (12V-DR) should ride on the DR board. The attached portion should not protrude from the CA lower BU. BU thread guard 2 4-74 ODS-D280U/ODS-D280F... -
Page 233: Attaching Of Heat Transfer Sheet
The sheet should not be detached from the drive base. 0.5 mm The sheet should The sheet should not not overlap with overlap with the screw. the screw. The sheet should not Reference be detached from the drive base. 4-75 ODS-D280U/ODS-D280F... -
Page 234: Dr-683 Sub Assembly
“4-11. Carry Loader Assembly”.) Remove the CA upper assembly. (Refer to “4-14-1. CA Upper Assembly”.) Remove the CA upper BU assembly. (Refer to “4-14-2. CA Upper BU Assembly”.) Remove the sub base assembly. (Refer to “4-29. Sub Base Assembly”.) 4-76 ODS-D280U/ODS-D280F... - Page 235 Board support Attach the DR-683 sub assembly (RP) with the eight screws. Assemble this unit. As for the attaching of the BU thread guard 2 and JS BU harness retaining sheet, refer to “4-29. Sub Base Assembly”. 4-77 ODS-D280U/ODS-D280F...
-
Page 236: Main Assembly
Remove the CA upper BU assembly. (Refer to “4-14-2. CA Upper BU Assembly”.) Remove the CA lower BU assembly. (Refer to “4-16. CA Lower BU Assembly”.) 10. Remove the main base assembly. (Refer to “4-30. Main Base Assembly”.) 4-78 ODS-D280U/ODS-D280F... - Page 237 As for the attaching of the BU thread guard 2, JS BVA heat transfer sheet and JS SPDL DRV heat transfer sheet, refer to “4-30. Main Base Assembly”. Attach the DR-683 main assembly (RP) with the eight screws. Assemble this unit. 4-79 ODS-D280U/ODS-D280F...
-
Page 239: Adjustment Of Optical Drive System
“6-6-2. Clearing the Error Log”) 5-1-2. Preparation for Adjustment Display the maintenance menu referring to “6-2. Starting the Maintenance Menu”. Place the cursor at “ADJUST” with the [UP]/[DOWN] buttons. Click the [RIGHT] button. The ADJUST window appears. DRIVE MAINTENANCE ADJUST > OPTICAL ODS-D280U/ODS-D280F... -
Page 240: Optical Adjustment
A selection window appears. Select “ADJUST OP 0” with the [UP]/[DOWN] buttons and then click the [RIGHT] button. DRIVE MAINTENANCE ADJUST OPTICAL MAIN BASE > ADJUST OP 0 ADJUST OP 1 A confirmation window appears waiting for entry of the [SET] button. ADJUST OP 0 ADJUST START? SET KEY EXIT: MENU KEY ODS-D280U/ODS-D280F... -
Page 241: Sub Base Adjustment
ADJUSTING...FAILURE EXIT: MENU KEY There may be a problem in flexible card wire connection between the optical block assembly and the BF-92 board (ODS-D280F) or BI-353 board (ODS-D280U). • When “LOADER ISN’T ATTACHED” is displayed ADJUST OP 0 LOADER ISN’T ATTACHED... - Page 242 A confirmation window appears waiting for entry of the [SET] button. ADJUST OP 2 ADJUST START? SET KEY EXIT: MENU KEY Click the [SET] button. The result is displayed. ADJUST OP 2 ADJUSTING...-->... ADJUSTING...COMPLETED EXIT: MENU KEY EXIT: MENU KEY The following information is displayed when the adjustment fails. ODS-D280U/ODS-D280F...
- Page 243 ADJUSTING...FAILURE EXIT: MENU KEY There may be a problem in flexible card wire connection between the optical block assembly and the BF-92 board (ODS-D280F) or BI-353 board (ODS-D280U). • When “LOADER ISN’T ATTACHED” is displayed ADJUST OP 2 LOADER ISN’T ATTACHED...
-
Page 244: Actions To Be Taken After Adjustment
• Seek Counter 1 • Spindle Running Hours Optical block assembly OP 2/3 A-2186-363-A/Sub base assembly (RP) • Seek Counter 2 • Seek Counter 3 Click the [EXIT] button and close the maintenance mode. Turn off the power of the unit. ODS-D280U/ODS-D280F... -
Page 245: Maintenance Mode
• ERROR LOGGER (Refer to “6-6. ERROR LOGGER”) A menu used to display errors occurred in the optical drive • OTHERS (Refer to “6-7. OTHERS”) A menu used to display the version and serial number of the optical drive ODS-D280U/ODS-D280F... -
Page 246: Starting The Maintenance Menu
Prepare a PC that meets the specifications described in the Operation Manual. • ODS-D280U and ODS-D280F commonness: - PDW-U1 service software (PDW Terminal) To know how to obtain the PDW-U1 service software, contact your local Sony Sales Office/Service Center. Preparation Extract the PDWTerminal.lzh file of the PDW-U1 service software. - Page 247 • An incorrect drive letter is set. • This unit is not recognized by the PC due to a cause other than above. Symptom: “ABORTING” appears momentarily on the menu window and “COMMAND SEQUENCE ERROR” appears in the error message area. ODS-D280U/ODS-D280F...
- Page 248 Possible cause: A cartridge is remaining in the unit. ODS-D280U/ODS-D280F...
-
Page 249: Maintenance Menu List
OTHERS VERSION — 6-7-1. SERIAL NO — 6-7-2. MEMORY SUPPORT UPLOAD TO DR (MAIN) 6-7-3. UPLOAD TO DR (SUB) 6-7-4. UPLOAD TO BF: ODS-D280F 6-7-5. UPLOAD TO BI: ODS-D280U MAINTENANCE HOURS TIMERS-1 6-7-6. TIMERS-2 6-7-7. RESET HOURS — 6-7-8. ODS-D280U/ODS-D280F... -
Page 250: Check
A confirmation window appears waiting for entry of the [SET] button. TEMPERATURE SENSOR CHECK START? SET KEY EXIT: MENU KEY Click the [SET] button. The current temperature (unit: °C) is displayed. ODS-D280U ODS-D280F TEMPERATURE SENSOR TEMPERATURE SENSOR CHECKING...OK CHECKING...OK FPGA :52.5 [DEG] FPGA :47.6... -
Page 251: Acceleration Sense
SET KEY EXIT: MENU KEY Check the DC fan installation status. 6-4-3. ACCELERATION SENSE This menu is used to check the acceleration sensor installed on the BF-92 board (ODS-D280F) or BI-353 board (ODS- D280U). Menu hierarchy [CHECK] [DEVICE] [ACCELERATION SENSE] ODS-D280U/ODS-D280F... - Page 252 Lift the left panel side of the unit to tilt it about 40 degrees or more, and check that "ILLEGAL" is displayed. ACCELERATION SENSE SENSOR 1 (X: * Y:0 Z: * ) ILLEGAL SENSOR 2 (X: * Y:0 Z: * ) ILLEGAL EXIT: MENU KEY 40° or more ODS-D280U/ODS-D280F...
-
Page 253: Loader Auto Test
If "BOTTOM SIDE DOWN" is not displayed in step 2 or if "RIGHT SIDE DOWN" is not displayed in step 5 or if "ILLEGAL" is not displayed in steps 3 to 4, possible causes are as follows. • Acceleration sensor (IC202 (SENSOR 2) or IC203 (SENSOR 1): BI-353 board (ODS-D280U)/BF-92 board (ODS- D280F)) is defective. -
Page 254: Loader Switch
Procedure Select the “AUTO TEST”. A window to confirm that the unit is rightly (ODS-D280U: horizontal/ODS-D280F: vertical) placed appears waiting for entry of the [SET] button. ODS-D280U ODS-D280F AUTO TEST AUTO TEST PLACE DRIVE PLACE DRIVE HORIZONTALLY. VERTICALLY. CHECK START? - Page 255 Menu hierarchy [CHECK] [LOADER] [SWITCH] Fixture Working cartridge Procedure Select the “SWITCH”. A window to confirm that the unit is rightly (ODS-D280U: horizontal/ODS-D280F: vertical) placed appears waiting for entry of the [SET] button. ODS-D280U ODS-D280F SWITCH SWITCH PLACE DRIVE PLACE DRIVE HORIZONTALLY.
- Page 256 • Flexible flat cable connection between the SM-49 board and the SM-48 board is defective. Note When a door is open at the time of check completion, abnormality is thought about for the installation of the door. Check whether a door is attached definitely. (Refer to “4-6. FR Front Block Assembly”) 6-12 ODS-D280U/ODS-D280F...
-
Page 257: Slider Auto Test
If these sensors are checked with the unit placed improperly, the sensor check may fail. Menu hierarchy [CHECK] [SLIDER] [AUTO TEST] Procedure Select the “AUTO TEST”. A window to confirm that the unit is rightly (ODS-D280U: horizontal/ODS-D280F: vertical) placed appears waiting for entry of the [SET] button. ODS-D280U ODS-D280F SLIDER SLIDER PLACE DRIVE PLACE DRIVE HORIZONTALLY. -
Page 258: Spindle Motor Auto Test
• Use a working cartridge to execute this menu. • When executing this menu, place the unit in the right position. - ODS-D280U: horizontal - ODS-D280U: vertical (right side surface below) ODS-D280U: Horizontal ODS-D280F: Vertical If these sensors are checked with the unit placed improperly, the sensor check may fail. - Page 259 [SPINDLE MOTOR] [AUTO TEST] Fixture Working cartridge Procedure Select the “AUTO TEST”. A window to confirm that the unit is rightly (ODS-D280U: horizontal/ODS-D280F: vertical) placed appears waiting for entry of the [SET] button. ODS-D280U ODS-D280F SPINDLE MOTOR SPINDLE MOTOR PLACE DRIVE PLACE DRIVE HORIZONTALLY.
-
Page 260: Sa Actuator
A confirmation window appears waiting for entry of the [SET] button. SA ACTUATOR CHECK START? SET KEY EXIT: MENU KEY Click the [SET] button. The result is displayed. SA ACTUATOR CHECKING...OK EXIT: MENU KEY The following information is displayed when the check fails. 6-16 ODS-D280U/ODS-D280F... -
Page 261: Laser
Menu hierarchy [CHECK] [OPTICAL BLOCK] [LASER] Procedure Select the “LASER”. A confirmation window appears waiting for entry of the [SET] button. LASER CHECK START? SET KEY EXIT: MENU KEY 6-17 ODS-D280U/ODS-D280F... - Page 262 • Fails of both optical block assemblies: BOTH A problem may exist in the following. • Flexible card wire (FPC) connection between the DR-683 board and the optical block assembly is defective. • The optical block assembly is defective. 6-18 ODS-D280U/ODS-D280F...
-
Page 263: Adjust
The loader assembly must be installed when performing these menus. 6-5-1. OPTICAL This menu is used to adjust the offset and gain of the laser driver control signal circuit. For details, refer to “5-2. OPTICAL Adjustment”. Menu hierarchy [ADJUST] [OPTICAL] 6-19 ODS-D280U/ODS-D280F... -
Page 264: Error Logger
>09:01/01 00:00 95-51F >17:01/01 00:00 95-50F 10:01/01 00:00 95-50F 18:01/01 00:00 95-51F 11:01/01 00:00 95-51F 19:01/01 00:00 95-50F 12:01/01 00:00 95-50F 20:01/01 00:00 95-51F 13:01/01 00:00 95-51F 14:01/01 00:00 95-51F 15:01/01 00:00 95-51F 16:01/01 00:00 95-51F CLEAR ERROR LOG 6-20 ODS-D280U/ODS-D280F... -
Page 265: Clearing The Error Log
ERROR LOGGER 17:01/01 00:00 20-213 18:01/01 00:00 20-217 19:01/01 00:00 20-F10 20:01/01 00:00 20-217 >CLEAR ERROR LOG A confirmation window appears waiting for entry of the [SET] button. CLEAR ERROR LOG ARE YOU SURE? SET KEY EXIT: MENU KEY 6-21 ODS-D280U/ODS-D280F... - Page 266 Click the [SET] button. The result is displayed. CLEAR ERROR LOG EXECUTING...COMPLETED EXIT: MENU KEY The following information is displayed when the operation fails. CLEAR ERROR LOG EXECUTING...FAILURE EXIT: MENU KEY The EEPROM (IC206: BI-353 board (ODS-D280U)/BF-92 board (ODS-D280F)) is defective. 6-22 ODS-D280U/ODS-D280F...
-
Page 267: Others
This menu is used to display the serial number of the optical drive. Menu hierarchy [OTHERS] [SERIAL NO] Procedure Select the “SERIAL NO”. The serial number of the optical drive appears. SERIAL NO ID: ODS-D280U NO1: 1000135 NO2: 1000135 NO3: 1000135 EXIT: MENU KEY 6-23 ODS-D280U/ODS-D280F... -
Page 268: Upload To Dr (Main)
EXIT: MENU KEY The following information is displayed when the operation fails. UPLOAD TO DR (MAIN) LOADING...FAILURE SET KEY EXIT: MENU KEY The BF-92 board (ODS-D280F), the BI-353 board (ODS-D280U) or the DR-683 board (main base assembly) may be defective. 6-24 ODS-D280U/ODS-D280F... -
Page 269: Upload To Dr (Sub)
EXIT: MENU KEY The following information is displayed when the operation fails. UPLOAD TO DR (SUB) LOADING...FAILURE SET KEY EXIT: MENU KEY The BF-92 board (ODS-D280F), the BI-353 board (ODS-D280U) or the DR-683 board (sub base assembly) may be defective. 6-25 ODS-D280U/ODS-D280F... -
Page 270: Upload To Bf (Ods-D280F)/Upload To Bi (Ods-D280U)
6-7-5. UPLOAD TO BF (ODS-D280F)/UPLOAD TO BI (ODS-D280U) This menu is used to update the FLASH ROM on the BF-92 board (ODS-D280F) or BI-353 board (ODS-D280U) with the FLASH data on the DR-683 board. Note Use this menu only when the BF-92 board (ODS-D280F) or BI-353 board (ODS-D280U) has been replaced. -
Page 271: Timers-1
The BF-92 board (ODS-D280F), the BI-353 board (ODS-D280U) or the DR-683 board may be defective. 6-7-6. TIMERS-1 This menu is used to display the elapsed operation time of the unit and the total count of loader count. Menu hierarchy [OTHERS]... -
Page 272: Reset Hours
RESET CA MOTOR V CT Select the “RESET SPINDLE HOURS” and the click the [RIGHT] button. A confirmation window appears waiting for entry of the [SET] button. RESET SPINDLE HOURS ARE YOU SURE? OK: SET KEY EXIT: MENU KEY 6-28 ODS-D280U/ODS-D280F... - Page 273 Click the [SET] button. The result is displayed. RESET SPINDLE HOURS EXECUTING...COMPLETED AGAIN: SET KEY EXIT: MENU KEY 6-29 ODS-D280U/ODS-D280F...
-
Page 275: Firmware Upgrade
Prepare the latest utility software. The latest utility software contains the latest firmware. Make an access to the Sony professional products site to download the Optical Disc Archive Software and the release note. After these items have been obtained, install the software according to the release note. - Page 276 If a failure to start from the firmware is detected, startup from the recovery firmware is performed. This startup takes longer than usual. Wait at least five minutes after power is turned on. After startup from the recovery firmware, update the firmware again using the utility software. ODS-D280U/ODS-D280F...
-
Page 277: Ods-D280F
7-2. ODS-D280F ODS-D280F upgrade the firmware with state installed in the PetaSite system (ODS-L30M/L60E). For details about the upgrading firmware, refer to the ODS-L30M service manual. ODS-D280U/ODS-D280F... -
Page 279: Circuit Description
Data write system On the BI-353 board (ODS-D280U) of the USB model, the write signal input from the host to the USB connector (CN30) on the BI-353 board is converted into the SATA interface (Gen3/6 Gbps) signal using the USB3.0-SATA bridge (IC800) and sent to the BRIDGE (IC700). -
Page 280: System
• Disc load information in cartridge: Flash memory in base drive (IC701) • Log-related data: EEPROM (IC206) on a BF-92 board (ODS-D280F)/BI-353 board (ODS-D280U) • Adjusted value in a select system: EEPROM (IC1) on an SM-48 board • Hour meter-related data:... -
Page 281: Loader Control System
D280U) through the SM-48 board. This control is performed by the BRIDGE (IC700). Motors and sensor/cartridge position detection switches are mounted on SM-45, SM-47, SM-48, SM-49, SM-50, and SM-51 boards and connected with the BF-92 board (ODS-D280F)/BI-353 board (ODS-D280U) using the flexible flat cable. -
Page 282: Power System
8-4. Power System The supply voltage of 19.5 V supplied from the AC adaptor (ODS-D280U)/ODBK-20x (ODS-D280F) is input from the DC jack on the PP-62 board to the PP-61 board. On the PP-61 board, the input voltage branches to three power systems through the reverse input/overvoltage/low-voltage protection circuit. -
Page 283: Spare Parts
Therefore, specified parts should be used in the case 指定の部品を使ってください。 of replacement. 2. Standardization of Parts 2. 部品の共通化 Some repair parts supplied by Sony differ from those ソニーから供給する補修用部品は,セットに使われ used for the unit. These are because of parts common- ているものと異なることがあります。 ality and improvement. -
Page 284: Exploded Views
9-2. Exploded Views Top Cover ODS-D280F B2.6 x 4 B2.6 x 4 ODS-D280U B2.6 x 4 B2.6 x 4 ODS-D280U/ODS-D280F... - Page 285 Top Cover Part No. SP Description A-2167-853-A s COVER (U) ASSY, TOP (For ODS-D280U) A-2167-855-A s COVER (F) ASSY, TOP (For ODS-D280F) 4-685-958-02 s SHEET REAR PLT, RE DUST PR 4-691-138-01 s SHEET, COVER DUST PROTECTION (For ODS-D280F) 4-691-140-01 s SHEET (U), DUST PROTECTION...
-
Page 286: Bottom Plate (Ods-D280U)
Bottom Plate (ODS-D280U) B2.6 x 4 B2.6 x 4 B2.6 x 4 2.6 x 5 B2.6 x 4 B2.6 x 4 B2.6 x 4 B2.6 x 4 B2.6 x 4 B2.6 x 14 ODS-D280U/ODS-D280F... - Page 287 Bottom Plate (ODS-D280U) Part No. SP Description A-2167-852-A s PLATE (U) ASSY, BOTTOM A-2181-544-A s FILTER AIR (RP) X-2594-021-3 s LID ASSY, LO DUST FILTER X-2594-068-2 s PANEL (280) ASSY, FR FRONT 4-098-033-01 s SADDLE WIRE (C) 4-283-042-01 s SCREW (M2), SPECIAL HEAD...
-
Page 288: Bottom Plate (Ods-D280F)
B2.6 x 4 B2.6 x 4 B2.6 x 4 2.6 x 5 B2.6 x 4 B2.6 x 4 B2.6 x 4 B2.6 x 4 B2.6 x 4 B2.6 x 4 B2.6 x 4 B4 x 6 B4 x 6 ODS-D280U/ODS-D280F... - Page 289 4-685-945-02 s DUST SHEET, LO DUCT MESH(BTM) 4-685-983-02 s BRACKET (RE), D280 4-689-628-02 s CLAMP,RE DUST PROTECTION SHEET 4-689-719-01 s SHEET (M), 280 DUST PROTECTION 7-621-759-35 s +PSW, 2.6X5 7-621-775-10 s SCREW +B 2.6X4 7-682-560-09 s SCREW +B 4X6 ODS-D280U/ODS-D280F...
-
Page 290: Bottom Block
A-2122-544-A s BF-92 COMPL (For ODS-D280F) 4-685-929-01 s PACKING (L), MC BOTTOM A-2144-904-A s BI-353 COMPL 4-685-933-02 s HEAT SINK, JS BF (For ODS-D280U) 1-458-764-11 s OPTICAL MODULE (SFP+) 4-685-934-01 s DUCT CUSHION, JS BF HEATSINK (For ODS-D280F) 4-685-947-01 s SHEET, JS HEAT SINK WINDOW... - Page 291 Bottom Block Part No. SP Description 4-685-932-01 s SHEET (PCIE), JS RADIATION (For ODS-D280F) 4-735-652-02 s SHEET (KINTEX), JS RADIATION 3 ODS-D280U/ODS-D280F...
-
Page 292: Power Supply Block
Power Supply Block To BF-92 board: ODS-D280F To BI-353 board: ODS-D280U To BF-92 board: ODS-D280F To BI-353 board: ODS-D280U To SM-45 board Rear side Part No. SP Description Part No. SP Description A-2122-548-A s PP-61 MOUNT 4-685-970-01 s DUST SHEET (RE), JS PWR HOLDER... -
Page 293: Select Loader Assembly
ODS-D280U B2.6 x 4 Part No. SP Description A-2122-580-A s KY-761 MOUNT (For ODS-D280U) A-2167-951-A s BRUSH ASSY (RP), SE BRUSH A-2167-952-D s LOADER (280) ASSY (RP), SELECT A-2167-953-C s FR FRONT BLOCK ASSY (RP) 1-849-503-12 s FFC (8CORE) SM48-KY761... -
Page 294: Carry Loader Assembly-1
2-590-635-01 s TAPE (AS 1/2) 3-079-115-01 s TAPE AS 4-283-042-01 s SCREW (M2), SPECIAL HEAD 4-685-926-01 s PLATE,MC DUCT CUSHION (MASTER) A-2225-607-A s LOADER ASSY (RP), CARRY 1-849-501-11 s FFC (8CORE) SM45-SM50 4-688-765-01 s SHEET F,PLATE DUST PROTECTION 9-12 ODS-D280U/ODS-D280F... -
Page 295: Carry Loader Assembly-2
4-685-758-01 s BEARING (DDL-F-415ZZ) A-5015-817-A s CA UPPER ASSY (RP) 3-726-829-01 s WASHER, STOPPER 4-283-042-01 s SCREW (M2), SPECIAL HEAD 7-621-775-10 s SCREW +B 2.6X4 4-685-734-01 s GEAR, CA (FLOOR THROUGH) 4-685-746-01 s SPRING, CA BU 4-685-755-01 s BEARING (DDL-520ZZH) 9-13 ODS-D280U/ODS-D280F... -
Page 296: Sub Base Assembly
Sub Base Assembly To BF-92 board: ODS-D280F To BI-353 board: ODS-D280U To BF-92 board: ODS-D280F To BI-353 board: ODS-D280U To BF-92 board: ODS-D280F To BI-353 board: ODS-D280U To PP-61 board View on arrow A Part No. SP Description A-2186-363-A s BASE ASSY (RP), SUB... -
Page 297: Main Base Assembly
Main Base Assembly View on arrow A To BF-92 board: ODS-D280F To BI-353 board: ODS-D280U To BF-92 board: ODS-D280F To BI-353 board: ODS-D280U Part No. SP Description A-2186-362-A s BASE ASSY (RP), MAIN 1-849-505-11 s FFC (36CORE) BF/BI-DR683L 2-590-635-01 s TAPE (AS 1/2) 3-079-115-01 s TAPE AS 4-282-992-01 s SCREW (DIA. -
Page 298: Ca Middle Loader Assembly
4-685-735-01 s GEAR, CA (JOINT ARM DIA.2) 1010 4-685-736-01 s GEAR, CA (JOINT ARM DIA.5) 1011 4-685-745-02 s GEAR, CA (UPPER SMALL) 1012 4-685-753-01 s GEAR, CA (ARM R) 1013 A-2167-949-C s LOADER ASSY (RP), CA MIDDLE 1014 A-5011-777-A s BRUSH ASSY(RP),CA 2 9-16 ODS-D280U/ODS-D280F... -
Page 299: Supplied Accessories
ODS-D280F Q'ty Part No. SP Description 1-848-006-12 s CABLE WITH CONNECTOR (DD2) 1-849-819-12 s CABLE WITH PLUG (DC) 7-682-547-04 s SCREW +B 3X6 ODS-D280U Q'ty Part No. SP Description A-2165-887-A s AC ADAPTOR (110W)ASSY 1-782-476-15 CORD, POWER (for CN) 1-846-103-82 CORD, POWER (for CN) 1-839-351-11 s CORD WITH CONNECTOR (USB3.0) -
Page 301: Diagrams
Section 10 Diagrams Overall ODS-D280U DC FAN (L) DC FAN (S) BI-353 KY-761 IC700 IC300, IC301 CARRY LOADER ASSEMBLY +3.3V POWER ACCESS ERROR CARTRIDGE IN IC200 DDR3 PP-61 CN92 CN61 FLASH IC201 CA UPPER BU FAN CNT (S)/ ASSEMBLY FAN FG (S) - Page 302 CN61 DISC CARRY LOAD 6.3A/32V DISC CARRY UNLOAD CR_LDR SM-50 CN50 CN45 PHOTO PHOTO PHOTO Disc Carry Load PHOTO INTERRUPTER INTERRUPTER INTERRUPTER INTERRUPTER Disc Carry Unload 19.5V Home Load End V Motor PHOTO AC ADAPTOR Unload End INTERRUPTER 10-2 ODS-D280U/ODS-D280F...
- Page 303 Frame Wiring CARRY LOADER ASSEMBLY DR-683 BF-92 (ODS-D280F) KY-761 (ODS-D280U) (Upper) BI-353 (ODS-D280U) FINE WIRE CN401 CN48 CN1302 COAXIAL CABLE (U) DC FAN (S) DC FAN (L) SELECT LOADER ASSEMBLY PP-61 SM-49 SM-48 SUB HARNESS CN761 FLEXIBLE (12V-DR) CN001 CN121...
- Page 305 1-18. Lead-free Solder • Modifications of the exploded views: Top Cover, Bottom Plate (ODS-D280U), Bottom Plate (ODS-D280F), Bottom Block, Power Supply Block, Select Loader Assembly, Carry Loader Assembly-1, Carry Loader Assembly-2, Sub Base Assembly, Main Base Assembly, CA Middle Loader Assembly...
- Page 308 ODS-D280U (SY) ODS-D280U (CN) ODS-D280F (SY) Printed in Japan Sony Corporation ODS-D280F (CN) J, E 2019. 11 08 V1.20A 9-932-503-03 © 2017...