Electrolux 26" Stainless Steel Outdoor Grill Use & Care Manual
26" stainless steel outdoor grill
Hide thumbs
Also See for 26" Stainless Steel Outdoor Grill:
- Use and care manual (19 pages) ,
- Use & care manual (20 pages)
Table of Contents
Quick Links
Table of Contents

Related Manuals for Electrolux 26" Stainless Steel Outdoor Grill


Summary of Contents for Electrolux 26" Stainless Steel Outdoor Grill
- Page 1 Grill Assembly Built-In Instructions 10-12 16-17...
-
Page 2: Welcome & Congratulations
Welcome & Congratulations Congratulations on your purchase of a new gas grill! At Electrolux Home Products, we are very proud of our product and are completely committed to providing you with the best service possible. Your satisfaction is our number one priority. -
Page 3: General Safety Instructions
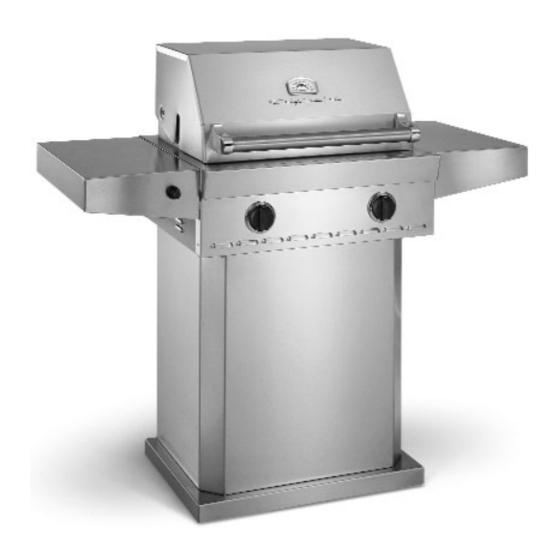
General Safety Instructions IMPORTANT SAFETY INFORMATION Read this manual carefully before using your grill to reduce the risk of fire, burn hazard or other injury. - Extreme care should be used because of the high temperatures produced by this appliance. CHILDREN SHOULD NOT BE LEFT UNATTENDED IN AN AREA WHERE THE GRILL IS BEING OPERATED. - Page 4 Grill Features: FD26 Roll top grill hood Grilling/Cooking surface Electronic ignitor: main burners Control knobs: main burners Convection vents Handle Warming shelf Side shelf Pedestal base...
-
Page 5: Grill Components List
Grill Components List Cart Parts 3 sided pedestal base Base Wheel channels Grill Parts Stainless steel grill head Stainless steel side shelves Electronic ignitor Flavor grid Porcelain bar grates Stainless steel warming rack Drip pan Hose and regulator (LP models only) Black plastic plug for right shelf hole Assembly Parts Hex head screws... -
Page 6: Grill Assembly
Note: Prior to assembly remove protective film from stainless steel parts Assembly requires: 6 tools and a Friend Tools required: Power screwdriver Screwdriver extension 1/4” socket wrench 1/2” socket wrench adjustable wrench scissors Caution: Gas regulator is not flush with bottom. DO NOT let the Grill head sit flat without placing support around regulator to prevent damage to the regulator prior to installing on cart. - Page 7 Ignitor Attachment Remove the ignitor cap, spring assembly, battery and lock nut from ignitor. (See Fig. 5) Insert the threaded section of the ignitor into the U-shaped cut out of the ignitor mounting bracket. (See Fig. 6) Insert the threaded section of the ignitor through the hole in either shelf and secure to shelf using the lock nut.
- Page 8 Interior parts installation Insert the Flavor Grid into the bottom of the grill with the ridges facing up by angling it down and in. Be sure the middle sections solid area is covering the front ignitor. (See Fig. 12) Install cooking grates on the ledges provided on the grill to create your cooking surface.
-
Page 9: Built-In Instructions
Built-In Instructions The Frigidaire Grill can be installed as a built-in Grill. If installed as a built-in Grill, the Grill surround must be constructed of Non-combustible material. Planning and Design Start by identifying the number and size of components you want to include: Grill, side burner, access doors for storage or other items you may wish to furnish such as: refrigerator, sink, warming drawer. - Page 10 Built-In Instructions Side cutout is needed on left side to feed ignitor wire to the ignitor plate (26” model only) (Size: 10” high x 5” long, set 1” back from front edge) GFI Electrical outlet for rotisserie motor (6.5 amp min.) *Required Ignitor cutout for front or side mount (26”...
-
Page 11: Gas Requirements
Gas Requirements General Information Verify the type of gas supply to be used, either Natural Gas (NG) or Liquid Propane (L.P)., and make sure the marking plate (located on the back of the unit) agrees with that of the supply. Note: Never attach an unregulated gas line to the appliance. - Page 12 L.P. Gas Installation Frigidaire Gas Grills that are set to operate with L.P. gas come with a high capacity hose and regulator assembly. (Note: Only use the pressure regulator and hose assembly supplied with the grill or a replacement pressure regulator and hose assemblies specified by Frigidaire). This assembly is designed to connect directly to a standard 20 lb.
-
Page 13: Leak Testing
General Information Although all gas connections on the grill are leaked tested at the factory prior to shipment, a complete gas tightness check must be performed at the installation site due to possible mishandling in shipment, or excessive pressure unknowingly being applied to the unit. Periodically check the whole system for leaks, or immediately check if the smell of gas is detected. -
Page 14: Using The Grill
Clearance to combustible construction - A minimum of 12” from the sides and back must be maintained from the gas grill above and below the cooking surface to adjacent vertical combustible construction. Clearance to non-combustible construction - A minimum of 3” clearance from the back of the grill to non- combustible construction is required for the lid to fully open. -
Page 15: Lighting The Grill
Before Lighting Warning: Important! Before Lighting... Check the gas supply line for cuts, wear or abrasion. Always keep your face and body as far away from the grill as possible when lighting. Grill Burner Lighting Lighting the Grill with electronic ignitor Always open the lid before attempting lighting. -
Page 16: Care And Maintenance
Care and Maintenance General Maintenance (performed on a periodic basis, depending on usage) Check to make sure ventilation openings on the LP cylinder enclosure are not obstructed Check to make sure the flow of combustion and ventilation air is not obstructed. Check for proper burner flame Drip Tray The drip tray located below the grill, inside the cart, should be cleaned periodically to prevent heavy buildup... -
Page 17: Troubleshooting
General Trouble Shooting You should inspect the burners at least once a year or immediately if any of the following conditions occur: The smell of gas in conjunction with the burner flames appearing yellow. The Grill does not reach temperature. The burners make a popping noise. - Page 18 Problem Flame is erratic Flare-Ups Burner flame is yellow or orange, in conjunction with the odor of gas. Cart door does not align properly with cart Spider and Insect Warning Spider and insects can nest in the burners of this or any other Grill and cause the gas to flow from the front of the burn- er.
-
Page 19: Warranty
LIMITED LIFETIME WARRANTY Frigidaire Grills have a Lifetime Warranty on all stainless steel parts, 15 years on stainless burners and a 5 year warranty on all other parts. IMPORTANT: We recommend you return the warranty registration card so that you can be contacted with any questions of safety arise that could affect you.