
Related Manuals for Yamaha YK-XR Series


Summary of Contents for Yamaha YK-XR Series
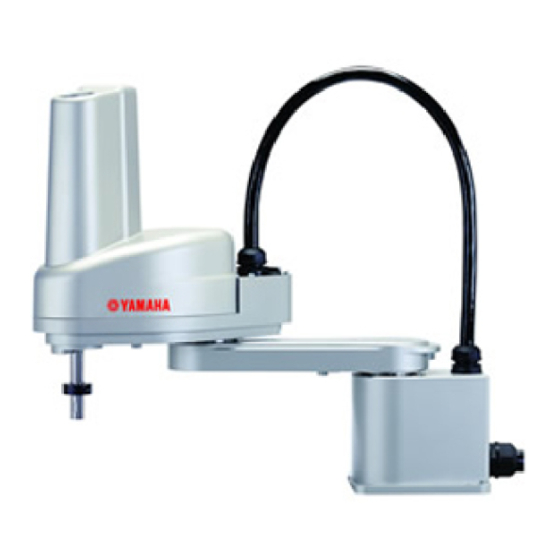
- Page 1 YAMAHA SCARA ROBOT YK-XR Series Installation Manual YK400XR EWFK155120 Ver. 1.20...
-
Page 3: Table Of Contents
CONTENTS YK-XR Installation Manual Safety Instructions 1. Safety Information 2. Signal words used in this manual 3. Warning labels 3.1 Warning labels 3.1.1 Warning label messages on robot and controller 3.1.2 Supplied warning labels 3.2 Warning symbols 4. Important precautions for each stage of the robot life cycle S-10 4.1 Precautions for using robots and controllers S-10... - Page 4 CONTENTS YK-XR Installation Manual Warranty Introduction Before using the robot (Be sure to read the following notes.) Introduction Chapter 1 Functions 1. Robot manipulator 1.1 Manipulator movement 1.2 Part names 2. Robot controller 3. Robot initialization number list Chapter 2 Installation 1.
- Page 5 CONTENTS YK-XR Installation Manual 7. Limiting the movement range with X-axis and Y-axis mechanical stoppers 2-20 7.1 Installing the X-axis/Y-axis additional mechanical stoppers 2-21 7.2 Robot overrun during impacts with X-axis or Y-axis mechanical stopper 2-23 8. Working envelope 2-24 9.
- Page 6 CONTENTS YK-XR Installation Manual 5 . Affixing the stickers for origin positions, movement directions, and axis names 3-32 Chapter 4 Periodic inspecition 1. Overview 2. List of inspection items Chapter 5 Harmonic drive replacement period 1. Overview 2. Replacement period Chapter 6 Increasing the robot operating speed 1. Increasing the robot operating speed 1.1 Increasing speed by arch motion 1.2 Increasing the speed with the WEIGHT statement 1.3 Increasing the speed by the tolerance parameter...
- Page 7 Safety Instructions Contents 1. Safety Information 2. Signal words used in this manual 3. Warning labels Warning labels 3.1.1 Warning label messages on robot and controller 3.1.2 Supplied warning labels Warning symbols 4. Important precautions for each stage of the robot life cycle S-10 Precautions for using robots and controllers S-10 Essential precautions for the linear conveyor module...
-
Page 9: Safety Information
The precautions listed in this manual relate to this product. To ensure safety of the user’s final system that in- cludes YAMAHA robots, please take appropriate safety measures as required by the user’s individual system. To use YAMAHA robots and controllers safely and correctly, always comply with the safety rules and instruc- tions. -
Page 10: Signal Words Used In This Manual
Signal words used in this manual This manual uses the following safety alert symbols and signal words to provide safety instructions that must be observed and to describe handling precautions, prohibited actions, and compulsory actions. Make sure you understand the meaning of each symbol and signal word and then read this manual. DANGER This indicates an immediately hazardous situation which, if not avoided, will result in death or serious injury. -
Page 11: Warning Labels
Warning labels Warning labels shown below are attached to the robot body and controller to alert the operator to potential hazards. To ensure correct use, read the warning labels and comply with the instructions. Warning labels WARNING If warning labels are removed or difficult to see, then the necessary precautions may not be taken, resulting in an accident. - Page 12 Warning label 3 (SCARA robots, Cartesian robots, controllers*) ■ * Some models WARNING Improper installation or operation may cause serious injury. Before installing or operating the robot, read the manual and instructions on the warning labels and understand the contents. Instructions on this label •...
- Page 13 Warming label 6 (Robot drivers RDV-X/RDV-P) ■ WARNING • Before touching the terminals or connectors on the outside of the robot driver, turn off the power and wait for 10 minutes or longer to prevent electrical shock. Otherwise, burn or electrical shock may result. •...
- Page 14 To avoid hazard Wait at least 100 seconds after power-off before opening the covers (*). * These are precautions for YAMAHA and distributors' service personnel. Customers must not attempt to open the covers. 90K41-001390 Warning label 9 (single-axis linear motor robots) ■...
- Page 15 Warning label 11 (Controller)* ■ * This label is attached to the front panel. CAUTION Refer to the manual. Instructions on this label This indicates important information that you must know and is described in the manual. Before using the controller, be sure to read the manual 取扱説明書参照...
-
Page 16: Supplied Warning Labels
3.1.2 Supplied warning labels Some warning labels are not affixed to robots but included in the packing box. These warning labels should be affixed to an easy-to-see location. Warning label is attached to the robot body. Warning label comes supplied with the robot and should be affixed to an easy-to-see location on the door or gate of the safety enclosure. -
Page 17: Warning Symbols
Warning symbols Warning symbols shown below are indicated on the robots and controllers to alert the operator to potential hazards. To use the YAMAHA robot safely and correctly always follow the instructions and cautions indicated by the symbols. Electrical shock hazard symbol WARNING Touching the terminal block or connector may cause electrical shock, so use caution. -
Page 18: Important Precautions For Each Stage Of The Robot Life Cycle
Precautions for using robots and controllers General precautions for using robots and controllers are described below. Applications where robots cannot be used YAMAHA robots and robot controllers are designed as general-purpose industrial equipment and cannot be used for the following applications. DANGER YAMAHA robot controllers and robots are designed as general-purpose industrial equipment and cannot be used for the following applications. -
Page 19: Essential Precautions For The Linear Conveyor Module
Essential precautions for the linear conveyor module The linear conveyor module is a YAMAHA robot so safety measures must be followed and safety equipment must be installed just as required for other YAMAHA robots. This section describes essential precautions for handling the linear conveyor module. Precautions for each stage in the robot life cycle are listed from the next section, so be sure to read the whole section of “Safety... -
Page 20: Design
Design 4.3.1 Precautions for robots Restricting the robot moving speed WARNING Restriction on the robot moving speed is not a safety-related function. To reduce the risk of collision between the robot and workers, the user must take the necessary protective measures such as enable devices according to risk assessment by the user. -
Page 21: Moving And Installation
Do not use in locations exposed to flammable gases WARNING • YAMAHA robots are not designed to be explosion-proof. • Do not use the robots in locations exposed to explosive or inflammable gases, dust particles or liquid. Failure to follow this instruction may cause serious accidents involving injury or death, or lead to fire. -
Page 22: Precautions For Robot Controllers
Installation environment WARNING YAMAHA robots are not designed to be explosion-proof. Do not use the robots and controllers in locations exposed to explosive or inflammable gases, dust particles or liquid such as gasoline and solvents. Failure to follow this instruction may cause serious accidents involving injury or death, and lead to fire. - Page 23 Wiring ■ Connection to robot controller The controller parameters are preset at the factory before shipping to match the robot model. Check the specified robot and controller combination, and connect them in the correct combination. Since the software detects abnormal operation such as motor overloads, the controller parameters must be set correctly to match the motor type used in the robot connected to the controller.
-
Page 24: Safety Measures
Safety measures 4.5.1 Safety measures Referring to warning labels and manual WARNING • Before starting installation or operation of the robot, be sure to read the warning labels and this manual, and comply with the instructions. • Never attempt any repair, parts replacement and modification unless described in this manual. These tasks require specialized technical knowledge and skills and may also involve hazards. -
Page 25: Installing A Safety Enclosure
WARNING • During startup or maintenance tasks, display a sign "WORK IN PROGRESS" on the programming box and operation panel in order to prevent anyone other than the person for that task from mistakenly operating the start or selector switch. If needed, take other measures such as locking the cover on the operation panel. •... -
Page 26: Operation
Operation When operating a robot, ignoring safety measures and checks may lead to serious accidents. Always take the following safety measures and checks to ensure safe operation. DANGER Check the following points before starting robot operation. • No one is within the robot safety enclosure. •... - Page 27 Working inside safety enclosures Before starting work within the safety enclosure, always confirm from outside the enclosure that each protective function is operating correctly (see the previous section 2.3). DANGER Never enter within the movement range while within the safety enclosure. See “7.1 Movement range”...
-
Page 28: Automatic Operation
4.6.2 Automatic operation Check the following points when operating the robot in AUTO mode. Observe the instructions below in cases where an error occurs during automatic operation. Automatic operation described here includes all operations in AUTO mode. Checkpoints before starting automatic operation Check the following points before starting automatic operation DANGER •... - Page 29 Use caution when releasing the Z-axis (vertical axis) brake WARNING The vertical axis will slide downward when the brake is released, causing a hazardous situation. Take adequate safety measures in consideration by taking the weight and shape into account. • Before releasing the brake after pressing the emergency stop button, place a support under the vertical axis so that it will not slide down.
-
Page 30: Inspection And Maintenance
Inspection and maintenance Always perform daily and periodic inspections and make a pre-operation check to ensure there are no prob- lems with the robot and related equipment. If a problem or abnormality is found, then promptly repair it or take other measures as necessary. Keep a record of periodic inspections or repairs and store this record for at least 3 years. -
Page 31: Precautions During Service Work
4.7.2 Precautions during ser vice work Precautions when removing a motor (Cartesian robots and vertical mount single-axis robots) WARNING The vertical axis will slide down when the motor is removed, causing a hazardous situation. • Turn off the controller and place a support under the vertical axis before removing the motor. •... -
Page 32: Disposal
Disposal When disposing of robots and related items, handle them carefully as industrial wastes. Use the correct disposal method in compliance with your local regulations, or entrust disposal to a licensed industrial waste disposal company. Disposal of lithium batteries When disposing of lithium batteries, use the correct disposal method in compliance with your local regulations, or entrust disposal to a licensed industrial waste disposal company. -
Page 33: Emergency Action When A Person Is Caught By Robot
Make a printout of the relevant page in the manual and post it a conspicuous location near the controller. Cautions regarding strong magnetic fields Some YAMAHA robots contain parts generating strong magnetic fields which may cause bodily injury, death, or device malfunction. Always comply with the following instructions. -
Page 34: Using The Robot Safely
Using the robot safely Movement range When a tool or workpiece is attached to the robot manipulator tip, the actual movement range enlarges from the movement range of the robot itself (Figure A) to include the areas taken up by movement of the tool and workpiece attached to the manipulator tip (Figure B). -
Page 35: Robot Protective Functions
Robot protective functions Protective functions for YAMAHA robots are described below. Overload detection This function detects an overload applied to the motor and turns off the servo. If an overload error occurs, take the following measures to avoid such errors: 1. -
Page 36: Residual Risk
Residual risk To ensure safe and correct use of YAMAHA robots and controllers, System integrators and/or end users imple- ment machinery safety design that conforms to ISO12100. Residual risks for YAMAHA robots and controllers are described in the DANGER or WARNING instructions provided in each chapter and section. - Page 38 All rights reserved. No part of this publication may be reproduced in any form without the permission of YAMAHA MOTOR CO., LTD. Information furnished by YAMAHA in this manual is believed to be reliable. However, no responsibility is assumed for possible inaccuracies or omissions.
-
Page 39: Warranty
10. Fires or natural disasters such as earthquakes, tsunamis, lightning strikes, wind and flood damage, etc; 11. Breakdown due to causes other than the above that are not the fault or responsibility of YAMAHA; The following cases are not covered under the warranty: ■... -
Page 41: Introduction
Introduction Contents Before using the robot (Be sure to read the following notes.) Introduction... - Page 43 Before using the robot (Be sure to read the following notes.) At this time, our thanks for your purchase of this YAMAHA YK-XR series SCARA robot. NOTE In the RCX340 controller, axis names are called using numeric values, like axis-1, axis-2, axis-3, and so on. In this manual, axis names are called using alphabetic characters, like X-axis, Y-axis, Z-axis, and so on. So, read this manual while referring to the robot external view and axis name correspondence table shown below.
- Page 44 Robot malfunctions (vibration, noise) may also occur. The origin position of the YK-XR series robots is adjusted to the position as shown below, so the reference or standard coordinates are temporarily set. The customer should set the origin position before any other job. There are 2 types of origin position settings as shown below.
- Page 45 Set the standard coordinates while referring to instructions in "4. Setting the standard coordinates" in Chapter 3 of this manual and also to "Setting the Standard coordinates" in the "YAMAHA Robot Controller User's Manual". Robot malfunctions (vibration, noise) may occur if the standard coordinates are not set correctly.
- Page 46 Introduction The YAMAHA YK-XR series robots are SCARA type industrial robots developed based on years of YAMAHA experience and achievements in the automation field as well as efforts to streamline our in-house manufacturing systems. The YK-XR series robots have a two-joint manipulator consisting of an X-axis arm and a Y-axis arm, and are further equipped with a vertical axis (Z-axis) and a rotating axis (R-axis) at the tip of the manipulator. The YK- XR series robots can be used for a wide range of assembly applications such as installation and insertion of various parts, application of sealant, and packing operations. This user's manual describes the safety measures, handling, adjustment and maintenance of YK-XR series robots for correct, safe and effective use. Be sure to read this manual carefully before installing the robot.
-
Page 47: Chapter 1 Functions
Chapter 1 Functions Contents 1. Robot manipulator Manipulator movement Part names 2. Robot controller 3. Robot initialization number list... -
Page 49: Robot Manipulator
The YK-XR series robots are available in 4-axis models having an X/Y-axis arm (equivalent to human arm) and a Z/R-axis (equivalent to human wrist). With these 4 axes, the YK-XR series robots can move as shown in the Fig. below. By attaching different types of end effector (gripper) to the end of the arm, a wide range of tasks can be performed with high precision at high speeds. -
Page 50: Part Names
Standard type X-axis mechanical stopper User tubing 1 (φ4 black) User tubing 2 (φ4 red) Tapped hole for user User tubing 3 (φ4 blue) 23102-FK-00 * YAMAHA Part Nos. Warning label 1 90K41-001470 Warning label 2 90K41-001460 Warning label 3 90K41-001290... -
Page 51: Robot Controller
Robot controller The YK-XR series robot comes supplied with a robot controller RCX340. For more details, refer to the separate "YAMAHA Robot Controller User's Manual". Robot controller RCX340 23103-FK-00... -
Page 52: Robot Initialization Number List
Robot initialization number list The YK-XR series robots are initialized for optimum setting (default setting) according to the robot model prior to shipping. The robot controllers do not have to be reinitialized during normal operation. However, if for some reason the controller must be reinitialized, proceed while referring to the robot number shown below. YK400XR Robot number: Robot Model initialization... - Page 53 Chapter 2 Installation Contents 1. Robot installation conditions Installation environments Installation base 2. Installation Unpacking Checking the product Moving the robot Installing the robot 3. Protective bonding 4. Robot cable connection 5. User wiring and user tubing 6. Attaching the end effector 2-11 Acceleration coefficient vs.
-
Page 55: Robot Installation Conditions
40μm or less Working space Allow sufficient space margin to perform jobs (teaching, inspection, repair, etc.) For detailed information on how to install the robot controller, refer to the separate "YAMAHA Robot Controller User's Manual". WARNING • AvOID INSTALLING THE ROBOT IN LOCATIONS WHERE THE AMBIENT CONDITIONS MAY EXCEED THE ALLOWABLE TEMPERATURE OR HUMIDITY, OR IN ENvIRONMENTS WHERE WATER, CORROSIvE GASES, METALLIC POWDER OR DUST ARE GENERATED. -
Page 56: Installation Base
Installation base Prepare a sufficiently rigid and stable installation base, taking account of the robot weight including the end effector (gripper), workpiece and reaction force while the robot is operating. WARNING • BE SURE TO INSTALL THE ROBOT ON A HORIZONTAL SURFACE WITH THE BASE MOUNT SECTION FACING DOWN. INSTALL THE WALL-MOUNT OR WALL-MOUNT INvERSE MODEL ROBOT WITH THE BASE MOUNT SECTION FACING SIDEWARD. -
Page 57: Installation
The equipment and tools used for moving the robot should be serviced daily. The YK-XR series robot comes packed with a robot controller and accessories, according to the order specifications. Using a carrying cart (dolly) or forklift, move the package to near the installation base. Take sufficient care not to apply shocks to the equipment when unpacking it. -
Page 58: Checking The Product
After unpacking, check the product configuration and conditions. CAUTION If there is any damage due to transportation or insufficient parts, please notify your distributor immediately. ● Controller : RCX340 Robot : YK-XR series Product configurations Standard Disc version of the User’s Manual Robot manipulator User's Manual Warning label (×1) -
Page 59: Moving The Robot
Moving the robot WARNING SERIOUS INjURY MAY OCCUR IF THE ROBOT FALLS AND PINS SOMEONE UNDER IT. • DO NOT ALLOW ANY PART OF YOUR BODY TO ENTER THE AREA BENEATH THE ROBOT DURING WORK. • ALWAYS WEAR A HELMET, SAFETY SHOES AND GLOvES DURING WORK. To check the mass of robot, refer to "1.1 Basic specification"... -
Page 60: Installing The Robot
Installing the robot Install the robot securely with the four hex socket head bolts as shown in the Fig. below. The robot can be secured from the upper portion. WARNING WHEN INSTALLING THE ROBOT, BE SURE TO USE THE SPECIFIED SIzE AND QUANTITY OF BOLTS THAT MATCH THE DEPTH OF TAPPED HOLES IN THE INSTALLATION BASE, AND SECURELY TIGHTEN THE BOLTS TO THE CORRECT TORQUE. -
Page 61: Protective Bonding
When the end effector uses an electrical device which, if it malfunctions, might make contact with the power supply, the user must provide proper grounding on his own responsibility. The YK-XR series robots do not have a ground terminal for this purpose. -
Page 62: Robot Cable Connection
Robot cable connection The robot cable is pre-connected to the YK-XR series robot. For details on connections to the robot controller, refer to the Fig. below and the "YAMAHA Robot Controller User's Manual". After making connections, check the operation while referring to the section "4.6.1 Trial Operation" in Chapter “Safety Instructions” of this manual. WARNING • BEFORE CONNECTING THE CABLES, CHECK THAT THERE ARE NO BENDS OR BREAKS IN THE CONNECTOR PINS OF THE ROBOT CABLE AND THAT THE CABLES ARE NOT DAMAGED. BENT OR BROKEN PINS OR CABLE DAMAGE MAY CAUSE MALFUNCTION OF THE ROBOT. -
Page 63: User Wiring And User Tubing
AIR OR POWER IS SUPPLIED DURING THIS WORK, THE MANIPULATOR MAY MOvE ERRONEOUSLY CAUSING A HAzARDOUS SITUATION. The YK-XR series robots are equipped with user wires and air tubes in the machine harness. The table below shows the number of wires and air tubes available for each robot model. - Page 64 NOT TO POSE HAzARDS FOR THE OPERATORS. THE OPERATORS COULD TRIP ON THESE PARTS AND BE INjURED. CAUTION Always use the supplied connectors and pins. Contact faults could occur if other types are used. • Connector supplied at shipment YAMAHA’s model number Part name Model number Q’ty...
-
Page 65: Attaching The End Effector
Attaching the end effector Acceleration coefficient vs. moment of inertia 6.1.1 R-axis tolerable moment of inertia and acceleration coefficient The moment of inertia of a load (end effector and workpiece) that can be attached to the R-axis is limited by the strength of the robot drive unit and residual vibration during positioning. -
Page 66: Equation For Moment Of Inertia Calculation
Equation for moment of inertia calculation Usually the R axis load is not a simple form, and the calculation of the moment of inertia is not easy. As a method, the load is replaced with several factors that resemble a simple form for which the moment of inertia can be calculated. - Page 67 3) Moment of inertia for cylinder (part 2) The equation for the moment of inertia for a cylinder that has a rotation center such as shown in the Fig. below is given as follows. Moment of inertia for cylinder (part 2) ρπ...
- Page 68 In the same manner, the moment of inertia of a cylinder as shown in the Fig. below is given by Moment of inertia of a cylinder ρπD ρπD Center line ) + mx (kgm ρπD ρπD (kgfcmsec ... (6) 23208-F0-00 In the same manner, the moment of inertia of a prism as shown in the Fig.
-
Page 69: Example Of Moment Of Inertia Calculation
Example of moment of inertia calculation Let's discuss an example in which the chuck and workpiece are at a position offset by 10cm from the R-axis by the stay, as shown in the Fig. below. The moment of inertia is calculated with the following three factors, assuming that the load material is steel and its density ρ... - Page 70 2. Moment of inertia of the chuck Moment of inertia of the chuck When the chuck form resembles R-axis that shown in figure, the weight of the chuck (Wc) is = 0.0078 × 2 × 4 × 6 = 0.37 (kgf) The moment of inertia of the chuck (Jc) is then calculated from Eq.
-
Page 71: Attaching The End Effector
Attaching the end effector It is necessary to prepare the user's end effector attaching part to the robot that has adequate strength and rigidity, as well as gripping force to prevent positioning errors. WARNING • BEFORE ATTACHING THE END EFFECTOR, BE SURE TO TURN OFF THE CONTROLLER. •... - Page 72 Next, the following shows the recommended end effector attaching method. Attaching the end effector Hole diameter Bolt Slot Spline shaft End effector or stay 23214-F0-00 Tightening torque Robot Model Bolts used Number of bolts Hole diameter (mm) kgfcm +0.018 YK400XR M5 or more 2 or more The following shows the details of the end effector attachment of each robot.
-
Page 73: Gripping Force Of End Effector
Gripping force of end effector The gripping force of the end effector must have a sufficient extra margin of strength versus the workpiece weight and reaction force applied to the workpiece during robot operation. The reaction force applied to the workpiece during operation can be calculated from the acceleration applied to the end effector attachment. -
Page 74: Limiting The Movement Range With X-Axis And Y-Axis Mechanical Stoppers
7. Limiting the movement range with X-axis and Y-axis mechanical stoppers WARNING ALWAYS TURN OFF THE CONTROLLER BEFORE CHANGING THE MOvEMENT RANGE WITH MECHANICAL STOPPERS. CAUTION When the mechanical stopper positions are changed, the soft limits must be set to a point inside the mechanical stopper positions. -
Page 75: Installing The X-Axis/Y-Axis Additional Mechanical Stoppers
After changing the mechanical stopper positions, set the soft limits to the values shown below. Soft limits ■ Standard stopper Additional stopper Stopper position in X-axis plus or minus direction 134° 106° Maximum movement position in X-axis plus or minus direction 132°... - Page 76 Turn off the controller. Place a sign indicating the robot is being adjusted. Place a sign indicating the robot is being adjusted, to keep others from touching the controller switch. Enter the safety enclosure. Secure the bolt. Step 4 Installing to the standard stopper 23213-FK-00 Check that the movement range is Plus...
-
Page 77: Robot Overrun During Impacts With X-Axis Or Y-Axis Mechanical Stopper
Robot overrun during impacts with X-axis or Y-axis mechanical stopper The robot may overrun from the mechanical stopper position for some reason, such as deformation of the mechanical stopper during impacts with mechanical stopper. Be aware that the end effector may interfere with the robot main body and peripheral unit or the robot main body may interfere with the peripheral unit due to overrun during impacts with mechanical stopper. -
Page 78: Working Envelope
Working envelope The working envelope of each robot is shown in “1.2 External view and dimensions” of Chapter 8. X and Y axes ■ Do not use an area other than the working envelope for the work. The working envelope described in this manual shows the robot working envelope in the no-load state based on the robot front. - Page 79 Z-axis ■ Do not attempt work outside the working envelope. In particular, do not attempt work in the area between the working envelope and mechanical stopper position. Mechanical stoppers are installed at both the upper and lower ends of the movement range.
- Page 80 R-axis ■ The R-axis has no mechanical stoppers. CAUTION Since the R-axis has no mechanical stoppers, make certain that the end effector wiring and tubing do not become entangled during operation. Robot overrun during impacts with mechanical stopper ■ The robot may overrun from the mechanical stopper position for some reason, such as deformation of the mechanical stopper during impacts with mechanical stopper.
-
Page 81: Stopping Time And Stopping Distance At Emergency Stop
9. Stopping time and stopping distance at emergency stop When the emergency stop button is pressed during robot operation or the power supply to the controller is turned off, the stopping time and stopping distance or angle of the main 3 axes change depending on the operation speed as shown below. The following figures show typical time and distance or angle needed for each axis to come to a stop after a stop signal is initiated when the robot arms are fully extended while 3 types of tip mass (33%, 66% and 100% of maximum payload) are loaded. - Page 82 Z-axis stopping time (Emergency stop is activated while the Z-axis operates in the plus direction.) 0.04 1kg Z-axis 2kg Z-axis 0.035 3kg Z-axis 0.03 0.025 0.02 0.015 0.01 0.005 Operation speed (%) 23222-FK-01 Z-axis stopping distance (Emergency stop is activated while the Z-axis operates in the plus direction.) 1kg Z-axis 2kg Z-axis 3kg Z-axis...
- Page 83 R-axis stopping time (Emergency stop is activated while the R-axis operates in the plus direction.) 0.60 0.50 0.40 0.30 0.20 1kg 0.0166kgm R-axis 0.10 2kg 0.0333kgm R-axis 3kg 0.05kgm R-axis 0.00 Operation speed (%) 23224-FK-00 R-arm stopping angle (Emergency stop is activated while the R-axis operates in the plus direction.) 1kg 0.0166kgm R-axis 2kg 0.0333kgm...
-
Page 84: 10. Installing The User Wiring And Tubing Newly
10. Installing the user wiring and tubing newly Use the user wiring and tubing in the machine harness as much as possible by considering the durability of the machine harness. If the user wiring and tubing incorporated into the machine are insufficient, add new user wiring and tubing using tie bands. The following shows the outside diameters and quantities that can be added by considering the durability of the machine harness. -
Page 85: Passing The Wiring And Tubing In The User Wiring/Tubing Through Spline Type
11. Passing the wiring and tubing in the user wiring/tubing through spline type In the YK-XR series with the user wiring/tubing through spline type, the user wiring and tubing can be passed through the spline. The following Fig. shows a reference example. The wiring at the top end of the spline can be detached or attached easily when replacing the spline, R-axis speed reduction unit, or R-axis motor. Use an appropriate connector that passes through the spline with an inside diameter of φ11. -
Page 86: 12. Detaching Or Attaching The Covers
MAY BE ENTANGLED IN THE DRIvE UNIT DURING TEACHING, OR YOUR HAND MAY BE IN CONTACT THE HOT DRIvE UNIT, CAUSING BURN. TO PREvENT SUCH TROUBLES, STRICTLY OBSERvE THIS CAUTION. YK400XR Y-axis arm cover (YAMAHA’s part No.: KDS-M1314-000) Harness cover (YAMAHA’s part No.: KDS-M1312-000) Harness cover mounting bolt Hex socket head bolt M4×10, 4 pcs. - Page 87 Chapter 3 Robot settings Contents 1. Overview 2. Adjusting the origin Return-to-origin method 2.1.1 Stroke end method 2.1.2 Mark method 2.1.3 Sensor method (X-axis, Y-axis) Machine reference Return-to-origin procedures 2.3.1 Stroke end method 2.3.2 Sensor method (X-axis, Y-axis) Adjusting the machine reference value 2.4.1 Stroke end method 2.4.2...
-
Page 89: Overview
Over view Various settings have been completely made at the factory or by your distributor before shipment, including the origin position setting. If the operating conditions are changed and the robot needs to be set again, then follow the procedures described in this chapter. The following describes the safety precautions to be observed when making various settings. CAUTION •... -
Page 90: Adjusting The Origin
However, return-to-origin is required if any of the following cases occur. The robot is shipped from the factory in condition "3." (below), so please perform return-to-origin after installing the robot. For more details on return-to-origin, refer to "Return-to-origin" in the "YAMAHA Robot Controller User's Manual". -
Page 91: Return-To-Origin Method
Return-to-origin method Two kinds of return-to-origin methods, stroke end method and mark method are available for the YK-XR series as standard methods. The sensor method is optional. 2.1.1 Stroke end method In the stroke end method, return-to-origin is performed at a position slightly backed off from the stroke end, after the axis whose return-to-origin is performed contacts the mechanical stopper and stroke end is detected. -
Page 92: Mark Method
2.1.2 Mark method In the mark method, the robot is moved to a position beforehand where the return-to-origin is performed and this position is determined to the return-to-origin position. There are two kinds of methods to move the robot to a position where the return-to-origin is performed as described below. -
Page 93: Machine Reference
Machine reference The position detector of the YK-XR series uses a resolver that has five positions where the return-to-origin can be performed per motor revolution. The machine reference means the position relationship of the position where the robot detects the origin signal to the position where the reset can be performed soon after detection (see the Fig. -
Page 94: Return-To-Origin Procedures
• When pressing the key on the execution confirmation screen, the execution of the return-to-origin is canceled. • For details about how to operate the robot controller, see the "YAMAHA Robot Controller User's Manual". Turn on the controller. Check that no one is inside the safety enclosure, and then turn on the controller. -
Page 95: Sensor Method (X-Axis, Y-Axis)
• For details about how to operate the robot controller, see the "YAMAHA Robot Controller User's Manual". Turn on the controller. Check that no one is inside the safety enclosure, and then turn on the controller. - Page 96 Perform the return-to-origin. Step 6 Return-to-origin The return-to-origin execution confirmation screen pops up. Check that there are no obstacles within the movement range, and then press . To cancel the return-to-origin, press . After the return-to-origin has been completed, press to return to the "ORIGIN RTN (TRQ/ SENS)"...
-
Page 97: Adjusting The Machine Reference Value
Adjusting the machine reference value The X- and Y-axis origin positions of the YK-XR series are fixed and cannot be changed. Additionally, the machine reference value was correctly adjusted at shipment. The readjustment is not needed during normal operation. However, if the machine reference value exceeds the return-to-origin tolerance range for some reason, follow the steps below to readjust the machine reference value. - Page 98 Replace the bolts one-by-one and take great care so that the speed reduction gear and arm do not deviate. Bolt M3 x 35, (YAMAHA’s part No.: 91312-03035) 12 pcs. Secure the speed reduction gear. Secure the speed reduction gear while referring to “2.1 Replacing the X-axis harmonic drive” in Chapter 5 of the Maintenance Manual.
- Page 99 Changing the Z-axis and R-axis reference ■ Step 9 Removing the cover values Remove the cover. Remove the cover while referring to Cover "12. Detaching or attaching the covers" in Chapter 2. 23301-FK-00 Z-axis motor R-axis motor WARNING IF THE PULLEY COMES OFF FROM THE BELT, THE z-AxIS MAY DROP. BE SURE TO PROP THE z-AxIS WITH A SUPPORT STAND.
- Page 100 Go out of the safety enclosure. Turn on the controller. Check that no one is inside the safety enclosure, and then turn on the controller. Perform the return-to-origin of the Z-axis. NOTE For details about how to perform the return-to-origin, refer to "2.3 Return-to-origin procedures" in this Chapter. Check the Z-axis machine reference value.
-
Page 101: Mark Method
2.4.2 Mark method The absolute reset in the mark method is classified into four groups according to the conditions as shown in the flowchart below. Since each operating procedure varies, refer to relevant portion. Absolute reset flowchart ■ The origin is performed at the same The origin is performed at a position position as the previous absolute reset different from the previous absolute... -
Page 102: Absolute Reset In Servo On State (Re-Reset)
• For details about how to operate the robot controller, see the "YAMAHA Robot Controller User's Manual". Turn on the controller. Check that no one is inside the safety enclosure, and then turn on the controller. - Page 103 Select an axis whose absolute reset is performed. Use the cursor keys ( ) to select an axis number whose absolute reset is performed, and then press The execution confirmation screen will pop up. Perform the step movement. Press the jog key to perform the step movement of the robot until the origin position marks are matched with each other.
-
Page 104: Absolute Reset In Servo Off State (Re-Reset)
• For details about how to operate the robot controller, see the "YAMAHA Robot Controller User's Manual". Turn on the controller. Check that no one is inside the safety enclosure, and then turn on the controller. - Page 105 Move the arm to the position where the origin position marks are matched with each other. Press the emergency stop button on the PBX to put the robot in the emergency stop state. WARNING BE SURE TO PRESS THE EMERGENCY STOP BUTTON AND MOvE THE ROBOT IN THE STATE WHERE THE SERvO ON CANNOT BE OPERATED FROM THE OUTSIDE.
- Page 106 Select an axis whose absolute reset is performed. Use the cursor keys ( ) to select an axis number whose absolute reset is performed, and then press The execution confirmation screen will pop up. CAUTION • There are multiple discrete positions where the absolute reset can be performed. Move the robot step-by-step while referring to the PBx screen.
-
Page 107: Absolute Reset In Servo On State (New Reset)
• For details about how to operate the robot controller, see the "YAMAHA Robot Controller User's Manual". Turn on the controller. Check that no one is inside the safety enclosure, and then turn on the controller. - Page 108 Affix the origin position stickers. After the robot has been moved to the all axes "0" pulse position, press the emergency stop button and affix the origin position stickers to legible positions. After that, these origin position stickers are used to perform the absolute reset again at the same position.
-
Page 109: Absolute Reset In Servo Off State (New Reset)
• For details about how to operate the robot controller, see the "YAMAHA Robot Controller User's Manual". Turn on the controller. Check that no one is inside the safety enclosure, and then turn on the controller. - Page 110 Affix the origin position stickers. After the robot has been moved to the all-axis 0 pulse position, press the emergency stop switch and affix the origin position stickers supplied with the robot to easy-to-identify positions near the R-axis rotation part so that they can be used when the absolute reset is performed again at the same position. Degrease the origin position sticker affixing surfaces with alcohol.
-
Page 111: Sensor Method (X-Axis, Y-Axis)
2.4.3 Sensor method (X-axis, Y-axis) Adjusting the X-axis machine reference ■ CAUTION • The origin position may change due to machine reference adjustment. If it occurs, you must set point data again. • When the return-to-origin direction is reversed, the origin position may not be the base front. When using the standard soft limit, the axis may collide with the mechanical stopper. - Page 112 Loosen the hex nut. Step 8-10 Adjusting the X-axis machine reference value Using the wrench, loosen the hex nut that secures the X-axis origin sensor. 23307-FK-00 X-axis origin sensor CAUTION It is enough to loosen the nut. Do not remove the nut completely.
- Page 113 Adjusting the Y-axis machine reference ■ CAUTION The origin position may change due to machine reference adjustment. If it occurs, you must set point data again. Follow the steps below to adjust the Y-axis machine reference value. Prepare a wrench for a width across flat of 13 mm. Turn on the controller.
- Page 114 Loosen the hex nut. Step 8-10 Adjusting the Y-axis machine reference value Using the wrench, loosen the hex nut that secures the Y-axis origin sensor. 23308-FK-00 CAUTION It is enough to loosen the nut. Do not remove the nut completely. Move the Y-axis origin sensor as follows.
-
Page 115: Setting The Soft Limits
Press the emergency stop button on the PBX to put the robot in the emergency stop status. NOTE For details about emergency stop and how to cancel the emergency stop, see the "YAMAHA Robot Controller User's Manual". Place a sign indicating the robot is being adjusted. -
Page 116: Setting The Z-Axis Soft Limits
Setting the Z-axis soft limits CAUTION Set the Z-axis soft limits from outside the safety enclosure. The Z-axis has mechanical stoppers fixed at the upper and lower ends of the Z-axis movement range. When the actual working range of the robot is smaller than the maximum working envelope or the manipulator interferes with the peripheral equipment, reduce the Z-axis plus (+) soft limit [pulses] to narrow the working envelope. -
Page 117: Setting The Standard Coordinates
Never enter the robot movement range. Set the standard coordinates. See "Setting the standard coordinates" stated in the "YAMAHA Robot Controller User's Manual". NOTE The next section, "4.1 Standard coordinate setting using a standard coordinate setup jig (option)", describes how to set the standard coordinates more accurately using an optional setup jig. -
Page 118: Standard Coordinate Setting Using A Standard Coordinate Setup Jig
NOTE Step 5-6 Installing the Y-axis standard coordinate jig For details about emergency stop and how to cancel the emergency stop, see the "YAMAHA Robot Controller User's Manual". Place a sign indicating the robot is being adjusted. Place a sign indicating the robot is being adjusted, to keep others from operating the controller or operation panel. - Page 119 Put the X-axis arm in contact with Putting the X-axis arm in contact with the Step 9 X-axis standard coordinate setting jig the X-axis standard coordinate setting jig. Put the X-axis arm in contact with the standard coordinate setup jig as shown in the figure.
-
Page 120: Affixing The Stickers For Origin Positions, Movement Directions, And Axis Names
Affixing the stickers for origin positions, movement directions, and axis names The robot comes packed with stickers showing origin positions, movement directions and axis names. Using the following procedure, attach these stickers in conspicuous points on the robot after changing the origin position and installing peripheral equipment. Origin position stickers, direction of movement and axis name stickers Origin position stickers Direction of movement and axis name stickers... - Page 121 Sticker affixing positions (example) 23305-FK-00 3-33...
-
Page 123: Chapter 4 Periodic Inspecition
Chapter 4 Periodic inspecition Contents 1. Overview 2. List of inspection items... -
Page 125: Overview
• DO NOT ATTEMPT TO WELD, HEAT UP, DRILL HOLES OR CUT THIS CONTAINER. THIS MIGHT CAUSE THE CONTAINER TO ExPLODE AND THE REMAINING MATERIALS INSIDE IT TO IGNITE. CAUTION Unless grease specified by YAMAHA is used, the service life of the ball screw and ball spline will shorten. -
Page 126: List Of Inspection Items
ENGINEERS WHO HAvE THE QUALIFICATION IN CONFORMITY WITH "2. QUALIFICATION OF OPERATORS/WORKERS" IN SECTION 4.1 OF THE SAFETY GUIDE MUST PERFORM THE INSPECTION ITEMS REQUIRING THE COvER REMOvAL WHILE REFERRING TO THE SEPARATE YK-XR SERIES MAINTENANCE MANUAL. : Conduct. : Conduct if trouble is found as a result of inspection. - Page 127 Bolt tightening torque Bolt size Tightening torque (kgfcm) Tightening torque (Nm) M3 set screw 0.69 M4 set screw 15.3 45.0...
-
Page 129: Chapter 5 Harmonic Drive Replacement Period
Chapter 5 Harmonic drive replacement period Contents 1. Overview 2. Replacement period... -
Page 131: Overview
WARNING ENGINEERS WHO HAvE THE QUALIFICATION IN CONFORMITY WITH "2. QUALIFICATION OF OPERATORS/WORKERS" IN SECTION 4.1 OF THE SAFETY GUIDE MUST PERFORM THE HARMONIC DRIvE REPLACEMENT WHILE REFERRING TO THE SEPARATE YK-XR SERIES MAINTENANCE MANUAL. -
Page 132: Replacement Period
: Operation time per day : Operation days per year For example, when the robot is used under the following conditions, the replacement period for the X-axis harmonic drive of the YK-XR series robots can be calculated as follows. : 10 θ... - Page 133 Chapter 6 Increasing the robot operating speed Contents 1. Increasing the robot operating speed Increasing speed by arch motion Increasing the speed with the WEIGHT statement Increasing the speed by the tolerance parameter Increasing the speed by the OUT effective position parameter...
-
Page 135: Increasing The Robot Operating Speed
Increasing the robot operating speed The robot operating speed can be increased by the following methods. Use these methods as needed when programming. Increasing speed by arch motion [Also refer to:] Robot controller user’s manual ("Controller system settings" in Chapter 7) (11.5 Axis parameters Arch pulse) Programming manual ("Robot Language Lists" in Chapter 8) (ARCHP1/ARCHP2) Gate motion From point P1 to P4 via P2 and P3: MOVE P, P2 MOVE P, P3... - Page 136 Arch motion: Making the arch position value smaller In "2. Arch motion", as the arch pulse value is made further smaller, the tracking arc becomes large to further shorten the cycle time. Since the tracking draws an arc, use caution to avoid obstacles if they are located on the arm movement path.
-
Page 137: Increasing The Speed With The Weight Statement
Increasing the speed with the WEIGHT statement [Also refer to:] Robot controller user’s manual ("Controller system settings" in Chapter 7) (11.4 Robot parameters Tip weight) Programming manual ("Robot Language Lists" in Chapter 8) (WEIGHT) [Example] From P1 when chuck is open: WEIGHT 5 .... -
Page 138: Increasing The Speed By The Tolerance Parameter
Increasing the speed by the tolerance parameter [Also refer to:] Robot controller user’s manual ("Controller system settings" in Chapter 7) (11.5 Axis parameters Tolerance) Programming manual ("Robot Language Lists" in Chapter 8) (TOLE) Increasing the speed by the tolerance parameter 23605-F0 [Example] From P1 to P3 via P2... -
Page 139: Increasing The Speed By The Out Effective Position Parameter
Increasing the speed by the OUT effective position parameter [Also refer to:] Robot controller user’s manual ("Controller system settings" in Chapter 7) (11.5 Axis parameters Out valid position) Programming manual ("Robot Language Lists" in Chapter 8) (OUTPOS) [Example] From P1 when chuck is open: OUTPOS (1) = 10000... - Page 141 Chapter 7 Torque limit designated Z-axis pushing action Contents 1. Torque limit designated Z-axis pushing action...
-
Page 143: Torque Limit Designated Z-Axis Pushing Action
Torque limit designated Z-axis pushing action You can use the PUSH statement in a program to apply a Z-axis pushing action (in the direction of gravity). The table below shows the torque limit value (%) and speed limit value (%) for the motor rated torque at the tip load weights. Stay within these limit values while operating the robot. Failure to observe these limits may shorten the life of the Z-axis drive unit and the arm joint section. - Page 145 Chapter 8 Specifications Contents 1. Manipulator Basic specification External view and dimensions Robot inner wiring diagram Wiring table...
-
Page 147: Manipulator
Manipulator Basic specification Arm length 225mm X-axis ±132° Rotation angle Arm length 175mm Axis Y-axis specifications Rotation angle ±150° 150mm Z-axis Stroke R-axis Rotation angle ±360° X-axis 200W 100W Y-axis Motor Z-axis 100W R-axis 100W 6m/s XY resultant Maximum speed Z-axis 1.1m/s R-axis... -
Page 148: External View And Dimensions
External view and dimensions User wiring connector (Numbers 1 to 10 are usable.) XY-axis origin position 166 (Base size) (Sensor type) J.S.T. Connector 45.5 (120.5) When performing return-to-origin, SM connector: SMR-11V-B move both the X-axis and Y-axis Pin: SYM-001T-P0.6 is attached. counterclockwise in advance from the Use AP-K2N for the crimping machine. - Page 149 YK400XR As this hole is intended for the ↓F wiring/tubing clamp, do not φ27 attach a large load to it. 4-M3 × 0.5 through-hole (No phase relation to R-axis origin.) View of F Option User wiring and tubing routed through spline shaft. XY-axis origin position Working envelope (Stroke end type)
-
Page 150: Robot Inner Wiring Diagram
Robot inner wiring diagram Robot inner wiring diagram Machine harness User tubing User IO connector R-axis resolver Z-axis resolver Y-axis resolver R-axis motor Z-axis motor Y-axis motor RORG X-axis origin sensor YORG YORG Z-axis brake Round terminal X-axis arm Y-axis arm Y-axis origin sensor X-axis motor X-axis resolver... -
Page 151: Wiring Table
Wiring table Robot cable wiring table Signal Connector Connection Connector Color/Number Wire Resolver Orange-1-Red 0.15sq Orange-1-Black Twisted pair Gray-1-Red 0.15sq Gray-1-Black Twisted pair Sky blue-2-Red 0.15sq Sky blue-2-Black Twisted pair Gray 0.3sq Resolver Orange-2-Red 0.15sq Orange-2-Black Twisted pair Bright green-2-Red 0.15sq Bright green-2-Black Twisted pair... - Page 152 Signal Connector Connection Connector Color/Number Wire Resolver Orange-1-Red 0.15sq Orange-1-Black Twisted pair Gray-1-Red 0.15sq Gray-1-Black Twisted pair Sky blue-2-Red 0.15sq Sky blue-2-Black Twisted pair Gray 0.3sq Brake Pink-1-Red 0.15sq MB– Pink-1-Black Twisted pair Sky blue-1-Red 0.15sq Sky blue-1-Black Twisted pair Resolver Orange-2-Red 0.15sq...
- Page 153 Machine harness wiring table Signal Connector Connection Connector Color Wire Y-axis Resolver Brown 0.2mm Twisted pair White 0.2mm Twisted pair White Orange 0.2mm Twisted pair White Gray Shield Z-axis Resolver Brown 0.2mm Twisted pair Black 0.2mm Twisted pair Black Orange 0.2mm Twisted pair Black...
- Page 154 Motor wiring table Signal Color Connection Remarks Motor White Black Green/ Motor Round terminal Yellow Cable wiring table (Motor Robot cable) Signal Connection Wire 0.3sq Blue Orange Bright green Brown Gray Drain wire Origin sensor wiring table Signal Color Connection Connector +24V Brown...
- Page 156 All rights reserved. No part of this publication may be reproduced in any form without the permission of YAMAHA MOTOR CO., LTD. Information furnished by YAMAHA in this manual is believed to be reliable. However, no responsibility is assumed for possible inaccuracies or omissions.
- Page 158 882 Soude, Nakaku, Hamamatsu, Shizuoka, 435-0054, Japan Tel. 81-53-460 - 6103 Fax. 81 - 53 - 460 - 6811 Robot manuals can be downloaded from our company website. Please use the following for more detailed information. http://global.yamaha-motor.com/business/robot/ YAMAHA MOTOR CO., LTD.