
Related Manuals for Whirlpool HB124


Summary of Contents for Whirlpool HB124
- Page 1 BATHROOM VENTILATION HEATER OPERATION MANUAL HB124 HB116 Please read this Operation Manual carefully before using this machine Warning: In order to prevent damage or accident, this machine must be installed by those qualified technician recognized by the government.
-
Page 2: Important Safety Information
1.Important Safety Information ◎ Must use the appropriate power (220V-240V~/50HZ). ◎ This product must be connected to the ground wire ◎ Incorrect connection to the ground wire may cause danger . ◎ Please check the reliability of the ground wire connection and do not use your own power wire. If your plug does not match this machine, please ask qualified electrician for the acceptable outlet. - Page 3 ◎ Keep flammable or explosive substances away from this machine ◎ Do not let the kids or pets come close to this machine. Do not let the kids operate this machine. When kids are beside, do pay strictly attention to them. ◎...
-
Page 4: Installation Precautions
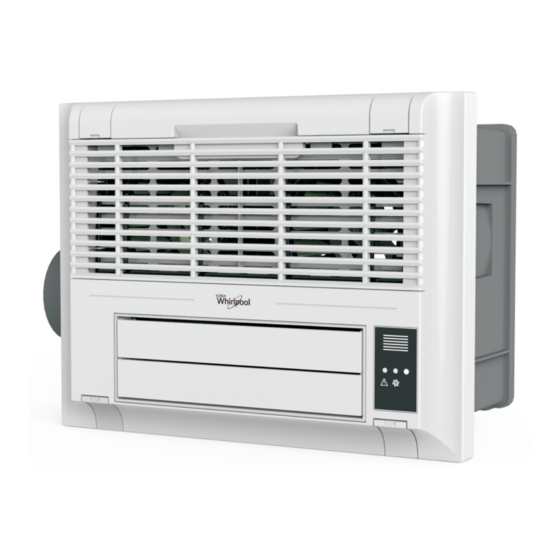
2.Installation Precautions ● This product should be installed in the place where can bear the weight of this goods. ● Incorrect installation may cause noise, empathy. Please assembly properly. ● In order not to cause the dew flowing back from exhaust pipe to the bathroom, the exhaustpipe should always be set in downward sloping to the outdoor. - Page 5 【 】 Names of the device and functions 1. Main Body Air outlet joint Main body Signal receiver Frequency button Automatic louver Front panel Screw cover Pre-filter Air inlet cover 2.Remote LCD Display Screen Oscillation Ionizer Battery exchange Time display Signal delivering 2 Hr LCD function display area...
-
Page 6: Installation Method
【Installation Method 】 A. Ceiling fixed frame method Air outlet joint Over 5cm Exhaust pipe Main body Downdip 1-2 Over 50cm to the wall Inspecttion opening ●Installation reference picture: Self-tapping screw(4 pieces) Front panel Screw hole 2,4,7,9 for Screw hole 3 Install the Fixed Frame to the ceiling. - Page 7 【 Installation Method】 B.Ceiling Type Method Install t he Main Body : ■ Fix the Main Body to the Boom ( Recommend Boom M6 if necessary). 1.Screw 2.Nut 3.Washer 4The machine fixed hole 5.Hooded Nut 2) Install the Exhaust Pipe ■...
- Page 8 【 Installation Method】 C.Window type method (Wall) (Aluminium window) Size of the Front Panel: (Water resistance housing) 300mm x 400mm Front panel Size of the frame of the Window: 300mm x 400mm (Aluminium window) The thickness of the Main Body: 164mm *Window type installation must be transverse installation.
- Page 9 【 Installation Method】 D.Wall mount type method 1) Applicable to the bathroom without ceiling. 2) Firstly set the support stick transverse stability to the wall, then embed the Main Body on the support. 3) Set the exhaust pipe (4“(100mm))to the glass window. Fix the exhaust pipe to the air outlet joint with tape or metal clamp.
- Page 10 【The frequency matching description】 1) Wireless remote control has unique ID code corresponding to each of the particular receiver, so the frequency matching is necessary. 2) Remote control and the machine has been matched frequency during assembling. Please open the back cover of the remote control and install the battery and lock the cover then use the remote control.
-
Page 11: Air Exhaust
【 Air Exhaust 】 Please avoid the following situations when installing the exhaust pipe. 1) Over bending. 2) Bending too much. 3) The bend of the pipe comes too close to the main body. 4) The bend shrinks. Bending too much 3. (Minimum 200mm) 1.Over bending 4.The bend shrinks The bend of the pipe... - Page 12 【INSTRUCTIONS】 Operation Mode Default FUNCTION APPLICATION Circulation Fan Exhaust Fan HEATER Super High 1.Heat (Super) Quick Heat 2450W/1700W 2 Hours Speed Run High Speed Heat (High) Warm Air 2250W/1550W 2 Hours Low Speed Heat (Low) Warm Air 1600W/1200W 2 Hours Super High 2.Vent(Super)...
-
Page 13: Function Descriptions
【Function Descriptions】 1) HEATING Function - Quick Heat Press the “Quick Heat” button, then the LCD displays the “Quick Heat” function icon, air volume will run the mode of “Super”. Timer: the default time is 2 hours. By pressing “Timer” up or down button to select time duration. - Page 14 【Function Descriptions】 3) DRY Function - Super / High / Low Press the “Dry” function, the LCD displays “Dry” icon, the air volume will run at “Super” mode. Press the button again to select “Hi”, or “Lo” air volume. Timer: the default time is 4 hours. By pressing “Timer” up or down button to select time duration.
- Page 15 【Function Descriptions】 Delay Vent Function Start: press “Delay Vent” button, LCD “Vent” function displays, and starts running. The default mode will run 15 minutes before it stops. Stop: press “Stop” button, and LCD “Vent” function and timer will turn off, and the machine will stop automatically.
- Page 16 【Maintenance and Safety Items】 ■ Maintenance: ● Please do turn off the power before maintenance. ● Please clean the front panel. front panel filter ○ Please use the soft rag or soft brush to clean the dirty place of the panel. ○...
-
Page 17: Products Specification
If any item in the English Version is different from the Chinese Version, please refer to the Chinese Version. The latest operation manual will be based on the url www.whirlpool.com.hk. Test method:measure the data one meter respectively from the front, left and right side in the low-vent inside the Noise Test Room and calculate the average data by formula.