Quick Links
(Moving) Performing white horses : Assembly Instructions
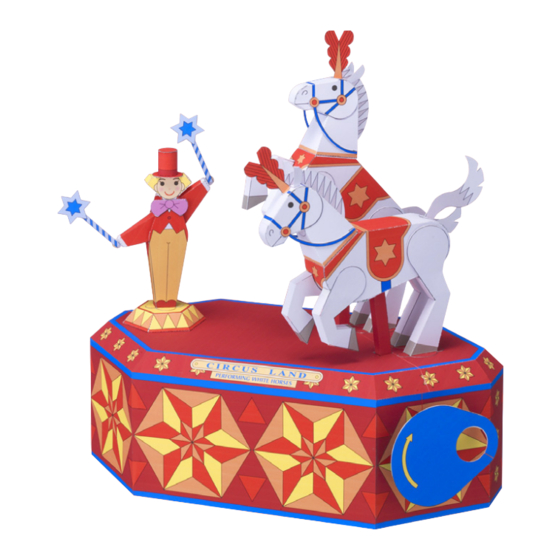
View of completed model
Assembly Instructions : Twelve A4 sheets (No. 1 to No. 12)
* Build the model by carefully reading the Assembly Instructions , in the parts sheet page order.
*Hint: Trace along the folds with a ruler
and an exhausted pen (no ink) to get a sharper, easier fold.
Assembly Instructions
Mountain fold(dotted line)
Make a mountain fold.
Valley fold(dashed and dotted line)
Make a valley fold.
Scissors line(solid line)
Cut along the line.
Cut in line(solid line)
Cut along the line.
Scissors, set square, glue(We recommend stick glue), pencil, used
Tools and materials
ballpoint pen, toothpicks, tweezers, (useful for handling small parts)
Before gluing, crease the paper along mountain fold and valley
Assembly tip
fold lines and make sure rounded sections are nice and stiff.
Glue, scissors and other tools may be dangerous to young children
Caution
so be sure to keep them out of the reach of young children.
* Turn the handle to make
the horses prance in time
with the trainer's baton.
Glue
The glue spot(colored dot)
shows where to apply the glue.
Glue spot(Red dot)
Glue parts with the same number together.
Glue spot(Green dot)
Glue within the same part.
Glue spot(Blue dot)
Glue to the rear of the other part.
©
Canon Inc.
Before starting assembly : Writing the number of each section on
its back side before cutting out the sections is highly recommended.
(* This way, you can be sure which section is which even after
cutting out the sections.)
Round bar : Use to give parts a curved surface.
Tweezers : Useful in working with fine parts.
Caution :
Performing horses' tricks require two pieces of thread, approximately 20cm long. Use silk or other durable thread.
Caution :
Spread glue in
a thin even layer,
then glue parts 7
and 8 to the base.
©
Hideharu Naitoh & G&P
Indicates where sections should be glued together.
Indicates where to insert sections.
Do not glue the sections together.
Indicates the order for assembling parts.
Cut along the line.
Be sure to build
this model carefully.
Glue parts 7, 8, and 10 to
the reverseside of part 1.

Related Manuals for Canon CREATIVE PARK (Moving) Performing white horses


Summary of Contents for Canon CREATIVE PARK (Moving) Performing white horses
- Page 1 (Moving) Performing white horses : Assembly Instructions © © Canon Inc. Hideharu Naitoh & G&P Indicates where sections should be glued together. Before starting assembly : Writing the number of each section on its back side before cutting out the sections is highly recommended.
- Page 2 (Moving) Performing white horses : Assembly Instructions © © Canon Inc. Hideharu Naitoh & G&P Caution : When viewed from the side, parts 16 and 17 should be aligned exactly.
- Page 3 (Moving) Performing white horses : Assembly Instructions © © Canon Inc. Hideharu Naitoh & G&P Parts 16, 17, and 18 Align the star marks when gluing part 14 to part 8. Caution : Do not attach the front (part 3) and back (part 6) to the base at this stage.
- Page 4 (Moving) Performing white horses : Assembly Instructions © © Canon Inc. Hideharu Naitoh & G&P Caution : Align the colored flaps when gluing parts 20 and 22. Wrap the end of a 20cm piece of thread around Glue the thread firmly the axle two or three times.
- Page 5 (Moving) Performing white horses : Assembly Instructions © © Canon Inc. Hideharu Naitoh & G&P Parts 20 to 22 Parts 23 to 26 Make two sets. Make two sets. Make two sets.
- Page 6 (Moving) Performing white horses : Assembly Instructions © © Canon Inc. Hideharu Naitoh & G&P Caution : Hold the horses' bodies (part 30) flat to prevent warping as you glue on the other parts. Confirm movement. Parts 40 and 41 Make two sets.
- Page 7 (Moving) Performing white horses : Assembly Instructions © © Canon Inc. Hideharu Naitoh & G&P Caution : Fold the legs carefully as you glue them together to prevent twisting. Make two sets. Make two sets.
- Page 8 (Moving) Performing white horses : Assembly Instructions © © Canon Inc. Hideharu Naitoh & G&P Caution : Do not attach part 28 and parts 42 through 44 at this stage. Make two sets. Caution : Glue the legs so that they are exactly aligned when viewed from the side.
- Page 9 (Moving) Performing white horses : Assembly Instructions © © Canon Inc. Hideharu Naitoh & G&P Insert the support under each horse into the square hole in the base and glue the hind legs in place. * Horses are easier to attach if you glue one leg at a time.
- Page 10 (Moving) Performing white horses : Assembly Instructions © © Canon Inc. Hideharu Naitoh & G&P Insert the end of the 20cm thread into the Caution : Take care when cutting slot and glue it firmly out the circular holes to in place.
- Page 11 (Moving) Performing white horses : Assembly Instructions © © Canon Inc. Hideharu Naitoh & G&P With parts A and B in positioned as illustrated below, insert both threads through the slot on part 27 and lightly take up the tension on both threads.
- Page 12 (Moving) Performing white horses : Assembly Instructions © © Canon Inc. Hideharu Naitoh & G&P Parts 50 to 52 Finished! Glue on all the remaining parts.