
Related Manuals for Sony GBL-T3


Summary of Contents for Sony GBL-T3
- Page 1 Adjusting the gimbal parameters (GBL-T3) Airpeak gimbal setting guide...
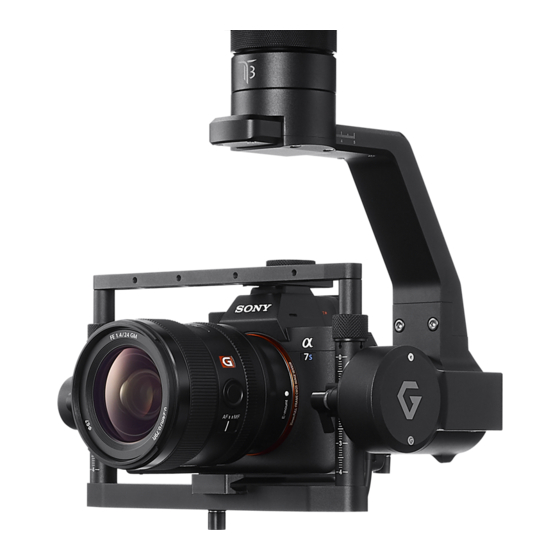
- Page 2 Overview Correct adjustment of the gimbal is essential for proper use. Please review the following explanation and make any necessary changes to the gimbal’s settings. Please refer to Help Guide for the instructions on how to mount and use the gimbal. Preset of motor parameters .
- Page 3 Preset of motor parameters To use the gimbal correctly, you need to enter the appropriate motor parameters for your camera and lens. This section describes how to manually enter motor parameters and how to apply presets all at once. Sections: 1.
- Page 4 Manual adjustment of motor parameters If the motor parameters of the gimbal do not match due to the difference in weight when the camera is equipped with accessories (such as a hood, a filter, etc.) or the individual differences in the gimbal, you need to manually adjust the motor parameters.
- Page 5 2. Connect gimbal to PC Before motor parameter adjustment, please double check the gimbal is properly balanced. If it is not balanced, refer to Startup Guide or Help Guide and try the balance adjustment again. Control cable needs to be disconnected during motor parameter adjustment. With the power source of Airpeak turned off, disconnect one side of the control cable as shown in the image below.
- Page 6 3. Start gTuneDesktop and input initial parameter Start “gTuneDesktop”, select Gremsy T3, then press the [CONNECT] button. After connecting, the screen will switch to [SETTINGS]. Press the Lock button at the top left of the screen. Note: All subsequent operations must be performed in Lock mode. Airpeak gimbal setting guide Manual adjustment of motor parameters...
- Page 7 3. Start gTuneDesktop and input initial parameter (continued) Depending on the model of camera used, set the following motor parameters for both [BASIC] setting and [EXPERT] setting. Table of Motor parameters for initial setting (Except ILCE-7C) TILT STIFFNESS ROLL BASIC SETTING GYRO FILTER FILTER...
- Page 8 4. Adjust motor parameters on each axis Adjust the motor parameters on each axis in the following order to get a proper response without any overshoot on the graph: TILT ROLL Check the graph. A. Press the [MONITOR] button to switch to the MONITOR screen. B.
- Page 9 4. Adjust motor parameters on each axis (continued) TILT axis parameter adjustment. A. While holding the gimbal so that it doesn’t roll, push the TILT axis of the gimbal directly by hand and move it up to +10 degrees (Angle of the TILT axis will be displayed at the top of BASIC setting screen).
- Page 10 4. Adjust motor parameters on each axis (continued) Hint: The graph screen on the right figure below, you can see that the graph goes over the center part and penetrates to the lower side (so-called “overshoot”). NO Overshoot Overshoot Hint: In the left figure below, there is no overshoot in the positive direction, but there is in the negative direction.
- Page 11 4. Adjust motor parameters on each axis (continued) ROLL axis parameter adjustment. In the same sequence as TILT axis adjustment, tune the parameter in ROLL axis. While holding the gimbal so that it doesn’t (+10) move in PAN axis, push the left side of the (-10) gimbal’s ROLL axis down with your hand until it reaches ±10 degrees.
-
Page 12: Check The Image
5. Check the image Turn on the controller and the mobile device, then check the image of main gimbal with Airpeak Flight. Make sure that there is no oscillation on the screen. If oscillation occurs, identify which axis is vibrating by decreasing axis value of each axis around 20 in BASIC setting of gTuneDesktop. Once you find the vibrating axis, adjust the value by around 5 to 10, then re-check the image on Airpeak Flight. - Page 13 6. Trouble shooting (continued) The temporary vibration occurs in the image With quick acceleration or slow down, the image may temporarily vibrate. This may be avoided by taking the following actions: • Decrease STIFFNESS value by 5 to 10. • Increase HOLD STRENGTH value. Do not set the value higher than 55. If you change the HOLD STRENGTH value, you need to adjust the STIFNESS value as well.
- Page 14 Calibration Here are the steps to execute Gyro calibration of the IMU sensor. Normally, it is not necessary to do this calibration. Only do this if you experience symptoms of drift such as camera cannot be leveled, angle gradually shifts, etc. Please install PC software “gTuneDesktop”...
- Page 15 Hint: When the initial position of gimbal is not level The angle can be adjusted with the controller. • Use a remote controller in operation role “Sub”. • Tap “Settings” in the top right on “Airpeak Flight”. • Tap “Remote controller” in the displayed setting menu. •...
- Page 16 © 2021 Sony Electronics Inc. All rights reserved. Reproduction in whole or in part without written permission is prohibited. Sony, and the Sony logo are trademarks of Sony Corporation. All other trademarks are trademarks of their respective owners.