Table of Contents
Table of Contents

Related Manuals for Yamaha ADVENTURE PRO

Summary of Contents for Yamaha ADVENTURE PRO
- Page 1 Owner’s Manual...
- Page 2 Be sure to read this guide as well as the owner’s/operator’s manuals for any vehicle in which you will use this device. The driver or passenger should enter data or program the Adventure Pro receiver only when the vehicle is stopped.
-
Page 3: Table Of Contents
GPS & Cradle Overview .........06 Track Details ..........17 Accessories Overview ........07 Expand/Contract Map View ......17 Mounting to a Yamaha Vehicle ......08 Following a Track ..........17 Battery/Power in your Vehicle .......09 Share a Track ..........18 Battery/Power Outside of your Vehicle ..10 Create a Course from a Track .......18... -
Page 4: Safety Information
Table of Contents. Search Results/Share ........24 TIMING MODE ........34 Create a New Course ........35 Search Results/Follow/Go ......24 Loop Course ..........35 MAP & NAVIGATION ......25 Map Screen Overview ........25 Sprint Course ..........35 Panning the Map ...........26 Course Waypoints ..........35 Map Zoom ............26 Start a New Session ........36 Select a Point on Map ........26... - Page 5 Table of Contents. Navigation ............41 Service Alerts ..........42 History ............42 Wi-Fi ..............42 Product Information ........43 CAMERA ..........44 Open Android ..........44 Open the Camera App ........44 Open Camera Settings ........44 Camera Settings ..........44 Taking Photos ..........45 Taking Videos ..........45 View Photos & Videos ........45...
-
Page 6: Hardware
Hardware. Cradle Front Cradle Back 1. Front camera lens 9. Rear microphone 2. Light sensor 10. Mini-USB port 3. POWER button 11. Speaker 4. Volume buttons (+ / -) 12. CAN Bus harness connector 5. Front microphone 13. Quick release button 6. -
Page 7: Accessories Overview
Hardware. 1. Adventure Pro GPS Navigator 5. Adventure Pro cradle with Can-bus harness 2. Vehicle power adapter 6. RAM Torque mount 3. AC power adapter 7. RAM sizing inserts 4. micro USB Cord 8. Hex key... -
Page 8: Mounting To A Yamaha Vehicle
Hardware. ATTACH MOUNT TO YAMAHA VEHICLE • Using the supplied allen tool attach the torque ring to the passenger grab bar. • Attach the mount arm to the torque ring • Attach the mount base plate to the GPS cradle CONNECT CRADLE TO MOUNT •... -
Page 9: Battery/Power In Your Vehicle
GPS will only use the internal battery power that can last up to 4 days* from a fully charged state. If 1. Make sure the Adventure Pro GPS navigation system the vehicle is powered on within that time frame the GPS is properly attached to the power cradle. -
Page 10: Battery/Power Outside Of Your Vehicle
Hardware. Your Adventure Pro GPS navigation system can be removed from the vehicle cradle and used on internal battery power. The internal lithium ion battery is 2400mAH and has a battery life up to 4 days or 96 hrs from a full charge. -
Page 11: Getting Started
Getting Started. The first time you use your new Adventure Pro system you will be asked to: 1. Review and agree to the End User License Agreement. 2. Set up a Wi-Fi network connection. 3. Set up a new user account and register your GPS. -
Page 12: Updates
Android installation steps Once the software update is installed, the Adventure Pro software will reopen and ask you to download Resources. Click Start Download. MAP UPDATES You will see a progress bar across the bottom of the Updates screen as the map update downloads. -
Page 13: Create Account
Note: you must be connected to a Wi-Fi network to create an account. You do not have to create an account in order to use your Yamaha Adventure Pro, but it is recommended. On the Create Account page, you will be asked to enter an email address and password to create your new account. -
Page 14: Dashboard
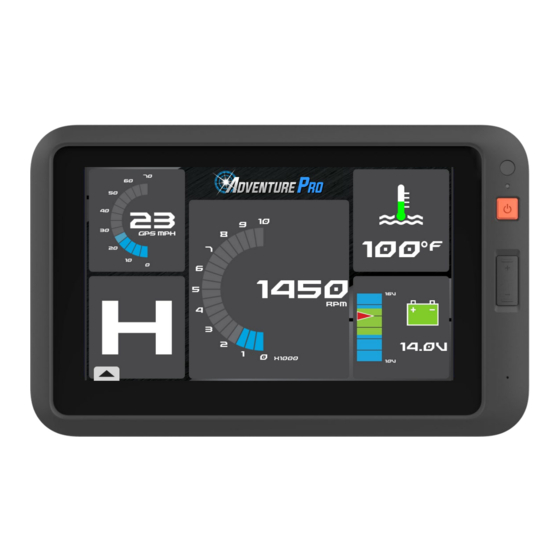
Dashboard. DASHBOARD OVERVIEW Journal: Contains your Log & Plans. Your Yamaha Adventure Pro will always start and open on the dashboard. The dashboard displays five default instruments. The Search: Search for Trails, Tracks, dashboard layout is customizable. To change POIs, etc. -
Page 15: Yamaha Instruments
Dashboard. YAMAHA INSTRUMENTS Yamaha instruments are designed to be used when connected to your Yamaha vehicle. The instruments receive and display data from your vehicle’s on-board computer and sensors. CHANGE DASHBOARD INSTRUMENTS To change any of the five default dashboard instruments press/hold on the instrument(s) you want to change. -
Page 16: Journal
Journal. JOURNAL OVERVIEW The Journal is where your GPS track recordings, waypoints and saved searches are stored. There are two parts to the Journal: Logs and Plans. JOURNAL/LOGS Logs contain Personal Tracks, Waypoints and Trip Folders The Logs section of the Journal stores all of your GPS track recordings and waypoints. -
Page 17: Logs
Log. TRACKS Tracks are your recorded GPS paths saved to your Log. Tracks can contain waypoints saved along the Active Track. ON THE MAP: Dashed purple line TRACK DETAILS On the left-hand side of the screen the track details show a map preview of the full extent of the track file, the trail-heads and any waypoints attached to the track. -
Page 18: Share A Track
Log. SHARE A TRACK Make sure you are connected to Wi-Fi and press the SHARE button to share your data on connected social networks such as Twitter or Facebook. CREATE COURSE FROM A TRACK Press Create Course to convert a track into a course to record new sessions in timing mode. -
Page 19: Create A New Trip Folder
Log. CREATE A NEW TRIP FOLDER Press to open the Log edit options. Press ADD ENTRIES TO A TRIP FOLDER Select Add Entries to select the items from your Log you want to put into the trip folder. Items are copied into the folder, creating a duplicate of the original. -
Page 20: Export Gps Files
Log. IMPORT GPS FILES You can import GPX or USR file types from internal storage or from a microSD card. Select the origin and choose the file(s) to be imported. Select IMPORT. The files will be added into a folder in your Logs. EXPORT GPX FILES Press to open the Log edit options. -
Page 21: Plans
ON THE MAP: Solid orange line SHARED TRACKS Shared tracks are tracks recorded by other Yamaha Adventure Pro or Magellan TRX users and published for all OHV enthusiasts to use. Shared tracks are helpful but should always be used with extreme caution. -
Page 22: Search
Search. SEARCH Enter keywords, an address and/or select a category to search for. You can also set a specific location to search around. SEARCH CATEGORIES SET SEARCH LOCATION By default your GPS will search around your current location (Nearby). You can change it to the location you want to search around. -
Page 23: Search Location/Near Point On Map
Search. SEARCH LOCATION/NEAR POINT ON • Press the option for Near Point on Map. • Tap on the screen to place a point on the map. • Press OK or Clear Point. • Continue your search by entering an address, keyword or by selecting one of the search categories. -
Page 24: Search Results/Info
Search. SEARCH RESULT/INFO The Info screen displays the search result on the map and the detailed info on that item on the right of the screen. • Choose to Save, Share or Follow/Go. SEARCH RESULT/SAVE Select Save to save the item to your Plans folder. SEARCH RESULT/SHARE Select to post the item to your connected... -
Page 25: Map & Navigation
Map & Navigation. MAP & NAVIGATION OVERVIEW The map screen consists of a top navigation Instruments: There are bar, tracking controls and map controls. two instrument boxes to display various NAVIGATION BAR data options you want on the map while you navigate or track. -
Page 26: Panning The Map
Map & Navigation. PANNING THE MAP • Press and drag the map to move/pan to another location. • Press to return to your current position. MAP ZOOM Zoom range is 120ft - 2070mi. • Press “+” to zoom in closer to ground level. •... -
Page 27: Map Options
Map & Navigation. MAP OPTIONS Press to open the map options. SWITCH 2D/3D VIEWS Select between a 2D topographic basemap or 3D terrain view basemap. ADDITIONAL MAP OPTIONS Turn on and off content layers to customize your map view. -
Page 28: Waypoints
Map & Navigation. WAYPOINTS Set waypoints along a trail, track or course to mark important locations. Waypoints recorded while recording a track or course are Quick Waypoints and are attached to that track in your Log or the course in your course history. -
Page 29: Audio Waypoints
Map & Navigation. AUDIO WAYPOINTS • When Paused, click • Next to Audio Waypoint, click to begin recording your audio waypoint. • Press to stop the recording. • Press SAVE and complete any additional details you want to capture. SET WAYPOINT AT CURRENT LOCATION •... -
Page 30: Record A Track
Map & Navigation. RECORD A TRACK • Open the map. • Press button to start recording a track. Your active track will display on the map as a line of blue dots following your current position. ON THE MAP: Dotted blue line PAUSE TRACKING •... -
Page 31: Finish And Save A Track
You can turn on street navigation in Settings if you plan to use the Yamaha Adventure Pro in a street legal vehicle. TURN ON STREET NAVIGATION • On the Menu Bar, select Settings. -
Page 32: Follow A Trail
Map & Navigation. HOW TO FOLLOW A TRAIL • Select a trail from a search result, your plans folder or by selecting one on the map. • In the trail info window, select Follow. • Choose the trailhead that you want to start •... -
Page 33: Follow A Custom Route
Map & Navigation. HOW TO FOLLOW A CUSTOM ROUTE • Select a route from your Plans folder. • In the Route info window, select Follow. • Choose the trailhead you want to start at. • A straight, point-to-destination line will be drawn from your current position to the selected trailhead. -
Page 34: Timing Mode
Timing Mode. SESSION HISTORY: TIMING MODE. This function gives you the ability to measure View timing measurements and vehicle your driving time automatically using the GPS performance data from past Sessions. signal, record your history with in-vehicle STORED COURSES: information for your review, and share on YamahaAdventurePro.com. -
Page 35: Create A New Course
Timing Mode. CREATE A NEW COURSE. Tap Create New Course when you get to the location where you want to set as the Starting Line. Tap Set Starting Line and begin driving through the Course you want to create. LOOP COURSE If you are creating a Loop Course, the system will automatically recognize the Finish Line when you return to the Starting Line. -
Page 36: Start A New Session
Timing Mode. START A NEW SESSION Tap Stored Courses > Select a Course you want to race >Tap New Session > Tap Start > measurements will start automatically when you get to the Starting Line. LAPS Laps are the number of times you go around a Loop Course. -
Page 37: Session History
Timing Mode. SESSION HISTORY • Session History shows a chronological listing of your recorded sessions. • Press Session History. • Select a Session you want to review. CLEAR HISTORY • Press Clear History. • Check the box for any sessions you want to delete. -
Page 38: Settings
Settings. OPEN ANDROID Select this option to exit the Yamaha Adventure Pro software into the Android operating system. To re- enter the Yamaha Adventure Pro software, select the Yamaha Adventure Pro app icon. SOFTWARE UPDATE • Make sure you are connected to Wi-Fi. -
Page 39: Account Profile/Product Registration
• Select Edit to add a photo of your vehicle. • Select Active Vehicle. • Select Save. SOCIAL NETWORKS • Press Social Networks. • Press the + symbol next to any of the social networks that you want to link to your Adventure Pro account. -
Page 40: Link To Twitter
Settings. LINK YOUR TWITTER ACCOUNT • Press Social Networks. LINK YOUR INSTAGRAM ACCOUNT • Press Social Networks. LINK YOUR FACEBOOK ACCOUNT • Press Social Networks. ACHIEVEMENTS Achievement badges are earned for locations visited and usage milestones. To view your current achievements press Achievements. -
Page 41: General
View contact information to get support for your Yamaha Adventure Pro. Press the support URL to open the support pages for Adventure Pro to search and read more how to articles and video tutorials. MAP DISPLAY Set preferences for 2D/3D, map orientation and to turn ON/OFF the north up and zoom buttons on the map screen. -
Page 42: Service Alerts
Settings. SERVICE ALERTS Your Adventure Pro will prompt you with any service alerts or fault codes that require your attention. - Press Dismiss to close the alert dialog box. REVIEW OR CLEAR SERVICE ALERTS To review service alerts go to Settings and open the Service Alerts option. -
Page 43: Product Information
Settings. PRODUCT INFORMATION Hardware and software model and version numbers. End-User License Agreement. -
Page 44: Camera
Camera. OPEN ANDROID From the Yamaha Adventure Pro software: 1. Select Settings from the menu bar. 2. Press Open Android in the top right of the Settings screen. 3. Press the Apps button in the right hand menu. OPEN THE CAMERA APP Select the Camera app from the Android Apps menu. -
Page 45: Taking Photos
Camera. TAKING PHOTOS Press the camera button to take a photo. Press the menu button to access flash, HDR and timer settings. After you take a photo an icon will appear at the top of the screen to open your photo gallery. TAKING VIDEO Press the video camera icon to begin recording. - Page 46 Need Technical Support? Go to AdventureProSupport.com for online troubleshooting and feedback. If you can’t find a solution there, e-mail us at [email protected] or call Yamaha Motor Corporation USA Customer Relations Department at 1-800-962-7926. Connect with us @YamahaOutdoors Yamaha Motor Corporation U.S.A.