Table of Contents
Available languages
Available languages
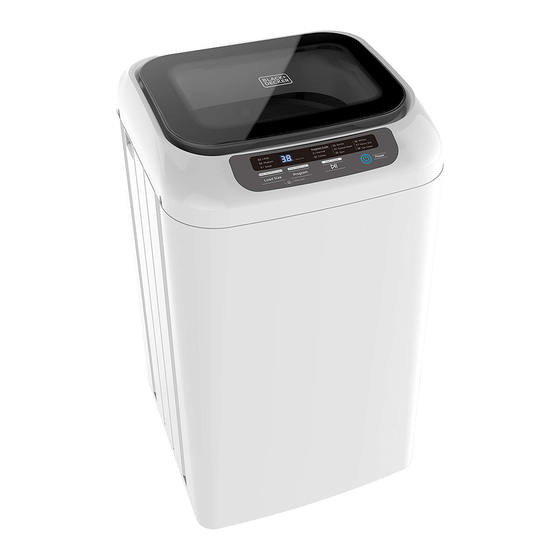
0.84 CU. FT. PORTABLE WASHING MACHINE
INSTRUCTION MANUAL
CATALOG NUMBER
BPWH84W
Thank you for choosing BLACK+DECKER!
PLEASE READ BEFORE RETURNING THIS PRODUCT FOR
ANY REASON.
If you have a question or experience a problem with your BLACK+DECKER
purchase, go to www.blackanddecker.com/instantanswers
If you can't find the answer or do not have access to the Internet, call
844-299-0879 from 10:30 a.m. to 6:30 p.m. EST Mon. - Fri. to speak with an
agent. Please have the catalog number available when you call.
SAVE THIS MANUAL FOR FUTURE REFERENCE.
Page 1
Table of Contents
Troubleshooting

Related Manuals for Black & Decker BPWH84W


Summary of Contents for Black & Decker BPWH84W
- Page 1 0.84 CU. FT. PORTABLE WASHING MACHINE INSTRUCTION MANUAL CATALOG NUMBER BPWH84W Thank you for choosing BLACK+DECKER! PLEASE READ BEFORE RETURNING THIS PRODUCT FOR ANY REASON. If you have a question or experience a problem with your BLACK+DECKER purchase, go to www.blackanddecker.com/instantanswers If you can’t find the answer or do not have access to the Internet, call...
- Page 2 Page 2...
- Page 3 CONTENTS SAFETY INFORMATION Important Safety Instructions ............................4-6 Installation Warnings and Precautions ........................6-7 Grounding Instructions ................................5 Usage and Maintenance Warnings and Cautions ....................8-11 SET UP & USE Parts & Features ..................................13 Installation Guide ................................15-19 Operation Guide ................................20-25 CLEANING & CARE .............................
- Page 4 SAFETY INFORMATION DANGER WARNING CAUTION DANGER - Immediate hazards WARNING - Hazards or unsafe CAUTION - Hazards or unsafe which WILL result in severe practices which COULD result in practices which COULD result in personal injury or death severe personal injury or death minor personal injury IMPORTANT SAFETY INSTRUCTIONS WARNING...
- Page 5 SAFETY INFORMATION 13. Under certain conditions, hydrogen gas may be produced in a hot water system that has not been used for 2 weeks or more. HYDROGEN GAS IS EXPLOSIVE. If the hot water system has not been used for 2 weeks or more, before using a washer or combination washer-dryer, turn on all hot water faucets and let the water flow from each for several minutes.
- Page 6 SAFETY INFORMATION INSTALLATION WARNINGS AND PRECAUTIONS Plug the power cord into an AC 120V/60Hz wall socket rated at 15amps or higher. Use the socket for this washer only. 2. Do not use an extension cord. - Sharing a wall socket with other appliance, using a power strip, or extending the power cord may result in electric shock or fire.
- Page 7 SAFETY INFORMATION 15. If the washer is moved to a new location, have it checked and re-installed by a qualified service technician. - Failing to follow this warning may result in electric shock or fire. 16. Do not install on carpet. Install washer on a level and solid floor that can support its weight.
- Page 8 SAFETY INFORMATION USAGE AND MAINTENANCE WARNING If the appliance is flooded, cut the power immediately and contact your nearest service center. 2. If the appliance emits a strange noise, a burning smell, or smoke, unplug the power plug immediately and contact your nearest service center. - Failing to do so may result in electric shock or fire.
- Page 9 SAFETY INFORMATION USAGE AND MAINTENANCE WARNING 13. Do not attempt to repair, disassemble, or modify the appliance yourself. - Do not use any fuse (such as cooper, steel wire, etc.) other than the standard fuse. - If you need to repair or reinstall the appliance, contact your nearest service center.
- Page 10 SAFETY INFORMATION USAGE AND MAINTENANCE CAUTION Unplug the power plug when the appliance is not being used for long periods of time or during a thunder/lightning storm. - Failing to do so may result in electric shock or fire. 2. Keep hands and foreign objects clear of the lid and latch area when closing the lid.
- Page 11 SAFETY INFORMATION 14. Do not spray volatile material such as insecticide onto the surface of the appliance. - As well as being harmful to humans, it may also result in electric shock, fire, or problems with the product. 15. Do not place an object that generates an electromagnetic field near the washer. - This may result in injury due to a malfunction.
- Page 12 SAFETY INFORMATION UNPACKING AND REMOVING SHIPPING MATERIAL Remove the packing box and lift the washer up and away from the foam base cushion. Open the lid of washer to take out all accessories including protection foam. Foam Base Cushion Protection Foam WARNING: Packaging materials can be dangerous to children;...
- Page 13 SET UP & USE PARTS & FEATURES Inner Safety Lid Top lid Control panel Bleach Inner Safety Dispenser Lid Lock Adjustable Leg Cold Water Inlet Power cord wrap Drain Hose Power Cord Drain Outlet Rollers Page 13...
- Page 14 Quick connection adaptor Inner safety lid Drain hose SET UP & USE Owner's manual Water supply hose Locking hinge PARTS INCLUDED Quick connection adaptor Inner safety lid Drain hose Owner's manual Water supply hose Locking hinge Adjustable pliers Phillips screwdriver Level or spanner wrench Quick connection adaptor...
- Page 15 SET UP & USE CHOOSE THE PROPER LOCATION FLOORING For best performance, you must install your washer on a solidly constructed floor. Wood floors may need to be reinforced to minimize vibration and/or unbalanced load situations. - Carpeting and soft tile surfaces are contributing factors to vibration which can cause your washer to move slightly during the spin cycle.
- Page 16 SET UP & USE CHOOSE THE PROPER LOCATION WATER To correctly fill your washer in the proper amount of time, water pressure of 14 to 70psi (100 to 500 kPa) is required. Water pressure less than 14psi may cause water valve failure, or may not allow the water valve to shot off completely, or may extend the fill time beyond what your washer controls allow, causing your washer to turn off and alarm error.
- Page 17 SET UP & USE Step 2: Install the Inner Safety Lid Insert the right pin of the inner lid into the slot of the tub cover (1) . Top Lid Tub Cover Insert the locking hinge into the slot on the front of the lid (2) Make sure the locking hinge is pushed firmly into place as shown (3) Before operating the washer the inner safety lid should be locked (4) Page 17...
- Page 18 SET UP & USE Step 3: Connect the water supply hose TEMPORARY CONNECTION • The Quick Connection Adaptor is primarily for quick connection to a single faucet, such as a typical kitchen sink, in cases where the washer is stored in a different place than where it is used.
- Page 19 Rubber gasket Pull down on the white ring Rubber gasket Inner threads for oute to divide the adaptor into Pull down on the white ring two parts. Inner threads for oute to divide the adaptor into Top part: Faucet fitting two parts.
- Page 20 SET UP & USE Pulsator Step 5: Leveling your washer See if the washer is level by checking the position of the tub or using a leveling gauge. 1. Slide the washer into position. 2. Open the lid of the washer, and pour the water into the tub to just below the pulsator level.
- Page 21 SET UP & USE CONTROL PANEL 1. Power Press the POWER button once to turn ON the power to the washer. Press again to turn OFF the unit. 2. Start/Pause Press Start/Pause once to start the wash cycle. Press again during operation to PAUSE the cycle.
- Page 22 SET UP & USE CONTROL PANEL 6. Delay Start (Press 3 sec.) You can delay the start of the wash cycle for 2-24 hours. Activate Delay Start by pressing the button for 3 seconds. You will see”2” on the digital display which stands for 2 hours.
- Page 23 SET UP & USE WARNING To reduce the risk of electric shock, or injury to persons, read the important safety instructions before operating this appliance. WASHING A LOAD OF LAUNDRY WARNING: Operate with cold water only. Step 1: Power on your washer Press the POWER button to power your washer on.
- Page 24 SET UP & USE Step 4: Select your desired cycle and options Select your desired wash program: 01 (Normal), 02 (Cotton), 03 (Gentle), 04 (Speed Wash), 05 (Spin), 06 (Whites), 07 (Heavy Soil), 08 (Tub Clean). The digital display will show the number you have selected. Select the load size based on 01 (Small), 02 (Medium), and 03 (Large) loads If you would like to add additional rinse times press and hold Rinse...
- Page 25 SET UP & USE RINSE & SPIN CYCLE GUIDE Normal Cotton Gentle Speed Wash Spin Whites Heavy Soil Tub Clean Energy efficiency test program “Normal” program is the most suitable program to wash soiled cotton or linen clothes and is the most efficient program in terms of combined energy and water consumption for washing that type of laundry.
- Page 26 CARE AND CLEANING CLEANING AND MAINTENANCE Cleaning the exterior Turn off the water faucets to shut off the water supply to your washer and prevent the unlikely possibility of damage from escaping water. Use a soft cloth to wipe up all detergent, lint or other residue.
- Page 27 TROUBLESHOOTING & WARRANTY BEFORE YOU CALL FOR SERVICE IF THE UNIT FAILS TO OPERATE: A) Check to make sure that the unit is plugged in securely. If it is not, remove the plug from the outlet, wait 10 seconds and plug it in again securely. B) Check for a blown circuit fuse or a tripped main circuit breaker.
- Page 28 TROUBLESHOOTING & WARRANTY TROUBLESHOOTING Troubleshoot your problem by using the chart below. If the unit still does not work properly, contact W Appliance Co. customer service center or the nearest authorized service center. Customer must never troubleshoot internal components. SYMPTOMS POSSIBLE CAUSE SOLUTIONS Thumping...
- Page 29 TROUBLESHOOTING & WARRANTY SYMPTOMS POSSIBLE CAUSE SOLUTIONS Excessive Too much detergent. Use 1/4 to 1/2 the amount of sudsing detergent recommended by the detergent manufacturer. Reduce the amount of detergent if the load is small or lightly soiled, or if your water is very soft.
- Page 30 TROUBLESHOOTING & WARRANTY SYMPTOMS POSSIBLE CAUSE SOLUTIONS Staining Washer was not Always remove items from the unloaded promptly. washer as soon as possible after the cycle is complete. Always wash dark Clothes were not colors separately from light colors properly sorted. and whites to prevent discoloration.
- Page 31 TROUBLESHOOTING & WARRANTY SYMPTOMS POSSIBLE CAUSE SOLUTIONS Water leaks Over sudsing of Use 1/4 to 1/2 the amount of detergent. detergent recommended by the detergent manufacturer. Reduce the amount of detergent if the load is small or lightly soiled, or if your water is very soft.
- Page 32 TROUBLESHOOTING & WARRANTY SYMPTOMS POSSIBLE CAUSE SOLUTIONS Washer will not Water supply is turned This is normal. Press the POWER operate off . Control panel has button to turn the washer on. powered off due to Make sure cord is plugged securely inactivity.
- Page 33 TROUBLESHOOTING & WARRANTY SYMPTOMS POSSIBLE CAUSE SOLUTIONS Washer not Filter clogged. Disassemble the water inlet hose and filling properly clean the inlet point. Check that inlet Inlet hoses may be hoses are not kinked or clogged. kinked Insufficient water supply. Make sure that water faucets are turned on all the way.
- Page 34 TROUBLESHOOTING & WARRANTY ERROR CODE POSSIBLE CAUSE SOLUTIONS It takes over 20 minutes Check for washer not filling to fill water but cannot properly and water leakage. achieve its preset water level. It takes over 7 minutes Ensure that the drain hose is not to drain water and/or kinked.
- Page 35 TROUBLESHOOTING & WARRANTY FABRIC CARE CHART The following symbols provide garment care direction. The Clothing care labels include symbols for washing, bleaching, drying and ironing, or dry cleaning when necessary. The use of symbols ensures consistency among garment manufacturers of domestic and imported items. Follow care label directions to maximize garment life and reduce laundering problems.
- Page 36 LIMITED WARRANTY Any repair, replacement, or warranty service, REPAIR OR REPLACEMENT AS PROVIDED UNDER THIS WARRANTY IS THE EXCLUSIVE REMEDY OF and all questions about this product should be THE CUSTOMER; W Appliance Co. SHALL NOT BE directed to W Appliance Co. at 844-299-0879 LIABLE FOR ANY INCIDENTAL OR CONSEQUENTIAL from the USA or Puerto Rico.
- Page 37 Page 37...
- Page 39 LAVARROPAS PORTÁTIL DE 0,84 PIES CÚBICOS (24 L) DE CAPACIDAD MANUAL DE INSTRUCCIONES NÚMERO DE CATÁLOGO BPWH84W ¡Gracias por elegir BLACK+DECKER! POR FAVOR, LEER ANTES DE DEVOLVER ESTE PRODUCTO POR CUALQUIER MOTIVO. Si tiene alguna pregunta o experimenta un problema con su compra de Black+Decker, vaya a www.blackanddecker.com/instantanswers...
- Page 40 Page 40...
- Page 41 CONTENIDO INFORMACIÓN DE SEGURIDAD Instrucciones importantes de seguridad ......................42-45 Advertencias y precauciones de instalación ......................43-45 Instrucciones de conexión a tierra..........................45 Advertencias y precauciones de uso y mantenimiento ................46-49 CONFIGURACIÓN Y USO Piezas y Características .................................51 Guía de instalación ................................53-57 Guía de operación ................................
- Page 42 INFORMACIÓN DE SEGURIDAD PELIGRO ADVERTENCIA PRECAUCIÓN PELIGRO - Amenazas inmediatas ADVERTENCIA - Peligros o prácticas PRECAUCIÓN - Peligros o prácticas inseguras que pueden resultar en inseguras que pueden resultar en que resultarán en lesiones lesiones personales graves o la muerte lesiones personales menores personales graves o la muerte IMPORTANTES INSTRUCCIONES DE...
- Page 43 INFORMACIÓN DE SEGURIDAD 13. Bajo ciertas condiciones el gas hidrógeno puede ser producido en un sistema de agua caliente que no se ha utilizado durante 2 semanas o más. EL GAS DE HIDRÓGENO ES EXPLOSIVO. Si el sistema de agua caliente no se ha usado durante 2 semanas o más, antes de usar una lavadora o una lavadora-secadora combinadas, abra todos los grifos de agua caliente y deje que el agua fluya por varios minutos.
- Page 44 INFORMACIÓN DE SEGURIDAD 3. Haga que este aparato sea instalado por un técnico calificado o una compañía de servicios. - No hacerlo puede provocar una descarga eléctrica, incendio, explosión, problemas con el producto o lesiones. 4. Retire todas las sustancias extrañas como el polvo o el agua de los terminales del enchufe de alimentación y los puntos de contacto con un paño seco regularmente.
- Page 45 INFORMACIÓN DE SEGURIDAD 18. Almacene e instale la lavadora donde no esté expuesta a temperaturas bajo cero o expuestas a condiciones climáticas en exteriores. - No hacerlo puede provocar daños graves por fugas. 19. Coloque el aparato de forma que se pueda acceder fácilmente al enchufe. - No hacerlo puede provocar una descarga eléctrica o un incendio debido a una fuga eléctrica.
- Page 46 INFORMACIÓN DE SEGURIDAD USO Y MANTENIMIENTO ADVERTENCIA Si el electrodoméstico se desborda o inunda, corte la corriente inmediatamente y comuníquese con su centro de servicio más cercano. 2. Si el aparato emite un ruido extraño, un olor a quemado o humo, desenchufe el cable de alimentación inmediatamente y póngase en contacto con su centro de servicio más cercano.
- Page 47 INFORMACIÓN DE SEGURIDAD USO Y MANTENIMIENTO ADVERTENCIA 12. No intente reparar, desmontar o modificar la unidad usted mismo. - No utilice ningún fusible (como cobre, alambre de acero, etc.) que no sea el fusible estándar. - Si necesita reparar o reinstalar el electrodoméstico, comuníquese con su centro de servicio más cercano.
- Page 48 INFORMACIÓN DE SEGURIDAD USO Y MANTENIMIENTO PRECAUCION Desenchufe el cable de alimentación cuando el electrodoméstico no se use durante largos períodos de tiempo o durante una tormenta eléctrica. - De lo contrario, puede provocar una descarga eléctrica o un incendio. 2.
- Page 49 INFORMACIÓN DE SEGURIDAD 14. No rocíe material volátil como insecticidas sobre la superficie del artefacto. - Además de ser dañino para los humanos, también puede provocar descargas eléctricas, incendios o problemas con el producto. 15. No coloque un objeto que genere un campo electromagnético cerca de la lavadora.
- Page 50 INFORMACIÓN DE SEGURIDAD DESEMBALAJE Y EXTRACCIÓN DEL MATERIAL DE ENVÍO Retire la caja de embalaje y levante la lavadora para separarla del cojín de espuma. Abra la tapa de la lavadora para sacar todos los accesorios, incluida la espuma de protección.
- Page 51 CONFIGURAR Y USAR PIEZAS Y CARACTERÍSTICAS Tapa de seguridad interior Tapa superior Panel de control Dispensador de Bloqueo interno blanqueador de la tapa de seguridad Pata ajustable Entrada de agua fría Envoltorio del cable de alimentación Manguera de drenaje Cable de alimentación Desagüe Rodillos Page 51...
- Page 52 Quick connection adaptor Inner safety lid Drain hose CONFIGURAR Y USAR PIEZAS INCLUIDAS Manual del propietario Manguera de Bisagra de bloqueo abastecimiento de agua Manual del propietario Manguera de Bisagra de bloqueo abastecimiento de agua Adaptador de Tapa de seguridad Manguera conexión rápida interior...
- Page 53 CONFIGURAR Y USAR ELIJA LA UBICACIÓN ADECUADA SUELO Para un mejor rendimiento, debe instalar su lavadora en un piso sólidamente construido. Los pisos de madera pueden necesitar ser reforzados para minimizar la vibración y/o situaciones de carga desequilibrada. - Las alfombras y las superficies de baldosas blandas son factores que contribuyen a la vibración y pueden hacer que la lavadora se mueva ligeramente durante el ciclo de centrifugado.
- Page 54 CONFIGURAR Y USAR ELIJA LA UBICACIÓN ADECUADA AGUA Para llenar correctamente su lavadora en el tiempo adecuado, se requiere una presión de agua de 14 a 70 PSI (100 a 500 kPa). Una presión de agua inferior a 14 psi puede causar fallas en la válvula de agua o no permitir que la válvula de agua se dispare por completo o prolongar el tiempo de llenado más allá...
- Page 55 CONFIGURAR Y USAR Paso 2: Instale la tapa de seguridad interna Inserte el pasador derecho de la tapa interior en la ranura de la tapa del tambor (1). Tapa superior Cubierta de bañera Inserte la bisagra de bloqueo en la ranura de la parte frontal de la tapa (2) Asegúrese de que la bisagra de cierre esté...
- Page 56 CONFIGURAR Y USAR Paso 3: conecte la manguera de suministro de agua CONEXIÓN TEMPORAL • El adaptador de conexión rápida es principalmente para la conexión rápida a un solo grifo, como un fregadero de cocina típico, en los casos en que la lavadora se almacena en un lugar diferente de donde se utiliza.
- Page 57 Rubber gasket Pull down on the white ring Inner thread to divide the adaptor into Pull down on the white ring Inner threads for oute to divide the adaptor into two parts. two parts. CONFIGURAR Y USAR Top part: Faucet fitting Top part: Faucet fitting Bottom part: Hose fitting Bottom part: Hose fitting...
- Page 58 CONFIGURAR Y USAR Pulsator Paso 5: nivele su lavadora Vea si la lavadora está nivelada verificando la posición del tambor o usando un nivel de burbuja 1. Deslice la lavadora a su posición. 2. Abra la tapa de la lavadora y vierta el agua en tambor justo debajo del nivel del pulsador.
- Page 59 CONFIGURAR Y USAR PANEL DE CONTROL 1. Encendido Presione el botón POWER (ENCENDIDO) una vez para encender la lavadora. Presione nuevamente para APAGAR la unidad. 2. INICIO/PAUSA Presione Inicio/Pausa una vez para iniciar el ciclo de lavado. Presione nuevamente durante la operación para PAUSAR el ciclo. Presione nuevamente para continuar el ciclo.
- Page 60 CONFIGURAR Y USAR PANEL DE CONTROL 6. Inicio diferido (Presione 3 segundos) Puede retrasar el inicio del ciclo de lavado desde 2 a 24 horas. Active el inicio diferido presionando el botón durante 3 segundos. Verá “2” en la pantalla digital que representa 2 horas.
- Page 61 CONFIGURAR Y USAR Para garantizar buenos resultados de limpieza, no sobrecargue el tambor, especialmente al lavar cargas muy sucias. Nunca cargue el tambor por encima de 3/4 de su capacidad total. ADVERTENCIA: La sobrecarga puede reducir la eficiencia del lavado, causar un desgaste excesivo y posiblemente causar arrugas en la carga.
- Page 62 CONFIGURAR Y USAR Paso 4: seleccione el ciclo y opciones deseadas Seleccione su programa de lavado deseado: 01 (Normal), 02 (Algodón), 03 (Suave), 04 (Lavado Rápido), 05 (Centrifugado), 06 (Blancos), 07 (Suciedad Pesada), 08 (Limpieza de Tambor). La pantalla digital mostrará el número que ha seleccionado.
- Page 63 CONFIGURAR Y USAR GUÍA DE CICLOS DE ENJUAGUE Y CENTRIFUGADO Tiempo de Opciones Disponibles Nivel del Agua Tiempo total Tiempos de Tiempos de Programa Lavado enjuague giro final (sobre) Alcance Reserva Enjuague+ (aprox.) Predeterminado Normal Medio Algodón Medio Suave Medio Lavado Bajo Rápido...
- Page 64 CUIDADO Y LIMPIEZA LIMPIEZA Y MANTENIMIENTO Limpieza del exterior Cierre los grifos para cerrar el suministro de agua a su lavadora y evitar la posibilidad improbable de que se escape el agua. Use un paño suave para limpiar todo el detergente, pelusa u otros residuos.
- Page 65 SOLUCIÓN DE PROBLEMAS Y GARANTÍA ANTES DE LLAMAR AL SERVICIO TÉCNICO SI LA UNIDAD FALLA AL OPERAR: A) Verifique para asegurarse de que el electrodoméstico esté enchufado de forma segura. Si no lo está, retire el enchufe de la toma de corriente, espere 10 segundos y vuelva a conectarlo firmemente.
- Page 66 SOLUCIÓN DE PROBLEMAS Y GARANTÍA RESOLUCIÓN DE PROBLEMAS Solucione su problema utilizando el cuadro a continuación. Si la unidad aún no funciona correctamente, comuníquese con el centro de servicio al cliente de W Appliance Co. o con el centro de servicio autorizado más cercano. El cliente nunca debe solucionar problemas de componentes internos.
- Page 67 SOLUCIÓN DE PROBLEMAS Y GARANTÍA SÍNTOMAS CAUSA POSIBLE SOLUCIONES Exceso de Demasiado detergente. Use 1/4 a 1/2 de la cantidad de espuma detergente recomendada por el fabricante de este. Reduzca la cantidad de detergente si la carga es pequeña o está ligeramente sucia, o si su agua es muy blanda.
- Page 68 SOLUCIÓN DE PROBLEMAS Y GARANTÍA SÍNTOMAS CAUSA POSIBLE SOLUCIONES Decoloración y La lavadora no se Siempre quite los artículos de manchas descargó rápidamente. la lavadora tan pronto como se complete el ciclo. Siempre lave los La ropa no estaba colores oscuros y los colores claros correctamente y blancos por separado para evitar clasificada.
- Page 69 SOLUCIÓN DE PROBLEMAS Y GARANTÍA SÍNTOMAS CAUSA POSIBLE SOLUCIONES Pérdidas de Espuma excesiva Use 1/4 a 1/2 de la cantidad de agua detergente recomendada por el fabricante de este. Reduzca la cantidad de detergente si la carga es pequeña o está ligeramente sucia, o si su agua es muy blanda.
- Page 70 SOLUCIÓN DE PROBLEMAS Y GARANTÍA SÍNTOMAS CAUSA POSIBLE SOLUCIONES La lavadora El suministro de Esto es normal. Presione el botón POWER (ENCENDIDO) para encender la lavadora. no comienza a agua está cerrado. El operar panel de control se Asegúrese de que el cable esté bien conectado a una toma de corriente que ha apagado debido a funcione.
- Page 71 SOLUCIÓN DE PROBLEMAS Y GARANTÍA SÍNTOMAS CAUSA POSIBLE SOLUCIONES La lavadora Filtro obstruido. Desmonte la manguera de entrada no se llena de agua y limpie el punto de entrada. Las mangueras de correctamente Verifique que las mangueras de entrada pueden estar entrada no estén dobladas ni dobladas.
- Page 72 SOLUCIÓN DE PROBLEMAS Y GARANTÍA CÓDIGO DE CAUSA POSIBLE SOLUCIONES ERROR Lleva más de 20 minutos Compruebe si la lavadora no se llena llenar el agua, pero no adecuadamente o tiene pérdidas de puede alcanzar el nivel agua. de agua preestablecido. Toma más de 7 minutos Asegúrese de que la manguera de drenar el agua y/o no...
- Page 73 SOLUCIÓN DE PROBLEMAS Y GARANTÍA CUADRO DE CUIDADO DE TELAS Los siguientes símbolos proporcionan instrucciones para el cuidado de la ropa. Las etiquetas de cuidado de la ropa incluyen símbolos para lavar, blanquear, secar y planchar, o limpiar en seco cuando sea necesario. El uso de estos símbolos garantiza la coherencia entre los fabricantes de prendas de vestir nacionales e importadas.
- Page 74 GARANTÍA LIMITADA Cualquier reparación, reemplazo o servicio LA REPARACIÓN O EL REEMPLAZO SEGÚN LO DISPUESTO BAJO ESTA GARANTÍA ES EL RECURSO de garantía, y todas las preguntas sobre este EXCLUSIVO DEL CLIENTE; W Appliance Co. NO SERÁ producto deben dirigirse a W Appliance Co. al RESPONSABLE POR NINGÚN DAÑO INCIDENTAL 844-299-0879 desde EE.
- Page 75 Page 75...
- Page 76 BLACK & DECKER, BLACK+DECKER, the BLACK & DECKER and BLACK+DECKER logos and product names and the orange and black color scheme are trademarks of The Black & Decker Corporation, used under license. All rights reserved. Product in this box may differ slightly from that pictured. Does not affect function.