LG N1A1DD1 User Manual
Network storage with 1tb hard disk drive
Hide thumbs
Also See for N1A1DD1:
- Specifications (2 pages) ,
- Manual de usuario (112 pages) ,
- Owner's manual (112 pages)
Table of Contents
Thank you very much for using products of LG Electronics.
Before using, please read 'the notice for safety' carefully and use the products properly.
This Owner's manual is copyrighted by [LG Electronics Inc.].
The copy or use of this Owner's manual, part or whole, without prior consent by [LG Electronics Inc.] is prohibited.
Table of Contents

Related Manuals for LG N1A1DD1


Summary of Contents for LG N1A1DD1
- Page 1 Before using, please read ‘the notice for safety’ carefully and use the products properly. This Owner’s manual is copyrighted by [LG Electronics Inc.]. The copy or use of this Owner’s manual, part or whole, without prior consent by [LG Electronics Inc.] is prohibited.
-
Page 2: About Lg Network Storage
About LG Network Storage Freedom to use anytime, anywhere Thank you for purchasing LG Network Storage. You can easily save and share files when and wherever you have internet access with LG Network Storage. - Page 3 About LG Network Storage...
-
Page 4: Safety Warning
Safety warning Do not place any objects within 15cm of the unit. The unit reaches high temperatures creating the risk of burn injuries. Only use compatible devices with the system ports, or the system and devices risk being damaged. Do not use damaged disks. Product can be damaged. Do not dismantle or change the structure of the system in any way. - Page 5 Safety warning Do not use damaged electrical cords. This may cause electric shock, and is a fire hazard. Do not handle the electrical cord with wet hands, as this may cause shock and injury. When removing the plug from the socket, ensure that the plug is handled and not the cord. Otherwise this may cause damage to the plug and even fire.
-
Page 6: Table Of Contents
(N1T1/N1T3/N1A1 Product) Network Storage installation (N2A2 Product) Network Storage installation (N2R5/N2B5 Product) Program Installation LG Network Storage software installation CD Network Storage set up LG Network Storage Installation Wizard NAS Detector Connecting to Web Menu NAS Monitor Using LG Network Storage... -
Page 7: Table Of Contents
When you cannot set up automatic network sharing device (UPnP setting) on DDNS set-up. Home Monitoring Camera Port Setup Volume & RAID A guide to using port number in LG Network Storage Open source software information 86-87 89-90 97-99 101-102... -
Page 8: Lg Network Storage Introduction
LG Network Storage Introduction Please check the components before installing. Components Network Storage Quick Installation Guide ※ Refer to quick install guide for component details. ※ Pictures or photographs used in the user manual are subject to change in accor- dance with the components of the model. -
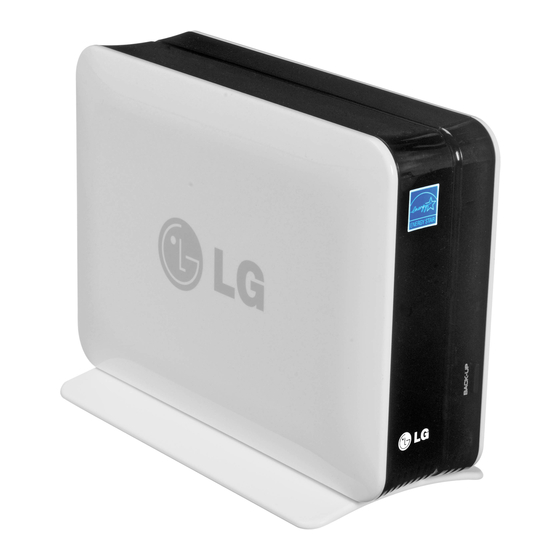
Page 9: Name Of The Product Parts (N1T1/N1T3/N1A1 Product)
LG Network Storage Introduction l Name of the product parts (N1T1/N1T3/N1A1 product) (Front) N1T1 N1A1 N1T3 ODD Slot hole : You should insert the disc having the writing side as a data side. Pedestal Back-up button : A button to back-up data of a disc or USB onto NAS. - Page 10 LG Network Storage Introduction l Name of the product parts (N1T1/N1T3/N1A1 product) (Back) N1T1 Power button Mode changing switch USB 2.0 port LAN port DC-in Adaptor cable holder Kensington Lock EX. HDD MODE USB Mini-B Port Air ventilation hole N1A1...
-
Page 11: Name Of The Product Parts (N2A2 Product)
LG Network Storage Introduction l Name of the product parts (N2A2 product) (Front) (Back) USB 2.0 port Back-up button LED panel :HDD :LAN :POWER USB 2.0 port LAN port Power button DC-in Adaptor cable holder Kensington Lock... -
Page 12: Name Of The Product Parts (N2R5/N2B5 Product)
LG Network Storage Introduction l Name of the product parts (N2R5/N2B5 product) (Front) Power button SET (S) button : Selects mode. LCD Panel Arrow button(←,→) : Navigates menu, moves cursor for IP settings Mode button : changes mode USB 2.0 port... -
Page 13: Installing Lg Network Storage
Installing LG Network Storage This is the preparation process before using Network Storage. Please follow the installation steps. -
Page 14: Product Installation
NAS mode. N1T1/N1A1 3. After checking the connection of the power supply cable of LG Network Storage, press the power button at the back and start LG Network Storage. The booting will take about 40 sec. ~ 1 min. and alert you with a sound. -
Page 15: Network Storage Installation (N2A2 Product)
(IP network sharing device / router / hub / switch) using a LAN cable enclosed, or directly connect the LAN port of the PC. Network Storage 2. After checking the connection of the power supply cable of LG Network Storage, press the power button at the back and start LG Network Storage. N2A2 외장형... -
Page 16: Network Storage Installation (N2R5/N2B5 Product)
(IP network sharing device / router / hub / switch) using a LAN cable enclosed, or directly connect the LAN port of the PC. 2. After checking the connection of the power supply cable of LG Network Storage, press the power button at the back and start LG Network Storage. N2R5/N2B5... -
Page 17: Program Installation
Program that helps you to set up network which is complicated to do without in an easy way. 2. NAS Monitor Provides a function of checking the state of LG Network Storage in real time as well as a simple control. 3. Nero Backitup&Burn Software that protects and stores data for backup and restoration. - Page 18 Program Installation l LG Network Storage software installation CD 1. Insert “LG Network Storage PC Software Installer” CD that is provided with the system into an optical drive (CD/DVD drive) of the user’s PC. 2. A pop-up as below appears due to automatic operation.
-
Page 19: Network Storage Set Up
Network Storage set up l LG Network Storage Installation Wizard Helps to easily set up Network Storage and complicated networks (DDNS, Port Forwarding). ※ Compatible with only Windows OS. Use NAS Detector for Mac OS. After running Installation Wizard, choose the router currently connected to Network Storage and click ‘Next’... - Page 20 Network Storage set up l LG Network Storage Installation Wizard Enter the name and password of the domain you would like to use. ※ Enter the domain name without special characters and spaces. (English and digits only) After entering the password for Network Storage administrator, click ‘Ok’...
- Page 21 If the connection failure persists, you must set up manual Port Forwarding by referring to the router’s manual. ※ Refer to Appendix 103p for all LG Network Storage port numbers. After confirming failed connection, click on ‘Next’ Select the brand and model of your router.
-
Page 22: Nas Detector
Recommended for searching Network Storage and setting up networks in Mac ※ Also, compatible with Windows It shows LG Network Storage’s ‘MAC Adress’ , ‘IP Adress’ , and ‘Host Name’ in order. If the LG Network Storage you are searching for fails, click the ‘Search Network’ button. -
Page 23: Connecting To Web Menu
Connecting to Web Menu You can easily enjoy Multi-media files and manage LG Network Storage through Web Menu. 1. There are several ways to connect to Web Menu. Connecting through Installation Wizard Connecting through Shortcut icon LG-NAS_We bMENU Click ‘Web Menu’... -
Page 24: Nas Monitor
- Network Folder : It is used when opening network folde. - FTP server : It is used to connect to FTP server. - NAS Detector : Used to change the IP Address of LG Network Storage NAS Detector must be installed to use this menu. -
Page 25: Using Lg Network Storage
Using LG Network Storage This explains how to use various services supported by LG Network Storage. ※ Network Folder and Remote Network Drive is recommended. -
Page 26: File Uploading And Downloading
File Uploading and Downloading File sharing and storing is possible by using ‘My computer’ settings at home or of- fice that uses the same network. 1. Connecting to Network Folder Connecting through Installation Wizard Connecting through Shortcut icon Click ‘Network Folder’ Click ‘Run’... - Page 27 ※ LG Network Storage administrator’s default ID and password are admin. 4. Network Drive Set up ※ You can conveniently connect to LG Network Storage by having it set to Network Drive. l Network folder (Windows) Right click mouse button ->...
-
Page 28: Network Folder (Mac)
In the address prompt, add the IP address of LG Network Storage in this fashion [smb://IP Address] -> Click the ‘Connect’ button. ※ Refer to 22p for LG Network Storage IP address. Enter login ID and Password -> Click ‘Connect’ button. -
Page 29: Network Folder (Linux)
Click ‘Places’ on the menu bar, then select ‘Network’ . LG Network Storage will be indicated. Select the name of LG Network Storage you want to connect to. LG Network Stor- age folder list is indicated. Select the desired volume. e.g.) /service... -
Page 30: Remote Network Drive
File Uploading and Downloading Remote Network Drive allows you to use the network folder anywhere, as if you are in your home, through the Window Explorer. l Remote Network Drive - Connect to Network Storage Web Menu -> Configuration -> Network Service Setting ->... -
Page 31: File Explorer
File Uploading and Downloading File Explorer allows you to upload/download files and directories on the web. Connect to Network Storage Web Menu -> Click on ‘File Explorer’ - Browser requirement specification IE 7,8, Firefox 3.5 or higher, Safari, Opera, - File Download Select file ->... -
Page 32: Ftp
File Uploading and Downloading You can quickly and easily upload/download files from LG Network Storage to your PC with FTP service. ※ Large size files exceeding 2GB can be uploaded/downloaded. ※ You can download multiple files without compressing. ※ Continued download of the last file is possible even if the connection gets lost during the download. - Page 33 Download by selecting the appropriate OS client. Install by following the number sequence. Logon to FileZilla Enter the information to connect to LG Network Storage. PC folder and file directory will be shown. LG Network Storage folder and file directory will be shown.
- Page 34 File Uploading and Downloading Connecting to LG Network Storage Host : Enter IP address or the domain address. Enter domain address when accessing remotely. ※ You must setup DDNS to use domain address. Refer to 70p User Name : Enter ID used in Network Storage.
-
Page 35: Using Network Storage
Using Network Storage You can enjoy Multimedia files by clicking ‘Photo’ , ‘Music’ , ‘Video’ . ※ You can upload/download files with the multimedia browser. ※ You can add multimedia files to /Multimedia folder. ※ For extra folder options, refer to 84p. Viewing Thumbnails Viewing List Preview List... -
Page 36: Sharing Through Community Board
‘Head’ , enter ‘Subject’ and ‘Message’ Select ‘Sharing group’ Select ‘File Attachment’ to add files or ※ You can only add files on LG Network Storage. Select the file if you want to attach additional files. Click on the arrow. -
Page 37: Enjoying Multimedia
- Put the file that you wish to play with DLNA in the /Multimedia folder. ※ For additional folder options, refer to 84p Using Player For easier understanding, the picture below is an example of LG DivX player of ※ DP1 product. l Enjoying Multimedia From the home menu, select ‘Home... - Page 38 Using Network Storage 2. Playing through network share folder Playing via player l Enjoying Multimedia Select the file you want and play. From the home menu select ‘Home link’ and choose the share folder that you want. After entering the ID and Password select ‘OK’...
-
Page 39: Play Through A Smartphone
Using Network Storage l Play through a Smartphone (LG My Data) You can connect to LG Network Storage by a smartphone and play music, picture, and video files stored in the Network Storage. 1. Downloading Application Downloading LG My Data on an iPhone Connect to App Store. -
Page 40: Play Through A Smartphone
Using Network Storage l Play through a Smartphone (LG My Data) Downloading LG My Data on Android 2. Setting up remote connection ※ If your device doesn’t remotely connect using UPnP, refer to 103p. Connect to Android Market -> Click on the magnifying glass icon. -
Page 41: Picture Backup
2. How to backup pictures in USB device by using backup button. You can easily backup data by using the backup button on the front of LG Net- work Storage. The data is backed up, sorted by back up date, under the created folder directory /service/backup/usb 3. -
Page 42: Burning Files With Dvd/Bd
Using Network Storage l Burning files with DVD/BD (N1T1/N1T3/N2R5/N2B5 Product) You can burn files stored in LG Network Storage to a disc by using DVD/BD. ※ BD is supported only by N2B5 product. 1. Burning Data / Disc Initialization 2. Burning iso image Connect to Network Storage Web Menu ->... -
Page 43: Home Monitoring Camera
Using Network Storage You can monitor and record anywhere in your house with Network Storage using connected USB camera. ※ ※ If you want to use an external network, you must setup Port Forwarding. Please refer to 103p for details on Port. 1. -
Page 44: Family Cast
Family Cast l Account and user registration LG SMART TV exclusive application which allows the user to easily access and share photos, music, videos and other data saved on the net hard with their family with the TV remote control from anywhere around the globe. -
Page 45: Access Service With A Pc
Family Cast l Access service with a PC Multimedia service accessible by a PC can be accessed with the SMART TV (Refer to page 48) 1. File Upload Click on ‘Upload’ after logging into FamilyCast. Select the member that will upload the multimedia file. - Page 46 Family Cast l Access service with a PC 2. Accessing Multimedia Files 3. Viewing member After logging onto FamilyCast select the family member where the photo, music, video file is saved. Uploaded multimedia files can be viewed either in thumbnails or list by clicking on the icon located at the top right corner.
- Page 47 Family Cast l Access service with a PC 4. Setting up notification (Option function) 5. Setting up Alarm (Option Function) 6. Changing Password 7. Preview Click on ‘Notice’ after logging into FamilyCast. Create notification. After selecting a member, choose a photo, music, or video file. Click on ‘Register’...
-
Page 48: Accessing From Tv
Click on the searched FamilyCast. ※ The version may differ depending on the TV application. Enter LG TV ID and Password when the LG TV login screen loads. ※ Refer to 52 if not a LG TV member. Click on ‘OK’... - Page 49 Family Cast l Accessing from TV Click on ‘Install’ ※ The version may differ depending on the TV application. Once successfully downloaded go to my App. ※ After clicking on ‘OK’ go back to step ‘ A ’ and register it onto ‘My Apps’...
- Page 50 Family Cast l Accessing from TV 2. Executing FamilyCast application from the TV. Click on the registered FamilyCast application. A login screen is loaded when the registered FamilyCast application is clicked. Click on ‘OK’ after entering the domain name and password. ※...
-
Page 51: Accessing From Tv
Family Cast l Accessing from TV 3. Accessing multimedia Multimedia files can be accessed through the ‘photo’ , ‘music’ , and ‘video’ menu. Home: Return to the main page. Letest, Most View: Files can be sorted by the date it was registered or by the number of times it was viewed. -
Page 52: Signing Up From The Tv
Family Cast l Signing up from the TV ※ If not a LG TV member click on the ‘Sign up’ button at the top and become a member. Click on ‘Register’ when the LG TV login screen is loaded. Click on ‘ A gree’ after reading the service agreement. -
Page 53: Lcd Panel And Buttons (N2R5/N2B5 Product)
LCD Panel and Buttons LCD Panel Icon Description Displays the network connection status. If the LAN cable is not connected it will not be active. It will be blinking during connection. Also, if DHCP for IP address is selected, the icon will flash an IP address is being allocated. It is activated when the User opens the network folder and connects to the Network Storage. -
Page 54: Using External Hdd (N1T1/N1T3/N1A1 Product)
Using external HDD N1T1/N1A1 ‘EX. HDD’ Mode - N1T1/N1A1 : You can connect to a PC with a USB cable and use it as an External Hard Disk. - N1T3: When the EX. HDD MODE USB Mini-B port and the PC is con- nected with a USB cable, it is automatically changed to external hard disk mode and can be used as an external hard disk. -
Page 55: Using Advanced Features
Using Advanced Features This is a P2P share program that can download files from several sources at once. ※ Doesn’t support self search mode. ※ To use Torrent, Configuration -> Application program setting -> Click ‘Use’ from Torrent. For detailed setup, please refer to 85p. Open : Register the torrent file of the file to download. -
Page 56: Network Printer
Using Advanced Features This feature allows you to use the USB printer like a network printer with LG Network Storage. 1. Connecting the printer Connect the USB Printer to Network Storage USB port. 2. Printer setup If you connect to LG Network Storage network, the printer icon will appear. - Page 57 On a pop-up window : Click on Windows on the top. When ‘workgroup’ appear, choose workgroup -> Host name of LG Network Storage in use -> printer to be used in order. Choose ‘choose driver to be used.. ’ from ‘printer in use’...
-
Page 58: Lg Network Storage Add-Ons Setup
LG Network Storage Add-ons setup You can specifically set features in LG Network Storage to decorate and manage Network Storage as you please. -
Page 59: Home Screen Setup
Home Screen setup You can change the login screen, the main home screen and sentences. Home Screen setup You can add desired menu and folders to Main Home Favorites. Select the menu and folder you desire to add to Main Favorites. Click on ‘Save’... -
Page 60: Favorites Mode
Home Screen setup Main Screen Picture View Screen Folder View Screen l Favorites Mode You can register frequently used menus for convenient access. When you click on Menu tab, it moves to the according page. ※ You can enjoy music and videos through PC player. -
Page 61: Setting Up Account And Access
Setting up Account and Access A new user can request account to current users of Network Storage for data sharing and storing. 1. The user can request a new ID through a new account. 2. After requesting account, you need the approval of the administrator to use the account. l Requesting Account Request a new ID by clicking ‘... -
Page 62: Approving Account Request
Setting up Account and Access Setting up Account and Access l Approving Account Request Connect to Network Storage Web Menu -> Configuration -> Permissions & Sharing -> Click ‘ A ccount Application’ You can Request, Approve, or Deny the users who made an Account Request with you. -
Page 63: Managing Users
Setting up Account and Access l Managing Users Connect to Network Storage Web Menu -> Configuration -> Permissions & Sharing -> Click ‘User’ User list will be displayed. If you want to add a user, Click ‘ A dd all’ or ‘ A dd’ . You can use CSV file to add users with add all option. -
Page 64: Managing Groups
Setting up Account and Access l Managing Groups Connect to Network Storage Web Menu -> Configuration -> Permissions & Sharing -> Click ‘Group’ Group list will be displayed. Click on ‘ A dd’ After entering Group name and Group Description, click on ‘Next’... - Page 65 Setting up Account and Access l Managing Groups Set the accessibility to share folder. After confirming setting information, click on ‘Save’ . You can edit Group information when you click ‘Group name’ from the group list.
-
Page 66: Managing Share Folder
Setting up Account and Access l Managing Share Folder Connect to Network Storage Web Menu -> Configuration -> Permissions & Sharing -> Click ‘Shared folder’ Share folder list will be displayed. Click on ‘ A dd’ . After selecting local, domain group accessibility from the group setting, click on ‘Next’... - Page 67 Setting up Account and Access l Managing Share Folder After selecting local, domain user accessibility from the user setting, click on ‘Next’ . After confirming setting information, click on ‘Save’ . You can edit Share folder when you click ‘Share folder’ from the Share folder list.
-
Page 68: Network Setup
Network Setup You can set a name for LG Network Storage. Network information is displayed. Host Name : System name can be minimum of 3 to maximum of 12 characters. - You can combine Alphabets(A-Z, a-z) , Numbers(0-9), and Hyphen(-). -
Page 69: Setting Up Lan
Network Setup This specifies IP address properties of network interface. You need to have caution because this can limit the connection of the system. If you wish to be assigned an automatic IP address : Select ‘Get Automatic IP address (DHCP)’... -
Page 70: Ddns Setup
Network Setup You can remotely connect to LG Network Storage using Domain name. DDNS provides convenient connectivity in a circulating IP environment where the IP continuously changes at a fixed time. e.g.) http://DomainName.lgnas.com, ftp://DomainName.lgnas.com. NOTICE ※ You can’t not use special characters and spaces when entering domain name. -
Page 71: Upnp Port Forwarding Setup
Network Setup You can remotely connect to LG Network Storage without router setup by us- ing UPnP Port Forwarding. ※ The router must support UPnP Port Forwarding. ※ When the router supports UPnP Port Forwarding, you can confirm detail contents in the routers Port Forwarding setting. -
Page 72: Network Folder Setup
Network Folder Setup This sets up supported working group and domain in the Windows network. LG Network Storage can quickly and easily obtain user information by supporting Active Directory in Windows. ※ Domain : In an environment that allows use of Active Directory, setup domain in order to grant per- mission on use of folder to local users and domain users without groups. -
Page 73: Mac Networking
Network Folder Setup Selects options of use for AFP network in Mac OS It is set to ‘Use’ by default. Network Folder Setup Selects options of use for NFS network in Unix/Linux OS It is set to ‘Use’ by default. l Mac Networking Connect to Network Storage Web Menu ->... -
Page 74: Advanced Network Setup
FTP is able to connect using DDNS service. ※ LG Network Storage supports FTPS with enhanced security than FTP to safely protect user information over the internet. In order to use FTPS, you need to use FTP connecting program that supports FTPS. -
Page 75: Web Server Setup
This feature allows you to manage you Homepage. If you set the Web server to ‘Use’ , myweb folder is created in LG Network Storage so that the user can post upload files on the web using SAMBA. To upload using FTP, activating the FTP feature of myweb folder from the folder menu is supported. -
Page 76: Managing Hard Disk
‘Create New Volume’ will appear only when there is no Volume. ※ When configuring Volume, part of the Hard Disk will be assigned as LG Network Storage system. Therefore, after Volume configuration, the Volume disk size will be smaller than the Hard Disk. - Page 77 Managing Hard Disk Volume menu l Volume Setup Delete volume : Click ‘OK’ after entering the password. ※ X-HDD area will also be deleted when Volume is deleted. (N1T1/N1T3/N1A1 Product) Format volume : Click ‘OK’ after entering the password. ※ X-HDD area will also be deleted when Vol- ume is format.
-
Page 78: External Hard Drive
Managing Hard Disk l External Hard Drive (N1T1/N1T3/N1A1 Product) You can format if needed after checking the size of memory being used by X- HDD and unused memory. ※ You can use up 400GB with External HDD. ※ X-HDD is the Volume name used when external HDD mode is selected in product N1T1/N1T3/N1A1. ※... -
Page 79: System Setting
System Setting Able to set up the LCD message and brightness. (N2R5/N2B5 models) You can turn on/off LED buzzer. Click on‘Save’ l Brightness and Sound Setting Connect to Network Storage Web Menu -> Configuration -> System -> Click ‘Brightness and Sound Setting’... -
Page 80: Managing Power
- Either send a magic package to the Network Storage MAC address using a WOL commercial tool on a local computer or connect to a WOL supported router to activate the LG Network Storage. - The remote computer can activate the network storage from the router after it connects to a router that supports WOL functions. -
Page 81: Language Setting
This sets Standard time and Interworking with standard time(NTP setting) setting. ※ You can use ‘Standard time’ to specify the area of current LG Network Storage. If you use NTP, it will automatically set the standard time. Click on ‘Save’... -
Page 82: Mail Notification Service
System Setting You can regularly check the memory usage of LG Network Storage. Also, it notifies new user registration results to the current user. If the default Port number of the mail server isn’t 25, then enter the port number. This usually occurs when SMTP SSL is specified. -
Page 83: Viewing System Information
System Setting This displays LG Network Storage system information. System Setting l Viewing System Information Connect to Network Storage Web Menu -> Configuration -> System -> Click ‘Report’ This allows you to know the current LG Network Storage’s information, connection status, system resource, and login information. -
Page 84: Dlna Setup
This performs the DLNA server feature on LG Network Storage that provides multi- media data. Enabling/Disabling DLNA Storing multimedia data in the source path You can read, write, and share multimedia files on LG Network Storage through a network. - Copy multimedia files to /Multimedia. ※ Multimedia folder is created by default. -
Page 85: Itunes Service Setup
Service Setup It is possible to play music file saved in LG Network Storage using iTunes service with iTunes program for PC/Mac. Music file update cycle setup. - Manual Update (Forced) Music file list for streaming is played once when the service is running. -
Page 86: Backup Setup
Backup Setup You can use Rsync feature to back up or restore data to another LG Network Storage on a connected network. ※ In order to backup data on a different Network Storage you must setup accordingly. 1. Network Storage you would like to backup : Rsync server setup After entering the job description, enter the ID of the user managing the data. -
Page 87: Rsync Setup (N2R5/N2B5 Product)
LG Network Storage. Enter the same task name that was set by Rsync server. Enter the LG Network Storage IP address that will receive the backup data. Enter the user ID and Password set by Rsync server. -
Page 88: Usb Backup Setup
Backup Setup This feature will backup data on USB device to LG Network Storage. Tasks can be created for each USB device. Name/Memo : Save name and memo of the task. Control Number : Unique ID of mounted device will be automatically generated through the product information. -
Page 89: Schedule Backup Setup
Backup Setup You can do a safe secondary backup of LG Network Storage data through the Optical Disc. ※ From the schedule backup list, you can do disk initialization, add schedule backup, edit, and delete. Creating Schedule Backup - When backup is executed, specified files are backed up through a generated folder which includes the backup date and time. - Page 90 Backup Setup Restoration Backed-up folder from optical disc or external storage device will be restored to LG Network Storage. Restoration will generate folder name as ‘YYYY_MM_DD’ according to the restore point of date and time from /service/Restore. e.g. ) ‘2011_01_01’...
-
Page 91: Backup Button Setup
Backup Setup The data saved on the device can be backed up to LG Network Storage by simple button operation. ※ If USB and ODD device are both inserted, it will read the last device used. ※ With USB, only data backup will be proceeded. -
Page 92: Usb Backup Mode (N2R5/N2B5 Product)
Another folder is created named by the date under the upper folder. Regenerate the subfolders according to the date of the backup and save all of the content of the USB on the LG Network Storage. USB Backup Mode Navigate to the USB Backup Mode and press Set key to enter USB Backup Modes. -
Page 93: Odd Backup Mode (N2R5/N2B5 Product)
Backup Setup l ODD Backup Mode (N2R5/N2B5 Product) Backing up optical disk data to LG Network Storage Network Storage provides a function that allows the backup of the data on a CD/DVD/Blu-ray and other optical disk with a few button clicks. -
Page 94: Time Machine Setup
Backup Setup Through automatic backup feature in Mac OS X, this service feature will keep Mac data copy of LG Network Storage up to date. This service supports Mac OS X version 10.5 Leopard or higher. ※ 1. Web Setting Set Time machine to ‘Use’... -
Page 95: Selective Mirror
Backup Setup A copy of a particular folder is automatically generated and can recover the data. Changes in the selected folder will be reflected in the destination folder, so you can protect your data. This service supports versions higher or equal to Mac OS X Version 10.5 Leopard. ※... -
Page 96: Updating Firmware
Updating Firmware This feature upgrades LG Network Storage system and optical drive firmware. ※ If a PC has firewall or security running, the upgrade may not execute. Firmware Upgrade Firmware Configuration Value Backup Connect to Network Storage Web Menu -> Configuration ->... -
Page 97: Supplement
Supplement... -
Page 98: Method To Set Up A Network Sharing Device
Method to set up a network sharing device l When you cannot set up automatic network sharing device (UPnP setting) on DDNS set-up. There might be cases the internet games cannot be operated on PC depending on the set-up type of DMZ, therefore please mind this when setting up DMZ. 1. -
Page 99: When You Cannot Set Up Automatic Network Sharing
Method to set up a network sharing device l When you cannot set up automatic network sharing device (UPnP setting) on DDNS set-up. When you cannot set up automatic network sharing device (UPnP setting) on DDNS set-up In case of presence of 2 network sharing devices 3. -
Page 100: Home Monitoring Camera Port Setup
Home Monitoring Camera Port Setup In order to access the installed USB camera in the internal network router from an external network router, you must set port forwarding on the camera from the router’s setup menu. ※ IP in the figure below is an example to facilitate your understanding. - Set IP and port when accessing a camera in the internal network(LAN) of the router. -
Page 101: Volume & Raid
Volume & RAID 1. Individual disc(No Raid) Volume This is a technique to configure volume for each hard disk without RAID configuration. It is similar to the use of hard disks in regular PCs. If the hard disk is damaged, the hard disks data will be lost. 2. -
Page 102: Volume & Raid
Volume & RAID 3. RAID0 Striping Volume It is a technique for using multiple hard disks in parallel as one hard disk. Because it saves data on each hard disk in parallel, it has an excellent performance in reading multiple small sized files. In order to maximize storage space, it does not record backup information in case of hard disk damage. -
Page 103: A Guide To Using Port Number In Lg Network Storage
Network Storage. Please refer to the router manual for port forward- ing. ※ The basic port number may change depending on the LG Network Storage models. ※ The user can change port numbers for part of the features through manual setting.