Silvercrest SEAS 20 A1 Operating Instructions Manual
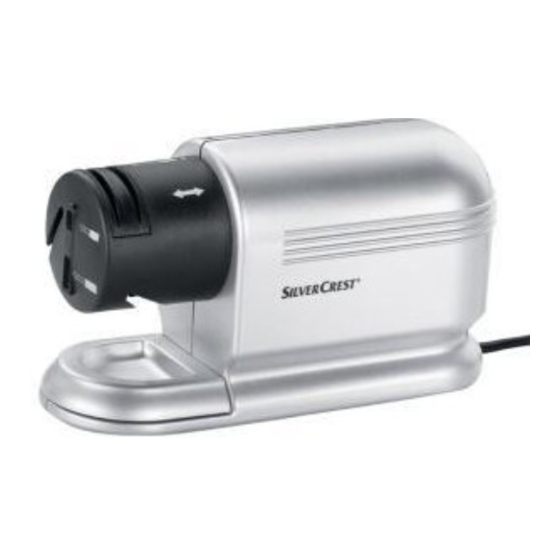
Electric all-purpose sharpener
Hide thumbs
Also See for SEAS 20 A1:
- Operating instructions manual (72 pages) ,
- Operating instructions manual (54 pages) ,
- Operating instructions manual (34 pages)
Table of Contents
Available languages
Available languages
Quick Links
Chapters
Table of Contents

Related Manuals for Silvercrest SEAS 20 A1


Summary of Contents for Silvercrest SEAS 20 A1
- Page 1 ELEKTRISCHER ALLESSCHÄRFER SEAS 20 A1 ELEKTRISCHER ALLESSCHÄRFER AIGUISEUR ÉLECTRIQUE Bedienungsanleitung Mode d’emploi AFFILACOLTELLI ELETTRICO ELEKTRISCHE ALLESSLIJPER Istruzioni per l’uso Gebruiksaanwijzing ELECTRIC ALL-PURPOSE SHARPENER Operating instructions IAN 95913...
- Page 2 Klappen Sie vor dem Lesen die Seite mit den Abbildungen aus und machen Sie sich anschließend mit allen Funktionen des Gerätes vertraut. Avant de lire le mode d‘emploi, ouvrez la page contenant les illustrations et familiarisez-vous ensuite avec toutes les fonctions de l‘appareil. Prima di leggere aprire la pagina con le immagini e prendere confi...
-
Page 4: Table Of Contents
I I N N H H A A L L T T S S V V E E R R Z Z E E I I C C H H N N I I S S S S E E I I T T E E Einleitung Verwendungszweck Lieferumfang... -
Page 5: Einleitung
Einleitung Herzlichen Glückwunsch zum Kauf Ihres neuen Gerätes. Sie haben sich damit für ein hochwertiges Produkt entschieden. Die Bedie- nungsanleitung ist Bestandteil dieses Produkts. Sie enthält wichtige Hinweise für Sicherheit, Gebrauch und Entsorgung. Machen Sie sich vor der Benut- zung des Produkts mit allen Bedien- und Sicherheitshinweisen vertraut. Benut- zen Sie das Produkt nur wie beschrieben und für die angegebenen Einsatz- bereiche. -
Page 6: Gerätebeschreibung
Die KB-Zeit (Kurzzeitbetrieb) gibt an, wie lange man ein Gerät betreiben kann, ohne dass der Motor überhitzt und Schaden nimmt. Nach der angege- benen KB-Zeit muss das Gerät solange ausgeschaltet werden, bis sich der Motor auf Raumtemperatur abgekühlt hat (ca. 30 Minuten). Gerätebeschreibung Funktion “Messer mit glattem Schliff”... - Page 7 • Ziehen Sie nach Gebrauch oder bei Abwesenheit im- mer den Netzstecker aus der Steckdose. Es liegt Netz- spannung im Produkt an, solange der Netzstecker in der Steckdose steckt. • Sorgen Sie dafür, dass der Stecker jederzeit erreichbar ist, um ihn bei Gefahr schnell aus der Steckdose ziehen zu können.
-
Page 8: Auspacken
• Das Gerät ist bei nicht vorhandener Aufsicht und vor dem Zusammenbau, dem Auseinandernehmen oder Reinigen stets vom Netz zu trennen. • Das Gerät und seine Anschlussleitung sind von Kindern fernzuhalten. Auspacken • Überprüfen Sie das Produkt auf Vollständigkeit und einwandfreien, unbe- schädigten Zustand. -
Page 9: Schleifen
Schleifen • Legen Sie die Klingen erst an, wenn sich der Schleifstein dreht. • Ziehen Sie die Messer und Scheren immer vom Schaftanschlag in gleich- förmiger Bewegung weg, nicht wieder zurück oder hin und her – das Schleifergebnis wird sonst ungleichmäßig. •... -
Page 10: Reinigung Und Pflege
Scherenschliff Wenn Sie die Stellung “Scherenschliff” gewählt haben (Abb. D): • Schärfen Sie nacheinander beide Scherenklingen. Hierzu klappen Sie die Schere auf, und ziehen nacheinander beide Klingen durch die Führung. Schlitz-Schraubendreher Wenn Sie einen Schlitz-Schraubendreher plan schleifen möchten (Abb. E): •... -
Page 11: Wartung
Gerät reinigen: • Drehen Sie die Funktions- und Schutzkappe , bis der Pfeil oben steht. Nun können Sie die Funktions- und Schutzkappe abnehmen und den Bereich um den Schleifstein mit einem trockenen Pinsel säubern. • Ziehen Sie die Staubmulde ab und reinigen Sie diese mit einem Pinsel und ggf. -
Page 12: Entsorgen
Entsorgen Werfen Sie das Gerät keinesfalls in den normalen Hausmüll. Dieses Produkt unterliegt der europäischen Richtlinie 2012/19/EU. Entsorgen Sie das Gerät über einen zugelassenen Entsorgungsbetrieb oder über Ihre kommunale Entsorgungseinrichtung. Beachten Sie die aktuell geltenden Vorschriften. Setzen Sie sich im Zweifels- fall mit Ihrer Entsorgungseinrichtung in Verbindung. - Page 13 Die Garantieleistung gilt nur für Material- oder Fabrikationsfehler, nicht aber für Transportschäden, Verschleißteile oder für Beschädigungen an zerbrechli- chen Teilen, z. B. Schalter oder Akkus. Das Produkt ist lediglich für den priva- ten und nicht für den gewerblichen Gebrauch bestimmt. Bei missbräuchlicher und unsachgemäßer Behandlung, Gewaltanwendung und bei Eingriffen, die nicht von unserer autorisierten Service-Niederlassung vorgenommen wurden, erlischt die Garantie.
- Page 14 SOMMAIRE PAGE Introduction Destination de l'appareil Accessoires fournis Caractéristiques techniques Description de l'appareil Instructions relatives à la sécurité Déballage Installation Réglage Affûtage Nettoyage et entretien Entretien Mise au rebut Importateur Garantie et service après-vente - 11 -...
-
Page 15: Introduction
Introduction Toutes nos félicitations pour l'achat de votre nouvel appareil. Vous avez choisi un produit de grande qualité. Le mode d'emploi fait partie de ce produit. Il contient des remarques importantes concernant la sécurité, l'utilisation et la mise au rebut. Veuillez vous familiariser avec l'ensemble des consignes d'opération et de sécurité... -
Page 16: Description De L'appareil
Le temps d'opération par intermittence indique pendant combien de temps l'appareil peut être opéré, sans que le moteur ne surchauffe ou subisse de dommages. Après le temps d'opération par intermittence indiqué, l'appareil doit rester éteint jusqu'à ce que le moteur se soit refroidi à température ambi- ante (env. - Page 17 • Après usage ou en cas d'absence, retirez toujours la fi- che secteur de la prise secteur. Il y a présence de tensi- on électrique tant que la fiche secteur reste branchée dans la prise secteur. • Assurez-vous que la fiche secteur reste accessible en permanence afin de permettre le débranchement rapide de l'appareil en cas de danger.
-
Page 18: Déballage
• En cas d'absence de surveillance et avant l'assembla- ge, le désassemblage ou le nettoyage, l'appareil doit toujours être débranché du secteur. • Tenir l'appareil et son cordon de raccordement à l'écart des enfants. Déballage • Assurez-vous que le produit livré est complet et en parfait état. •... -
Page 19: Affûtage
Affûtage • Attendez que la pierre à affûter soit en mouvement avant d'approcher les lames. • Retirez toujours la lame et les ciseaux de la butée de la lame par mouve- ments uniformes, sans y retourner ou par mouvements de va-et-vient – car sinon, le résultat sera irrégulier. -
Page 20: Nettoyage Et Entretien
Lame de ciseaux Lorsque vous avez choisi la position "Lame de ciseaux" (Fig. D) : • Affûtez l'une après l'autre les deux lames des ciseaux. Pour ce faire, dépliez les ciseaux et passez l'une après l'autre les deux lames à travers la rainure. Tournevis pour vis à... -
Page 21: Entretien
Nettoyage de l'appareil : • Tournez le capuchon fonctionnel et de protection , jusqu'à ce que la flèche se trouve en haut. Vous pouvez à présent retirer le capuchon fonctionnel et de protection et nettoyer la zone entourant la pierre à af- fûter à... -
Page 22: Mise Au Rebut
Mise au rebut L’appareil ne doit jamais être jeté dans la poubelle domestique normale. Ce produit est soumis à la directive européenne 2012/19/EU. Eliminez l’appareil par l’intermédiaire d’une entreprise de traitement des déchets autorisée ou via le service de recyclage de votre commune. Veuillez respecter les règlements actuellement en vigueur. - Page 23 La prestation de garantie s'applique uniquement pour les erreurs de matériaux et de fabrication, pas pour les dommages de transport, les pièces d'usure ou les dommages subis par les pièces fragiles, comme par ex. les interrupteurs ou les batteries. Le produit est exclusivement destiné à un usage privé et non commercial.
- Page 24 INDICE PAGINA Introduzione Destinazione d'uso Fornitura Dati tecnici Descrizione dell'apparecchio Avvertenze di sicurezza Disimballaggio Montaggio Impostazione Molatura Pulizia e cura Manutenzione Smaltimento Importatore Garanzia e assistenza - 21 -...
-
Page 25: Introduzione
Introduzione Congratulazioni per l'acquisto del nuovo apparecchio. Lei ha scelto un prodotto di alta qualità. Il manuale di istruzioni è parte inte- grante del presente prodotto. Esso contiene importanti indicazioni per la sicu- rezza, l'uso e lo smaltimento. Prima di utilizzare il prodotto, si familiarizzi con tutte le indicazioni relative ai comandi e alla sicurezza.Utilizzi il prodotto solo come descritto e per i campi di impiego indicati. -
Page 26: Descrizione Dell'apparecchio
Il tempo di funzionamento continuato indica il tempo di funzionamento del- l'apparecchio senza pericolo di surriscaldamento e di guasti al motore. Trascorso questo periodo di tempo, spegnere l'apparecchio fino al raffredda- mento del motore a temperatura ambiente (per circa 30 minuti). Descrizione dell'apparecchio Funzione “Coltello con lama piatta”... - Page 27 • Dopo l'uso o in caso di assenza, staccare sempre la spina dalla presa di rete. La tensione di rete è presente nel pro- dotto fino a quando la spina è collegata alla presa di rete. • Fare in modo che la spina sia sempre raggiungibile per consentirne la rapida estrazione dalla presa in caso di pericolo.
-
Page 28: Disimballaggio
• Staccare sempre l'apparecchio dalla rete in caso di mancata sorveglianza e prima del montaggio, dello smontaggio o della pulizia. • Tenere lontani i bambini dall'apparecchio e dal relativo cavo. Disimballaggio • Controllare la completezza e l'integrità del prodotto. • Rimuovere tutte le parti di imballaggio e i resti di imballaggio dal prodotto. •... -
Page 29: Molatura
Molatura • Inserire la lama solo quando la mola gira. • Inserire lame e forbici sempre dalla base della lama, con un movimento uniforme, senza spostarle avanti e indietro, altrimenti il risultato sarà una molatura difforme. • Non esercitare una forte pressione e affilare solo lame pulite, per evitare l'usura precoce della mola. -
Page 30: Pulizia E Cura
Affilatura forbici Se è stata selezionata la posizione “Affilatura di forbici” (ill. D): • Affilare entrambe le lame delle forbici, una dopo l'altra. Per farlo, aprire le forbici e inserire le lame, una dopo l'altra, nella guida. Cacciavite a lama Se si desidera affilare un cacciavite a lama (ill. -
Page 31: Manutenzione
Pulizia dell'apparecchio: • Ruotare il cappuccio di funzione e di protezione , fino a rivolgere la freccia verso l'alto. A tal punto è possibile rimuovere il cappuccio di funzione e di protezione e pulire l'area intorno alla mola con un pennello asciutto. -
Page 32: Smaltimento
Smaltimento Non gettare per alcun motivo l’apparecchio insieme ai normali rifiuti domestici. Questo prodotto sottostà alla direttiva euro- pea 2012/19/EU. Smaltire l’apparecchio presso un’azienda autorizzata o presso l’ente comunale di smaltimento. Rispettare le norme attualmente in vigore. In caso di dubbi, contattare l’azienda di smaltimento competente. - Page 33 La garanzia vale solo per i difetti di materiale o fabbricazione, non per i dan- ni da trasporto, parti soggette a usura o danni a parti fragili come ad es. in- terruttori o accumulatori. Il prodotto è destinato esclusivamente all'uso dome- stico e non a quello commerciale.
- Page 34 INHOUDSOPGAVE PAGINA Inleiding Gebruiksdoel Inhoud van het pakket Technische gegevens Apparaatbeschrijving Veiligheidsvoorschriften Uitpakken Plaatsen Instellen Slijpen Reiniging en onderhoud Onderhoud Milieurichtlijnen Importeur Garantie en service - 31 -...
-
Page 35: Inleiding
Inleiding Gefeliciteerd met de aankoop van uw nieuwe apparaat. U hebt hiermee gekozen voor een hoogwaardig product. De bedienings- handleiding maakt deel uit van dit product. Deze bevat belangrijke aanwij- zingen voor veiligheid, gebruik en afvoeren. Maak uzelf voorafgaand aan het gebruik van het product vertrouwd met alle bedienings- en veiligheidsvo- orschriften. -
Page 36: Apparaatbeschrijving
De KB-tijd (kort bedrijf) geeft aan hoe lang een apparaat kan worden be- diend, zonder dat de motor oververhit raakt en schade hieraan ontstaat. Na de aangegeven KB-tijd moet het apparaat zo lang uitgeschakeld worden, totdat de motor op kamertemperatuur is afgekoeld (ca. 30 minuten). Apparaatbeschrijving Functie “Messen met glad lemmet”... - Page 37 • Na gebruik en in geval van afwezigheid altijd de stekker uit het stopcontact halen. Er staat netspanning op het product zo lang de stekker in het stopcontact steekt. • Zorg ervoor dat de stekker te allen tijde bereikbaar is, om deze bij gevaar snel uit het stopcontact te kunnen halen.
-
Page 38: Uitpakken
• Het apparaat moet altijd van de stroom worden losge- koppeld indien er geen toezicht is, en voor montage, demontage of reiniging. • Houd het apparaat en het bijbehorende snoer buiten bereik van kinderen. Uitpakken • Controleer of het product compleet is en in perfecte, onbeschadigde toestand. -
Page 39: Slijpen
Slijpen • Leg de lemmeten er pas tegenaan, als de slijpsteen draait. • Trek de messen en scharen altijd van de steelaanslag in een gelijkmatige beweging weg en niet weer terug of heen en weer - ander wordt het slijpresultaat onregelmatig. •... -
Page 40: Reiniging En Onderhoud
Scharenslijpen Als u de stand “Scharenslijpen” heeft gekozen (afb. D): • Dlijp achtereenvolgens beide lemmeten van de schaar. Hiertoe klapt u de schaar open en trekt u na elkaar beide lemmeten door de geleiding heen. Sleuf-schroevendraaier Als u een sleufschroevendraaier glad wilt slijpen (afb. -
Page 41: Onderhoud
Apparaat reinigen: • Draai de functie- en beschermingskap totdat de pijl boven staat. Nu kunt u de functie- en beschermingskap afnemen en het bereik om de slijpsteen met een droge penseel schoonmaken. • Haal de stofbak eraf en reinig deze met een penseel en desnoods met een licht vochtige doek. -
Page 42: Milieurichtlijnen
Milieurichtlijnen Deponeer het apparaat in geen geval bij het normale huisvuil. Dit product is onderhevig aan de Europese richtlijn 2002/96/EC. Voer het apparaat af via een erkend afvalverwerkingsbedrijf of via uw gemeentereiniging. Neem de bestaande voorschriften in acht. Neem in geval van twijfel contact op met de gemeentelijke reinigingsdienst. - Page 43 De garantie geldt alleen voor materiaal- of fabricagefouten, echter niet voor transportschade, of voor onderdelen die aan slijtage onderhevig zijn, of voor beschadigingen aan breekbare delen, bijv. schakelaars of accu's. Het product is uitsluitend bestemd voor privé-gebruik en niet voor bedrijfsmatige doeleinden. Bij verkeerd gebruik en ondeskundige behandeling, bij gebruik van geweld en bij reparaties die niet door ons geautoriseerd servicefiliaal zijn uitgevoerd, vervalt de garantie.
- Page 44 INDEX PAGE Introduction Intended use Items supplied Technical data Appliance description Safety instructions Unpacking Placement Adjustment Sharpening Cleaning and Care Maintenance Disposal Importer Warranty and Service - 41 -...
-
Page 45: Introduction
Introduction Congratulations on the purchase of your new appliance. You have clearly decided in favour of a quality product. These operating in- structions are a part of this product. They contain important information in re- gard to safety, use and disposal. Before using the product, familiarise yourself with all of these operating and safety instructions. -
Page 46: Appliance Description
The C.O. Time (Continuous Operation) details how long an appliance may be used without the motor overheating and being damaged. When the specified C.O. Time has been reached, the appliance must be switched off until the motor has cooled itself down to room temperature (approx. 30 minutes). Appliance description Function “Knife with smooth edge”... - Page 47 • After use or during extended absences, ALWAYS remove the plug from the power socket. For as long as the plug is inserted in the wall socket the appliance itself is under electrical power. • Ensure that the power plug is at all times easily accessible, so that it can be quickly and easily removed in the event of potential danger or risk.
-
Page 48: Unpacking
• The appliance should always be disconnected from the mains when not supervised and before assembly, disas- sembly or cleaning. • The appliance and its connecting cable must be kept away from children. Unpacking • Check that all items listed are available and that they show no signs of visible damage. -
Page 49: Sharpening
Sharpening • First present the blade when the grindstone is revolving. • Always draw the knife or scissors back, from the blade stop, in an even movement, not in a repetitive back and forth movement – otherwise the result will be an uneven sharpening. •... -
Page 50: Cleaning And Care
Scissor sharpening If you have selected the setting "Scissor sharpening" (Fig. D): • Sharpen both scissor blades one after the other. For this, open the scissors out and draw both blades, one after the other, through the guide. Flat-head screwdriver Should you wish to grind a slot-screwdriver flat (Fig. -
Page 51: Maintenance
Cleaning the appliance: • Turn the function and protective cap , until the arrow is at the top. You can now remove the function and protective cap and clean the area around the grindstone with a dry brush. • Dismantle the abrade collector and clean it with a brush and, if necessary, a lightly moistened cloth. -
Page 52: Disposal
Disposal Do not dispose of the appliance in your normal domestic waste. This product is subject to the European guideline 2012/19/EU. Dispose of the appliance through an approved disposal centre or at your community waste facility. Observe the currently applicable regulations. In case of doubt, please contact your waste disposal centre. - Page 53 The warranty covers only claims for material and manufacturing defects, but not for transport damage, for wearing parts or for damage to fragile compo- nents, e.g. buttons or batteries. This product is for private use only and is not intended for commercial use. The warranty is void in the case of abusive and improper handling, use of force and internal tampering not carried out by our authorized service branch.
- Page 54 KOMPERNASS HANDELS GMBH BURGSTRASSE 21 44867 BOCHUM DEUTSCHLAND / GERMANY www.kompernass.com Stand der Informationen · Version des informations Versione delle informazioni · Stand van de informatie Last Information Update: 11 / 2013 · Ident.-No.: SEAS20A1-092013-1 IAN 95913...