Table of Contents
Quick Links
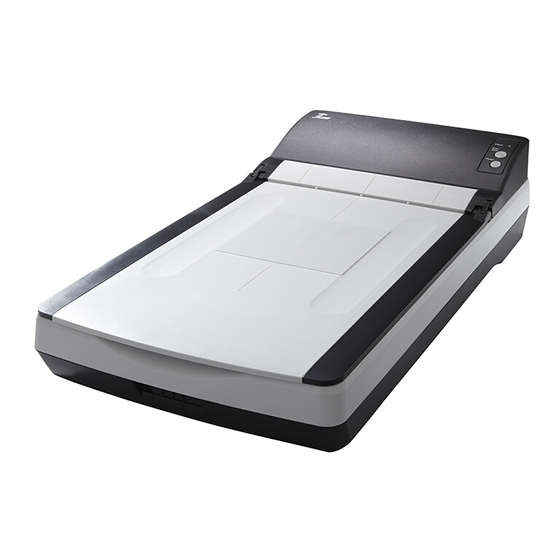
fi-400F
Operator's Guide
Thank you for purchasing our image scanner.
This manual explains about the basic operations and handling of the scanner.
For details about installation and connection of the scanner, refer to Quick Installation Sheet.
P3PC-5942-02ENZ0
Explains the names and functions of parts
and basic scanner operation.
Explains how to place documents on the
scanner.
Explains how to use the operator panel.
Explains about various ways of scanning.
Explains how to clean the scanner.
Explains about troubleshooting.
Explains how to configure settings in the
Software Operation Panel.
How to Use This Manual
TOP
Contents
Index
Introduction
Scanner
Overview
How to Scan
Documents
How to Use the
Operator Panel
Various Ways to
Scan
Daily Care
Troubleshooting
Operational
Settings
Appendix
Glossary
Table of Contents
Troubleshooting

Related Manuals for Fujitsu FI-400F


Summary of Contents for Fujitsu FI-400F
- Page 1 P3PC-5942-02ENZ0 Contents Index fi-400F Introduction Explains the names and functions of parts Scanner and basic scanner operation. Overview Operator's Guide Explains how to place documents on the How to Scan scanner. Documents Explains how to use the operator panel. How to Use the Thank you for purchasing our image scanner.
-
Page 2: How To Use This Manual
How to Use This Manual Contents How to Use This Manual Index Introduction Scanner The following shows the tips for using this manual. - Contents page Overview ® ® To display or print this manual, either Adobe Acrobat (7.0 or later) ®... -
Page 3: Introduction
Introduction Contents Introduction Index Introduction Scanner Thank you for purchasing our image scanner. Manual Description Overview About This Product Help (application) Explains how to use and configure the settings for the application software. Read How to Scan This scanner is equipped with a flatbed that allows you to scan them as needed. - Page 4 Introduction Contents Manufacturer Index PFU Limited Introduction YOKOHAMA i-MAKR PLACE, 4-4-5 Minatomirai, Nishi-ku, Yokohama, Kanagawa, 220-8567, Japan Scanner © PFU Limited 2016-2017 Overview How to Scan Documents How to Use the Operator Panel Various Ways to Scan Daily Care Troubleshooting Operational Settings Appendix...
-
Page 5: Conventions
Conventions Contents Conventions Index Introduction Scanner Safety Information Abbreviations Used in This Manual Overview The attached "Safety Precautions" manual contains important The operating systems and products in this manual are information about the safe and correct use of this product. How to Scan indicated as follows. - Page 6 Conventions Contents *2: This indicates a driver name of a scanner that is available for linkage. Name Indication Index Arrow Symbols in This Manual ® Windows Windows Server 2012 R2 Standard (64-bit) Introduction Server 2012 Right-arrow symbols () are used to separate icons or menu R2 (*1) Scanner options you should select in succession.
-
Page 7: Table Of Contents
Contents Contents Contents Index Introduction Scanner How to Use This Manual ........................... 2 Overview Introduction ................................ 3 Conventions ............................... 5 How to Scan Documents Chapter 1 Scanner Overview ........................11 Main Features ................................12 How to Use the Parts and Functions ..............................13 Operator Panel Front .................................... - Page 8 Contents Contents Chapter 3 How to Use the Operator Panel ....................27 Index Operator Panel Overview ............................28 Introduction Names and Functions ..............................28 Indications for LED Indicators ............................29 Scanner Overview Chapter 4 Various Ways to Scan ........................ 30 Summary ..................................
- Page 9 Contents Contents Image quality is poor when scanning pictures/photos....................50 Index Quality of scanned text or lines is unsatisfactory......................51 Introduction Images are distorted or not clear............................ 52 Vertical streaks appear on the scanned image......................53 Scanner The Check indicator on the operator panel lights up or is flashing after it is powered-on.
- Page 10 Contents Contents Settings Related to Scanning ............................. 75 Index Adjusting the Position to Start a Scan [Offset/Vertical Magnification Adjustment] ............75 Introduction Removing Shadows/Streaks That Appear around the Scanned Image [Page Edge Filler (FB)] ........76 Removing a Color from the Scanned Image [Dropout color]..................77 Scanner Settings Related to Waiting Time ..........................
-
Page 11: Chapter 1 Scanner Overview
Contents Index Chapter 1 Scanner Overview Introduction Scanner Overview This chapter explains about the names and functions of the scanner components, as well as the basic operations. How to Scan Documents 1.1 Main Features.............................12 How to Use the 1.2 Parts and Functions............................13 Operator Panel 1.3 Turning the Power ON/OFF........................17 1.4 Opening/Closing the Document Cover .......................18... -
Page 12: Main Features
Chapter 1 Scanner Overview Contents Index 1.1 Main Features Introduction This section explains about the main features of this product. Scanner The scanner is equipped with the following features: Overview High speed scanning The scanner has achieved a scanning speed of 1.7 sec./sheet (*1). How to Scan Scanner linkage Documents... -
Page 13: Operator Panel
Chapter 1 Scanner Overview Contents Index 1.2 Parts and Functions Introduction This section explains each part of the scanner. Scanner Front Overview Flatbed How to Scan Place a document on the glass section when you scan thick Documents documents such as a book or plastic cards, and thin paper. How to Use the Operator Panel Various Ways to... -
Page 14: Inside
Chapter 1 Scanner Overview Contents Inside Index Introduction Document Cover Scanner Close it to hold the document in place. Overview How to Scan Documents Document Pad How to Use the Holds the document down against the document bed. Operator Panel Various Ways to Scan Document Bed... -
Page 15: Back
Chapter 1 Scanner Overview Contents Back Index Security Cable Slot Introduction Used to connect an anti-theft security cable (commercially available). Scanner Overview Power Connector How to Scan Used to connect the power cable. "Power cable" refers to the cable that is made up of a plug adapter and an Documents AC adapter. -
Page 16: Removable Part
Chapter 1 Scanner Overview Contents Removable Part Index Document Cover Introduction Scanner Overview How to Scan Documents How to Use the Operator Panel Various Ways to Scan Daily Care Troubleshooting Operational Settings Appendix Glossary... -
Page 17: Turning The Power On/Off
Chapter 1 Scanner Overview Contents Index 1.3 Turning the Power ON/OFF Introduction How to Turn the Power OFF This section explains how to power on/off the scanner. Scanner HINT Overview The method by which the scanner is powered on/off can be specified Press the [Power] button on the operator panel for more from one of the following: than 2 seconds. -
Page 18: Opening/Closing The Document Cover
Chapter 1 Scanner Overview Contents Index 1.4 Opening/Closing the Document Cover Introduction How to Close the Document Cover This section describes how to open and close the document Scanner cover. Overview How to Open the Document Cover Gently close the document cover. How to Scan Open the document cover. -
Page 19: Power Saving Mode
Chapter 1 Scanner Overview Contents Index 1.5 Power Saving Mode Introduction Power saving mode keeps the power consumption low when ATTENTION Scanner the scanner has not been used for a certain period of time. When the scanner performs scanning for the first time after it Overview resumes from power saving mode, the same initialization as power- If the scanner is left powered on for 15 minutes (factory default... -
Page 20: Bundled Software
Chapter 1 Scanner Overview Contents Index 1.6 Bundled Software Introduction Overview of Bundled Software PaperStream Capture An image scanning application that supports both PaperStream IP Scanner (TWAIN) and PaperStream IP (ISIS). By defining scan settings as The following software programs are bundled with this Overview document profiles, you can customize the settings according to your product:... -
Page 21: Operating Environment
Chapter 1 Scanner Overview Contents Operating Environment Operating ® Windows 8.1 (32-bit/64-bit) (including updates) (*1) Index system ® The operating environment is as follows: Windows 8.1 Pro (32-bit/64-bit) (including updates) Introduction (*1) Operating ® Windows Vista Home Basic (32-bit/64-bit) (Service ®... -
Page 22: Installing The Bundled Software
Chapter 1 Scanner Overview Contents Installing the Bundled Software HINT Index If the [fi Series Setup] window does not appear, open [Explorer] or This section explains how to install software from the "Setup [Computer] and double-click [Setup.exe] in the Setup DVD-ROM. Introduction DVD-ROM"... - Page 23 Chapter 1 Scanner Overview Contents ■Installation (Custom) Index In the same way as in "Installation (Recommended)" Introduction (page 22), perform steps through 2. Scanner Click the [Installation (Custom)] button. Overview How to Scan Documents How to Use the Operator Panel Various Ways to Scan Daily Care...
-
Page 24: Chapter 2 How To Scan Documents
Contents Index Chapter 2 How to Scan Documents Introduction Scanner Overview This chapter explains how to scan documents with the scanner. How to Scan Documents 2.1 Scanning Documents ..........................25 How to Use the Operator Panel Various Ways to Scan Daily Care Troubleshooting Operational Settings... -
Page 25: Scanning Documents
Chapter 2 How to Scan Documents Contents Index 2.1 Scanning Documents Introduction This section explains about the basic flow of performing a Place a document on the document bed. Scanner Place the document face-down to align its top left-hand corner with scan. - Page 26 Chapter 2 How to Scan Documents Contents Gently close the document cover. Scan the document with an image scanning application. Index For details, refer to "1.4 Opening/Closing the Document Cover" (page ATTENTION 18). Introduction When the scanner and the computer are communicating, for instance, during scanning, note the following: Start an image scanning application.
-
Page 27: Chapter 3 How To Use The Operator Panel
Contents Chapter 3 How to Use the Operator Index Introduction Panel Scanner Overview How to Scan This chapter explains how to use the operator panel. Documents 3.1 Operator Panel Overview ...........................28 How to Use the Operator Panel Various Ways to Scan Daily Care Troubleshooting... -
Page 28: Operator Panel Overview
Chapter 3 How to Use the Operator Panel Contents Index 3.1 Operator Panel Overview Introduction The operator panel consists of buttons and LED indicators. Scanner Names and Functions Overview Check Indicator How to Scan Lights up or flashes in orange when an error occurs. Documents Check How to Use the... -
Page 29: Indications For Led Indicators
Press the [Scan/Stop] button in this status to return to the ready status. When this alarm occurs, turn the power off then back on. If the problem still persists, contact your FUJITSU scanner dealer or an authorized FUJITSU scanner service provider. Appendix Glossary... -
Page 30: Chapter 4 Various Ways To Scan
Contents Index Chapter 4 Various Ways to Scan Introduction Scanner Overview This chapter explains how to configure scanner settings and scan different types of documents with an image scanning How to Scan application. Documents 4.1 Summary ..............................31 How to Use the Operator Panel 4.2 Scanning Documents of Different Types and Sizes..................32 4.3 Customizing the Scanner Settings ......................35... -
Page 31: Summary
Chapter 4 Various Ways to Scan Contents Index 4.1 Summary Introduction The following shows the main ways of scanning documents: Scanner Scanning documents of different types and sizes Overview "Scanning a Book" (page 32) "Scanning a Large Document" (page 33) How to Scan Documents Customizing the scanner settings... -
Page 32: Scanning Documents Of Different Types And Sizes
Chapter 4 Various Ways to Scan Contents Index 4.2 Scanning Documents of Different Types and Sizes Introduction Scanning a Book Place a document on the document bed. Scanner Place the document face-down to align its top left-hand corner with the reference point. Overview Open the document cover. -
Page 33: Scanning A Large Document
Chapter 4 Various Ways to Scan Contents Scanning a Large Document Scan the document with an image scanning application. Index For details, refer to the image scanning application manual. Introduction Open the document cover. For details, refer to "1.4 Opening/Closing the Document Cover" (page Do not look directly into the light source. - Page 34 Chapter 4 Various Ways to Scan Contents Place a document on the document bed. Attach the document cover. Index Place the document face-down to align its top left-hand corner with the reference point. Close the document cover. Introduction For details, refer to "1.4 Opening/Closing the Document Cover"...
-
Page 35: Customizing The Scanner Settings
Chapter 4 Various Ways to Scan Contents Index 4.3 Customizing the Scanner Settings Introduction Using a Button on the Scanner to Start Scanning Click [View devices and printers]. Scanner The [Devices and Printers] window appears. The [Scan/Stop] button on the operator panel can be Overview Right-click on the scanner icon, and select [Scan configured to perform scanning by pressing the button. -
Page 36: Various Ways To
Chapter 4 Various Ways to Scan Contents Select an action and an application to be launched by the Scanner setup Index scanner button event. Click [Start this program] under [Actions], and select an application Check Introduction from the drop-down list on the right. Scanner Overview Scan... -
Page 37: Chapter 5 Daily Care
Contents Index Chapter 5 Daily Care Introduction Scanner Overview This chapter describes how to clean the scanner. How to Scan Documents Do not use aerosol spray or spray that contains alcohol. Paper How to Use the dust blown up by strong air from the spray may enter inside the scanner which may cause the scanner to fail or malfunction. -
Page 38: Cleaning Materials And Locations That Require Cleaning
Settings ATTENTION In order to use the cleaning materials safely and correctly, read the precautions on each product thoroughly. For more information about the cleaning materials, contact your FUJITSU scanner dealer or an authorized FUJITSU scanner service provider. Appendix Glossary... -
Page 39: Cleaning The Outside
Chapter 5 Daily Care Contents Index 5.2 Cleaning the Outside Introduction The outside of the scanner should be cleaned with either a Cloth Scanner Cleaner F1 or Mild piece of dry cloth, a cloth moistened with Cleaner F1/mild Overview Detergent detergent, or a sheet of Cleaning Wipe. -
Page 40: Cleaning The Inside
Chapter 5 Daily Care Contents Index 5.3 Cleaning the Inside Introduction The inside of the scanner should be cleaned with a piece of Open the document cover. Scanner For details, refer to "1.4 Opening/Closing the Document Cover" (page cloth moistened with Cleaner F1, or a sheet of Cleaning Wipe. 18). - Page 41 Chapter 5 Daily Care Contents Wait for the cleaned parts to dry. Index Close the document cover. Introduction For details, refer to "1.4 Opening/Closing the Document Cover" (page 18). Scanner Overview How to Scan Documents How to Use the Operator Panel Various Ways to Scan Daily Care...
-
Page 42: Chapter 6 Troubleshooting
Contents Index Chapter 6 Troubleshooting Introduction Scanner Overview This chapter explains about the countermeasures against troubles, items to check before contacting your scanner service How to Scan provider, and how to read the product labels on the scanner. Documents How to Use the ATTENTION Operator Panel For details about other errors/troubles that are not covered in this... -
Page 43: Error Indications On Operator Panel
Chapter 6 Troubleshooting Contents Index 6.1 Error Indications on Operator Panel Introduction Temporary Error When an error occurs during operation, the indicators on the Scanner operator panel light up as follows: The following are lists of temporary errors which can be Overview ... -
Page 44: Device Error
Turn the scanner off then back on. occurred. If the problem persists, write down the status of the indicators and contact your FUJITSU scanner dealer or an authorized FUJITSU scanner service Various Ways to Flashes 3 times Flashes 3 times An internal error occurred. -
Page 45: Troubleshooting
"6.3 Before You Contact the Scanner How to Scan Service Provider" (page 58), and then contact your FUJITSU Documents scanner dealer or an authorized FUJITSU scanner service provider. How to Use the The following are some examples of troubles that you may Operator Panel experience. -
Page 46: Scanner Does Not Turn On
Documents If the problem persists, check the items in "6.3 Before You Contact the Scanner Service Provider" (page 58) first, then contact your FUJITSU scanner dealer or an How to Use the authorized FUJITSU scanner service provider. Operator Panel Various Ways to... -
Page 47: The Power Indicator Lights Off
If the problem persists, check the items in "6.3 Before You Contact the Scanner Operator Panel Service Provider" (page 58) first, then contact your FUJITSU scanner dealer or an authorized FUJITSU scanner service provider. Various Ways to Scan Daily Care... -
Page 48: Scanning Does Not Start
The scanner is operating correctly. Daily Care If the problem persists, check the items in "6.3 Before You Contact the Scanner Service Provider" (page 58) first, then contact your FUJITSU scanner dealer or an authorized FUJITSU scanner service provider. Troubleshooting Operational Settings... -
Page 49: Scanning Takes A Long Time
Various Ways to Scan If the problem persists, check the items in "6.3 Before You Contact the Scanner Service Provider" (page 58) first, then contact your FUJITSU scanner dealer or an Daily Care authorized FUJITSU scanner service provider. Troubleshooting Operational... -
Page 50: Image Quality Is Poor When Scanning Pictures/Photos
"6.3 Before You Contact the Scanner Operator Panel Service Provider" (page 58) first, then contact your FUJITSU scanner dealer or an authorized FUJITSU scanner service provider. Various Ways to *1: The scanned image may differ from the original image significantly if you scan a picture or a photo in black & white. -
Page 51: Quality Of Scanned Text Or Lines Is Unsatisfactory
If the problem persists, check the items in "6.3 Before You Contact the Scanner Service Provider" (page 58) first, then contact your FUJITSU scanner dealer or an Daily Care authorized FUJITSU scanner service provider. *1: When you scan in grayscale or color mode, scanned images with text or lines may not become sharp or clear. -
Page 52: Images Are Distorted Or Not Clear
Scan If the problem persists, check the items in "6.3 Before You Contact the Scanner Daily Care Service Provider" (page 58) first, then contact your FUJITSU scanner dealer or an authorized FUJITSU scanner service provider. Troubleshooting Operational Settings Appendix... -
Page 53: Vertical Streaks Appear On The Scanned Image
Operator Panel If the problem persists, check the items in "6.3 Before You Contact the Scanner Various Ways to Service Provider" (page 58) first, then contact your FUJITSU scanner dealer or an Scan authorized FUJITSU scanner service provider. Daily Care Troubleshooting... -
Page 54: The Check Indicator On The Operator Panel Lights Up Or Is Flashing After It Is Powered-On
Operator Panel If the problem persists, check the items in "6.3 Before You Contact the Scanner Various Ways to Service Provider" (page 58) first, then contact your FUJITSU scanner dealer or an Scan authorized FUJITSU scanner service provider. Daily Care Troubleshooting... -
Page 55: A Shadow Appears At The Top Or The Bottom Of The Scanned Image
Operator Panel If the problem persists, check the items in "6.3 Before You Contact the Scanner Various Ways to Service Provider" (page 58) first, then contact your FUJITSU scanner dealer or an Scan authorized FUJITSU scanner service provider. Daily Care Troubleshooting... -
Page 56: Images Scanned In Black & White (Or In Grayscale Or Color) Are Dark
Operator Panel If the problem persists, check the items in "6.3 Before You Contact the Scanner Various Ways to Service Provider" (page 58) first, then contact your FUJITSU scanner dealer or an Scan authorized FUJITSU scanner service provider. Daily Care Troubleshooting... -
Page 57: Automatic Page Size Detection Fails
Daily Care If the problem persists, check the items in "6.3 Before You Contact the Scanner Troubleshooting Service Provider" (page 58) first, then contact your FUJITSU scanner dealer or an authorized FUJITSU scanner service provider. Operational Settings Appendix Glossary... -
Page 58: Before You Contact The Scanner Service Provider
Chapter 6 Troubleshooting Contents Index 6.3 Before You Contact the Scanner Service Provider Introduction Please check the following items before contacting your Scanner FUJITSU scanner dealer or an authorized FUJITSU scanner Overview service provider. General How to Scan Documents Item... -
Page 59: Error Status
Chapter 6 Troubleshooting Contents ■Other Error Status Index Item Findings ■Computer connection issues Introduction Can you send the Item Findings output image and a Scanner photo that shows Operating system Overview the paper condition (Windows) by e-mail? Error message How to Scan Documents Interface Example: USB interface... -
Page 60: Checking The Product Label
Chapter 6 Troubleshooting Contents Index 6.4 Checking the Product Label Introduction This section explains about the product label on the scanner. Scanner Location Overview The label is located on the back of the scanner. The location of the label is shown below. How to Scan Documents How to Use the... -
Page 61: Chapter 7 Operational Settings
Contents Index Chapter 7 Operational Settings Introduction Scanner Overview This chapter explains how to use the Software Operation Panel to configure the scanner settings. How to Scan Documents 7.1 Starting Up the Software Operation Panel....................62 How to Use the 7.2 Password Setting for Software Operation Panel ..................64 Operator Panel 7.3 Configuration Items ............................70 7.4 Settings Related to Sheet Counters ......................74... -
Page 62: Starting Up The Software Operation Panel
Chapter 7 Operational Settings Contents Index 7.1 Starting Up the Software Operation Panel Introduction The Software Operation Panel is installed together with the Display the Software Operation Panel window. Windows Vista/Windows Server 2008/Windows 7 Scanner PaperStream IP driver. Click [Start] menu [All Programs] [fi Series] [Software Overview This application allows you to check the scanner information Operation Panel]. - Page 63 Chapter 7 Operational Settings Contents The Software Operation Panel icon is displayed in the menu that Index appears when you click in the notification area. The notification area is located at the far right of the taskbar. Introduction To have the Software Operation Panel icon always displayed in the notification area, drag the icon and drop it onto the notification area.
-
Page 64: Password Setting For Software Operation Panel
Chapter 7 Operational Settings Contents Index 7.2 Password Setting for Software Operation Panel Introduction By setting a password, the Software Operation Panel can run Enter a new password then again to confirm, and click the Scanner [OK] button. in [View Only mode] which allows users to only view the Overview Up to 32 characters can be used for the password. -
Page 65: Setting [View Only Mode]
Chapter 7 Operational Settings Contents Setting [View Only mode] The Software Operation Panel enters [View Only mode]. Index Set the Software Operation Panel to [View Only mode] in the Introduction following procedure: Scanner Set a password. Overview For details, refer to "Setting a Password"... -
Page 66: Clearing [View Only Mode]
Chapter 7 Operational Settings Contents Clearing [View Only mode] [View Only mode] is cleared, and the scanner settings can now be Index changed. Clear [View Only mode] in the following procedure: Introduction Right-click the Software Operation Panel icon in the Scanner notification area, and select [View Only mode] from the Overview... -
Page 67: Operational
Chapter 7 Operational Settings Contents Changing the Password Enter a new password then again to confirm, and click the Index [OK] button. Change the password in the following procedure: Up to 32 characters can be used for the password. Introduction Note that only alphanumeric characters (a to z, A to Z, 0 to 9) are Right-click the Software Operation Panel icon in the allowed. -
Page 68: Clearing The Password
Chapter 7 Operational Settings Contents Clearing the Password Leave both fields blank and click the [OK] button. Index Clear the password in the following procedure: Introduction Right-click the Software Operation Panel icon in the Scanner notification area, and select [Password Setting] from the Overview menu. -
Page 69: Resetting The Password
Chapter 7 Operational Settings Contents Resetting the Password Enter a new password then again to confirm, and click the Index [OK] button. In case you forgot your password, it can be reset in the Up to 32 characters can be used for the password. Introduction following procedure: Note that only alphanumeric characters (a to z, A to Z, 0 to 9) are... -
Page 70: Configuration Items
Chapter 7 Operational Settings Contents Index 7.3 Configuration Items Introduction The Software Operation Panel allows the configuration of the Scanner following settings for the scanner that is connected to the Overview computer. Device Setting How to Scan Documents Start up the Software Operation Panel. How to Use the For details, refer to "7.1 Starting Up the Software Operation Panel"... - Page 71 Chapter 7 Operational Settings Contents Item Description Parameter/Value Factory Index Default Introduction Count Displays the approximate total number of sheets scanned on the Total Count (FB) (page 74) flatbed. Scanner Overview Power saving Specify the waiting time before the scanner enters power saving Range: 5 to 235 min.
-
Page 72: Device Setting 2
Chapter 7 Operational Settings Contents Device Setting 2 Index HINT Introduction The Software Operation Panel settings can be restored to the Start up the Software Operation Panel. factory default. For details, refer to "7.1 Starting Up the Software Operation Panel" To restore the settings to the factory default, click the [Default] Scanner (page... - Page 73 Chapter 7 Operational Settings Contents Item Description Parameter/Value Factory Default Index Page Edge Filler (FB) Specify the width for the margin around the Top/Bottom/Left/Right: 0 to 15 mm Top/Bottom/Left/ Introduction (page 76) scanned image to be filled in with black. Right: 0 mm This setting can also be configured in the Scanner...
-
Page 74: Settings Related To Sheet Counters
Chapter 7 Operational Settings Contents Index 7.4 Settings Related to Sheet Counters Introduction Checking the Sheet Counters [Count] ATTENTION Scanner If you turned off the scanner by unplugging the power cable, or The approximate total number of sheets scanned on the Overview selected [Disable power switch], the number of scanned sheets flatbed can be checked. -
Page 75: Settings Related To Scanning
Chapter 7 Operational Settings Contents Index 7.5 Settings Related to Scanning Introduction Adjusting the Position to Start a Scan Adjust the level of offset/vertical magnification as needed. Scanner [Offset/Vertical Magnification Adjustment] Overview When the output position of the scanned image is not correct or the image appears shortened/elongated (vertically), adjust How to Scan the offset and the vertical magnification in the following... -
Page 76: Removing Shadows/Streaks That Appear Around The Scanned Image [Page Edge Filler (Fb)]
Chapter 7 Operational Settings Contents Removing Shadows/Streaks That Appear around Vertical Description Index the Scanned Image magnification [Page Edge Filler (FB)] Adjustment Introduction Unit The unit for vertical magnification adjustment is Depending on the condition of the documents that you scan, Scanner fixed to [Flat bed]. -
Page 77: Removing A Color From The Scanned Image [Dropout Color]
Chapter 7 Operational Settings Contents Removing a Color from the Scanned Image Specify the width of each margin to fill in: top/bottom/left/ Index right. [Dropout color] T: top = 0 to 15 mm Introduction With "Dropout color", you can select either green, red, or blue B: bottom = 0 to 15 mm (primary colors) to remove the details of the selected color R: right = 0 to 15 mm... - Page 78 Chapter 7 Operational Settings Contents Start up the Software Operation Panel. Index For details, refer to "7.1 Starting Up the Software Operation Panel" (page 62). Introduction From the listing on the left, select [Device Setting 2] Scanner [Dropout color]. Overview How to Scan Documents...
-
Page 79: Settings Related To Waiting Time
Chapter 7 Operational Settings Contents Index 7.6 Settings Related to Waiting Time Introduction Waiting Time to Enter Power Saving Mode [Power HINT Scanner saving] By selecting the [Power off after a certain period of time] check Overview box, the scanner turns off automatically if the scanner is left on for The waiting time for the scanner to enter power saving mode a certain period of time without being used. -
Page 80: Settings Related To Power On/Off
Chapter 7 Operational Settings Contents Index 7.7 Settings Related to Power ON/OFF Introduction Method of Turning the Scanner ON/OFF [Power Select one of the following: Scanner SW Control] Enable power switch: Press the [Power] button on the operator panel. Overview Disable power switch: Use an AC power strip to control power supply The method by which the scanner is powered on/off can be for peripherals such as a scanner in... -
Page 81: Appendix
Contents Index Appendix Introduction Scanner Overview This appendix provides the following information. How to Scan Documents A.1 Basic Specification .............................82 How to Use the A.2 Installation Specification..........................83 Operator Panel A.3 Outer Dimensions ............................84 A.4 Uninstalling the Software ...........................85 Various Ways to A.5 Scanners That Are Linkable........................86 Scan Daily Care... -
Page 82: Basic Specification
Appendix Contents Index A.1 Basic Specification Introduction Scanner Item Specification Notes Overview Scanner type Flatbed How to Scan Image sensor Color CCD Documents Light source White LED How to Use the Scanning area Maximum 216 × 297 mm/8.5 × 11.69 in. Operator Panel Scanning speed Binary (black &... -
Page 83: Installation Specification
Appendix Contents Index A.2 Installation Specification Introduction Scanner Item Specification Overview Outer dimensions (W × D × H) (*1) 300 × 569 × 121 (mm)/11.81 × 22.40 × 4.76 (in.) How to Scan Installation space (W × D × H) (*2) 400 ×... -
Page 84: Outer Dimensions
Appendix Contents Index A.3 Outer Dimensions Introduction The outer dimensions are as follows: Scanner Overview How to Scan Documents How to Use the Operator Panel Various Ways to Scan Daily Care Troubleshooting Operational Operational Settings Settings 569 (22.40) Appendix Unit: mm (in.) Glossary... -
Page 85: Uninstalling The Software
To display [], move the mouse cursor. Click [PaperStream Capture]. Daily Care Windows 10/Windows Server 2016 Manuals: Click [fi Series manuals for fi-400F]. Right-click [Start] menu, and then click [Control Panel]. Click the [Uninstall] button or the [Uninstall/Change] Select [Uninstall a Program]. Troubleshooting button. -
Page 86: Scanners That Are Linkable
Appendix Contents Index A.5 Scanners That Are Linkable Introduction This scanner can be linked with other scanners with the Scanner PaperStream IP driver. Overview The scanners that are available for linking are the following: Linkable scanners fi-7140/fi-7160/fi-7180 How to Scan Documents How to Use the Operator Panel... -
Page 87: Glossary
Glossary Contents Glossary Index Introduction Scanner Overview Edge Extract Noise removal A4 size How to Scan Emphasis Documents A5 size Error diffusion OCR (Optical Character A6 size Recognition) How to Use the A7 size Operator Panel Operator panel Filter A8 size Flatbed Various Ways to Ambient condition... - Page 88 Glossary Contents Index Introduction A7 size A standard paper size which is 74 × 105 mm (2.91 × 4.13 in.). Scanner Overview A4 size A standard paper size which is 210 × 297 mm (8.27 × 11.7 in.). How to Scan Documents A5 size A standard paper size which is 148 ×...
- Page 89 Glossary Contents Index Introduction Default setting (Hardware) Scanner Preset values from the factory. Overview (Software) How to Scan Values set upon installation of software. Documents Density Refers to the deepness of a color in an image. How to Use the Operator Panel Device error An error which requires troubleshooting by a service engineer.
- Page 90 Glossary Contents Error diffusion Index Method of halftone (pseudo-grayscale) image processing which is based on black & white pixel binarization. It sums the Introduction optical density of a pixel and its adjacent pixels, then relocates black pixels in the order of density to minimize the difference between scanned and output images.
- Page 91 Glossary Contents Index Introduction Halftone Reproduces the color density in black & white by using dot patterns. This method is effective for scanning images such as Scanner photographs in black & white. Overview How to Scan Documents Image processing Refers to the processing of a scanned image with specified scan parameters before outputting the image data. How to Use the Operator Panel Interface...
- Page 92 Glossary Contents Index Introduction Noise removal A function which improves the quality of an image by removing isolated noise that appears as black dots in a white area (or Scanner vice versa). Overview How to Scan Documents OCR (Optical Character Recognition) A device or a technology that recognizes the text on documents and converts them into text data that can be edited.
- Page 93 Glossary Contents Index Introduction Threshold The value which is used to determine whether a certain color is black or white. Threshold value must be configured in order Scanner to scan images with grayscale gradation. Each pixel is converted into black or white according to the specified value. Overview TWAIN How to Scan...
-
Page 94: Index
Index Contents Index Index Introduction Scanner Overview before you contact the scanner service provider.... 58 installation specification..........83 bundled software ............20 introduction............... 3 How to Scan Documents cleaning materials............38 locations that require cleaning........38 How to Use the cleaning the inside............ - Page 95 Index Contents scanners that are linkable..........86 Index scanning ................. 25 scanning documents of different types and sizes... 32 Introduction settings related to power on/off ........80 settings related to scanning..........75 Scanner settings related to sheet counters........74 Overview settings related to waiting time ........
- Page 96 Overview How to Scan Documents How to Use the Operator Panel Various Ways to Scan Daily Care fi-400F Image Scanner Operator's Guide Troubleshooting P3PC-5942-02ENZ0 Issue date: March 2017 Operational Settings Issued by: PFU Limited The contents of this manual are subject to change without notice.