
Related Manuals for Makita XDT12


Summary of Contents for Makita XDT12
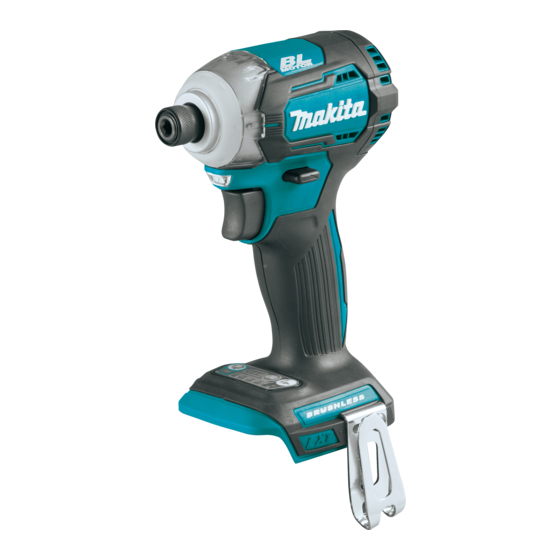
- Page 1 INSTRUCTION MANUAL MANUAL DE INSTRUCCIONES Cordless Impact Driver Atornillador de Impacto Inalámbrico XDT12 IMPORTANT: Read Before Using. IMPORTANTE: Lea antes de usar.
-
Page 2: Specifications
ENGLISH (Original instructions) SPECIFICATIONS Model: XDT12 Fastening capacities Machine screw 4 mm - 8 mm (5/32" - 5/16") Standard bolt 5 mm - 16 mm (3/16" - 5/8") High tensile bolt 5 mm - 14 mm (3/16" - 9/16") No load speed (RPM) - Page 3 Personal Safety Use the power tool, accessories and tool bits etc. in accordance with these instructions, tak- Stay alert, watch what you are doing and use ing into account the working conditions and common sense when operating a power tool. the work to be performed.
-
Page 4: Functional Description
Use of non-genuine Makita batteries, or batteries that have been altered, may result in the battery bursting direct current causing fires, personal injury and damage. It will also void the Makita warranty for the Makita tool and charger. no load speed Tips for maintaining maximum... -
Page 5: Overload Protection
If the status will not change, stop using and have the tool repaired by a Makita local service center. NOTE: When the tool is overheated, the light blinks for one minute as shown in the table below, and then the LED display goes off. -
Page 6: Electric Brake
Indicator lamps Remaining This tool is equipped with an electric brake. If the tool capacity consistently fails to quickly stop after the switch trigger is released, have the tool serviced at a Makita service Lighted Blinking center. 75% to 100%... - Page 7 This tool has a reversing switch to change the direction of rotation. Depress the reversing switch lever from the A side for clockwise rotation or from the B side for coun- terclockwise rotation. When the reversing switch lever is in the neutral posi- tion, the switch trigger cannot be pulled.
- Page 8 Changing the impact force You can change the impact force in five steps: max- ,hard, medium, soft, and T mode. This allows a tightening suitable to the work. Every time the button is pressed, the number of blows changes in five steps. “T”...
-
Page 9: Installing Hook
Impact force grade displayed Maximum blows Purpose Example of application on panel A mode 3,800 min (/min) Tightening screws with better Tightening long screws. control. NOTE: T mode and A mode is available only when the tool rotates clockwise. When rotating counterclockwise in T mode and A mode, the impact force and speed are the same as max mode. -
Page 10: Operation
The hook is convenient for temporarily hanging the tool. Proper fastening torque for high tensile bolt This can be installed on either side of the tool. To install the hook, insert it into a groove in the tool housing on N•m (ft•lbs) either side and then secure it with a screw. -
Page 11: Maintenance
MAINTENANCE • alterations have been made to the tool. IN NO EVENT SHALL MAKITA BE LIABLE FOR ANY CAUTION: Always be sure that the tool is INDIRECT, INCIDENTAL OR CONSEQUENTIAL switched off and the battery cartridge is removed... -
Page 12: Especificaciones
ESPAÑOL (Instrucciones originales) ESPECIFICACIONES Modelo: XDT12 Capacidades de apriete Tornillo de máquina 4 mm - 8 mm (5/32" - 5/16") Tornillo estándar 5 mm - 16 mm (3/16" - 5/8") Tornillo de alta resistencia 5 mm - 14 mm (3/16" - 9/16") Velocidad sin carga (RPM) Modo de impacto máx. - Page 13 No exponga las herramientas eléctricas a la Mantenimiento y uso de la herramienta eléctrica lluvia ni a condiciones húmedas. La entrada de No fuerce la herramienta eléctrica. Utilice la agua en una herramienta eléctrica aumentará el herramienta eléctrica correcta para su aplica- riesgo de que se produzca una descarga eléctrica.
- Page 14 Servicio Instrucciones importantes de Haga que una persona calificada repare la seguridad para el cartucho de herramienta eléctrica utilizando sólo piezas de batería repuesto idénticas. Esto asegura que se man- tenga la seguridad de la herramienta eléctrica. Antes de utilizar el cartucho de batería, lea Siga las instrucciones para la lubricación y todas las instrucciones e indicaciones de cambio de accesorios.
-
Page 15: Descripción Del Funcionamiento
Makita, o de baterías alteradas, puede ocasio- nar que las baterías exploten causando un incendio, lesiones personales y daños. Asimismo, esto inva- lidará la garantía de Makita para la herramienta y el cargador Makita. Consejos para alargar al máximo la vida útil de la batería... - Page 16 Si el estado no cambia, deje de usar la herramienta y llévela a un centro de servicio Makita de su localidad para que la reparen. NOTA: Cuando la herramienta se sobrecaliente, la luz parpadeará durante un minuto tal como se mues- tra en la tabla a continuación y luego la luz LED indi-...
- Page 17 La herramienta está equipada con un freno eléctrico. Si disminuir. la herramienta falla constantemente en detenerse tras soltar el gatillo interruptor, lleve la herramienta a mante- nimiento a un centro de servicio Makita. Iluminación de la luz delantera PRECAUCIÓN: No mire a la luz ni vea a la fuente de luz directamente.
- Page 18 Accionamiento del conmutador de Modo A inversión de giro El “modo A (modo de asistencia)” es un modo fácil de usar para insertar tornillos con un buen control. En este modo, la herramienta inserta un tornillo con una rotación menos rápida al principio. Una vez que la herramienta empieza el impacto, la velocidad de rota- ción aumenta y alcanza la velocidad máxima.
- Page 19 Cambio de la fuerza de impacto La fuerza de impacto puede cambiarse a cinco niveles: máx., duro, medio, suave y modo T. Esto permite un apriete adecuado para el trabajo. Cada vez que el botón es oprimido, el número de percusiones cambia a cinco niveles.
- Page 20 Grado de la fuerza de impacto Golpes máximos Propósito Ejemplo de aplicación mostrado en el panel Modo A 3 800 ipm Apriete de tornillos con un Apriete de tornillos largos. mejor control. NOTA: El modo T y el modo A están disponibles sólo cuando la herramienta rota en el sentido de las manecillas del reloj.
-
Page 21: Operación
Torsión de apriete apropiada para un perno Instalación del gancho estándar N•m (ft•lbs) 140 N•m 16 mm(5/8") (101 ft•lbs) 14 mm(9/16") 120 N•m (87 ft•lbs) 16 mm(5/8") 100 N•m (72 ft•lbs) 12 mm(1/2") 80 N•m (58 ft•lbs) 14 mm(9/16") 60 N•m 10 mm(3/8") (43 ft•lbs) 12 mm(1/2") -
Page 22: Mantenimiento
Makita. Si la inspección muestra que el problema ha sido a causa de un defecto de mano de obra o material, Makita hará la reparación (o a su discreción, el reemplazo) sin ningún cargo. MANTENIMIENTO Esta garantía no aplica cuando:... - Page 23 Esta garantía le concede derechos legales específicos y usted podrá tener también otros derechos que varían de un estado a otro. Algunos estados no permiten la exclusión o limitación de daños incidentales o con- secuentes, por lo que la limitación o exclusión arriba mencionada podría no aplicar para usted.
- Page 24 Para reducir la exposición a estos productos químicos: trabaje en un área bien ventilada y póngase el equipo de seguridad indicado, tal como las máscaras contra polvo que están especialmente diseñadas para filtrar partículas microscópicas. Makita Corporation 3-11-8, Sumiyoshi-cho, Anjo, Aichi 446-8502 Japan 885516-941...
- Page 25 DC18RA DC18RC Fast Charger Chargeur rapide Cargador rápido Symbols The followings show the symbols used for the charger and battery. Be sure that you understand their meaning before use. Symboles Nous donnons ci-dessous les symboles utilisés pour le chargeur et la batterie. Assurez-vous que vous en avez bien compris la signification avant d’utiliser l’outil.
- Page 26 • Do not short batteries. • Ne jamais court-circuiter les bornes d’une batterie. • No provoque un cortocircuito en las baterías. IMPORTANT: Read Before Using. IMPORTANT : Lire ce qui suit avant d’utiliser cet outil. IMPORTANTE: Leer antes de usar.
-
Page 27: Important Safety Instructions
10. Make sure cord is located so that it will not be stepped on, tripped over, or otherwise subjected to damage or stress. 11. Do not operate charger with damaged cord or plug. If the cord or plug is damaged, ask Makita authorized service center to replace it in order to avoid a hazard. -
Page 28: Cooling System
6. Preset melody sound remains stored even when the charger is unplugged. NOTE: • The battery charger is for charging Makita-battery cartridge. Never use it for other purposes or for other manufacturer’s batteries. • When you charge a battery cartridge which is new or has not been used for a long period of time, it may not accept a full charge until after discharging it completely and recharging a couple of times. - Page 29 (1) le chargeur de batterie, sur (2) la batterie et sur (3) le produit utilisant la batterie. ATTENTION — Pour réduire le risque de blessure, ne chargez que les batteries rechargeables MAKITA qui figurent sur l’étiquette du chargeur. Les autres types de batteries peuvent causer des blessures et entraî- ner des dommages en explosant.
-
Page 30: Système De Refroidissement
6. La mélodie préréglée demeure en mémoire même lorsque vous débranchez le chargeur. NOTE : • Le chargeur de batterie est conçu pour les batteries Makita. Ne jamais l’utiliser à d’autres fins ou avec les batteries d’autres fabricants. • Lorsque vous chargez une cartouche de batterie neuve ou restée inutilisée pendant une période prolongée, il se peut que vous deviez la recharger et la décharger à... - Page 31 Tension 9,6 V 12 V 14,4 V Capacité (Ah) Temps de charge (en minutes) Nombre de cellules — — — BH9020A — — — BH1220/C BH1420 Cartouche de batterie au Ni-MH — — — BH9033A — — — BH1233/C BH1433 Tension 14,4 V 18 V...
- Page 32 (1) el cargador de baterías, (2) la batería, y (3) el producto con el que se utilice la batería. PRECAUCION — Para reducir el riesgo de sufrir heridas, cargue solamente las baterías recargables MAKITA marcadas en la etiqueta de cargador. Otros tipos de baterías podrán explotar y ocasionar heridas personales y daños.
- Page 33 6. El sonido de melodía permanecerá almacenado aunque desenchufe el cargador. NOTAS: • El cargador de baterías es sólo para cargar cartuchos de batería Makita. No lo utilice nunca con otros fines ni para baterías de otros fabricantes. • Cuando cargue un cartucho de batería que sea nuevo o que no haya sido utilizado durante un largo periodo de tiempo, es posible que no acepte una carga completa hasta después de haberlo descargado completamente y...
- Page 34 Tensión 9,6 V cc 12 V cc 14,4 V cc Capacidad (Ah) Tiempo de carga (minutos) Número de celdas — — — 1,7 Ah 20 min BH9020A — — 2,0 Ah 20 min — BH1220/C BH1420 2,0 Ah 15 min Cartucho de batería Ni-MH —...
- Page 36 Makita Corporation 3-11-8, Sumiyoshi-cho, Anjo, Aichi 446-8502 Japan 884676H946 www.makita.com...