Sony DSC-T99 Instruction Manual
Hide thumbs
Also See for DSC-T99:
- Instruction manual (451 pages) ,
- Handbook (160 pages) ,
- Service manual (26 pages)

Related Manuals for Sony DSC-T99


Summary of Contents for Sony DSC-T99
- Page 1 4-199-739-31(1) DSC-T99/T99D GB Digital Still Camera/Instruction Manual FR Appareil photo numérique/Mode d’emploi © 2010 Sony Corporation...
- Page 2 English Owner’s Record The model and serial numbers are located on the bottom. Record the serial number in the space provided below. Refer to these numbers whenever you call your Sony dealer regarding this product. Model No. DSC-T99/T99D Serial No. ______________________________...
- Page 3 • Do not incinerate or dispose of in fire. • Do not handle damaged or leaking lithium ion batteries. • Be sure to charge the battery pack using a genuine Sony battery charger or a device that can charge the battery pack.
- Page 4 1-800-222-SONY (7669) The number below is for the FCC related matters only. Regulatory Information Declaration of Conformity Trade Name: SONY Model No.: DSC-T99, DSC-T99D Responsible Party: Sony Electronics Inc. Address: 16530 Via Esprillo, San Diego, CA 92127 U.S.A. Telephone No.: 858-942-2230 This device complies with Part15 of the FCC Rules.
- Page 5 For Customers in Europe Notice for the customers in the countries applying EU Directives The manufacturer of this product is Sony Corporation, 1-7-1 Konan Minato-ku Tokyo, 108-0075 Japan. The Authorized Representative for EMC and product safety is Sony Deutschland GmbH, Hedelfinger Strasse 61, 70327 Stuttgart, Germany. For any service or guarantee matters please refer to the addresses given in separate service or guarantee documents.
- Page 6 If the plug supplied with this equipment has a detachable fuse cover, be sure to attach the fuse cover after you change the fuse. Never use the plug without the fuse cover. If you should lose the fuse cover, please contact your nearest Sony service station.
-
Page 7: Table Of Contents
Table of contents Getting started Refer to “Cyber-shot Handbook” (PDF) on supplied CD-ROM..................8 Checking the accessories supplied...........8 Notes on using the camera ............8 Identifying parts ...............11 Battery charging and the number of images/time that can be recorded ..................12 Inserting the battery pack/a memory card (sold separately)...15 Setting the date and time/display color ........18 Shooting/viewing images Shooting still images ..............19... -
Page 8: Refer To "Cyber-Shot Handbook" (Pdf) On Supplied Cd-Rom
Refer to “Cyber-shot Handbook” (PDF) on supplied CD-ROM For details on advanced operations, please read “Cyber- shot Handbook” (PDF) on the CD-ROM (supplied) using a computer. Refer to “Cyber-shot Handbook” for in-depth instructions on shooting or viewing images and connecting the camera to your computer, printer or TV (page 22). - Page 9 Functions built into this camera This manual describes each of the functions of TransferJet-compatible/ incompatible devices. To check if your camera supports the TransferJet function, check for the following mark on the bottom of the camera. TransferJet-compatible device: (TransferJet) On database files When you insert a memory card without a database file into the camera and turn on the power, part of the memory card capacity is used to automatically create a database file.
- Page 10 JEITA (Japan Electronics and Information Technology Industries Association). • Sony does not guarantee that the camera will play back images recorded or edited with other equipment, or that other equipment will play back images recorded with the camera.
-
Page 11: Identifying Parts
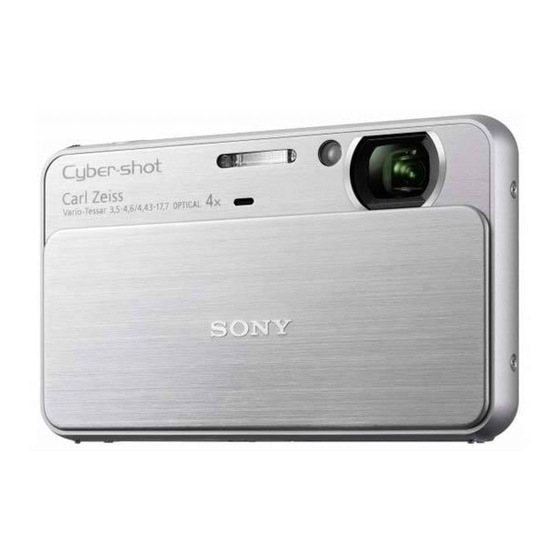
Identifying parts A Zoom (W/T) lever B Shutter button C Microphone D ON/OFF (Power) button/ Power lamp E Flash F Self-timer lamp/Smile Shutter lamp/AF illuminator G Lens H Lens cover I LCD screen/Touch panel J Speaker (Playback) button L Hook for wrist strap M Battery insertion slot N Tripod receptacle •... -
Page 12: Battery Charging And The Number Of Images/Time That Can Be Recorded
Battery charging and the number of images/time that can be recorded Insert the battery pack into the battery charger. • You can charge the battery even when it is partially charged. Battery pack Connect the battery For customers in the USA and Canada charger to the wall Plug... - Page 13 (wall socket), and remove the battery pack from the battery charger. • Be sure to use the battery pack or the battery charger of the genuine Sony brand. Battery life and number of images you can record/ view Battery life (min.)
- Page 14 • The number of still images that can be recorded is based on the CIPA standard, and is for shooting under the following conditions. (CIPA: Camera & Imaging Products Association) – [LCD Brightness] is set to [Normal]. – Shooting once every 30 seconds. –...
-
Page 15: Inserting The Battery Pack/A Memory Card (Sold Separately)
Inserting the battery pack/a memory card (sold separately) Open the cover. Insert a memory card (sold separately). With the notched corner facing as illustrated, insert the memory card until it clicks into place. Note the notched corner facing the correct direction. Insert the battery pack. - Page 16 Memory card that you can use The following memory cards are compatible with this camera: “Memory Stick PRO Duo” media, “Memory Stick PRO-HG Duo” media, “Memory Stick Duo” media, SD memory card, SDHC memory card and SDXC memory card. However, all memory cards are not guaranteed to work with this camera. MultiMediaCard cannot be used.
- Page 17 When there is no memory card inserted Images are stored in the camera’s internal memory (approximately 32 MB). To copy images from the internal memory to a memory card, insert a memory (Settings) t card in the camera, then touch (Memory Card Tool) t [Copy].
-
Page 18: Setting The Date And Time/Display Color
Setting the date and time/display color Lower the lens cover. The camera is turned on. The power lamp lights up only when the camera starts up. • You can also turn on the camera by pressing the ON/OFF (Power) button. •... -
Page 19: Shooting Still Images
Shooting still images Lower the lens cover. Lens cover Hold the camera steady as illustrated. • Slide the zoom (W/T) lever to the T side to zoom. Slide to the W side to return. Press the shutter button Shutter button halfway down to focus. -
Page 20: Shooting Movies
Shooting movies Lower the lens cover, then (REC Mode) t touch (Movie Mode). Press the shutter button to start recording. Press the shutter button again to stop recording. -
Page 21: Viewing Images
Viewing images Press the (Playback) button. • When you play back images on a memory card that were recorded on other cameras, the database file registration screen appears. (Playback) button Selecting next/previous image Touch (Next)/ (Previous) on the screen. • To play back movies, touch (Playback) in the center of the LCD screen. -
Page 22: Cyber-Shot Handbook" (Pdf)
Learning more about the camera (“Cyber-shot Handbook”) “Cyber-shot Handbook”, which explains how to use the camera in detail, is included on the CD-ROM (supplied). Refer to it for in-depth instructions on the many functions of the camera. For Windows users Turn on your computer, and insert the CD-ROM (supplied) into the CD-ROM drive. -
Page 23: List Of Icons Displayed On The Screen
List of icons displayed on the screen The displayed icon positions may differ according to the shooting mode. When shooting still images Display Indication Battery remaining Low battery warning AF illuminator Recording folder Recording/Playback Media (Memory card, internal memory) Eye-Fi Mode display When shooting movies Zoom scaling Display... - Page 24 Display Indication Spot metering cross- hairs Display Indication Focus Red-eye reduction AE/AF lock NR slow shutter Shutter speed F3.5 Aperture value ISO400 ISO number +2.0EV Exposure Value Close focus Flash mode Flash charging Metering mode Standby Recording a movie/ Standby 0:12 Recording time (m:s)
-
Page 25: Number Of Still Images And Recordable Time Of Movies
Number of still images and recordable time of movies The number of still images and recordable time may vary depending on the shooting conditions and the memory card. Still images (Units: Images) Capacity Internal Memory card formatted with this camera memory Approx. - Page 26 Movies The table below shows the approximate maximum recording times. These are the total times for all movie files. Continuous shooting is possible for approximately 29 minutes or up to approximately 2 GB of data at one time. (Units: hour : minute : second) Capacity Internal Memory card formatted with this camera...
-
Page 27: Precautions
Precautions Do not use/store the camera in the following places • In an extremely hot, cold or humid place In places such as in a car parked in the sun, the camera body may become deformed and this may cause a malfunction. •... - Page 28 On the internal rechargeable backup battery This camera has an internal rechargeable battery for maintaining the date and time and other settings regardless of whether the power is on or off. This rechargeable battery is continually charged as long as you are using the camera. However, if you use the camera for only short periods, it discharges gradually, and if you do not use the camera at all for about one month it becomes completely discharged.
-
Page 29: Specifications
Exif Ver. 2.3, MPF Baseline) (–4°F to +140°F) compliant, DPOF compatible Dimensions: Movies: MPEG-4 Visual DSC-T99: 93.0 × 55.6 × 16.8 mm Recording media: Internal Memory (3 3/4 × 2 1/4 × 11/16 inches) (approx. 32 MB), “Memory Stick DSC-T99D: 93.0 × 55.6 ×... - Page 30 Trademarks Microphone: Monaural Speaker: Monaural • The following marks are trademarks Exif Print: Compatible of Sony Corporation. PRINT Image Matching III: , “Cyber-shot,” Compatible “Memory Stick,” , “Memory Stick PRO,” BC-CSN/BC-CSNB battery “Memory Stick Duo,” charger , “Memory Stick PRO Duo,”...
- Page 31 • In addition, system and product names used in this manual are, in general, trademarks or registered trademarks of their respective developers or manufacturers. However, the ™ or ® marks are not used in all cases in this manual. Additional information on this product and answers to frequently asked questions can be found at our Customer Support Website.
- Page 32 Les numéros de modèle et de série se situent sous l’appareil. Prendre en note le numéro de série dans l’espace prévu ci-dessous. Se reporter à ces numéros lors des communications avec le détaillant Sony au sujet de ce produit. Modèle no DSC-T99/T99D No de série _____________________________...
- Page 33 • Veillez à recharger la batterie à l’aide d’un chargeur Sony authentique ou d’un appareil capable de la recharger. • Tenez la batterie hors de la portée des petits enfants. • Gardez la batterie au sec. • Remplacez-la uniquement par une batterie de même type ou d’un type équivalent recommandé...
- Page 34 États-Unis (FCC). Information réglementaire Déclaration de conformité Nom commercial : SONY No de modèle : DSC-T99, DSC-T99D Responsable : Sony Electronics Inc. Adresse :16530 Via Esprillo, San Diego, CA 92127 É.-U. No de téléphone : 858-942-2230 Cet appareil est conforme à...
- Page 35 Note pour les clients européens Avis aux consommateurs des pays appliquant les Directives UE Le fabricant de ce produit est Sony Corporation, 1-7-1 Konan Minato-ku Tokyo, 108-0075 Japon. Le représentant agréé pour la compatibilité électromagnétique et la sécurité du produit est Sony Deutschland GmbH, Hedelfinger Strasse 61, 70327 Stuttgart, Allemagne.
- Page 36 Si la fiche fournie avec cet équipement comporte un couvercle de fusible détachable, assurez-vous de remettre en place le couvercle de fusible après avoir remplacé le fusible. N’utilisez jamais la fiche sans le couvercle de fusible. Si vous perdez le couvercle de fusible, veuillez contacter le service après-vente Sony le plus proche.
- Page 37 Table des matières Préparation Reportez-vous au « Guide pratique de Cyber-shot » (PDF) se trouvant sur le CD-ROM fourni ...........8 Vérification des accessoires fournis ..........8 Remarques sur l’utilisation de l’appareil ........8 Identification des pièces ............12 Charge de la batterie et nombre d’images/durée pouvant être enregistrés ................13 Insertion de la batterie/d’une carte mémoire (vendue séparément) ................16...
-
Page 38: Reportez-Vous Au " Guide Pratique De Cyber-Shot " (Pdf) Se Trouvant Sur Le Cd-Rom Fourni
Reportez-vous au « Guide pratique de Cyber-shot » (PDF) se trouvant sur le CD-ROM fourni Pour plus d’informations sur les opérations avancées, lisez le « Guide pratique de Cyber-shot » (PDF) se trouvant sur le CD-ROM (fourni) à l’aide d’un ordinateur. Reportez-vous au «... - Page 39 Fonctions incorporées dans cet appareil Ce manuel décrit chacune des fonctions des dispositifs compatibles/ incompatibles TransferJet. Pour vérifier si votre appareil prend en charge la fonction TransferJet, regardez si la marque suivante se trouve sur la face inférieure de l’appareil. Dispositif compatible TransferJet : (TransferJet) Fichiers base de données...
- Page 40 File system) établie par JEITA (Japan Electronics and Information Technology Industries Association). • Sony ne garantit pas que l’appareil lira les images enregistrées ou éditées avec un autre appareil, ou que les autres appareils pourront lire les images enregistrées avec cet appareil.
- Page 41 Pas d’indemnisation en cas de contenu endommagé ou d’enregistrement manqué Sony ne saurait offrir d’indemnisation dans le cas où l’enregistrement serait impossible ou que le contenu enregistré serait perdu ou endommagé, en raison d’un dysfonctionnement de l’appareil ou d’une anomalie du support...
-
Page 42: Identification Des Pièces
Identification des pièces A Levier de zoom (W/T) B Déclencheur C Micro D Touche ON/OFF (Alimentation)/ Témoin d’alimentation E Flash F Témoin de retardateur/Témoin de détection de sourire/ Illuminateur d’assistance AF G Objectif H Bouchon d’objectif I Écran LCD/Panneau tactile J Haut-parleur K Touche (Lecture) -
Page 43: Charge De La Batterie Et Nombre D'images/Durée Pouvant Être Enregistrés
Charge de la batterie et nombre d’images/durée pouvant être enregistrés Insérez la batterie dans le chargeur de batterie. • Vous pouvez charger la batterie même lorsqu’elle est partiellement chargée. Batterie Branchez le Pour les utilisateurs aux États-Unis et au Canada chargeur de Fiche batterie à... - Page 44 • Lorsque la charge est terminée, débranchez le cordon d’alimentation et le chargeur de batterie de la prise murale, et retirez la batterie du chargeur de batterie. • Veillez à utiliser une batterie ou un chargeur de batterie garanti d’origine Sony. Autonomie de la batterie et nombre d’images que...
- Page 45 • Le nombre d’images fixes pouvant être enregistrées est basé sur la norme CIPA et il correspond à une prise de vue dans les conditions suivantes. (CIPA: Camera & Imaging Products Association) – [Luminosité LCD] est réglé sur [Normal]. – prise de vue une fois toutes les 30 secondes. –...
-
Page 46: Insertion De La Batterie/D'une Carte Mémoire (Vendue Séparément)
Insertion de la batterie/d’une carte mémoire (vendue séparément) Ouvrez le couvercle. Insérez une carte mémoire (vendue séparément). Le coin entaillé étant dans le sens illustré, insérez la carte mémoire jusqu’à ce qu’elle se mette en Vérifiez que le coin entaillé est place avec un déclic. - Page 47 Cartes mémoire que vous pouvez utiliser Les cartes mémoire suivantes sont compatibles avec cet appareil : « Memory Stick PRO Duo », « Memory Stick PRO-HG Duo », « Memory Stick Duo », carte mémoire SD, carte mémoire SDHC et carte mémoire SDXC. Il n’est toutefois pas garanti que toutes les cartes mémoire fonctionnent avec cet appareil.
- Page 48 Lorsqu’une carte mémoire n’est pas insérée Les images sont enregistrées dans la mémoire interne de l’appareil (environ 32 Mo). Pour copier des images de la mémoire interne vers une carte mémoire, insérez (Réglages) t une carte mémoire dans l’appareil, puis touchez (Outil carte mémoire) t [Copier].
-
Page 49: Réglage De La Date Et De L'heure/De La Couleur D'affichage
Réglage de la date et de l’heure/de la couleur d’affichage Abaissez le bouchon d’objectif. L’appareil se met sous tension. Le témoin d’alimentation ne s’allume que lorsque l’appareil se met en marche. • Vous pouvez aussi mettre l’appareil sous tension en appuyant sur la touche ON/OFF Touche ON/OFF (Alimentation). - Page 50 Horodatage des images L’appareil ne comporte pas de fonction pour superposer des dates sur les images. Vous pouvez imprimer ou sauvegarder des images avec la date en utilisant « PMB » se trouvant sur le CD-ROM (fourni). Pour plus d’informations, voir l’« Aide PMB ». Nouveau réglage de la date et de l’heure L’écran de paramétrage de la date et de l’heure apparaît automatiquement seulement lors de la première mise sous tension.
-
Page 51: Prise De Vue D'images Fixes
Prise de vue d’images fixes Abaissez le bouchon Bouchon d’objectif d’objectif. Tenez l’appareil immobile, comme illustré. • Faites glisser le levier de zoom (W/T) vers le côté T pour faire un zoom avant. Faites-le glisser vers le côté W pour retourner. Enfoncez le déclencheur Déclencheur à... -
Page 52: Enregistrement De Films
Enregistrement de films Abaissez le bouchon d’objectif, puis touchez (Mode ENR) (Mode Film). Enfoncez le déclencheur pour commencer l’enregistrement. Enfoncez à nouveau le déclencheur pour arrêter l’enregistrement. -
Page 53: Visualisation D'images
Visualisation d’images Appuyez sur la touche (Lecture). • Lors de la lecture d’images sur une carte mémoire qui ont été enregistrées sur un autre appareil, l’écran d’enregistrement de fichier dans la base de données apparaît. Touche (Lecture) Sélection de l’image suivante/précédente Touchez (Suivante)/... -
Page 54: Connaissance Plus Approfondie De L'appareil (" Guide Pratique De Cyber-Shot ")
Connaissance plus approfondie de l’appareil (« Guide pratique de Cyber- shot ») Le « Guide pratique de Cyber-shot », qui explique en détails comment utiliser l’appareil, se trouve sur le CD-ROM (fourni). Consultez-le pour des instructions spécifiques sur les nombreuses fonctions de l’appareil. Pour les utilisateurs de Windows Mettez l’ordinateur sous tension et insérez le CD- ROM (fourni) dans le lecteur de CD-ROM. -
Page 55: Liste Des Icônes Affichées Sur L'écran
Liste des icônes affichées sur l’écran Les positions des icônes affichées peuvent être différentes selon le mode de prise de vue. Lors de la prise de vue Affichage Indication d’images fixes Avertissement de vibrations Scène d’enregistrement film Atténuation yeux fermés Affichage Indication Charge restante de la... - Page 56 Affichage Indication Affichage Indication Réglages Rafale Mise au point C:32:00 Affichage Atténuation des yeux d’autodiagnostic rouges Avertissement Verrouillage AE/AF d’augmentation de la Obturation lente NR température Vitesse d’obturation Retardateur F3.5 Valeur d’ouverture Nombre d’images ISO400 Valeur ISO enregistrables +2.0EV Durée enregistrable Valeur d’exposition 100 min Plan rapproché...
-
Page 57: Nombre D'images Fixes Et Durée Enregistrable De Films
Nombre d’images fixes et durée enregistrable de films Le nombre d’images fixes et la durée enregistrable peuvent différer en fonction des conditions de prise de vue et de la carte mémoire. Images fixes (Unité : images) Capacité Mémoire Carte mémoire formatée avec cet appareil interne Environ 2 Go... - Page 58 Films Le tableau ci-dessous indique les durées d’enregistrement maximum approximatives. Ce sont les durées totales pour tous les fichiers de film. Une prise de vue continue est possible pendant environ 29 minutes ou jusqu’à environ 2 Go de données par séance. (Unité...
-
Page 59: Précautions
Précautions N’utilisez/ne rangez pas l’appareil dans les endroits suivants • Endroits très chauds, très froids ou très humides Dans des endroits tels qu’un véhicule stationné en plein soleil, le boîtier de l’appareil peut se déformer et ceci peut provoquer un dysfonctionnement. •... - Page 60 Batterie interne rechargeable de sauvegarde Cet appareil comporte une batterie interne rechargeable pour la conservation de la date, de l’heure et des autres réglages, que l’appareil soit allumé ou éteint. La batterie rechargeable se recharge continuellement tant que vous utilisez l’appareil.
-
Page 61: Spécifications
Spécifications Appareil photo Flash : Portée du flash (sensibilité ISO (indice de lumination [Système] recommandé) réglée sur Auto) : 0,08 m à 2,8 m (3 1/4 po à 9 pi Dispositif d’image : CCD couleur 2 1/4 po) environ (W)/ 7,76 mm (type 1/2,3), filtre à... - Page 62 +60 °C (–4 °F à +140 °F) Batterie rechargeable NP-BN1 Dimensions : Batterie utilisée : Batterie Lithium-ion DSC-T99 : 93,0 × 55,6 × 16,8 mm Tension maximale : 4,2 V CC (3 3/4 × 2 1/4 × 11/16 po) Tension nominale : 3,6 V CC DSC-T99D : 93,0 ×...
- Page 63 • Eye-Fi est une marque commerciale de Eye-Fi, Inc. • Les marques suivantes sont des • Les noms de système et de produit marques commerciales de Sony utilisés dans ce manuel sont Corporation. généralement des marques , « Cyber-shot », commerciales ou des marques «...
- Page 64 Printed in China...