Table of Contents
Quick Links
Table of Contents

Summary of Contents for Samsung SND-5010
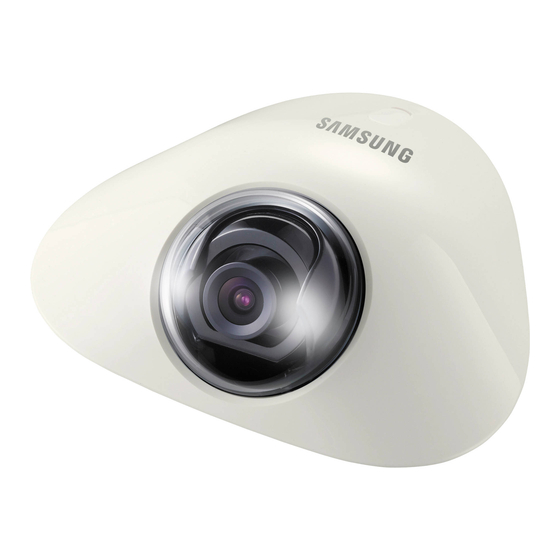
- Page 1 NETWORK CAMERA User Manual SND-5010...
- Page 2 Disclaimer Samsung Techwin makes the best to verify the integrity and correctness of the contents in this document, but no formal guarantee shall be provided. Use of this document and the subsequent results shall be entirely on the user’s own responsibility.
-
Page 3: Important Safety Instructions
overview important Safety inStructionS 1. Read these instructions. 2. Keep these instructions. 3. Heed all warnings. 4. Follow all instructions. 5. Do not use this apparatus near water. 6. Clean only with dry cloth. 7. Do not block any ventilation openings, Install in accordance with the manufacturer’s instructions. - Page 4 overview warninG TO REDUCE THE RISK OF FIRE OR ELECTRIC SHOCK, DO NOT EXPOSE THIS PROCUCT TO RAIN OR MOISTURE. DO NOT INSERT ANY METALLIC OBJECT THROUGH THE VENTILATION GRILLS OR OTHER OPENNINGS ON THE EQUIPMENT. Apparatus shall not be exposed to dripping or splashing and that no objects filled with liquids, such as vases, shall be placed on the apparatus.
- Page 5 class construction An apparatus with CLASS construction shall be connected to a MAINS socket outlet with a protective earthing connection. Battery Batteries(battery pack or batteries installed) shall not be exposed to excessive heat such as sunshine, fire or the like. Danger of explosion if battery is incorrectly replaced.
- Page 6 overview Please read the following recommend safety precautions carefully. y Do not Place this apparatus on an uneven surface. y Do not install on a surface where it is exposed to direct sunlight, near heating equipment or heavy cold area. y Do not place this apparatus near conductive material.
-
Page 7: Table Of Contents
contentS oveRview Important Safety Instructions Product Features Recomended PC Specifications What’s Included At a Glance iNSTALLATioN & Installation CoNNeCTioN Connecting with other Device NeTwoRk CoNNeCTioN Connecting the Camera Directly AND SeTup to Local Area Networking Connecting the Camera Directly to a DHCP Based DSL/Cable Modem Connecting the Camera Directly to a PPPoE Modem... - Page 8 overview web vieweR Connecting to the Camera Login Installing STW WebViewer Plugin Using the Live Screen SeTup SCReeN Setup Video Setup Network Setup Event Setup System Setup AppeNDix Specification Product Overview Troubleshooting Open Source Announcement License GPL/LGPL Software License 8_ overview...
-
Page 9: Product Features
proDuct featureS y multi-Streaming This network camera can display videos in different resolutions and qualities simultane- ously using different CODECs. y web Browser-based monitoring Using the Internet web browser to display the image in a local network environment. y alarm If an event occurs, the event-related video will be transferred to the email or FTP server specified by the user. -
Page 10: What's Included
overview wHat’S incLuDeD Please check if your camera and accessories are all included in the product package. Appearance Item Name Quantity Description Camera Instruction book, Installer S/W CD, CMS S/W DVD Quick Guide (Optional) Used to test the camera connection to a Cable for the testing monitor portable display device Template for installation... -
Page 11: At A Glance
at a GLance appearance Item Description PoE Connector Connects to the network and supplies power through Ethernet cable. Screw Cover Screw cover, the screw is used to separate the dome cover. Dome Cover Dome cover for the lens and unit protection. Clean the lens if contaminated softly with a lens tissue or cloth to which you have applied ethanol. - Page 12 overview inside Item Description Fixing Hole Used for securing the camera to the ceiling. ON : When the system operates normally System Indicator OFF : If the system does not operate properly Resets the camera settings to the default. Press and hold it for about 5 seconds to turn off the system indicator and restart the system.
-
Page 13: Installation & Connection
installation & connection inStaLLation precautions before installation Ensure you read out the following instructions before installing the camera: y When installing on a ceiling, desired spot must be capable of supporting at least 5 times of the camera’s weight. y Stuck-in or peeled-off cables can cause damage to the product or a fire. y For safety purposes, keep anyone else away from the installation site. - Page 14 installation & connection adjusting the monitoring direction for the camera Lens Cover ❖ adjusting the monitoring direction You can adjust the camera direction only when the camera is fixed on the ceiling. Then, turning the camera to the left or right is referred to as “Panning”, while tilting the angle is “Tilting”.
-
Page 15: Connecting With Other Device
connectinG witH otHer Device PoE Connector PoE Device Monitor Out Monitor The BNC Out terminal of the product is provided for easier installation, and is not recommended for monitoring purposes. If you keep the BNC cable connected, a risk of lightening may cause damage or malfunction to the product. -
Page 16: Network Connection And Setup
network connection and setup You can set up the network settings according to your network configurations. connectinG tHe camera DirectLy to LocaL area networKinG connecting to the camera from a local pc in the Lan 1. Launch an Internet browser on the local PC. 2. -
Page 17: Connecting The Camera Directly
connectinG tHe camera DirectLy to a DHcp BaSeD DSL/caBLe moDem INTERNET DSL/Cable Modem External Remote PC Camera DDNS Server (Data Center, KOREA) 1. Use the cross LAN cable to connect the network cable directly to your PC. 2. Run the IP Installer and change the IP address of the camera so that you can use the web browser on your desktop to connect to the Internet. -
Page 18: Modem
network connection and setup connectinG tHe camera DirectLy to a pppoe moDem INTERNET PPPoE Modem Camera External Remote PC DDNS Server (Data Center, KOREA) 1. Use the cross LAN cable to connect the network cable directly to your PC. 2. Run the IP Installer and change the IP address of the camera so that you can use the web browser on your desktop to connect to the Internet. -
Page 19: Connecting The Camera To A Broadband Router With The
connectinG tHe camera to a BroaDBanD router witH tHe pppoe/caBLe moDem This is for a small network environment such as homes, SOHO and ordinary shops. Camera INTERNET PPPoE or PPPoE or Broadband Cable Modem Cable Modem Camera Router External Remote PC DDNS Server (Data Center, KOREA) Local PC... -
Page 20: Buttons Used In Ip Installer
network connection and setup ButtonS uSeD in ip inStaLLer e f g Item Description Model name of the connected camera. Device Name Click the column to sort the list by model name. However, search will be stopped if clicked during the search. Alias This function is not currently implemented. -
Page 21: Static Ip Setup
Exits the IP Installer program. For the IP installer, use only the installer version provided in the installation CD or use the latest one if available. You can download the latest version from the Samsung web site (www.samsungcctv.com). Static ip Setup manual network Setup Run... - Page 22 network connection and setup 3. In the pane, provide the necessary information. y MAC (Ethernet) Address : The MAC (Ethernet) address of the applicable camera will be set automatically so you don't need to input it manually. You can configure the static IP settings only if the DHCP checkbox is unchecked.
-
Page 23
if using a Broadband router y IP Address : Enter an address falling in the IP range provided by the Broadband Router. ex) 192.168.1.2~254, 192.168.0.2~254, 192.168.XXX.2~254 y Subnet Mask : The
of the Broadband Router will be the ... -
Page 24
network connection and setup auto network Setup Run
to display the camera search list. At the initial startup, both [auto Set] and [manual Set] will be grayed out. For cameras found with the IPv6 setting, these buttons will be grayed out as the cameras do not support this function. -
Page 25: Dynamic Ip Setup
Dynamic ip Setup Dynamic ip environment Setup y Example of the Dynamic IP environment - If a Broadband Router, with cameras connected, is assigned an IP address by the DHCP server - If connecting the camera directly to modem using the DHCP protocols - If IPs are assigned by the internal DHCP server via the LAN checking the Dynamic ip 1. -
Page 26: Port Range Forward (Port Mapping)
network connection and setup port ranGe forwarD (port mappinG) Setup If you have installed a Broadband Router with a camera connected, you must set the port range forwarding on the Broadband Router so that a remote PC can access the camera in it. manual port range forwarding 1. - Page 27 Setting up port range forward for several network cameras When several network cameras are connected to one Broadband Router device, you should forward the TCP 943 port of the router to the TCP 943 port of a connected camera. If you don't set properly the TCP 943 port of the router, you cannot get any video stream from the web page of the camera.
- Page 28 network connection and setup connectinG to tHe camera from a SHareD LocaL pc 1. Run the IP Installer. It will scan for connected cameras and display them as a list. 2. Double-click a camera to access. The Internet browser starts and connects to the camera.
- Page 29 web viewer connectinG to tHe camera normally, you would 1. Launch the Internet browser. 2. Type the IP address of the camera in the address bar. ex) • IP address (IPv4) : 192.168.1.100 http://192.168.1.100 - the Login dialog should appear. •...
-
Page 30
To register your device to the
server, visit www.samsungipolis.com and register your device first, and then set the Web Viewer’s - to , as well as providing that had been used for DDNS registration. - Page 31 inStaLLinG Stw webviewer pLuGin If connecting to a camera for the first time, you will see the installation message. Then, install the required WebViewer Plugin to access the camera and control the video from it in real time. Microsoft Visual C++ 2010 Redistribute Package should be installed on the PC before you can install the Web viewer plug-in.
- Page 32 web viewer uSinG tHe Live Screen Item Description Monitoring Move to the monitoring screen. Setup Move to the Setup screen. Displays the Live video on the screen. Viewer Screen You can use the mouse wheel to activate the digital zooming in Viewer screen. Profile type You can select a profile type in
- Page 33 Item Description Screen The video size of the camera will switch to as big as the Web browser. Optimization Hide the context The left-corner context menu will disappear but only the menu icon. menu to capture the snapshot 1. Click [capture ( )] on the scene to capture.
-
Page 34: Setup
setup screen Setup You can configure the video, network, event and system settings of the camera via the network. 1. In the Live screen, click [ Setup ( ) ] . 2. The Setup screen appears. Microsoft Sliverlight 4.0 is required to be installed on the PC for setup pages that provide preview video. - Page 35 5. Configure the ATC mode settings. • ATC mode : It adjusts the video properties according to the variance in the network bandwidth, controlling the bit rate. Adjusting the bit rate depends on the ATC mode. - Control framerate : Reduce the frame rate if the network bandwidth drops down. - Control compression : Control the compression rate if the network bandwidth drops down.
- Page 36 setup screen to add a video profile You can add as many codecs as necessary so that a variety of profiles can be applied according to the recording condition. 1. Select one from the
- Page 37 what is Gop size? GOP(Group of Pictures) is a set of video frames for H.264 compression, indicating a collection of frames from the initial I-Frame (key frame) to the next I-Frame. GOP consists of 2 kinds of frames: I-Frame and P-Frame. I-Frame is the basic frame for the compression, also known as Key Frame, which contains one complete image data.
-
Page 38
setup screen to set the privacy zone You can specify a certain area of the camera video to be protected for your privacy. 1. Set it to
. 2. When done, click [apply ( 3. Place the cursor at a point in the video and drag it to whatever you need. -
Page 39
white balance Setup You can correct the image colors based on white under any lighting conditions. 1. Select
. 2. Select . • ATW : Corrects the colors of the camera video automatically. It is available in the color temperature of between 1,800°K and 10,500°K. •... -
Page 40
setup screen BLc Setup You can specify a desired area on the video manually and set the area to be displayed more clearly. 1. Select
. 2. Set to . 3. Set . You can change the level to adjust the brightness of the monitoring area. - Page 41 • Sens-up limit : Set the work condition to Auto mode in a low contrast scene. • AGC mode : Select AGC Control mode. Adjust the gain value of the video (that, in particular, was recorded at a low contrast scene and had a lower brightness level than normal) to control the video brightness.
-
Page 42
setup screen oSD Setup 1. Select
. 2. Select each item and set it properly. • Camera title : Specify whether or not to display the camera title on the screen. You can enter up to 15 characters for the title. •... -
Page 43
networK Setup interface 1. From the Setup menu, select the
tab. 2. Click . 3. Set the and as necessary. • IP type : Select an IP connection type. - Manual : Specify the IP address, Subnet mask, Gateway, DNS1, and DNS2. - Page 44 The default is 80(TCP). • Device port : Set a port used to transfer video signals with the Samsung protocols. • RTSP port : Used to transfer videos in the RTSP mode; the default is 554.
- Page 45 DDNS server provided by Samsung Techwin. - Product ID : Enter the product ID that is registered with the Samsung DDNS service. • Public DDNS : Select one of provided public DDNS servers when you use a public DDNS server.
-
Page 46
DDnS to register your product with the Samsung DDnS 1. Visit the iPOLiS web site (www.samsungipolis.com) and sign in with a registered account. 2. From the top menu bar, select
- . 3. Click [proDuct reGiStration]. -
Page 47
Samsung DDnS in camera setup 1. From the DDNS setup page, set
to . 2. Provide the that you registered product ID with the DDNS site. 3. Click [apply ( When the connection is successfully made, you will see the message of <(Success)>... -
Page 48
setup screen ip filtering You can create a list of IPs that you want to grant or deny access to them. 1. From the Setup menu, select the
tab. 2. Click . 3. Select . •... -
Page 49
You can select a secure connection system or install the public certificate for this purpose. 1. From the Setup menu, select the
tab. 2. Click . 3. Select a secure connection system. To access the camera using HTTPS mode, you have to type the IP address for the camera in the form of “https:// ”. -
Page 50
setup screen 802.1x When connecting network, you can choose whether using 802.1x protocol, and then install the certification. 1. From the Setup menu, select the
tab. 2. Click <802.1x>. 3. Set the . •... -
Page 51
You can specify the priority to secure a stable transfer rate for a specific IP. 1. From the Setup menu, select the
tab. 2. Click . 3. Click the [add ( )] button. The IP list will be created. 4. - Page 52 setup screen • Enable SNMP v3 : SNMP version 3 will be active. - Password : Specify the default password for SNMP version 3. The default password is “admin4321”. The default password can be exposed to a hacking thread so it is recommended to change the password after installing the product.
- Page 53 • E-mail configuration - Server address : Enter the IP address of the email server that you transfer the alarm or event images to. - Use authentication : Select whether to use authorization. - Use SSL : Specify the use of SSL. - ID : Enter the user ID for logging into the email server.
-
Page 54
setup screen time schedule You can set to save the video data at a certain interval as scheduled regardless of the actual occurrence of the event. 1. From the Setup menu, select the
tab. 2. Click . 3. -
Page 55
tampering detection You can set to trigger an event when a scene is changed on the video screen. 1. From the Setup menu, select the
tab. 2. Click . 3. Select from . 4. -
Page 56
setup screen motion detection 1. From the Setup menu, select the
tab. 2. Click . 3. Select from . 4. Set whether or not to . 5. Set the motion detection mode to Mask. - Page 57 If the camera is capturing a short-distant object, the motion detection performance may be degraded. The motion detection function may not work properly in the following cases: - The object color or brightness is similar to the background. - Multiple movements continue occurring at random due to a scene change or other reasons. - A fixed object continues moving in the same position.
-
Page 58
setup screen SyStem Setup product information 1. From the Setup menu, select the
tab. 2. Click . 3. Check the camera information, or provide details according to your network environment. • Model : Model name of the product. •... - Page 59 • System time setup : Specify the time and date that will be applied to your system. - Manual : Specify the time manually. - Synchronize with NTP server : Sync with the time of the specified server address. - Synchronize with PC viewer : Synchronize the time with the connected PC. 4.
-
Page 60
setup screen upgrade / reboot 1. From the Setup menu, select the
tab. 2. Click . 3. Select a desired item and set it appropriately. • Upgrade : Performs upgrading the system. • Factory default : Resets the system to the factory default. - Page 61 If you forcibly terminate the upgrade process, upgrade will not be completed properly. During restarting the system, accessing with web viewer will not be made. You can download the latest version from the Samsung web site (www.samsungcctv.com). to back up the current settings 1.
-
Page 62
setup screen You can check the system log or event log. 1. From the Setup menu, select the
tab. 2. Click . 3. Select a log type. • System : You can check the system logs where any system changes are recorded including the time information. -
Page 63
profile access You can check the profile information. 1. From the Setup menu, select the
tab. 2. Click . • Profile access : Show the information of the newly added profile. - Profile : Show the information of the newly added codec. - Page 64 appendix appendix Specification Items Description Imaging Device 1/3” 1.3M PS CMOS Total Pixels 1,384(H) x 1,076(V) Effective Pixels 1,329(H) x 1,049(V) Scanning System Progressive Video Min. Illumination Color/B/W : 1.6 Lux (F1.8, 50IRE) S / N Ratio CVBS : 1.0 Vp-p / 75Ω composite, 704x480(N), Video Out 704x576(P), for installation Focal Length (Zoom Ratio)
- Page 65 Items Description Pan Range -10°~10° Pan Speed Tilt Range 0°~90° Tilt Speed Pan / Tilt /Rotate Rotate Range Preset Preset Accuracy Auto Tracking Camera Title Off / On (Displayed up to 15 characters) Day & Night Auto (S/W) / Color / B/W Backlight Compensation Off / BLC Wide Dynamic Range...
- Page 66 appendix Items Description Privacy Masking Off / On (12 programmable zones) Off / Auto (2X ~ 60X) Sens-up (Sens-up is limited to x30 in maximum if two or more (Frame Integration) users of different profiles are accessing at the same time.) Gain Control Off / Low / Medium / High White Balance...
- Page 67 Items Description Streaming Capability Multiple Streaming (Up to 10 Profiles) Audio I/O Audio Compression Format Audio Communication IPv4, IPv6 TCP/IP, UDP/IP, RTP(UDP), RTP(TCP), RTSP, NTP, HTTP, Protocol HTTPS, SSL, DHCP, PPPoE, FTP, SMTP, ICMP, IGMP, SNMPv1/v2c/v3(MIB-2), ARP, DNS, DDNS, ONVIF On/Off HTTPS(SSL) Login Authentication Digest Login Authentication...
- Page 68 appendix Items Description Operating Temperature / -10°C ~ +55°C (+14°F ~ +131°F) / ~ 90%RH Humidity Environmental Storage Temperature / Humidity -30°C ~ +60°C / ~ 90%RH Input Voltage / Current PoE(IEEE802.3af, Class1) Electrical Power Consumption Max. 3.3W Color / Material Body : Ivory / Plastic Dimension (WxHxD) Mechanical...
- Page 69 proDuct overview Unit : mm (inch) 115.3 (4.54") 7.8 (0.3") 41.9 (1.65") 89 (3.5") English _69...
- Page 70 appendix trouBLeSHootinG PROBLEM SOLUTION y Check to make sure that the camera’s Network settings are appropriate. y Check to make sure that all network cables have been connected properly. I can’t access the camera from a y If connected using DHCP, verify that the camera is able to acquire web browser.
- Page 71 For more additional information, send email to help.cctv@ 3. All advertising materials mentioning features or use of this samsung.com. software must display the following acknowledgement: This product includes software developed by the Computer copyright (c) 2004, Kneschke, incremental Science Department at University College London.
- Page 72 License Various copyrights apply to this package, listed in various NEGLIGENCE OR OTHERWISE) ARISING IN ANY WAY OUT separate parts below. Please make sure that you read all the OF THE USE OF THIS SOFTWARE, EVEN IF ADVISED OF parts. THE POSSIBILITY OF SUCH DAMAGE.
- Page 73 THIS SOFTWARE IS PROVIDED BY THE COPYRIGHT y Neither the name of Cisco, Inc, Beijing University of HOLDERS AND CONTRIBUTORS “AS IS” AND ANY Posts and Telecommunications, nor the names of their EXPRESS OR IMPLIED WARRANTIES, INCLUDING, contributors may be used to endorse or promote products BUT NOT LIMITED TO, THE IMPLIED WARRANTIES OF derived from this software without specific prior written MERCHANTABILITY AND FITNESS FOR A PARTICULAR...
- Page 74 2. Redistributions in binary form must reproduce the above copyright notice, this list of conditions and the following disclaimer in the documentation and/or other materials provided with the distribution. 3. Neither the name of Apple Inc. (“Apple”) nor the names of its contributors may be used to endorse or promote products derived from this software without specific prior written permission.
- Page 75 Corresponding Source code from us for a period of three years after our last shipment of this product by sending email to [email protected] If you want to obtain the complete Corresponding Source code in the physical medium such as CD-ROM, the cost of physically performing source distribution might be charged.
- Page 76 b) You must cause any work that you distribute or publish, If distribution of executable or object code is made by that in whole or in part contains or is derived from offering access to copy from a designated place, then the Program or any part thereof, to be licensed as a offering equivalent access to copy the source code from the whole at no charge to all third parties under the terms...
- Page 77 9. The Free Software Foundation may publish revised and/ one line to give the program’s name and an idea of what it or new versions of the General Public License from time does. to time. Such new versions will be similar in spirit to the Copyright (C)yyyy name of author present version, but may differ in detail to address new problems or concerns.
- Page 78 We, the Free Software Foundation, use the GNU General called a “modified version” of the earlier work or a work “based Public License for most of our software; it applies also to any on” the earlier work. other work released this way by its authors. A “covered work”...
- Page 79 the stated conditions are met. This License explicitly affirms d) If the work has interactive user interfaces, each must your unlimited permission to run the unmodified Program. display Appropriate Legal Notices; however, if the Program The output from running a covered work is covered by this has interactive interfaces that do not display Appropriate License only if the output, given its content, constitutes a Legal Notices, your work need not make them do so.
- Page 80 doubtful cases shall be resolved in favor of coverage. For c) Prohibiting misrepresentation of the origin of that material, a particular product received by a particular user, “normally or requiring that modified versions of such material be used” refers to a typical or common use of that class of marked in reasonable ways as different from the original product, regardless of the status of the particular user or of version;...
- Page 81 10. automatic Licensing of Downstream recipients. If, pursuant to or in connection with a single transaction or arrangement, you convey, or propagate by procuring Each time you convey a covered work, the recipient conveyance of, a covered work, and grant a patent license automatically receives a license from the original licensors, to to some of the parties receiving the covered work authorizing run, modify and propagate that work, subject to this License.
- Page 82 If the Program specifies that a proxy can decide which future This license, the Lesser General Public License, applies versions of the GNU General Public License can be used, to some specially designated software packages-typically that proxy’s public statement of acceptance of a version libraries-of the Free Software Foundation and other authors permanently authorizes you to choose that version for the who decide to use it.
- Page 83 For example, on rare occasions, there may be a special need You may charge a fee for the physical act of transferring a to encourage the widest possible use of a certain library, so copy, and you may at your option offer warranty protection in that it becomes a de-facto standard.
- Page 84 If distribution of object code is made by offering access to copy c) Accompany the work with a written offer, valid for at least from a designated place, then offering equivalent access to copy three years, to give the same user the materials specified the source code from the same place satisfies the requirement in Subsection 6a, above, for a charge no more than the to distribute the source code, even though third parties are not...
- Page 85 by court order, agreement or otherwise) that contradict NOT LIMITED TO, THE IMPLIED WARRANTIES OF the conditions of this License, they do not excuse MERCHANTABILITY AND FITNESS FOR A PARTICULAR you from the conditions of this License. If you cannot PURPOSE.
- Page 86 openSSL LicenSe documentation (online or textual) provided with the package. Redistribution and use in source and binary forms, with Copyright (c) 1998-2006 The OpenSSL Project. All rights or without modification, are permitted provided that the reserved. Redistribution and use in source and binary forms, following conditions are met: with or without modification, are permitted provided that the 1.
- Page 87 Samsung Techwin cares for the environment at all product manufacturing stages, and is taking measures to provide customers with more environmentally friendly products.
- Page 88 SAMSUNG TECHWIN AMERICA Inc. SAMSUNG TECHWIN EUROPE LTD. 100 Challenger Rd. Suite 700 Ridgefield Park, NJ 07660 Samsung House, 1000 Hillswood Drive, Hillswood Business Toll Free : +1-877-213-1222 Direct : +1-201-325-6920 Park Chertsey, Surrey, UNITED KINGDOM KT16 OPS Fax : +1-201-373-0124 TEL : +44-1932-45-5300 FAX : +44-1932-45-5325 www.samsungcctvusa.com...