Quick Links
SERVICE MANUAL (Rev.D)
Be sure to read this manual before servicing. To assure safety from fire, electric shock, injury,
harmful radiation and materials, various measures are provided in this Hitachi Plasma display.
Be sure to read cautionary items described in the manual to maintain safety before servicing.
1. Since Panel Module and front Filter are made of glass, handling to the broken Module and
Filter shall be taken care sufficiently in order not to be injured.
2. Replacing work shall be started after the Panel Module and the AC/DC Power supply
become sufficiently cool.
3. Special care shall be taken to the display area in order not to damage its surface.
4. The Panel Module shall not to be touched with bare hand to protect its surface from stains.
5. It recommended to use clean soft gloves during the replacing work in order to protect not
only the display area of the Panel Module but also a serviceman himself.
6. The Chip Tube of Panel Module (located upper left of the back) and flexible cables
connecting Panel glasses to drive circuit PWBs are very weak, so shall be taken care
sufficiently not break. If you break Chip Tube, the Panel doesn't display forever.
SPECIFICATIONS AND PARTS ARE SUBJECT TO CHANGE FOR IMPROVEMENT.
HITACHI
S TA N DB Y ( RE D )
O N (G R N )
R GB /V I D EO
ME N U
S E L E C T
VO L UM E
Caution
Serviceman Warning
Contents
2
2
3
4
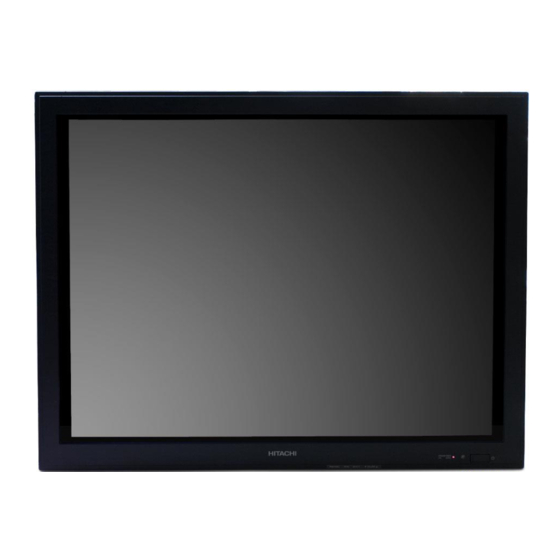
Plasma Display
September 2001 Digital Media Systems Division
SM0059
CMP307XE
CMP307XU
6. Disassembly diagram
7. Re-Adjustment
8. Replacement Parts list
6
7
11
14

Summary of Contents for Hitachi CMP307XE
-
Page 1: Table Of Contents
Be sure to read this manual before servicing. To assure safety from fire, electric shock, injury, harmful radiation and materials, various measures are provided in this Hitachi Plasma display. Be sure to read cautionary items described in the manual to maintain safety before servicing. -
Page 2: Features
1. Features 37 inches XGA high-definition color plasma display panel Newly developed Multi-scanning converter provides a multiscan coverage of TV signals through to PC analog signals (24kHz to SXGA(64kHz)) Large high-quality display images free from color misconvergence and display distortion, as well as from geomagnetic effect and the magnetic effect of ambient power lines 2. -
Page 3: Names Of Each Part
3. Names of each part Outlook Front Front Filter Filter Front Front Frame Frame Power Power Switch Switch HI TACHI S T A N D B Y (R E D ) O... -
Page 4: Trouble Shooting
4. Trouble shooting Power can not be turned on (LED is not light) Is the input voltage applied to the AC/DC Power unit ? (PESW1 4, 6) AC inlet Power switch AC Fuse F911 10A250V ... - Page 5 Picture is not displayed (LED is lighting) Is the LED red or green? green Voltage applied to pins 7(PED) of the Signal PWB? Do the Fans rotate? AC/DC Power unit 5 : GND When ...
-
Page 6: Block Diagram
5. BLOCK DIAGRAM MFN1 MFN2 MFN3 ADDRESS UL/LF ADDRESS UP/RI PAX5 PAX1 PAY1 PAY2 POWER SW EEF6 AC-DC POWER PAX6 PAX2 PAY1 PAY2 180v SW.REG. VADR(70V),+5V VADR(70V),+14V,,+5V 4V,5.6V.14V SW.REG. VADR(70V) INLET VXSC(60V) X_SCAN PESW1 VRES(340V) VYSC(70V) VYSB(-170V) CONTROL +14V VSUS(180V) PSD3 PSD1 PSD2... - Page 7 6. Disassembly diagram (1) Remove Back Cover Be careful not to be damaged the face of Front Filter. Remove 4 screws(a) and remove the Rear stand. Remove 20 screws(b) 、 and remove Back Cover. At this time be careful not to be damaged edges of Back Cover and its coated face.
- Page 8 (2) Remove Signal PWB Disconnect ESC1(PH-3P), ESC2(PH-7P), ESS(EH4P-HR3P/HR2P), ESD3(EH-12P), ESD2(FFC-40P) , PSD1(FFC-40P) Screw(c) Screw(c) Screw( Screw(c) PST ,ESV3,EVC2, EVC1 connectors. Be careful not to be damaged the SIGNAL VIDEO PWB PWB PSV1-3 Connector holder. Remove 2 screws(c), 8screws(f), plastic rivet, 4screws(e) 2screws(g) and remove Signal PWB,and Video PWB.
- Page 9 (4) Remove Front Frame Remove 3 screws(l),then be careful not to be damaged the face of front filter. Attached the Stand with 4screw(a), then stand it vertically. When remove front frame. Front Frame Front Frame Screw(l) Screw (l) Screw(a) Screw (a) ...
- Page 10 Screw (k) Screw(k) (6) Remove Fan AEF6/BEF6 AEF6/BEF6 Remove 3screws(k),and Fan Metal Fan Metal Fan Metal connector disconnect AEF6orBEF6 Connector connector, Remove Fan hold Metal. Then remove 2plastic rivets. Plastic rivet Prastic rivet (7) Remove AC/DC Power unit Remove 4 screws(o) and 2 screw(p), then disconnect PESW1(VH-6P), PEY1(VH-5P),...
- Page 11 7. Re-Adjustment After changing the Signal PWB or Panel Module, re-adjustment is needed according to the item 7.1 to 7.5 For Video PWB, item 7.3 to 7.5 are needed. 7.1 Personal Computer (PC)input black level/fundamental amplitude adjustment How to Prepare 1.Connect RGB input terminal XGA(Vertical Sync Frequency 60Hz),0.7Vpeak,no -set up.
- Page 12 3.Adjust color temperature as follows by increasing or reducing numbers of NO.32,33,34. PC color temperature (COOL) x=0.277± ± ± ± 0.002, y y y y =0.289± ± ± ± 0.002 at 10400K 4.Adjust color temperature as follows by increasing or reducing numbers of NO.35,36,37. PC color temperature (NORM) x=0.283±...
- Page 13 7.4 Video color temperature adjustment How to prepare 1.Connect Video input ( NTSC 3.58), Video level 0.714Vp-p ,Sync level 0.286Vp-p,no -set up 2.Input white window(33%) Signal. 2.Appear and Adjust screen OSD Menu of Picture: Contrast:127 ,Brightness:0,Video level:NORMAL,GAMMA:2.2 How to Adjust 1.Set Service Adjust Mode and adjust as follows by Remote Control Transmitter.
- Page 14 THE UPDATED PARTS LIST FOR THIS MODEL IS AVAILABLE ON ESTA...
- Page 15 Fax: +46 (0) 8 562 711 13 Tel: +39 02 38073415 Servizio Clienti Email: [email protected] Fax: +39 02 48786381/2 Email: [email protected] HITACHI EUROPE S.A.S HITACHI EUROPE LTD (Norway) AB Lyon Office STRANDVEIEN 18 B.P. 45, 69671 BRON CEDEX 1366 Lysaker FRANCE...


