
Related Manuals for Sharp mx-b380p

Summary of Contents for Sharp mx-b380p
- Page 1 MODEL: MX-B380P Operation Guide BEFORE USING BEFORE USING THE MACHINE THE MACHINE PRINTING PRINTING SYSTEM SETTINGS SYSTEM SETTINGS TROUBLESHOOTING TROUBLESHOOTING...
- Page 2 MANUALS PROVIDED WITH THE MACHINE Operation manuals in PDF format (this manual) The manuals in PDF format provide detailed explanations of the procedures for using the machine in each mode. To view the PDF manuals, download them from the hard drive in the machine. The procedure for downloading the manuals is explained in "Downloading the Operation Guide"...
- Page 3 SHARP Service Department. • Aside from instances provided for by law, SHARP is not responsible for failures occurring during the use of the product or its options, or failures due to incorrect operation of the product and its options, or other failures, or for any damage that occurs due to use of the product.
-
Page 4: Table Of Contents
• ACCESSING THE WEB PAGE ... . 1-20 SHARP OSA ......1-47 USER CONTROL . - Page 5 BEFORE USING THE MACHINE MAINTENANCE REPLACING THE TONER CARTRIDGES..1-49 REPLACING THE TONER COLLECTION CONTAINER ......1-52 REPLACING THE DEVELOPER CARTRIDGE / DRUM CARTRIDGE .
-
Page 6: Part Names And Functions
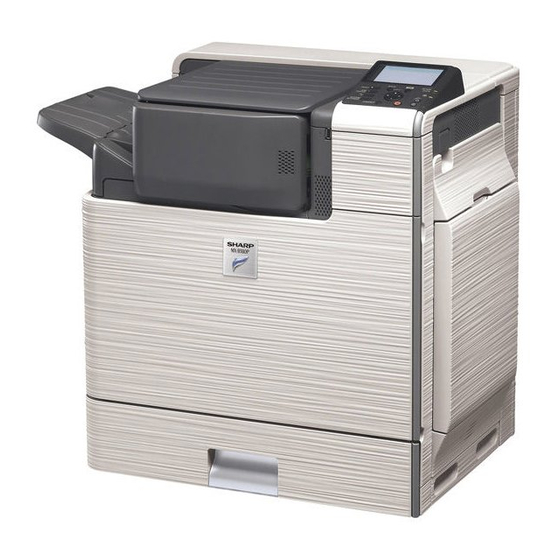
BEFORE USING THE MACHINE BEFORE USING THE MACHINE This section provides basic information about the machine. Please read this chapter before using the machine. PART NAMES AND FUNCTIONS EXTERIOR When a finisher is installed Front cover Main power switch This is used to power on the machine. Open this cover to replace a toner cartridge. - Page 7 For the USB cable, use a shielded cable. (when 500-sheet paper feed units are installed)* These hold paper. For 500-sheet paper feed unit combinations, consult your dealer or nearest SHARP Service Department. ☞ TRAY SETTINGS FOR TRAYS 1 TO 4 (page 1-40)
-
Page 8: Interior
BEFORE USING THE MACHINE INTERIOR (11) (12) (13) (14) (15) (16) Toner collection container removed and main charger cover open (17) (18) (19) (20) (21) (11) Developer cartridges (16) Paper reversing section This contains the developer that is necessary to transfer This is used when 2-sided printing is performed. -
Page 9: Side And Back
BEFORE USING THE MACHINE SIDE AND BACK USB connector (A type) Supports USB 2.0 (Hi-Speed). This is used to connect a USB device such as USB memory to the machine. This connector is not initially available for use. If you wish to use the connector, contact your service assistance. -
Page 10: Operation Panel
(page 1-13) Sharp OSA shortcut key (13) [POWER SAVE] key ( ) / indicator Press this key to display a shortcut key to Sharp OSA Use this key to put the machine into auto power shut-off mode. mode to save energy. -
Page 11: Using The Operation Panel
BEFORE USING THE MACHINE USING THE OPERATION PANEL This section explains how to use the operation panel. • To enter text, see "ENTERING TEXT" (page 1-75). • For information on the screens and procedures for using the system settings, see "Common Operation Methods"... - Page 12 BEFORE USING THE MACHINE Selecting items in lists and returning to the previous screen BACK (1) When selections appear as a list in a setting screen, select the desired item in the list with the keys. Items that are currently set are indicated by (2) Press the [OK] key to enter your selection.
- Page 13 BEFORE USING THE MACHINE Entering with the arrow keys To change the number of copies, enter a number as follows. Example: 123 BACK BACK (1) Select the number with the keys. (2) Use the keys to move the frame to the next place. (3) Repeat steps (1) and (2) to enter 2 and 3.
- Page 14 BEFORE USING THE MACHINE Items that appear in the display F.Colour Icon display This shows messages. Settings appear here. This icon appears when a USB memory or If you move the selection frame to the bottom setting and other USB device is connected to the then press the key, the next screen appears.
-
Page 15: Using The Web Page
BEFORE USING THE MACHINE USING THE WEB PAGE The procedures for using the Web page are explained below. Common buttons [Logout] button The [Submit] button used to store settings, the [Update] When user authentication is enabled, click this button to button used to update settings, and the [Cancel] button log out from the Web server. -
Page 16: Turning The Power On And Off
BEFORE USING THE MACHINE TURNING THE POWER ON AND OFF The machine has two power switches. One is the main power switch on the left side of the machine, and the other is the [POWER] key ( ) on the right side of the operation panel. Main power switch [POWER] key When the main power switch is switched on, the main... -
Page 17: Energy Save Functions
BEFORE USING THE MACHINE ENERGY SAVE FUNCTIONS This product has the following two energy save functions that conform to the Energy Star guidelines to help conserve natural resources and reduce environmental pollution. Preheat Mode (Low power mode) Preheat mode automatically lowers the temperature of the fusing unit and thereby reduces power consumption if the machine remains in the standby state for the interval of time set in "Preheat Mode Setting"... -
Page 18: User Authentication
BEFORE USING THE MACHINE USER AUTHENTICATION User authentication restricts the use of the machine to users that have been registered. The functions that each user is allowed to use can be specified, allowing the machine to be customized to meet the needs of your workplace. When the administrator of the machine has enabled user authentication, each user must log in to use the machine. - Page 19 BEFORE USING THE MACHINE Select the [OK] key. After the entered user number is authenticated, the user count screen will appear briefly. BACK When page limits have been set in "Pages Limit Group List" in the Web page, the number of pages remaining will appear. (The remaining number of pages that the user can use appears.) The amount of time that this screen appears can be changed using "Message Time Setting"...
-
Page 20: Authentication By Login Name / Password
BEFORE USING THE MACHINE AUTHENTICATION BY LOGIN NAME / PASSWORD The following procedure is used to log in using a login name and password received from the administrator of the machine or the administrator of the LDAP server. When controlled by login name and password (Different items will appear in the screen when LDAP authentication is used.) Keys in the display can be selected with the arrow keys and the [OK] key. - Page 21 BEFORE USING THE MACHINE Select the [Password] key. A text entry screen for entering the password will appear. Enter your password that is stored in "User List" in the Web page. If you are logging in to an LDAP server, enter the password that is stored with your LDAP server login name.
- Page 22 BEFORE USING THE MACHINE Select the [OK] key. After the entered login name and password are authenticated, the user count screen will appear briefly. BACK When page limits have been set in "Pages Limit Group List" in the Web page, the number of pages remaining will appear. (The remaining number of pages that the user can use (Different items will appear in the screen when LDAP appears.) The amount of time that this screen appears can be...
-
Page 23: Accessing The Web Page
BEFORE USING THE MACHINE ACCESSING THE WEB PAGE The login method for accessing the Web server in the machine varies depending on whether or not user authentication is enabled. For information on accessing the Web server in the machine, see "ACCESSING THE WEB SERVER IN THE MACHINE"... -
Page 24: User Control
BEFORE USING THE MACHINE USER CONTROL User Control is used to configure settings for user authentication in the Web page. Select the [User Control] key in the Web page menu to configure the settings. USER LIST This is used to store, edit, and delete users when user authentication is enabled. When the [User List] key is selected, the following screen appears. - Page 25 BEFORE USING THE MACHINE Factory-stored users The following users are stored in the machine at the factory. • Administrator: Factory-stored account for the administrator of the machine. • User: This is used when network authentication is used and a login name not stored in the machine is directly entered.
- Page 26 BEFORE USING THE MACHINE Item Description Specify page limits for the user by selecting one of the stored page limit groups. The factory Pages Limit Group default setting is [Unlimited]. For more information, see "PAGE LIMIT GROUP LIST" (page 1-26). Specify the authority of the user by selecting one of the stored authority groups.
-
Page 27: Default Setting
BEFORE USING THE MACHINE DEFAULT SETTING These settings enable or disable user authentication and specify the authentication method. When user authentication is enabled, each user of the machine is registered. When a user logs in, settings for that user are applied. This function allows greater control of security and cost management. In addition, even if the user information is not stored in the machine, it is possible to log in by directly entering user information stored on an LDAP server. - Page 28 (when the HID card reader is available.) Configure this setting if user authentication will be Server Setting performed using a Sharp OSA external authentication Use this to set the default network authentication server. application and an HID card. When a user logs in from the Web page or sends a print...
-
Page 29: Page Limit Group List
BEFORE USING THE MACHINE PAGE LIMIT GROUP LIST This is used to store groups of Account Limit Settings. The page limits for each user are specified by selecting one of these stored groups when the user is stored. When the [Page Limit Group List] key is selected, the following screen appears. (1) List display (3) [Return to the Defaults] key This shows the currently stored groups. -
Page 30: Authority Group List
BEFORE USING THE MACHINE AUTHORITY GROUP LIST Use this to store groups of user authority settings. The authority of each user is specified by selecting one of these stored groups when the user is stored. When the [Authority Group List] key is selected, the following screen appears. (1) List display (2) [Add] key This shows the currently stored groups. - Page 31 Network Folder Pull Print Allowed Allowed Prohibited Print hold Print Hold Image Check Allowed Allowed Prohibited Sharp OSA Approval Settings to Use a Sharp OSA Allowed Allowed Allowed Common Functions [1-Sided/2-Sided [1-Sided/2-Sided [1-Sided/2-Sided Approval Settings for 2-Sided Print Approved] Approved]...
-
Page 32: Favourite Operation Group List
BEFORE USING THE MACHINE FAVOURITE OPERATION GROUP LIST This is used to store favourite operation groups. Favourite Operation Group Registration Groups of preferred settings can be stored as "favourite operation groups". For example, a user who speaks a different language would normally have to change the display language each time he or she uses the machine; however, by storing the language in a favourite operation group, the language is automatically selected when the user logs in. -
Page 33: View User Count
BEFORE USING THE MACHINE VIEW USER COUNT This displays the total number of pages printed by each user. When the [View User Count] key is selected, the following screen appears. (1) User List (3) [Show] key This shows the factory-stored users and the currently This shows the counts of the selected user. -
Page 34: Remote Operation Of The Machine
BEFORE USING THE MACHINE REMOTE OPERATION OF THE MACHINE The remote operation function allows you to operate the machine from your computer. When this function is added, the same screen as the operation panel screen appears on your computer. This allows you to operate the machine from your computer in the same way as if you were standing in front of the machine. -
Page 35: Job Log
BEFORE USING THE MACHINE JOB LOG The machine retains a log of the jobs that are performed. Settings for the job log stored in the machine are configured on the Web page. Select [Job Log] on the Web page to configure the settings. SAVE / DELETE JOB LOG The log of jobs executed on the machine can be stored or deleted. -
Page 36: Items Recorded In The Job Log
BEFORE USING THE MACHINE ITEMS RECORDED IN THE JOB LOG The machine records the jobs that are performed in the job log. The main information that is recorded in the job log is described below. • To make it easy to total the usage counts of differently configured machines, the items recorded in the job log are fixed, regardless of what peripheral devices are installed or the objective of the recording. - Page 37 BEFORE USING THE MACHINE Item name Description Print Hold Related Print Hold Print hold status. Item Storing Mode Print hold store mode. File Name Name of file stored by retention print.* Data Size [KB] File size. Common Functionality Special Modes Special modes selected when the job was executed.
-
Page 38: Storage Backup
• This function cannot be used while the system settings are in use, while a job is being executed, or when there is a reserved job. • For machines for which data can be imported, contact your dealer or nearest SHARP Service Department. EXPORT SETTINGS Use these settings to back up data to your computer. -
Page 39: Device Cloning
• This function cannot be used while the system settings are in use, while a job is being executed, or when there is a reserved job. • For machines for which data can be imported, contact your dealer or nearest SHARP Service Department. • The following data is not copied when device cloning is performed: - List print. -
Page 40: Loading Paper
(16 lbs. to 28 lbs.)) Recycled paper, coloured paper and pre-punched paper must meet the same specifications as plain paper. Contact your dealer or nearest SHARP Service Department for advice on using these types of paper. * The "g/m " (lbs.) units used in these explanations indicate the weight of the paper. - Page 41 BEFORE USING THE MACHINE Types of paper that can be used in each tray The following types of paper can be loaded in each tray. " " in the table indicates "cannot be used". – Tray 1/Tray 2/Tray 3/Tray 4 Bypass tray Plain paper Permitted...
- Page 42 • The image quality and toner fusibility of paper may change due to ambient conditions, operating conditions, and paper characteristics, resulting in image quality inferior to that of SHARP standard paper. Contact your dealer or nearest authorised service representative for advice on using these types of paper.
-
Page 43: Tray Settings For Trays 1 To 4
BEFORE USING THE MACHINE TRAY SETTINGS FOR TRAYS 1 TO 4 LOADING PAPER AND CHANGING THE PAPER SIZE A maximum of 500 sheets of paper from size A5 to A4 (5-1/2" x 8-1/2" to size 8-1/2" x 14") can be loaded in trays 1 and 2. A maximum of 500 sheets of paper from size B5 to A4 (7-1/4"... - Page 44 BEFORE USING THE MACHINE Insert the paper into the tray. Load the paper with the print side face up. The stack must not be higher than the indicator line (maximum of 500 sheets). Indicator line • If paper is loaded higher than the line, paper misfeeds may occur. •...
-
Page 45: Loading Paper In The Bypass Tray
BEFORE USING THE MACHINE LOADING PAPER IN THE BYPASS TRAY The bypass tray can be used to print on plain paper, envelopes, label sheets, and other special media. Up to 100 sheets of paper can be loaded (up to 40 sheets of heavy paper) for continuous printing similar to the other trays. Open the bypass tray. -
Page 46: Important Points When Using The Bypass Tray
IMPORTANT POINTS WHEN USING THE BYPASS TRAY • When using plain paper other than SHARP standard paper or special media other than SHARP-recommended transparency film, or when printing on the reverse side of previously used paper, the paper must be loaded one sheet at a time. - Page 47 BEFORE USING THE MACHINE Loading envelopes When inserting envelopes in the bypass tray, place them aligned to the left side in the orientation shown below. Only the front side of envelopes can be printed on. Be sure to place the front side face down. When loading envelopes, load one envelope at a time.
-
Page 48: Peripheral Devices
PERIPHERAL DEVICES This section describes the peripheral devices that can be used with the machine and explains how to use the finisher, as well as Sharp OSA (application communication module and external account module). PERIPHERAL DEVICES Peripheral devices can be installed on the machine to increase its range of functionality. -
Page 49: Finisher
BEFORE USING THE MACHINE FINISHER The finisher is equipped with the offset function, which offsets each set of output from the previous set. In addition, each set of sorted output can be stapled. PART NAMES The following parts can be accessed when the finisher is open. Output tray Front cover Stapled and offset output is delivered to this tray. -
Page 50: Sharp Osa
Sharp OSA (Open Systems Architecture) is an architecture that enables external applications to be directly connected to a machine over a network. When a machine that supports Sharp OSA is used, the keys that are displayed on the operation panel and functions can be linked to an external application. -
Page 51: External Account Application
BEFORE USING THE MACHINE EXTERNAL ACCOUNT APPLICATION An external account application can be used in "external authentication mode" or "external count mode". When external authentication mode is used, the login screen is retrieved from the application when the machine is started. When a job ends, a job notification screen is sent to the application to enable counts to be kept for each authenticated user. -
Page 52: Replacing The Toner Cartridges
BEFORE USING THE MACHINE MAINTENANCE This section explains how to clean the machine and replace the toner cartridges and the toner collection container. REPLACING THE TONER CARTRIDGES When it is time to replace a supply item, a message instructing you to replace the item will appear in the display. •... - Page 53 BEFORE USING THE MACHINE Take out the new toner cartridge, hold it with both hands, and shake 5 or 6 times horizontally. Protective material • When shaking the toner cartridge, be sure to shake with the protective material inserted in the cartridge. If you shake the cartridge after removing the protective material, toner may spill out.
- Page 54 • If a toner cartridge other than a SHARP-recommended toner cartridge is used, the machine may not attain full quality and performance and there is a risk of damage to the machine. Be sure to use a SHARP-recommended toner cartridge.
-
Page 55: Replacing The Toner Collection Container
BEFORE USING THE MACHINE REPLACING THE TONER COLLECTION CONTAINER The toner collection container collects excess toner that is produced during printing. When it is time to replace a supply item, a message instructing you to replace the item will appear in the display. Follow the procedure below to replace the toner collection container. - Page 56 BEFORE USING THE MACHINE Remove the toner collection container. • If the toner collection container is tipped forward too far, it will not be possible to remove it. • Do not point the holes down as used toner will spill out. •...
- Page 57 BEFORE USING THE MACHINE Caution • Do not throw the toner collection container into a fire. Toner may fly and cause burns. • Store the toner collection container out of the reach of small children. • Place the old toner collection container in the bag that contained the new toner collection container, seal the bag, and place it in the box.
-
Page 58: Replacing The Developer Cartridge / Drum Cartridge
BEFORE USING THE MACHINE REPLACING THE DEVELOPER CARTRIDGE / DRUM CARTRIDGE Before replacing the developer cartridge or drum cartridge, turn off the main power of the machine and wait briefly. REPLACING THE DEVELOPER CARTRIDGE When it is time to replace a supply item, a message instructing you to replace the item will appear in the display. It is also necessary to remove the developer cartridge in order to replace the drum cartridge. - Page 59 BEFORE USING THE MACHINE Open the main charger cover. (1) Turn the main charger cover lock levers in the direction of an arrow below. When the lock levers are horizontal, the lock is released. (2) Grasp the lock levers and tip the cover forward.
- Page 60 BEFORE USING THE MACHINE Shake the new developer cartridge 5 or 6 Protective material times as shown. Hold the developer cartridge firmly as shown below and shake forward and back, left and right. Remove the protective material after shaking the developer cartridge.
- Page 61 BEFORE USING THE MACHINE Grasp the developer cartridge lock and replace it on the machine. Hold the developer cartridge with one hand and slowly remove the seal with the other hand. Slowly pull the seal straight and horizontally out. If excessive force is used or the seal is pulled out diagonally, it may tear. There is a mark (red belt) on the end of the seal.
- Page 62 BEFORE USING THE MACHINE Close the front cover. Take care that your fingers are not pinched when closing the cover. DATA Turn on the power. Switch the main power switch "ON" and press the [POWER] key ( ) on the operation panel to turn on the operation panel power.
-
Page 63: Replacing The Drum Cartridge
BEFORE USING THE MACHINE REPLACING THE DRUM CARTRIDGE When it is time to replace a supply item, a message instructing you to replace the item will appear in the display. • Do not replace a supply item before the replacement message appears in the display. •... - Page 64 BEFORE USING THE MACHINE Remove the protective material from the Drum cartridge alignment mark on machine drum cartridge and slowly insert the drum cartridge along the guides. Drum cartridge alignment mark Make sure that the mark on the drum cartridge is aligned with the mark on the machine as you insert the drum Right Hand...
-
Page 65: Replacing The Staple Cartridge In The Finisher
BEFORE USING THE MACHINE REPLACING THE STAPLE CARTRIDGE IN THE FINISHER When the staple cartridge runs out of staples, a message will appear in the operation panel. Follow the procedure below to replace the staple cartridge. Open the cover. While pressing the lever over to the left, slide the finisher to the left until it stops. - Page 66 BEFORE USING THE MACHINE Insert a new staple cartridge into the staple case as shown. Push the staple cartridge in until it clicks into place. Replace the staple case. Push the staple case in until it clicks into place. Slide the finisher back to the right. Gently slide the finisher back to the right until it locks into its original position.
-
Page 67: Regular Maintenance
BEFORE USING THE MACHINE REGULAR MAINTENANCE To ensure that the machine continues to provide top quality performance, periodically clean the machine. Caution Do not use a flammable spray to clean the machine. If gas from the spray comes in contact with hot electrical components or the fusing unit inside the machine, fire or electrical shock may result. - Page 68 BEFORE USING THE MACHINE Release the lock levers and open the main charger cover. ☞ REPLACING THE DEVELOPER CARTRIDGE (page 1-55) Remove the charger cleaner. (1) Flip down the charger cleaner lock (A) in the direction of the arrow, and lift the left end of the charger cleaner.
- Page 69 BEFORE USING THE MACHINE Replace the charger cleaner in its original position. Insert the tip of the charger cleaner in toward the right and then press down on the end of the charger cleaner. The charger cleaner will lock into place. Close the main charger cover and rotate the lock levers in the direction of the arrows to lock the cover.
-
Page 70: Cleaning The Bypass Feed Roller
BEFORE USING THE MACHINE CLEANING THE BYPASS FEED ROLLER If you find that paper fed from the bypass tray misfeeds or is soiled by the roller, clean the roller. Before starting, remove the paper from the bypass tray. Press the [POWER] key ( ) on the operation panel to turn off the panel power, and then switch the main power... - Page 71 BEFORE USING THE MACHINE DATA Turn on the power. Switch the main power switch "ON" and press the [POWER] key ( ) on the operation panel to turn on the operation panel power. 1-68...
-
Page 72: Cleaning The Laser Unit
BEFORE USING THE MACHINE CLEANING THE LASER UNIT When the laser unit inside the machine becomes dirty, line patterns may form in the printed image. Follow the steps below to clean the laser unit. Identifying lines (white lines) caused by a dirty laser unit •... - Page 73 BEFORE USING THE MACHINE Make sure that the cleaner at the tip of the cleaning tool is not dirty. Cleaner If the cleaner is dirty, remove the cleaner and replace it with a clean one. For the procedure for replacing the cleaner, see steps 5 through 7.
- Page 74 BEFORE USING THE MACHINE Clean the laser unit. (1) Point the cleaner down and slowly insert the tool into the hole that you wish to clean. The parts of the writing unit that require cleaning are indicated by labels similar to (A). (2) Insert the cleaning tool all the way into the hole and then pull it back out.
- Page 75 BEFORE USING THE MACHINE DATA Turn on the power. Switch the main power switch "ON" and press the [POWER] key ( ) on the operation panel to turn on the operation panel power. 1-72...
-
Page 76: Cleaning The Pt Charger
BEFORE USING THE MACHINE CLEANING THE PT CHARGER If black or white lines still remain after the main charger have been cleaned, use the PT charger cleaner to clean the PT charger. Press the [POWER] key ( ) on the operation panel to turn off the panel power, and then switch the main power switch to the off position. - Page 77 BEFORE USING THE MACHINE Close the front cover. Take care that your fingers are not pinched when closing the cover. DATA Turn on the power. Switch the main power switch "ON" and press the [POWER] key ( ) on the operation panel to turn on the operation panel power.
-
Page 78: Entering Text
BEFORE USING THE MACHINE ENTERING TEXT This section explains the text entry screen. FUNCTIONS OF THE MAIN KEYS Description This key changes the text entry screen from the lower case screen to the upper case screen. The upper case screen will continue to appear until the [Caps] key is selected again so that it is no longer highlighted. - Page 79 BEFORE USING THE MACHINE Description Select this key and search results will appear based on the entered characters. Search When this key is selected, the "Input Mode" screen appears. Input mode screen Select this key to select character entry mode. Select this key to select symbol entry mode.
- Page 80 CHAPTER 2 PRINTING This chapter provides detailed explanations of the procedures for printing. For the procedures for using the display of the machine, see "USING THE OPERATION PANEL" (page 1-8) in "1. BEFORE USING THE MACHINE". For the procedure for accessing the Web pages, see the Quick Start Guide. For the procedures for using the Web page, see "USING THE WEB PAGE"...
- Page 81 PRINTING PRINT FUNCTIONS FOR SPECIAL CHECKING THE PRINT STATUS PURPOSES ......2-45 JOB STATUS SCREEN .
-
Page 82: Printer Function Of The Machine
PRINTING PRINTER FUNCTION OF THE MACHINE The machine is equipped standard with a printing function. To enable printing from your computer, a printer driver must be installed. See the table below to determine which printer driver to use in your environment. Environment Printer driver type Remarks... -
Page 83: Printing From Windows
PRINTING PRINTING FROM WINDOWS BASIC PRINTING PROCEDURE The following example explains how to print a document from "WordPad", which is a standard accessory program in Windows. Select [Print] from the [File] menu of WordPad. If you are using Windows 7, click the button. - Page 84 PRINTING Select print settings. (1) Click the [Paper] tab. (2) Select the paper size. To select settings on other tabs, click the desired tab and then select the settings. (3) Click the [OK] button. • Make sure the paper size is the same as the paper size set in the software application. •...
-
Page 85: Selecting The Paper
PRINTING SELECTING THE PAPER This section explains how to configure the "Paper Selection" setting on the [Paper] tab of the printer driver properties window. Before printing, check the paper sizes, paper types, and paper remaining in the machine's trays. To view the most recent tray information, click the [Tray Status] button. •... -
Page 86: Printing On Envelopes
PRINTING PRINTING ON ENVELOPES The bypass tray can be used to print on special media such as envelopes. The procedure for printing on an envelope from the printer driver properties screen is described below. For the types of paper that can be used in the bypass tray, see "IMPORTANT POINTS ABOUT PAPER"... -
Page 87: Printing When The User Authentication Function Is Enabled
PRINTING PRINTING WHEN THE USER AUTHENTICATION FUNCTION IS ENABLED When the user authentication function is enabled, your user information (login name, password, etc.) must be entered in the printer driver properties window before you can print. The information that must be entered varies depending on the authentication method being used, so check with the administrator of the machine before printing. - Page 88 PRINTING Enter your login name and password. (1) Click the [Job Handling] tab. (2) Enter your user information. • When authentication is by login name/password Select the [Login Name] and [Password] checkboxes so that checkmarks appear, and enter your login name and password. Enter 1 to 32 characters for the password.
-
Page 89: Viewing Printer Driver Help
PRINTING VIEWING PRINTER DRIVER HELP When selecting settings in the printer driver, you can display Help to view explanations of the settings. Open the printer driver properties window from the print window of the software application. (1) Select the printer driver of the machine. (2) Click the [Preferences] button. -
Page 90: Saving Frequently Used Print Settings
PRINTING SAVING FREQUENTLY USED PRINT SETTINGS Settings configured on each of the tabs at the time of printing can be saved as user settings. Saving frequently used settings or complex colour settings under an assigned name makes it easy to select those settings the next time you need to use them. - Page 91 PRINTING Check and save the settings. (1) Check the displayed settings. (2) Enter a name for the settings (maximum of 20 characters). (3) Click the [OK] button. Click the [OK] button. Start printing. • Up to 30 sets of user settings can be saved. •...
-
Page 92: Using Saved Settings
PRINTING USING SAVED SETTINGS Open the printer driver properties window from the print window of the software application. (1) Select the printer driver of the machine. (2) Click the [Preferences] button. The button that is used to open the printer driver properties window (usually [Properties] or [Printing Preferences]) may vary depending on the software application. -
Page 93: Changing The Printer Driver Default Settings
PRINTING CHANGING THE PRINTER DRIVER DEFAULT SETTINGS The default settings of the printer driver can be changed using the procedure below. The settings selected using this procedure are saved and become the default settings when printing from a software application. (Settings selected in the printer driver properties window when printing from an application remain in effect only while the application is in use.) Click the [Start] button (... - Page 94 PRINTING Configure the settings and click the [OK] button. For explanations of the settings, see printer driver Help. 2-15...
-
Page 95: Printing From A Macintosh
PRINTING PRINTING FROM A MACINTOSH BASIC PRINTING PROCEDURE The following example explains how to print a document from the standard accessory program "TextEdit" in Mac OS X ("SimpleText" in Mac OS 9). SELECTING PAPER SETTINGS Select paper settings in the printer driver before selecting the print command. Select [Page Setup] from the [File] menu of TextEdit. -
Page 96: Printing
PRINTING PRINTING Select [Print] from the [File] menu of TextEdit. In Mac OS 9, select [Print] from the [File] menu of SimpleText. The menu used to execute printing may vary depending on the software application. Make sure that the correct printer is selected. - Page 97 PRINTING Click the [Print] button. Printing begins. 2-18...
-
Page 98: Selecting The Paper
PRINTING SELECTING THE PAPER This section explains the [Paper Feed] settings ("Paper Source" setting in [General] in Mac OS 9) in the print settings window. • When [Auto Select] is selected A tray with plain paper or recycled paper (the factory default setting is plain paper only) of the size specified in "Paper Size"... -
Page 99: Printing On Envelopes
PRINTING PRINTING ON ENVELOPES The bypass tray can be used to print on special media such as envelopes. The procedure for printing on an envelope from the printer driver properties screen is described below. For the types of paper that can be used in the bypass tray, see "IMPORTANT POINTS ABOUT PAPER"... -
Page 100: Printing When The User Authentication Function Is Enabled
PRINTING PRINTING WHEN THE USER AUTHENTICATION FUNCTION IS ENABLED When the user authentication function is enabled, you must enter your user information (login name, password, etc.) in order to print. The information that must be entered varies depending on the authentication method being used, so check with the administrator of the machine before printing. - Page 101 PRINTING Start printing. (1) Enter your user information. • When authentication is by login name/password Enter your login name in "Login Name" and your password in "Password" (1 to 32 characters). • When authentication is by user number Enter your user number (5 to 8 digits) in "User Number".
-
Page 102: Frequently Used Functions
PRINTING FREQUENTLY USED FUNCTIONS This section explains frequently used functions. • TWO-SIDED PRINTING (page 2-25) • PRINTING MULTIPLE PAGES ON ONE PAGE • FITTING THE PRINT IMAGE TO THE PAPER (page 2-28) (page 2-27) • STAPLING OUTPUT (page 2-30) The explanations assume that the paper size and other basic settings have already been selected. For the basic procedure for printing and the steps for opening the printer driver properties window, see the following section: ☞... -
Page 103: Selecting A Print Mode Setting
PRINTING SELECTING A PRINT MODE SETTING This section explains the procedure for selecting a print mode setting. The "Print Mode Settings" consist of the following three items: Normal: This mode is suitable for printing data such as regular text or a table. High Quality: The print quality of photos and text is high. -
Page 104: Two-Sided Printing
PRINTING TWO-SIDED PRINTING The machine can print on both sides of the paper. This function is useful for many purposes, and is particularly convenient when you want to create a simple pamphlet. Two-sided printing also helps conserve paper. Orientation Print results Windows Macintosh Windows... - Page 105 PRINTING Macintosh (1) Select [Layout]. (2) Select [Long-edged binding] or [Short-edged binding]. • In Mac OS X v10.2.8, select the settings in [Advanced]. • In Mac OS 9, select [Output/Document Style] and then select [Flip on long edge] or [Flip on short edge].
-
Page 106: Fitting The Print Image To The Paper
PRINTING FITTING THE PRINT IMAGE TO THE PAPER This function is used to automatically enlarge or reduce the printed image to match the size of the paper loaded in the machine. This is convenient for such purposes as enlarging an A5 or invoice size document to A4 or letter size to make it easier to view, and to print when the same size of paper as the document image is not loaded in the machine. -
Page 107: Printing Multiple Pages On One
PRINTING PRINTING MULTIPLE PAGES ON ONE PAGE This function can be used to reduce the print image and print multiple pages on a single sheet of paper. This is convenient when you want to print multiple images such as photos on a single sheet of paper, and when you want to conserve paper. - Page 108 PRINTING Windows (1) Configure the settings on the [Main] tab. (2) Select the number of pages per sheet. (3) If you wish to print borderlines, click the [Border] checkbox so that a checkmark appears. (4) Select the order of the pages. (2) (3) Macintosh (1) Select [Layout].
-
Page 109: Stapling Output
PRINTING STAPLING OUTPUT The staple function can be used to staple output. This function saves considerable time when preparing handouts for a meeting or other stapled materials. The staple function can also be used in combination with two-sided printing to create materials with a more sophisticated appearance. - Page 110 PRINTING Windows (1) Configure the settings on the [Main] tab. (2) Select the "Binding Edge". (3) Select the staple function. For the staple function, select the number of staples in the "Staple" menu. Macintosh (1) Select [Printer Features]. (2) Select the "Binding Edge". (3) Select the staple function.
-
Page 111: Convenient Printing Functions
PRINTING CONVENIENT PRINTING FUNCTIONS This section explains convenient functions for specific printing objectives. • CONVENIENT FUNCTIONS FOR CREATING • FUNCTIONS THAT COMBINE TEXT AND IMAGES PAMPHLETS AND POSTERS (page 2-42) • FUNCTIONS TO ADJUST THE SIZE AND • PRINT FUNCTIONS FOR SPECIAL PURPOSES ORIENTATION OF THE IMAGE (page 2-36) (page 2-45) - Page 112 PRINTING Macintosh (1) Select [Printer Features]. (2) Select the "Binding Edge". (3) Select [Tiled Pamphlet] or [2-Up Pamphlet]. • In Mac OS X v10.2.8, select from the "2-Side Printing" and "Binding Edge" menus in [Advanced]. • In Mac OS 9, select the settings in [Output/Document Style].
-
Page 113: Increasing The Margin (Margin Shift)
PRINTING INCREASING THE MARGIN (Margin Shift) This function is used to shift the print image to increase the margin at the left, right, or top of the paper. This is convenient when you wish to staple or punch the output but the binding area overlaps the text. -
Page 114: Creating A Large Poster (Poster Printing)
PRINTING CREATING A LARGE POSTER (Poster Printing) (This function is only available in Windows.) One page of print data can be enlarged and printed using multiple sheets of paper (4 sheets (2 x 2), 9 sheets (3 x 3) or 16 sheets (4 x 4)). The sheets can then be attached together to create a large poster. -
Page 115: Functions To Adjust The Size And Orientation Of The Image
PRINTING FUNCTIONS TO ADJUST THE SIZE AND ORIENTATION OF THE IMAGE ROTATING THE PRINT IMAGE 180 DEGREES (Rotate 180 degrees) This feature rotates the image 180 degrees so that it can be printed correctly on paper that can only be loaded in one orientation (such as envelopes or paper with punch ABCD holes). -
Page 116: Enlarging/Reducing The Print Image (Zoom/Xy-Zoom)
PRINTING ENLARGING/REDUCING THE PRINT IMAGE (Zoom/XY-Zoom) This function is used to enlarge or reduce the image to a selected percentage. This allows you to enlarge a small image or add margins to the paper by slightly reducing an image. When using the PS printer driver (Windows), you can set the width and length percentages separately to change the proportions of the image. -
Page 117: Adjusting Line Widths When Printing (Line Width Settings)
PRINTING ADJUSTING LINE WIDTHS WHEN PRINTING (Line Width Settings) (This function is only available in Windows.) When lines in special applications such as CAD cannot be printed correctly, this setting can be used to adjust line widths, such as making overall line widths wider. (This setting is only effective for vector data;... -
Page 118: Reversing The Image (Mirror Image)
PRINTING REVERSING THE IMAGE (Mirror Image) The image can be reversed to create a mirror image. This function can be used to conveniently print a design for a woodblock print or other printing medium. Windows (This function can be used when the PS printer driver is used.) (1) Click the [Advanced] tab. -
Page 119: Image Adjustment Function
PRINTING IMAGE ADJUSTMENT FUNCTION ADJUSTING THE BRIGHTNESS AND CONTRAST OF THE IMAGE (Image Adjustment) (This function is only available in Windows.) The brightness and contrast can be adjusted in the print settings when printing a photo or other image. These settings can be used for simple corrections when you do not have image editing software installed on your computer. -
Page 120: Printing Faint Text And Lines In Black (Text To Black/Vector To Black)
PRINTING PRINTING FAINT TEXT AND LINES IN BLACK (Text To Black/Vector To Black) (This function is only available in Windows.) When printing a color image, color text and lines that are ABCD ABCD faint can be printed in black. (Raster data such as bitmap images cannot be adjusted.) This allows you to bring out color text and lines that are faint and difficult to see. -
Page 121: Functions That Combine Text And Images
PRINTING FUNCTIONS THAT COMBINE TEXT AND IMAGES ADDING A WATERMARK TO PRINTED PAGES (Watermark) Faint shadow-like text can be added to the background of the printed image as a watermark. The size, angle, and print position of the watermark text can be adjusted. The text can be selected from a pre-stored list, or entered to create an original watermark. -
Page 122: Printing An Image Over The Print Data (Image Stamp)
PRINTING PRINTING AN IMAGE OVER THE PRINT DATA (Image Stamp) (This function is only available in Windows.) A bitmap or JPEG image stored on your computer can be printed over the print data. The size, position, and angle of the image can be adjusted. This feature can be used to "stamp"... -
Page 123: Creating Overlays For Print Data (Overlays)
PRINTING CREATING OVERLAYS FOR PRINT DATA (Overlays) (This function is only available in Windows.) The print data can be printed in a previously created XXXX XXXX overlay. By creating table rulings or a decorative frame in an application different from that of the text file and 1 100 1 100 XXXX... -
Page 124: Print Functions For Special Purposes
PRINTING PRINT FUNCTIONS FOR SPECIAL PURPOSES PRINTING SPECIFIED PAGES ON DIFFERENT PAPER (Different Paper) • Using this function in a Windows environment The front and back cover and specified pages of a document can be printed on paper that is different from the other pages. - Page 125 PRINTING Macintosh (This function can only be used in Mac OS 9, Mac OS X v10.4.11, v10.5 to 10.5.8 and 10.6.) (1) Select [Printer Features]. (2) Select [Different Paper]. (3) Select cover insertion settings. Select the print setting, paper tray, and paper type for the cover page and last page.
-
Page 126: Adding Inserts When Printing On Transparency Film (Transparency Inserts)
PRINTING ADDING INSERTS WHEN PRINTING ON TRANSPARENCY FILM (Transparency Inserts) When printing on transparency film, this function helps prevent the sheets of transparency film from sticking together by inserting a sheet of paper between each sheet of film. It is also possible to print the same content on each inserted sheet of paper as is printed on the corresponding sheet of transparency film. -
Page 127: Printing A Carbon Copy (Carbon Copy)
PRINTING PRINTING A CARBON COPY (Carbon Copy) (This function is only available in Windows.) This function is used to print an additional copy of the print image on paper that is the same size but from a different paper tray. For example, if carbon copy print is selected when standard paper is loaded in tray 1 and coloured paper is loaded in tray 2, a print result similar to a carbon copy... -
Page 128: Two-Sided Printing With Specific Pages Printed On The Front Side (Chapter Inserts)
PRINTING TWO-SIDED PRINTING WITH SPECIFIC PAGES PRINTED ON THE FRONT SIDE (Chapter Inserts) (This function is only available in Windows.) You can have specific pages printed on the front side of Example: the paper. When pages 4 and 8 are specified as page settings. When a page (such as the first page of a chapter) is specified as a front side page, the page will be printed on the front side of the paper even if would normally be... -
Page 129: Retention (Print Hold) Function
• Except in cases provided for by law, SHARP Corporation bears no responsibility for any damages that result from the leaking of sensitive information due to manipulation by a third party of any data saved using the retention function, or incorrect operation of the retention function by the operator that saves the data. -
Page 130: Saving Print Files (Retention)
PRINTING SAVING PRINT FILES (Retention) The explanations assume that the paper size and other basic settings have already been selected. For the basic procedure for printing and the steps for opening the printer driver properties window, see the following section: ☞... - Page 131 PRINTING Macintosh (1) Select [Job Handling]. (2) Select the retention setting. Click the [Retention] checkbox . Select the retention method in "Retention Settings". To simplify operation the next time the same password is set, click the (lock) button after entering the password (5 to 8 digit number). 2-52...
-
Page 132: Printing A Stored File
PRINTING PRINTING A STORED FILE A file stored using retention function can be retrieved and printed when needed. The settings used when the file was stored are also stored, and thus the file can be printed again using those settings. Output settings, 2-sided printing, paper size, the number of copies, and other settings can be selected. - Page 133 PRINTING Select the [Print and Delete] key or the [Print and Save] key. • If the [Print and Delete] key is selected, the files will be automatically deleted after printing. • If the [Print and Save] key is selected, the files will be saved after printing.
- Page 134 PRINTING Automatically print all stored data When user authentication is enabled, all retained (stored) print jobs of a user who logs in can be printed automatically after log in. After all jobs are printed, the files are deleted. To use the print all function, the following steps are necessary: •...
-
Page 135: Print Settings Screen
PRINTING PRINT SETTINGS SCREEN When a file is stored in the machine, the print settings that were in effect when the file was printed from the printer driver are also stored. However, the settings below can be changed when you print a stored file. For the procedures for operating the settings screen, see "USING THE OPERATION PANEL"... -
Page 136: Multi-File Printing
PRINTING MULTI-FILE PRINTING Multiple files in a folder can be selected for printing. Keys in the display can be selected with the arrow keys and the [OK] key. Select the [Multi-File Print] key. BACK Select the keys of the files that you wish to print. - Page 137 PRINTING Printing a selected file. The number of selected files appears in the number of selected files display. If you wish to use the number of copies that was stored with the file, go to step (3). (1) Select the [Apply the Number from Stored Setting of Each Job] checkbox so that it is BACK not selected (...
- Page 138 PRINTING Batch printing All files that have the same user name and password can be printed at once. When the [Multi-File Print] key is selected, it changes into the [Batch Print] key. Keys in the display can be selected with the arrow keys and the [OK] key. Select the [Batch Print] key.
- Page 139 PRINTING Select the user name. There are three ways to select the user name: (A) Select the [User List] key and press the [OK] key. A user list (D) appears. Select with the keys and press the [OK] key. If you accidentally select the wrong user name, select the key of the correct name.
- Page 140 PRINTING If a password has been established, select the [Password] key. Enter the password with the soft numeric keypad (5 to 8 digits) and select the [OK] key. For the procedure for entering numbers, see "Entering numbers" (page 1-9) in "1. BEFORE USING THE MACHINE".
-
Page 141: Deleting A Stored File
PRINTING DELETING A STORED FILE Stored files that are no longer needed can be deleted. ☞ PRINTING A STORED FILE (page 2-53) Keys in the display can be selected with the arrow keys and the [OK] key. Select the [Delete] key. BACK Check the file and then select the [Yes] key. - Page 142 PRINTING Automatic deletion of files You can have stored data automatically deleted at regular intervals by specifying a periodic deletion time. Periodic deletion of files stored in the machine helps to prevent the leaking of sensitive information and frees space on the hard drive.
-
Page 143: Searching For A Stored File
PRINTING SEARCHING FOR A STORED FILE When there are many stored files, it may take time to find a file. The search function can be used to find a file quickly. Searching is possible even when you only know part of the file name. Keys in the display can be selected with the arrow keys and the [OK] key. - Page 144 PRINTING Using the user name to search There are three ways to select the user name: (A) Select the [User List] key and press the [OK] key. A user list (D) appears. Select with the keys and press the [OK] key. If you accidentally select the wrong user name, select the key of the correct name.
-
Page 145: Printing Without The Printer Driver
PRINTING PRINTING WITHOUT THE PRINTER DRIVER When you do not have the printer driver installed on your computer, or when the software application used to open a file that you wish to print is not available, you can print directly to the machine without using the printer driver. The file types (and corresponding extensions) that can be printed directly are shown below. -
Page 146: Directly Printing A File On An Ftp Server
PRINTING DIRECTLY PRINTING A FILE ON AN FTP SERVER When an FTP server is configured in the machine's Web pages, you can specify and print a file on the FTP server from the operation panel of the machine. This saves you the trouble of downloading the file and printing it from a computer. To configure FTP server settings, click [Application Settings] and then [Setting for Print from the machine (FTP)] in the Web page menu. - Page 147 PRINTING Select the key of the file that you wish to print. • The icon appears to the left of keys of files that can be printed. • The icon is displayed to the left of keys of folders on the FTP server.
-
Page 148: Directly Printing A File In Usb Memory
PRINTING DIRECTLY PRINTING A FILE IN USB MEMORY A file in a USB memory device connected to the machine can be printed from the operation panel of the machine without using the printer driver. When the printer driver of the machine is not installed on your computer, you can copy a file into a commercially available USB memory device and connect the device to the machine to print the file directly. - Page 149 PRINTING Select the key of the file that you wish to print. • The icon appears to the left of keys of files that can be printed. • The icon is displayed to the left of keys of folders in the USB memory.
-
Page 150: Directly Printing A File In Anetwork Folder
PRINTING DIRECTLY PRINTING A FILE IN A NETWORK FOLDER You can use the machine's operation panel to select and print a file on a server or in a shared folder of an individual's computer on the same network as the machine. Keys in the display can be selected with the arrow keys and the [OK] key. - Page 151 PRINTING Access the network folder. (1) Select the key of the workgroup that you wish to access. (2) Select the key of the server or computer that you wish to access. If a screen appears prompting you to enter a user name BACK and password, check with your server administrator and enter the appropriate user name and password.
- Page 152 PRINTING Select the key of the file that you wish to print. • The icon appears to the left of keys of files that can be printed. • The icon is displayed to the left of keys of folders in the network folder.
-
Page 153: Directly Printing From A Computer
PRINTING DIRECTLY PRINTING FROM A COMPUTER Settings can be configured in the Web pages of the machine to enable direct printing from a computer without using the printer driver. SUBMIT PRINT JOB You can specify a file to be printed directly without using the printer driver. In addition to a file on your computer, this procedure can be used to print any file that can be accessed from your computer, such as a file on another computer connected to the same network. -
Page 154: E-Mail Print
PRINTING E-MAIL PRINT An e-mail account can be configured in the machine to have the machine periodically check your mail server and automatically print received e-mail attachments without using the printer driver. • Configuring settings To use E-mail Print, you must first configure an e-mail account in the machine. To configure an account, click [Application Settings] and then [E-mail Print Settings] in the Web page menu. -
Page 155: Checking The Print Status
PRINTING CHECKING THE PRINT STATUS JOB STATUS SCREEN The job status screen is displayed when the [JOB STATUS] key on the operation panel is pressed. The job status screen shows the status of jobs by mode. When the [JOB STATUS] key is pressed, the job status screen of the mode that was being used before the key was pressed appears. - Page 156 PRINTING Job key display Each job key shows the position of the job in the job queue and the current status of the job. Computer01 002/000 Waiting Indicates the number (position) of the job in the job Status queue. Shows the job status. When the job currently being printed is finished, the job Message Status...
-
Page 157: Printing An Encrypted Pdf File
PRINTING PRINTING AN ENCRYPTED PDF FILE Encrypted PDF is used to protect a PDF file by requiring the entry of a password to print or edit the file. To directly print an encrypted PDF file on an FTP server or in a USB memory device, etc. connected to the machine, follow the steps below to enter the password and begin printing. -
Page 158: Giving A Print Job Priority/Cancelling A Print Job
PRINTING GIVING A PRINT JOB PRIORITY/CANCELLING A PRINT JOB GIVING A PRINT JOB PRIORITY You can give priority to a print job that is waiting to be printed and print it ahead of the other jobs. Keys in the display can be selected with the arrow keys and the [OK] key. Press the [JOB STATUS] key. -
Page 159: Cancelling A Print Job
PRINTING CANCELLING A PRINT JOB A job being printed, a job waiting to be printed, or a spooled job can be cancelled. Keys in the display can be selected with the arrow keys and the [OK] key. Press the [JOB STATUS] key. STATUS Cancel the job. -
Page 160: Changing To Another Paper Size And Printing When Paper Runs Out
PRINTING CHANGING TO ANOTHER PAPER SIZE AND PRINTING WHEN PAPER RUNS OUT If printing stops because the machine ran out of paper, or if the size of paper specified in the printer driver is not loaded in the machine, a message will appear in the display. Printing will begin automatically when the [OK] key is selected and paper is loaded in the machine. - Page 161 PRINTING Select the [Paper] key. Colour / B/W: Mono2 BACK Select the key of the tray that has the paper you wish to use. Printing begins. BACK If you changed to a different paper size, printing may not take place correctly; for example part of the text or image may run off the paper.
-
Page 162: Retrieving And Using A File From The Job Status Screen
PRINTING RETRIEVING AND USING A FILE FROM THE JOB STATUS SCREEN Files stored selecting other than "Hold Only" in "Retention Settings" can be manipulated from the job status complete screen. Keys in the display can be selected with the arrow keys and the [OK] key. Press the [JOB STATUS] key. - Page 163 PRINTING Select the desired file in the completed Complete jobs. (1) Select the key of the desired file. (2) Select the [Call] key. The job settings screen appears. Select and perform the desired operation. BACK ☞ PRINTING A STORED FILE (page 2-53) ☞...
-
Page 164: Appendix
PRINTING APPENDIX PRINTER DRIVER SPECIFICATION LIST Available functions and output results may vary depending on the type of printer driver being used. Windows Macintosh Function PCL6 PCL5e Frequently used Copies 1-999 1-999 1-999 1-999 1-999 functions Orientation N-Up Number of 2,4,6,8,9,16 2,4,6,8,9,16 2,4,6,8,9,16... - Page 165 PRINTING Windows Macintosh Function PCL6 PCL5e Image Quality Print Mode Normal/ Normal/ Normal/ Normal/ High Quality/ High Quality/ High Quality/ High Quality/ Fine Fine Fine Fine Graphics Mode Selection Toner Save* Font Resident font 80 fonts 80 fonts 136 fonts 136 fonts* 35 fonts Selectable download...
- Page 166 CHAPTER 3 SYSTEM SETTINGS This chapter explains the system settings, which are used to configure a variety of parameters to suit the aims and needs of your workplace. The current selections that have been made for the settings can be viewed or printed out. To quickly check where a setting is located in the system settings menu, see "System Settings Menu (Operation Panel)"...
- Page 167 List Print (Administrator) ....3-26 Sharp OSA Settings ..... . . 3-58 Security Settings .
- Page 168 SYSTEM SETTINGS SYSTEM SETTINGS System Settings The system settings are used to configure a variety of parameters to suit the aims and needs of your workplace. The system settings are also used to display or print out the current settings and status of the machine. The system settings allow you to make the machine easier to use.
-
Page 169: Configuring The System Settings
SYSTEM SETTINGS Configuring the System Settings There are two ways to configure the system settings: using the machine's operation panel, and using the Web page that appears when the machine's Web server is accessed. The Web page enables easy configuration of the settings from your computer via the network. To configure the settings using the machine, see "Common Operation Methods"... -
Page 170: Common Operation Methods
SYSTEM SETTINGS Common Operation Methods This section explains special operation methods that are common to all system settings. Be sure to read this section, as the information is omitted in the explanations of some of the individual settings. For the procedures for using the display, see "USING THE OPERATION PANEL"... -
Page 171: Accessing The Web Server In The Machine
SYSTEM SETTINGS Accessing the Web Server in the Machine When the machine is connected to a network, the machine's built-in Web server can be accessed from a Web browser on your computer. For the procedures for using the display, see "USING THE WEB PAGE"... -
Page 172: System Settings (General) On The Operation Panel
SYSTEM SETTINGS OPERATION PANEL (GENERAL) SYSTEM SETTINGS (GENERAL) ON THE OPERATION PANEL This section explains system settings that can be configured on the operation panel by general users. Accessing the System Settings (General) Make sure that the machine is in the standby state and BACK READY then press the [SYSTEM SETTINGS] key on the... -
Page 173: System Settings (General) List
SYSTEM SETTINGS OPERATION PANEL (GENERAL) System Settings (General) List When the system settings are accessed with general rights, the following items appear. For items that can only be accessed with administrator rights, see "System Settings (Administrator) List" (page 3-20). Depending on the machine specifications and peripheral devices installed, it may not be possible to use some settings. Display Contrast Item Factory default setting... - Page 174 SYSTEM SETTINGS OPERATION PANEL (GENERAL) List Print (User) Item Factory default setting Page ■ List Print (User) ● All Custom Setting List 3-12 – ● Printer Test Page – Paper Tray Settings Item Factory default setting Page 3-13 ■ Paper Tray Settings ●...
-
Page 175: Display Contrast
SYSTEM SETTINGS OPERATION PANEL (GENERAL) Display Contrast Use this to set the contrast of the machine's display. Select the [Display Contrast] key. In the screen that appears, select the [Lighter] key or the [Darker] key to adjust the contrast. Total Count This function shows the page count in each mode. -
Page 176: Default Settings
SYSTEM SETTINGS OPERATION PANEL (GENERAL) Default Settings The default settings for operation of the machine can be configured. Select the [Default Settings] key and select the settings. Clock Adjust Use this to set the date and time in the machine's built-in clock. Set the time. -
Page 177: Keyboard Select
SYSTEM SETTINGS OPERATION PANEL (GENERAL) Date Format The format used to print the date on lists and other output can be changed. Item Settings Current Setting The current time appears in the format set in the date format settings. Format Set the order of display of the year, month, and day (YYYY/MM/DD). -
Page 178: Paper Tray Settings
SYSTEM SETTINGS OPERATION PANEL (GENERAL) Paper Tray Settings Paper tray and paper type settings are explained in this section. Select the [Paper Tray Settings] key to configure the settings. Tray Settings These settings specify the paper type, paper size, and functions allowed for each paper tray. When the [Tray Settings] key is selected, a list appears showing the trays and the current settings. - Page 179 SYSTEM SETTINGS OPERATION PANEL (GENERAL) Tray Settings Paper Tray Paper Type Size Tray 1 Plain, Pre-Printed, Auto-AB ( A4, A5, B5, 216 mm x330 mm (8-1/2" x 13")), Recycled, Letter Head, Auto-Inch (8-1/2" x 14", 8-1/2" x 11", 7-1/4" x 10-1/2", 5-1/2" x 8-1/2"), Pre-Punched, Colour, 216 mm x 343 mm (8-1/2"...
-
Page 180: Paper Type Registration
SYSTEM SETTINGS OPERATION PANEL (GENERAL) Paper Type Registration Store a paper type when the desired paper type does not appear as a selection or when you wish to create a new set of paper properties. Up to 7 paper types can be stored. Item Description Store any name. -
Page 181: System Settings (Administrator) On The Operation Panel
SYSTEM SETTINGS OPERATION PANEL (ADMINISTRATOR) SYSTEM SETTINGS (ADMINISTRATOR) ON THE OPERATION PANEL This section explains the system settings that are configured by the administrator of the machine. Accessing the System Settings (Administrator) To access the system settings (administrator), the administrator must log in as explained below. When User Authentication is not Enabled When "User Authentication"... -
Page 182: When User Authentication Is Enabled
SYSTEM SETTINGS OPERATION PANEL (ADMINISTRATOR) When User Authentication is Enabled When "User Authentication" (Web page only) is enabled, follow the procedure below to log in. When auto login is enabled, the login screen will not appear. When user authentication is by login name and password (and e-mail address) Administrator login is performed in the user selection screen. - Page 183 SYSTEM SETTINGS OPERATION PANEL (ADMINISTRATOR) Log in. (1) Select the [Administrator] key. (2) Select the [Password] key. Enter the administrator password in the administrator password entry screen. (3) Select the [OK] key. This completes the administrator login procedure. The BACK system settings (administrator) can now be used.
- Page 184 SYSTEM SETTINGS OPERATION PANEL (ADMINISTRATOR) Login by user number Keys in the display can be selected with the arrow keys and the [OK] key. Select the [Admin Login] key. BACK Log in. (1) Select the [Password] key. Enter the administrator password in the administrator password entry screen.
-
Page 185: System Settings (Administrator) List
SYSTEM SETTINGS OPERATION PANEL (ADMINISTRATOR) System Settings (Administrator) List The system settings that appear following administrator login are shown below. The default setting for each item is also shown. • Depending on the machine specifications and peripheral devices installed, it may not be possible to use some settings. •... - Page 186 SYSTEM SETTINGS OPERATION PANEL (ADMINISTRATOR) Network Settings Item Factory default setting Page 3-25 ■ Network Settings ● IPv4 Settings DHCP 3-25 ● IPv6 Settings Disabled 3-25 ● Enable TCP/IP Enabled 3-25 ● Enable NetWare Enabled 3-25 ● Enable EtherTalk Enabled 3-25 ●...
- Page 187 Storing/Calling of System Settings ● Restore Factory Defaults – 3-29 ● Store Current Configuration – 3-29 ● Restore Configuration – 3-29 Sharp OSA Settings Item Factory default setting Page 3-30 ■ Sharp OSA Settings* ● External Account Setting External Account Control Disabled 3-30...
-
Page 188: Energy Save
SYSTEM SETTINGS OPERATION PANEL (ADMINISTRATOR) Energy Save The Energy Save settings help reduce power costs. From an environmental perspective, these settings also help reduce pollution and conserve natural resources. Select the [Energy Save] key to configure the settings. Toner Save Mode Auto Power Shut-Off Timer You can reduce the amount of toner used for printing. -
Page 189: Operation Settings
SYSTEM SETTINGS OPERATION PANEL (ADMINISTRATOR) Operation Settings Settings related to machine operation can be configured. Select the [Operation Settings] key to configure the settings. Other Settings Keys Touch Sound Set Keyboard Priority This setting is used to adjust (or turn off) the volume of When an external keyboard is connected, you can select the beep that sounds when you select a key. -
Page 190: Network Settings
SYSTEM SETTINGS OPERATION PANEL (ADMINISTRATOR) Network Settings Network settings are described below. Select the [Network Settings] key to configure the settings. When settings are changed, the changes will take effect after the machine is restarted. To restart the machine see "TURNING THE POWER ON AND OFF"... -
Page 191: List Print (Administrator)
SYSTEM SETTINGS OPERATION PANEL (ADMINISTRATOR) List Print (Administrator) This is used to print lists and reports that are only for use by the administrator of the machine. Select the [List Print (Administrator)] key to configure the settings. User Information Print User lists, usage count lists, usage limit group lists, and other lists related to user control can be printed. -
Page 192: Security Settings
SYSTEM SETTINGS OPERATION PANEL (ADMINISTRATOR) Security Settings The following settings are related to security. Select the [Security Settings] key to configure the settings. SSL Settings IPsec Settings SSL can be used for data transmission over a network. IPsec can be used for data transmission/reception on a SSL is a protocol that enables the encryption of network. -
Page 193: Product Key
SYSTEM SETTINGS OPERATION PANEL (ADMINISTRATOR) Product Key The procedures for entering the product keys of the expansion kits are explained below. Select the [Product Key] key to configure the settings. • It may not be possible to use some settings, depending on the peripheral devices installed. •... -
Page 194: Storing/Calling Of System Settings
SYSTEM SETTINGS OPERATION PANEL (ADMINISTRATOR) Storing/Calling of System Settings The current system settings can be stored, previously stored system settings can be retrieved, and the factory default system settings can be restored. Select the [Storing/Calling of System Settings] key to configure the settings. Restore Factory Defaults This is used to return the system settings to the factory default settings. -
Page 195: Sharp Osa Settings
These settings can be used when the external account module or application communication module is available. External Account Setting Job Priority Preference External Account Control Set the playing speed of the animation in the Sharp OSA When this setting is enabled, the machine enters application. external totaling mode and the totaling function can be The following settings can be configured. -
Page 196: System Settings (General) In The Web Page
SYSTEM SETTINGS WEB PAGE (GENERAL) SYSTEM SETTINGS (GENERAL) IN THE WEB PAGE This section explains system settings that can be configured in the Web page by general users. These settings are accessed by selecting [System Settings] in the Web page menu bar. System Settings (General) List When the system settings are accessed with general rights, the following items appear. - Page 197 SYSTEM SETTINGS WEB PAGE (GENERAL) List Print (User) Item Factory default setting Page ■ List Print (User) 3-36 ● All Custom Setting List – ● Printer Test Page – Paper Tray Settings Item Factory default setting Page ■ 3-37 Paper Tray Settings ●...
- Page 198 SYSTEM SETTINGS WEB PAGE (GENERAL) Printer Condition Settings Item Factory default setting Page 3-41 ■ Printer Condition Settings ● Printer Default Settings Copies Orientation Portrait Default Paper Size A4 (8-1/2" x 11") Default Paper Type Plain Paper Initial Resolution Setting 600dpi (High Quality) Disable Blank Page Print Disabled...
-
Page 199: Total Count
SYSTEM SETTINGS WEB PAGE (GENERAL) Total Count This function shows the page count in each mode. Select [System Settings] - [Total Count] from the menu bar. Job Count This displays or prints out the counts of all jobs. • Each sheet of paper used for automatic two-sided printing is counted as two pages. •... -
Page 200: Default Settings
SYSTEM SETTINGS WEB PAGE (GENERAL) Default Settings The default settings for operation of the machine can be configured. Select [System Settings] - [Default Settings] from the menu bar and configure each setting. Clock Adjust Use this to set the date and time in the machine's built-in clock. Set the time. -
Page 201: Keyboard Select
SYSTEM SETTINGS WEB PAGE (GENERAL) Date Format The format used to print the date on lists and other output can be changed. Item Settings Current Setting The current time appears in the format set in the date format settings. Format Set the order of display of the year, month, and day (YYYY/MM/DD). -
Page 202: Paper Tray Settings
SYSTEM SETTINGS WEB PAGE (GENERAL) Paper Tray Settings Paper tray and paper type settings are explained in this section. Select [System Settings] - [Paper Tray Settings] from the menu bar and configure each setting. A displayed tray name can be selected to open the tray settings screen. Auto Tray Switching When a tray runs out of paper during printing, this determines whether or not another tray with the same size and type of paper is automatically selected and printing continues. - Page 203 SYSTEM SETTINGS WEB PAGE (GENERAL) Settings of each tray The following settings can be configured. Item Description Select the type of paper that is loaded in the tray. The paper types that can be selected vary by paper tray. For more information, see Type "Tray Settings"...
- Page 204 SYSTEM SETTINGS WEB PAGE (GENERAL) Tray Settings Paper Tray Paper Type Size Tray 1 Plain, Pre-Printed, Auto-AB ( A4, A5, B5, 216 mm x330 mm (8-1/2" x 13")), Recycled, Letter Head, Auto-Inch (8-1/2" x 14", 8-1/2" x 11", 7-1/4" x 10-1/2", 5-1/2" x 8-1/2"), Pre-Punched, Colour, 216 mm x 343 mm (8-1/2"...
-
Page 205: Custom Size Registration (Bypass)
SYSTEM SETTINGS WEB PAGE (GENERAL) Custom Size Registration (Bypass) If you frequently use a special non-standard paper size in the bypass tray, you can store that paper size. Storing the paper size saves you the trouble of setting the size each time you need to use it. Up to three paper sizes can be stored. -
Page 206: Printer Condition Settings
SYSTEM SETTINGS WEB PAGE (GENERAL) Printer Condition Settings The Printer Condition Settings are used to configure basic printer settings and settings for printing from a DOS application. Select [System Settings] - [Printer Condition Settings] from the menu bar and configure each setting. Printer Default Settings The default settings are used to set advanced print conditions for printing in an environment where the print driver is not used (such as printing from MS-DOS or from a computer that does not have the provided print driver installed). -
Page 207: Pcl Settings
SYSTEM SETTINGS WEB PAGE (GENERAL) Item Selections • (Use Print per Unit) Print per unit • (Do not use Print per Unit) Output • (Use Staple) Staple* • (Do not use Staple) • (Disabled) Quick File • (Enabled) *1 This setting is used to adjust the line width of vector graphics (black & white printing only). Except for CAD and other specialized uses, there is normally no need to change this setting. -
Page 208: Postscript Setting
SYSTEM SETTINGS WEB PAGE (GENERAL) PostScript Setting To configure settings for printing an error description when a PostScript data print error occurs and settings for reception of PostScript data in binary format, click the [PostScript Setting] tab. Settings Item Description Selections When a PS (PostScript) error •... -
Page 209: System Settings (Administrator) In The Web Page
SYSTEM SETTINGS WEB PAGE (ADMINISTRATOR) SYSTEM SETTINGS (ADMINISTRATOR) IN THE WEB PAGE This section explains system settings that can be configured in the Web page by an administrator. These settings are accessed by selecting [System Settings] in the Web page menu bar. Accessing the System Settings (Administrator) To access the system settings (administrator), the administrator must log in as explained below. - Page 210 SYSTEM SETTINGS WEB PAGE (ADMINISTRATOR) System Settings (Administrator) List The system settings that appear following administrator login are shown below. The default setting for each item is also shown. • Depending on the machine specifications and peripheral devices installed, it may not be possible to use some settings. •...
- Page 211 SYSTEM SETTINGS WEB PAGE (ADMINISTRATOR) Item Factory default setting Page ● Remote Operation Settings Remote Software Operation Operational Authority Prohibited View Password Entry Screen Display in Both PC and Machine Operation from Specified PC Operational Authority Prohibited 3-53 Hostname or IP Address of PC –...
- Page 212 SYSTEM SETTINGS WEB PAGE (ADMINISTRATOR) Printer Settings Item Factory default setting Page 3-55 ■ Printer Settings ● Default Settings 3-55 Prohibit Notice Page Printing Enabled 3-55 Prohibit Test Page Printing Disabled 3-55 A4/Letter Size Auto Change Varies depending on country and region 3-55 Print Density Level 3-55...
- Page 213 3-58 List Print (Administrator) ● Administrator Settings List – 3-58 ● Web Settings List* – 3-58 When network connection is enabled. Sharp OSA Settings Item Factory default setting Page 3-58 ■ Sharp OSA Settings* ● Job Priority Preference Printing 3-58 When the external account module or application communication module is available.
- Page 214 SYSTEM SETTINGS WEB PAGE (ADMINISTRATOR) Enable/Disable Settings Item Factory default setting Page 3-59 ■ Enable/Disable Settings ● Printer Condition Settings 3-59 Disable Blank Page Print Disabled 3-59 ● User Control 3-59 Disabling of Printing by Invalid User Disabled 3-59 ● Operation Settings 3-59 Cancel Auto Clear Timer...
- Page 215 SYSTEM SETTINGS WEB PAGE (ADMINISTRATOR) Product Key Item Factory default setting Page ■ 3-60 Product Key* ● Serial Number – 3-60 ● E-mail Alert and Status – 3-60 ● Application Integration Module – 3-60 ● Application Communication Module – 3-60 ●...
-
Page 216: Energy Save
SYSTEM SETTINGS WEB PAGE (ADMINISTRATOR) Energy Save The Energy Save settings help reduce power costs. From an environmental perspective, these settings also help reduce pollution and conserve natural resources. Select [System Settings] - [Energy Save] from the menu bar and configure each setting. -
Page 217: Operation Settings
SYSTEM SETTINGS WEB PAGE (ADMINISTRATOR) Operation Settings Settings related to machine operation can be configured. Select [System Settings] - [Operation Settings] from the menu bar and configure each setting. Keys Touch Sound Disabling of Job Priority Operation This setting is used to adjust (or turn off) the volume of the This disables the job priority function and hides the beep that sounds when you select a key. -
Page 218: Remote Operation Settings
SYSTEM SETTINGS WEB PAGE (ADMINISTRATOR) Remote Operation Settings Configure settings required for remote operation of the machine from a computer connected to the same network. Remote Software Operation Operational Authority This is used when remote software is used to operate the machine remotely. When remote software is used to operate the machine remotely, the entry screen for the various passwords entered on the machine (such as login passwords) can be View Password Entry Screen... -
Page 219: Device Control
SYSTEM SETTINGS WEB PAGE (ADMINISTRATOR) Device Control These settings control devices installed on the machine. Select [System Settings] - [Device Control] from the menu bar and configure each setting. Disabling of Duplex Auto Paper Selection Setting This is used to disable two-sided printing, such as when The paper types* that the Auto Paper Selection function will the duplex module malfunctions. -
Page 220: Printer Settings
SYSTEM SETTINGS WEB PAGE (ADMINISTRATOR) Printer Settings Settings related to the printer function can be configured Default Settings Printer condition settings are described below. Select [System Settings] - [Printer Settings] - [Default Settings] in the menu bar, and configure the settings. Prohibit Notice Page Printing Bypass Tray Settings This setting is used to disable printing of notice pages. -
Page 221: Interface Settings
SYSTEM SETTINGS WEB PAGE (ADMINISTRATOR) Interface Settings These settings are used to control and monitor data transmitted to the USB port or network port of the machine. Select [System Settings] - [Printer Settings] - [Interface Settings] in the menu bar, and configure the settings. Hexadecimal Dump Mode Enable Network Port This function is used to print the print data from a... -
Page 222: Print Hold Setting
SYSTEM SETTINGS WEB PAGE (ADMINISTRATOR) Print Hold Setting Settings for Print Hold (Retention) can be configured. Select [System Settings] - [Print Hold Setting] from the menu bar and configure each setting. Sort Method Setting Administrator Authority Setting This setting is used to select the order in which of files For files that have a password, this setting allows the stored in the Main Folder are displayed. -
Page 223: List Print (Administrator)
Sharp OSA Settings These settings can be used when the external account module or application communication module is available. Select [System Settings] - [Sharp OSA Settings] from the menu bar and configure each setting. Job Priority Preference Set the playing speed of the animation in the Sharp OSA application. -
Page 224: Enable/Disable Settings
SYSTEM SETTINGS WEB PAGE (ADMINISTRATOR) Enable/Disable Settings The following settings are used to prohibit the use of certain functions. Select [System Settings] - [Enable/Disable Settings] from the menu bar and configure each setting. The Enable/Disable Settings control the same parameters as the enable/disable settings in other settings. The settings are linked together (changing one setting changes the other). -
Page 225: Product Key
SYSTEM SETTINGS WEB PAGE (ADMINISTRATOR) Printer Settings Print Hold Setting Prohibit Notice Page Printing Batch Print Settings This setting is used to disable printing of notice pages. When printing files by batch printing, this setting is used to prohibit the selection of the [All Users] key and the Prohibit Test Page Printing [User Unknown] key in the user selection screen. -
Page 226: Appendix
List Print (Administrator) User Infromation Print Security Settings SSL Settings IPsec Settings IEEE802.1X Setting Product Key Storing/Calling of System Settings Restore Factory Defaults Store Current Configuration Restore Configuration Sharp OSA Settings External Account Setting USB Driver Settings Job Priority Preference 3-61... -
Page 227: System Settings Menu (Web Page)
Administrator Authority Setting Automatic Deletion of File Settings Sort Method Setting Batch Print Settings List Print (Administrator) Administrator Settings List Web Settings List Sharp OSA Settings Job Priority Preference Enable/Disable Settings Product Key Storing/Calling of System Settings Restore Factory Defaults... - Page 228 This chapter provides solutions to possible problems in a question and answer format. Locate the question that relates to your problem and use the answer to help correct the situation. If you are unable to solve a problem using this manual, please contact your dealer or nearest SHARP Service Department. System settings or Web pages System settings are indicated in the "Solutions"...
-
Page 229: Removing Misfeeds
TROUBLESHOOTING REMOVING MISFEEDS This section explains what to do when a paper misfeed occurs in the machine. Caution The fusing unit is hot. Take care not to burn yourself when removing a misfeed. • When removing misfed paper, do not touch or damage the transfer belt. Fusing unit •... -
Page 230: How To Remove Misfeeds
TROUBLESHOOTING HOW TO REMOVE MISFEEDS If you require more information when reading the instructions in the display, see the paper misfeed illustrations below. Refer to the illustration below and then go to the appropriate illustration (1 to 9) for your situation. ☞... - Page 231 TROUBLESHOOTING (4) Paper misfeed in the reversing unit (8) Paper misfeed in tray 1 to tray 4 (in the tray) Open the right side cover, open the paper conveyor When a paper gets twisted to cover, and remove the the roller, remove the tray paper.
- Page 232 TROUBLESHOOTING (9) Paper misfeed in the finisher Open the front cover. While pressing the lever over to the left, slide the finisher to the left until it stops. Remove the misfed paper. Turn roller rotating knob in the direction of the arrow to remove the misfed paper.
-
Page 233: Removing Staple Jams
TROUBLESHOOTING REMOVING STAPLE JAMS Follow the steps below to remove a staple jam. FINISHER Caution Take care that a bent staple does not hurt you. Open the cover. While pressing the lever over to the left, slide the finisher to the left until it stops. Gently slide the finisher until it stops. - Page 234 TROUBLESHOOTING Lower the lever at the front end of the staple case. Replace the staple case. Push the staple case in until it clicks into place. Slide the finisher back to the right. Gently slide the finisher back to the right until it locks into its original position.
-
Page 235: Printing
TROUBLESHOOTING PRINTING PROBLEMS RELATED TO PRINTING OPERATION • Printing does not take place............4-9 •... -
Page 236: Problems Related To Printing Operation
TROUBLESHOOTING PROBLEMS RELATED TO PRINTING OPERATION Problem Point to check Solution Printing does not take Is your computer connected correctly to Make sure that the cable is connected securely to the place. the machine? LAN connector or the USB connector on your computer and the machine. - Page 237 TROUBLESHOOTING Problem Point to check Solution Printing does not take Is the I/O timeout setting too short? If the I/O timeout setting is too short, errors may occur place. while writing to the printer. Ask the administrator of the machine to configure an appropriate time in "I/O Timeout". ➞...
-
Page 238: Problems Related To Print Results
TROUBLESHOOTING PROBLEMS RELATED TO PRINT RESULTS Problem Point to check Solution The image is grainy. Are the printer driver settings When selecting print settings, you can set the print appropriate for the print job? mode to [Normal], [High Quality], or [Fine]. When you need a very clear image, select [Fine]. - Page 239 TROUBLESHOOTING Problem Point to check Solution The image is upside Are you using a type of paper (punch When the image size and paper size are the same but the orientations are different, the orientation of the down. paper, etc.) that can only be loaded in a image is automatically rotated to match the paper.
-
Page 240: Problems Related To Filing
TROUBLESHOOTING PROBLEMS RELATED TO FILING Problem Point to check Solution Retention does not Did you select retention settings in the In print mode, enable retention on the [Job Handling] tab take place. printer driver? of the printer driver. A filed data can not be Have functions been disabled by the Some functions may have been disabled in the system printed. -
Page 241: General Problems
TROUBLESHOOTING GENERAL PROBLEMS PROBLEMS RELATED TO MACHINE OPERATION • Specified machine functions cannot be used..........4-15 •... -
Page 242: Problems Related To Machine Operation
TROUBLESHOOTING PROBLEMS RELATED TO MACHINE OPERATION Problem Point to check Solution Specified machine Have functions been disabled by the Some functions may have been disabled in the "User functions cannot be administrator? Control" (Web page only) or system settings used. (administrator). - Page 243 In this event, stop using the machine, unplug the power plug, and contact your dealer or nearest SHARP Service Department. (When contacting your dealer or nearest authorised service representative, inform them of the displayed error code.)
-
Page 244: Problems Related To Paper Feeding And Output
Are multiple sheets feeding at once? Fan the paper well before loading it. Are you using paper that is not within Use SHARP-recommended paper. Using paper that is the specifications? not supported may result in misfeeds, creases, or smudges. -
Page 245: Problems Related To Quality / Print Results
THE BYPASS FEED ROLLER" (page 1-67) Smudges appear on Are you using paper that is not within Use SHARP-recommended paper. Using paper that is printed output. the specifications? for other models or special paper that is not supported may result in misfeeds, creases, or smudges. - Page 246 Point to check Solution Toner does not adhere Are you using paper that is not within Use SHARP-recommended paper. Using paper that is well or creases appear the specifications? for other models or special paper that is not supported in the paper.
-
Page 247: Problems Related To Peripheral Devices
TROUBLESHOOTING PROBLEMS RELATED TO PERIPHERAL DEVICES Problem Point to check Solution The connected USB Is the USB device compatible with the Ask your dealer if the device is compatible with the device cannot be machine? machine. used. Is the connected USB device Use "USB-Device Check"... -
Page 248: Stapled Output Does Not Collect Neatly
➞ System Settings (Administrator) (Web page only) > "Operation Settings" > "Other Settings" > "Auto Clear Setting" You forgot the Was the administrator password Contact your dealer or nearest SHARP Service administrator changed from the factory default Department. password. setting? For the factory default administrator password, see "TO... - Page 249 Operation Guide MODEL: MX-B380P MXB380P-EX-Z1...