Table of Contents
Quick Links
Table of Contents

Related Manuals for Acer DME400


Summary of Contents for Acer DME400
- Page 1 Acer beTouch E400 User Guide...
- Page 2 © 2010 All Rights Reserved Acer beTouch E400 Smartphone User Guide First issue: 03/2010 Acer beTouch E400 Smartphone Model number: __________________________________ Serial number: ___________________________________ Date of purchase: ________________________________ Place of purchase: ________________________________...
-
Page 3: End User Licence Agreement
Sublicense or otherwise make the Software available to third parties, except that you may, after prior written notification to Acer, transfer the Software as a whole to a third party so long as you do not retain any copies of the Software and such third party accepts the terms of this Agreement. - Page 4 Your use of the Third Party Software and Third Party Services is also subject to additional terms and conditions and policies which can be accessed through our global website. Privacy policy During registration you will be asked to submit some information to Acer. Please refer to Acer’s privacy policy at http:// www.acer.com or your local Acer website.
-
Page 5: Table Of Contents
Acer Settings ........ - Page 6 Using a Bluetooth headset ........39 Using your smartphone as a modem .
-
Page 7: Features And Functions
When using your product for the first time, it is recommended that you immediately register it. This will give you access to some useful benefits, such • Faster service from our trained representatives • Membership in the Acer community: receive promotions and participate in customer surveys • The latest news from Acer... -
Page 8: Unpacking Your Smartphone
Your new smartphone comes packed in a protective box. Carefully unpack the box and remove the contents. If any of the following items is missing or damaged, contact your dealer immediately: • Acer beTouch E400 Smartphone • Battery • Quick Guide •... - Page 9 Item Description Power button Press to turn the screen on/off or enter sleep mode; press and hold for more than three seconds to turn the smartphone off. 3.5 mm headset jack Connect to a headset. Phone speaker Suitable for normal phone use. Touchscreen 480 x 320 pixel capacitive touchscreen to display data, phone content and enter information.
-
Page 10: Installing Or Removing The Battery
Installing or removing the battery Your smartphone uses a replaceable battery to provide power. It is packed seperately from your smartphone and needs to be inserted and charged before you can use the smartphone. Installing the battery Insert your fingernail into the cutout between the battery cover and the phone. -
Page 11: Installing A Sim Or Microsd Card
Removing the battery Open the battery compartment as shown in “Installing the battery“ on page 8. Lift the battery out of the compartment using the clip on the top of the battery. Replace the battery cover as described above. Installing a SIM or microSD card To take full advantage of your smartphone’s telephony capabilities, you must install a SIM card. -
Page 12: Using Your Smartphone
Using your smartphone Turning on for the first time To turn on your smartphone for the first time, press and hold the power button until the screen turns on. You will then be asked to configure some settings before you can use your smartphone. To start, tap the green android on the screen;... -
Page 13: Using The Touchscreen
To wake your smartphone, press any button on the edge of the device (e.g. power, volume or camera). Your smartphone will display the locked screen; drag the padlock icon to the right to enter the Home screen. For additional security, you may set an unlock pattern, a set of dots that must be tapped in the correct order to access the phone. - Page 14 XT9 Text Input The XT9 Text Input keyboard has various features that assist you to enter correct text. Tap the ?123 button to see numbers and special characters, and then tap the Alt key to see even more. Tap and hold a key to select alternative characters, such as letters with accents.
- Page 15 Function Description Quick fixes Corrects commonly typed mistakes. Show suggestions Shows suggested words while you are typing. Auto-complete Inserts the suggested word whenever you tap space or a punctuation mark. Penpower Input Method The Penpower Input Method allows you to draw letters and characters on the screen, one at a time.
-
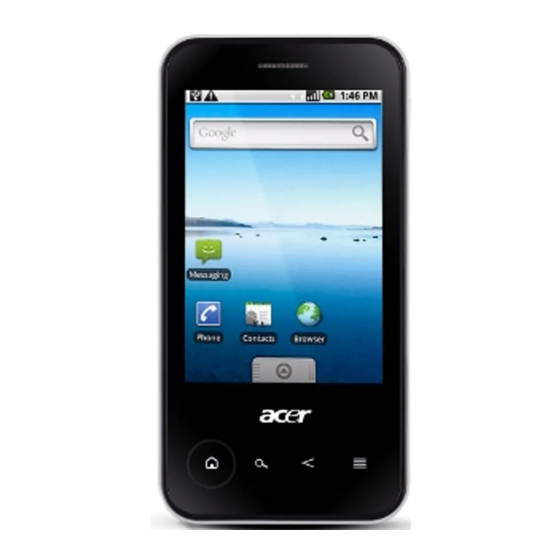
Page 16: The Home Screen
The Home screen After the first start process is completed, your smartphone will display the Home screen. This screen gives you quick, icon-based access to many of the frequently-used features of your smartphone. The Home screen already features some useful icons and widgets. - Page 17 Notification area The Notification area is at the top of the screen. This area contains a variety of icons to inform you of your phone’s status. The left side of the Notification area displays event icons that indicate a new event (such as a new message).
- Page 18 Adding or removing shortcuts or widgets To add shortcuts or widgets, tap and hold anywhere on the Home screen to open the Add to Home screen menu. Shortcuts Tap Shortcuts to open a list of quick links to applications and settings you can add to the Home screen. Widgets Tap Widgets to open a list of small applications that you can add to your Home screen.
-
Page 19: Managing Contacts
Managing contacts Managing your contacts Your smartphone features an address book that allows you to save contacts to either the internal memory or onto your SIM card. Tap Contacts from the Home screen or the Contacts tab from the Dialer to view your contacts. If you don’t have any contacts stored on your phone, you can import your Google account contacts, add a new contact or import any SIM contacts. - Page 20 Editing a contact To see the information stored for a contact, tap on the contact’s name. Then to add the contact to your Favorites list, tap the star next to the contact’s name. Tap Menu then Edit contact to add or change information. Tap the green plus sign to add an entry;...
-
Page 21: Making Calls
Making Calls This chapter shows you how to make phone calls, and the various options available to you during your call. Before making a call Check that the phone function is on before you make a call. You can confirm the phone status from the icon on the right-hand side of the Notification area. -
Page 22: The Voice Call Screen
Making a call to one of your contacts 1. Tap the Contacts tab in the dialer or Contacts from the Home screen to view your contacts. 2. Tap a contact. A dialog will open, asking if you want to Call the contact or send the contact an message. - Page 23 Using the speakerphone The speakerphone function allows you to make calls without having to hold your smartphone. This handsfree function is especially useful for multitasking. To activate the speakerphone, press the Menu button, then tap Speaker. Tap Speaker again to disable the speakerphone.
-
Page 24: Messaging
Messaging This chapter shows you how to set up and use the SMS and MMS functions of your smartphone. SMS and MMS messages are accessed via Messaging. Messaging automatically arranges received and sent messages into threads. To access Messaging tap Messaging on the Home screen. Creating a new message You can use your phone to compose SMS or MMS messages. -
Page 25: Replying To A Message
Replying to a message When a new text message arrives a message icon appears in the Notification area and the message icon on the top of the phone lights up. Tap Messaging on the Home screen to view the message list or expand the Notification area to see a summary of the message. -
Page 26: Mms Messages
MMS messages MMS messages are similar to text messages but also allow you to attach multimedia files such as pictures, audio or video clips. Each MMS message can be up to 300 kB in size. Note: You need to set up an MMS profile before you can send MMS messages. Normally, your smartphone will set up the profile for you based on information retrieved from your provider. -
Page 27: Going Online
Going online Browsing the Internet In order to browse the Internet with your smartphone, you must be connected to a data or wireless network. Using the browser Tap Browser on the Home screen to start browsing. To open a new website, tap the address box at the top of the page. -
Page 28: Online Applications
Online applications Your smartphone has a variety of applications installed on it from the factory. Note: Applications installed may vary according to your region. These applications may include: • Acer Sync: Sync your data between your computer and the Google servers. - Page 29 • Facebook: View your Facebook profile and keep up-to-date with your friends. • Maps:Get easy-to-follow directions using Google Maps. • YouTube: View the Most viewed and Most discussed video clips on TouTube. Android market Note: The Android Market may not be available in all countries and regions. Note: You need to have a Google account set up and active on your phone before you can use the Android Market.
- Page 30 urFooz urFooz is a portable avatar that lets you share information across your favorite social networks, blogs and more. Easily organize your Web favorites, such as photos, videos, bookmarks and more, with a urFooz ID. urFooz gives you: • One identity for all your online activities; •...
-
Page 31: Using The Camera
Using the Camera Your smartphone features a 3.2-megapixel digital camera mounted on the rear. This section will take you through all the steps in taking photos and videos with your smartphone. Note: You need to have a microSD card inserted into the microSD slot before you can use the camera. -
Page 32: Taking A Photo
Once you have taken a photo or video, you can view the it in Gallery by tapping . Alternatively, open the Applications tab and tap Gallery. From Gallery you can share the file directly via Acer Share (to Flickr or Facebook), Gmail, Messaging, Picasa, YouTube or as a Roadsync message. -
Page 33: Advanced Settings
Advanced Settings Acer Settings Acer Settings is a convenient all-in-one place for you to adjust commonly-used settings on your phone. Open the Applications tab and tap Acer Settings, or tap Acer Settings on the home screen. From this screen you can turn Wi-Fi and Bluetooth on or... -
Page 34: Adjusting Connection Settings
Activating or deactivating connections Open the Applications tab and tap Settings > Wireless & networks to manage your connection settings. You can choose to activate one or all connections from the . Each connection icon will be highlighted when turned on. Important: If your phone is in Airplane mode, the option to turn Bluetooth on will be disabled. - Page 35 Item Description Notification ringtone Set a ringtone for notifications. Audible touch tones Play tones when using dial pad. Audible selection Play a sound whenever a screen selection is made. Haptic feedback Vibrate on certain actions to provide feedback. SD card notifications Play a sound for SD card notifications.
-
Page 36: Phone Settings
device name and discoverability. Tap Scan for devices to scan for available devices. To connect to a device, tap the device in the list of available devices. You may be asked to enter a PIN on both devices to establish the connection. Phone settings Many phone settings are automatically configured by your smartphone when you insert a SIM card. - Page 37 Spinlets Spinlets gives you access to your favorite music, movie and television content. Get your favorite music, photos and videos from your mobile phone and share your favorite Spinlets on social networks, websites and more. Note: Some contents may not be available in some countries. Launching Spinlets To launch the Spinlets application, tap Spinlets in the applications tab.
- Page 38 Exploring Spinlets widgets When you select an album, you will see a Spinlet. To play the featured song, select the red Play button. To play selected songs, select the Music tab and choose which songs you would like to play. To view artist photos, select the Photos tab.
- Page 39 Adjusting the volume Adjust the volume of your phone using the volume button on the side of the phone. Alternatively, you can set the Ringer volume and Media volume by opening the Applications tab and going to Settings > Sound & display. Setting the date and time Set the date and time by opening the Applications tab and going to Settings >...
-
Page 40: Resetting Your Smartphone
Obtaining and installing applications Your smartphone uses the open-source Android platform. To obtain and install applications for your smartphone, you can tap Market from the applications tab to open the Google marketplace. Note: This requires a Gmail/Google mail account. Resetting your smartphone You may have to perform a reset if your smartphone fails to respond when buttons are pressed or the screen is tapped. -
Page 41: Accessories And Tips
Connect your smartphone to a PC via USB, and do the following steps: 1. Install Acer Easy Link on your PC or notebook. 2. When finished, please click Start > All Programs > Acer > Acer Easy Link > Acer Easy Link to run the application. -
Page 42: Inserting A Microsd Card
Note: If the connection fails, please try to restart and reconnect your smartphone to your PC, and then repeat the installation. Note: Acer Easy Link can run in the following operation systems: Windows XP/Vista (32-/64-bit) / Windows 7 (32-/64-bit). Note: Updates are available at the Acer website. Visit mobile.acer.com. -
Page 43: Appendix
It is also normal for the phone to heat up during long periods of use, such as watching a video or a long phone conversation. All Acer phones are factory tested before release. FAQ and troubleshooting... -
Page 44: Other Sources Of Help
Programs on your smartphone and This User Guide, which provides online additional programs that can be installed reference for using your smartphone. on your smartphone Up-to-date information regarding your www.acer.com smartphone mobile.acer.com Service enquiries www.acer.com/support/ Warnings and precautions • Do not use this product near water. - Page 45 When the talk and standby times are noticeably shorter than normal, buy a new battery. Use only Acer approved batteries, and recharge your battery only with Acer approved chargers designated for this device.
- Page 46 Remember to follow any special regulations in force in any area, and always switch off your device when its use is prohibited or when it may cause interference or danger. Use the device only in its normal operating positions. Do not cover the antenna with metal and you should position the device at the above-stated distance from your body.
-
Page 47: Emergency Calls
To minimize pollution and ensure utmost protection of the global environment, please recycle. For more information on the Waste from Electrical and Electronics Equipment (WEEE) regulations, visit www.acer-group.com/public/Sustainability/sustainability01.htm Mercury advisory For projectors or electronic products containing an LCD/CRT monitor or display: Lamp(s) inside this product contain mercury and must be recycled or disposed of according to local, state or federal laws. - Page 48 4. DO NOT expose your smartphone to extreme temperatures. For example, do not leave your smartphone on the dashboard of a car on a hot day or when temperatures are below freezing point. Also, keep it away from heaters and other sources of heat. 5.
-
Page 49: Specifications
Specifications Performance • Qualcomm QSD 7227, 600 MHz • System memory: • 256 MB of SDRAM • 512 MB of Flash ROM • Google Android operating system Display • 3.5” TFT-LCD resistive touchscreen • 480 x 320 resolution • 65K colors support Multimedia •... - Page 50 Battery • High density, rechargeable 1090 mAh Li-Ion Polymer / Li-Ion battery (replaceable) Note: Length of battery operation will depend on power consumption which is based on system resource use. For example, constantly using the backlight or using power- demanding applications will shorten battery life between charges. Dimensions •...
-
Page 51: Regulatory Information
Regulatory information LCD pixel statement The LCD unit is produced with high-precision manufacturing techniques. Nevertheless, some pixels may occasionally misfire or appear as black or red dots. This has no effect on the recorded image and does not constitute a malfunction. Radio device regulatory notice Note: Regulatory information below is for models with wireless LAN and/or Bluetooth only. - Page 52 RF exposure warning: The equipment complies with FCC RF exposure limits set forth for an uncontrolled environment. The antenna(s) used for this transmitter must not be co-located or operating in conjunction with any other antenna or transmitter. RF exposure information (SAR) This mobile phone meets the government's requirements for exposure to radio waves.
- Page 53 have been rated. Phones that have been rated have a label on the box. Your E400 has been tested for hearing aid device compatibility and has an M3 and/or T3 rating. These ratings are not guarantees. Results will vary, depending on the level of immunity of your hearing device and the degree of your hearing loss.
-
Page 54: Index
Index battery international numbers ......20 charging ...........8 information ........48 keyboard ..........11 Bluetooth connections ........33 LED indicators ...........7 headset ...........39 MMS messages ........24 call history ..........19 calls performance ...........47 answering ........20 phone ending ..........20 connections ......32, 33 onscreen options ......20 settings ...........34 camera icons and indicators .......29 safety regulations ........42...