
Related Manuals for Hitachi HIT BG17SS


Summary of Contents for Hitachi HIT BG17SS
- Page 1 Instruction Manual HIT BG17SS Microwave / Combination Oven DSG Retail Limited is responsible for after sales service. If you have a query about the product please contact our product support line 0844 561 6263 (Currys) and 08700 118 117 (Pixmania).
-
Page 2: Table Of Contents
Table of contents Table of contents 2 - 3 Know your Hitachi microwave Safety information 4 - 8 Using aluminium foil in your microwave Unpacking and getting ready Introducing microwave cooking 11 - 16 Cooking with a microwave 11 - 12... - Page 3 Steam Condensation Product overview 14 - 15 Control panel overview Checking your microwave Clock setting Setting the child lock GB-3...
-
Page 4: Know Your Hitachi Microwave
Know your Hitachi microwave Before using your Hitachi microwave ● Read these instructions carefully and retain for future reference. ● Remove all packaging labels. Please dispose of them properly. Before calling for service ● Review the section on Troubleshooting. This will help you to solve some general problems by yourself. - Page 5 Safety information Please read carefully and keep for future reference Maintenance of your microwave WARNING : It is hazardous for anyone other than a quali- fied technician to carry out any service or repair operation which involves the removal of a cover that gives protection against exposure to microwave energy.
- Page 6 Safety information Cooking use As the power of different microwave ovens can vary consider- ably, care must be taken when first using this appliance as it may cook faster than expected. ● Do not leave the appliance unattended during use. WARNING ●...
- Page 7 Safety information Do not use these in your microwave ● Never use equipment made of metal, except foil in your microwave oven. The microwave energy cannot pass through the metal so it bounces off and sparks against the inside of the oven.
- Page 8 Safety information Earthing instructions ● WARNING: THIS APPLIANCE MUST BE EARTHED. ● This appliance is equipped with a cord having an equipment-earthing conductor and an earthing plug. ● The plug must be plugged into an appropriate outlet that is installed and earthed in accordance with all local standards and requirements.
-
Page 9: Using Aluminium Foil In Your Microwave
Using aluminium foil in your microwave It is safe to use aluminium foil in your microwave oven as long as you follow these safety guidelines. As with all metal, microwave energy cannot pass through foil, but provided that you keep the foil away from the side of the oven it will not cause sparks and there will not be any damage to your oven. -
Page 10: Unpacking And Getting Ready
Unpacking and getting ready This microwave oven is designed for home use. It should not be used for commercial catering. 1. After unpacking your oven, check that it has not been damaged whilst in the box. Make sure there are no dents on the oven, and the door closes properly. -
Page 11: Introducing Microwave Cooking
Introducing microwave cooking Always remember the basic safeguards you would follow when using any cooking equipment or handling hot food. See below for basic guidelines in microwave cooking. If you are unfamiliar with using a microwave, refer to the back of this instruction booklet for more information. - Page 12 ● Microwave ovens cook food using microwave energy that is similar to naturally occurring radio waves. Normally, these “waves” would fade as they dispersed into the atmosphere but in a mi- crowave oven they are concentrated onto food causing it to heat up. ●...
-
Page 13: Microwave Heating Categories
Microwave heating categories Your oven has been tested and labelled to meet the government’s voluntary agreement on the reheating of pre-cooked food. The heating characteristics and output power levels of microwave ovens are usually calculated using a relatively large portion of food (a 1000 gram load, IEC 705) but many packs of pre-cooked food are sold in smaller packs, often about 350 grams. - Page 14 Steam When you microwave food, steam is created as water in the food heats up and evaporates. The steam formed during microwave cooking is entirely safe. It has to escape from the micro- wave to prevent pressure from building up inside the oven.
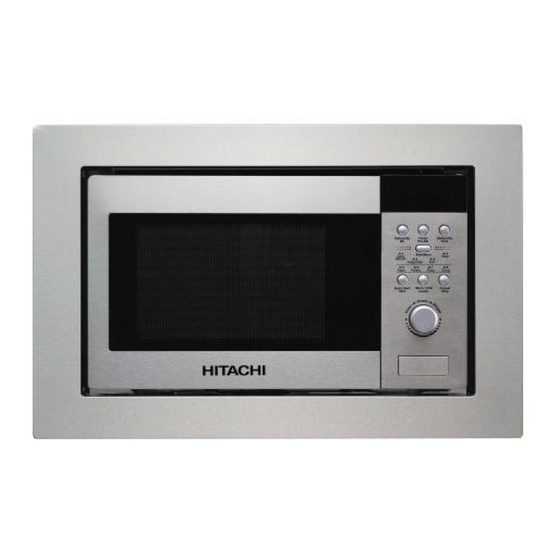
- Page 15 Control panel overview LED display Shows the clock , cooking Clock/Pre-Set button time and setting. Use this button to set the clock and to preset cooking time. Defrost By Wt. button Use this button to defrost the Defrost By Time button food by weight.
- Page 16 Checking your microwave Check your microwave after unpacking. NOTE: For your safety, the microwave stops if the oven door is opened during cooking. Close the door and press the Quick Start/Start to continue the cooking cycle. 1. Press the Open button to open the door. Put the turntable ring inside the oven and place the glass turntable on top of the ring.
- Page 17 Clock setting When the microwave oven is connected to the mains power, the oven will display 0:00, and the microwave will sound once. Please ensure you have set the clock prior to use. Please follow the steps below to set the clock. 1.
- Page 18 Setting the child lock This feature prevents the electronic operation of the oven by locking the operation of the control panel until you have cancelled it. Please follow the steps below to set the child lock. 1. Press the Cancel/Stop button for 3 seconds and a long tone will sound to indicate the microwave has set the child lock.
-
Page 19: Microwave Cooking
Microwave cooking For simple Microwave Cooking, follow the steps below. 1. Press the Micro./Grill/Combi. button once and the LED display will show P100. Turn the Timer/Power/Weight dial to change the microwave power level from 100% to 10%. P100, P80, P50, P30, P10 will display in order. -
Page 20: Grill Or Combination Cooking
Grill or combination cooking For Grilling, follow the steps below. 1. Press the Micro./Grill/Combi. button once. Turn the Timer/Power/Weight dial to change the cooking setting to G. 2. Press the Micro./Grill/Combi. button to confirm the grill cooking setting. 3. Turn the Timer/Power/Weight dial to adjust the cooking time. - Page 21 Please note there are only 2 modes of combina- tion cooking and their microwave and grill pow- ers are shown on the table above. For instance: If you want to do 55% microwave power and 45% grill power cooking (C-1) for 10 minutes, please follow the steps below.
-
Page 22: Multi-Stage Cooking
Multi-stage cooking For Multi-Stage Cooking, please follow the steps below. For instance if you want to cook your food with 100% microwave power for 20 min- utes and then with 80% microwave power for 5 minutes. NOTE: You can set a maximum of 3 stages for Multi-Stage Cooking. -
Page 23: Delay Start Cooking (Program Set In Advance)
Delay start cooking (program set in advance) For Delay Start Cooking, follow the steps below. For instance if the current time is 12 o’clock (noon) and you want to cook with 80% micro- wave power for 5 minutes after 1 hour 30 minutes. NOTE: You can set a maximum of 3 stages for Delay Start Cooking. -
Page 24: Auto Cooking
Auto cooking This feature allows you to cook most of your food based on the food category and the weight. Select the category and choose the default weight of the food. For quick reference of the cooking time and the default weight, please refer to the Auto Menu table. Auto menu 1. - Page 25 NOTE: The density and thickness of food can affect its cooking time. Ensure all food is piping hot and cooked thoroughly before serving. It is essential that food is checked during and after the recommended cooking time, even if Auto Menu was used.
-
Page 26: Quick Start Cooking
Quick start cooking This feature allows you to quickly cook your food for 60 seconds with 100% microwave power. Please follow the steps below. 1. Press the Quick Start/Start button to start the quick start cooking. Press the button again to increase by another 60 seconds, you may increase the cooking time up to 95 minutes. -
Page 27: Defrosting
Defrosting This feature allows you to defrost your frozen foods simply by entering the weight or time. You may wish to place the frozen food on a microwave safe plate or dish before placing it on the defrost rack (not supplied in this microwave package). This is to ensure that any liquids released during defrosting will not spill and dirty the interior of the oven. -
Page 28: Defrost By Time
Defrost by time 1. Press the Defrost By Time button once and the LED display will show dEF2. 2. Turn the Timer/Power/Weight dial to set the defrosting time. 3. Press the Quick Start/Start button to start defrosting. TIPS: Large items may be frozen in the centre. Therefore, to ensure even thawing, turn them over from time to time and break them in smaller pieces during defrosting. -
Page 29: Querying The Cooking Function
Querying the cooking function This feature allows you to check and view the current power, time, and pre-set time of your selected cooking program. To find out the current cooking power 1. Press the Micro./Grill/Combi. button once and the LED display will show the current cooking power while the oven is either at microwave, grill or combination cooking. -
Page 30: Cleaning Your Microwave
Cleaning your Cleaning your oven each time you use it will help to prevent Unplug your microwave from the mains and wait for the On the right hand side wall of the cavity is the wave guide cover, It is important that this wave guide cover is kept clean at all times. Make sure you keep the outlet grids clean. - Page 31 microwave a build up of stubborn marks that can be difficult to clean. oven to cool down completely before cleaning. microwaves are passed through this to enable your food to cook. Wipe it with mild detergent and water and leave to dry. Be careful not to spill water into the vents.
-
Page 32: Troubleshooting
Troubleshooting If you have a problem that cannot be answered by these points, please contact your near- est store. Please note: If you call a Mastercare engineer out to your home and the product is found not to be faulty, or the instruction book has not been followed, our product guarantee is not applicable and a call-out fee will be charged. - Page 33 Questions and answers Q. What happens if the microwave is switched on while the oven is empty? A. The microwave will be damaged. Do not switch the microwave on when there is noth- ing inside the oven. It is a good idea to keep a cup of water in the oven just in case some- one accidentally starts the microwave.
-
Page 34: Specification
Specification Input 230V ~50Hz Output 700 Watts Microwave Frequency 2450MHz Outside Dimensions 595mm x 316mm x 382mm (width x deep x height) Power consumption Microwave 1050 Watts Grill 1000 Watts Complies with EC directives 2004/108/EC and 2006/95/EC. Because we continually strive to improve our products, we may change specifications without prior notice. The highest quality requirements are placed on our appliances.