Table of Contents

Related Manuals for NEC Express5800/R120e-2M

Summary of Contents for NEC Express5800/R120e-2M
- Page 1 NEC Express Server Express5800 Series Express5800/R120e-2M EXP292 User’s Guide Model Number: N8100-2072F Chapter 1 General Description Chapter 2 Preparations Chapter 3 Setup Chapter 4 Appendix 10.102.02-101.01 Augustl 2013, First Edition © NEC Corporation 2013...
-
Page 2: Documents Provided With This Product
Chapter 2: Convenient Features Useful features and the detail of system BIOS settings, RAID Configuration Utility, and EXPRESSBUILDER Chapter 3: Appendix Error messages and Windows Event Logs Other documents Provides the detail of NEC ESMPRO, Universal RAID Utility, and the other features. Express5800/R120e-2M User’s Guide... -
Page 3: Table Of Contents
Internal View ............................ 37 Motherboard ............................ 38 Status Indicators ..........................40 4.7.1 POWER LED ( ) ......................40 4.7.2 STATUS LED ( )......................41 4.7.3 LINK/ACT LED ( 4) ................42 4.7.4 DISK Access LED ( ) ....................42 Express5800/R120e-2M User’s Guide... - Page 4 1.20 Optical Disk Drive .......................... 111 1.20.1 Installation........................111 1.20.2 Removal .......................... 112 1.21 Use of Internal hard disk drives in the RAID System ..............113 1.21.1 Connecting cables ......................114 1.21.2 Notes on Building RAID System ..................116 Express5800/R120e-2M User’s Guide...
- Page 5 EXPRESSSCOPE ENGINE 3 Network configuration ..............146 EXPRESSBUILDER..........................148 Features of EXPRESSBUILDER ....................148 Starting EXPRESSBUILDER ......................148 Installing Software Components........................ 149 Turning Off the Server..........................150 Chapter 4 Appendix ............................151 Specifications ............................152 Interrupt Lines ............................156 Express5800/R120e-2M User’s Guide...
-
Page 6: Notations Used In This Document
Unless otherwise stated, hard disk drives (HDD) described in this document refer to both of the following. • Hard disk drives (HDD) • Solid state drive (SSD) Removable media Unless otherwise stated, removable media described in this document refer to both of the following. • USB memory • Flash FDD Express5800/R120e-2M User’s Guide... -
Page 7: Abbreviations Of Operating Systems (Windows)
Windows Server 2008 Enterprise Includes 64-bit and 32-bit Editions unless otherwise stated. The following appears on EXPRESSBUILDER. • Windows Server 2008 64-bit Edition: Windows Server 2008 x64 • Windows Server 2008 32-bit Edition: Windows Server 2008 x86 Express5800/R120e-2M User’s Guide... -
Page 8: Trademarks
Trademarks Trademarks EXPRESSSCOPE is a registered trademark of NEC Corporation. Microsoft, Windows, Windows Server, Windows Vista, and MS-DOS are registered trademarks or trademarks of Microsoft Corporation in the United States and other countries. Intel, Pentium, and Xeon are registered trademarks of Intel Corporation of the United States. -
Page 9: License Agreement Notice
BSD License which accompanies this distribution. The full text of the license may be found at http://opensource.org/licenses/bsd-license.php THE PROGRAM IS DISTRIBUTED UNDER THE BSD LICENSE ON AN "AS IS" BASIS, WITHOUT WARRANTIES OR REPRESENTATIONS OF ANY KIND, EITHER EXPRESS OR IMPLIED. Express5800/R120e-2M User’s Guide... -
Page 10: Regulatory Notices
The mark on the electrical and electronic products only applies to the current European Union Member States. Outside the European Union If you wish to dispose of used electrical and electronic products outside the European Union, please contact your local authority and ask for the correct method of disposal. Express5800/R120e-2M User’s Guide... - Page 11 Mercury (Hg) – not over 0,1wt % or 1000wt ppm; Hexavalent chromium (Cr6+) – not over 0,1wt % or 1000wt ppm; Polybrominated biphenyls (PBBs) – not over 0,1wt % or 1000wt ppm; Polybrominated diphenyl ethers (PBDEs) – not over 0,1wt % or 1000wt ppm. Express5800/R120e-2M User’s Guide...
- Page 12 концентрации до 1000 миллионных частей; полибромбифенолы (PBB) – не превышает 0,1 % веса вещества или в концентрации до 1000 миллионных частей; полибромдифеноловые эфиры (PBDE) – не превышает 0,1 % веса вещества или в концентрации до 1000 миллионных частей. Express5800/R120e-2M User’s Guide...
-
Page 13: Warnings And Additions To This Document
The contents of this document may change without prior notice. Do not make copies or alter the document content without permission from NEC Corporation. Every effort has been made to ensure the completeness of this document. However, if you have any concerns, or discover errors or omissions, please contact your retailer. -
Page 14: Precautions For Use (Be Sure To Read)
Names and Functions of Parts in this document. Safety precautions Follow the instructions in this document for the safe use of NEC Express server. This User’s Guide describes hazardous parts of the server, possible hazards, and how to avoid them. Server components with possible danger are indicated with a warning label placed on or around them (or, in some cases, by printing the warnings on the server). -
Page 15: Symbols Used In This Document And On Warning Labels
Unplug the power cord of the server. cannot be specifically identified. Make Otherwise, an electric shock or fire may sure to follow the instruction. be caused. Make sure equipment properly grounded. Otherwise, an electric shock or fire may be caused. Express5800/R120e-2M User’s Guide... -
Page 16: Safety Notes
Failure to follow this warning may cause an electric shock, a fire, or failure of the server. When such things accidentally enter the server, immediately turn off the power and disconnect the power plug from the outlet. Do not disassemble the server, and contact the store where you purchased the product or your maintenance service company. Express5800/R120e-2M User’s Guide... -
Page 17: Rack Installation
For inquiries regarding the installation or wiring of the power supply system, consult with the company that performed the installation or wiring, or the power company that services your area. Express5800/R120e-2M User’s Guide... -
Page 18: Power Supply And Power Cord Use
• Do not secure the power cord with staples or damaged power cord with a power cord of the equivalents same standard. For information on replacing the power cord, contact the store where you purchased the product or a maintenance service company) Express5800/R120e-2M User’s Guide... -
Page 19: Installation, Relocation, Storage, And Connection
Do not get your fingers caught in the rails When mounting/removing the server onto/from the rack, be careful to avoid getting your fingers caught in the rails or cutting your fingers on the rails. Express5800/R120e-2M User’s Guide... -
Page 20: Cleaning And Working With Internal Devices
Use only the specified interface cable. Use only interface cables provided by NEC and locate a proper device and connector before connecting a cable. Using an authorized cable or connecting a cable to an improper destination may cause a short circuit, resulting in a fire. -
Page 21: During Operation
Keep your hands and hair away from the cooling fan at the rear of the server during operation. Failure to observe this warning may cause your hands or hair to catch in the fan, resulting in personal injury. Express5800/R120e-2M User’s Guide... -
Page 22: Warning Labels
If no label is attached or printed on the server, or if there is a label coming off or stained, contact your sales representative . External view Express5800/R120e-2M User’s Guide... -
Page 23: Handling Precautions (For Proper Operations)
Tape media: Approximately 1 day • For optional devices, we recommend you use our NEC products. Even if they are successfully installed or connected, installation of unsupported devices can cause the server to malfunction or even failure. You will be charged to repair failure or damage caused by use of such products even within warranty period. - Page 24 Keeping your equipment clean is important not only for the appearance but also for functional and safety reasons. A dusty monitor makes it difficult to see the display contents, so clean it regularly. Take rest breaks When you feel tired, take a break. Light exercise is also recommended. Express5800/R120e-2M User’s Guide...
-
Page 25: Chapter 1 General Description
Verify the condition of your server's accessories. 3. Standard Features This section describes the server’s features and the server management. 4. Names and Functions of Parts This section describes the name of each part contained in this server. Express5800/R120e-2M User’s Guide... -
Page 26: Introduction
This high performance server is powered by the latest microprocessor "Intel Xeon processor". NEC’s latest technology and architectures realize high-power and high-speed operation that cannot be matched by existing servers. The server is designed with consideration of not only reliability but also expandability, which enables you to use it as a network server. -
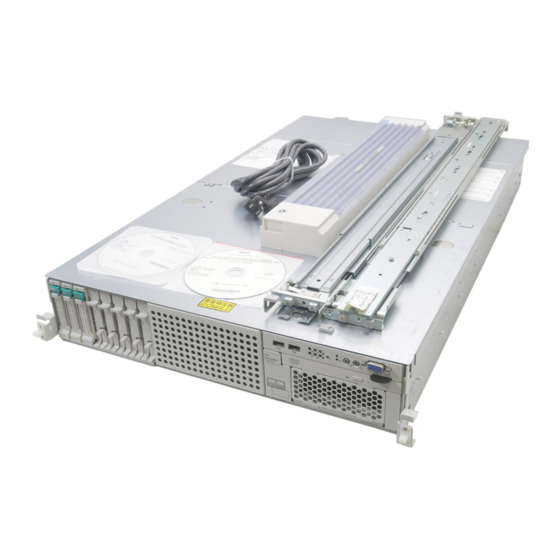
Page 27: Accessories
The chassis serial number plate and maintenance label is located on the server. If the serial number does not match the number on the warranty, you may not be guaranteed against failure even within the warranty period. Contact your sales representative if they do not match. Express5800/R120e-2M User’s Guide... -
Page 28: Features
Internal voltage monitoring feature • RAID System (Disk Array) (An option card is required.) • Auto rebuild feature (hot swapping supported) • BIOS password feature • The security lock that comes with Front Bezel • Redundant fan system Express5800/R120e-2M User’s Guide... - Page 29 With optional LAN riser card, two ports can be added. Ready to use • No cable connection is required to install a hard disk drive and additional power supply unit, and additional redundant fan (hot swap supported). Express5800/R120e-2M User’s Guide...
- Page 30 *2: Processor core speed depends on processor type, number and type of DIMMs installed, and operating voltage (1.35/1.5 V). *3: In 2-CPU configuration. Up to 768 GB in 1-CPU configuration *4: With N8151-68 2.5-inch Hot Plug Drive Cage installed. Eight slots in standard configuration. Express5800/R120e-2M User’s Guide...
-
Page 31: Management Features
The hardware components of the server provide operation control/reliability features as shown below. Additionally, NEC ESMPRO Agent, which is provided in EXPRESSBUILDER, enables you to collectively manage the state of your systems. You can also monitor the server states from a PC to manage the network where NEC ESMPRO Manager provided in EXPRESSBUILDER is installed. -
Page 32: Firmware And Software Version Management
3. Features Firmware and Software Version Management Use of NEC ESMPRO Manager and ExpressUpdate Agent allows you to manage versions of firmware and software as well as update them by applying update packages. This feature automatically updates modules without stopping the system just by specifying the updating packages from NEC ESMPRO Manager. -
Page 33: Names And Functions Of Parts
(3)-3: LAN connector 3 (3)-4: LAN connector 4 LEDs for LAN3 and LAN4 are lit when optional LAN riser card is installed. (See page 3.) Disk Access LED This LED indicates status of internal hard disk drive. (See page 3.) Express5800/R120e-2M User’s Guide... -
Page 34: Front View (Without Front Bezel)
The switch to turn on and off UID LED. Pressing the switch once turns on UID LED and pressing again turns off the LED. Commands from the software also cause it to turn on or flash. (See page 42.) Express5800/R120e-2M User’s Guide... -
Page 35: Rear View
Remove this cover to install an optional LAN riser card. If Shared BMC LAN feature is enabled in ROM Utility, LAN connector 1 can also be used as the management LAN port. Sharing port is not recommended from the point of performance and security. Express5800/R120e-2M User’s Guide... -
Page 36: External View
Chapter 1 General Description 4. Names and Functions of Parts External View (1) Top Cover (front) (2) Release Button (3) Top cover (rear) Express5800/R120e-2M User’s Guide... -
Page 37: Internal View
FAN1 to FAN4 are factory installed. FAN5 is required in 2-CPU configuration. FAN6 to FAN10 are required in redundant configuration. * 1-CPU configuration: FAN6 to FAN9 2-CPU configuration: FAN6 to FAN10 Support bar (Battery unit can be installed.) Express5800/R120e-2M User’s Guide... -
Page 38: Motherboard
Chapter 1 General Description 4. Names and Functions of Parts Motherboard (12) (13) (11) (8)-2 (10) (14) (15) (13) (16) (17) (18) (1)-1 (19) (20) (21) (22) (23) (24) (1)-2 (8)-1 (28) (27) (26) (25) (18) (13) Express5800/R120e-2M User’s Guide... - Page 39 B. (17) SPI Mezzanine connector EXPRESSSCOPE Profile Key (SPI flash memory) has been installed, where BIOS and BMC configuration data is stored. Relocate it when replacing motherboard to inherit configuration data. Express5800/R120e-2M User’s Guide...
-
Page 40: Status Indicators
When the power cord is connected, the LED goes on amber for 40 seconds. The server can be powered on after the amber LED is unlit. Do not power on the server while the LED is lit amber. The server is off-powered. The server is in halt status. Express5800/R120e-2M User’s Guide... -
Page 41: Status Led ( )
While hardware is operating normally, STATUS LED lights green. STATUS LED is off or lights/flashes amber if there is a hardware failure. The following table lists STATUS LED patterns. Once you have installed NEC ESMPRO, you can reference error logs to check the Tips causes of failures. -
Page 42: Link/Act Led ( 1, 2, 3, 4)
You can turn on an LED using remote management software. Tips The following table lists UID LED patterns. UID LED pattern Description On (blue) The UID switch is pressed. The UID switch is not pressed. Express5800/R120e-2M User’s Guide... -
Page 43: Led On A Hard Disk Drive
• Do not turn off or reboot the server while a HDD is being rebuilt. • Wait at least 90 seconds before installing a HDD after removing one. • Do not replace a HDD while another HDD is being rebuilt. Express5800/R120e-2M User’s Guide... -
Page 44: Leds For Lan Connectors
M) supports 100BASE-TX and 10BASE-T. The following table lists LINK/ACT LED patterns. SPEED LED pattern Description On (amber) The port is operating with 1000BASE-T interface. On (green) The port is operating with 100BASE-TX interface. The port is operating with 10BASE-T interface. Express5800/R120e-2M User’s Guide... -
Page 45: Ac Power Led On Power Unit
Cold Redundant feature is enabled. – On (amber) The power cable is not connected in redundant Connect the power cable. power configuration. Power unit is failing. Contact your sales representative. Flashing (amber) Power unit is failing. Express5800/R120e-2M User’s Guide... -
Page 46: Chapter 2 Preparations
This chapter describes preparations for using this server. 1. Installing Internal Optional Devices You can skip this section if you did not purchase any optional devices. 2. Location and Connection Place the server in a suitable location and connect some cables following this section. Express5800/R120e-2M User’s Guide... -
Page 47: Installing Internal Optional Devices
Important Use only the devices and cables specified by NEC. You will be charged to repair damages, malfunctions, and failures caused by the use of any devices or cables not specified for use with this server even within the warranty period. -
Page 48: Anti-Static Measures
− The device contains static-sensitive electronic components. When installing or uninstalling the optional device, wear an anti-static wrist strap on your wrist to avoid a failure caused by the static electricity. To use the strap, connect the wire to the chassis. Express5800/R120e-2M User’s Guide... -
Page 49: Overview Of Installation And Removal
Do not leave the server open on the rack. Remove Top Cover. See Chapter 2 (1.6 Removing Top Cover). Remove PCI riser card. See Chapter 2 (1.7 Removing PCI Riser Card). Remove the support bar. See Chapter 2 (1.8Removing Support Bar). Express5800/R120e-2M User’s Guide... - Page 50 See Chapter 2 (1.27 Power Supply Unit). 18. Attach Front Bezel. See Chapter 2 (1.28 Installing the Front Bezel). This is the end of the installation or removal procedures for internal optional devices. Continue the setup with reference to Chapter 2 (2.2 Connection). Express5800/R120e-2M User’s Guide...
-
Page 51: Confirming Servers (Uid Switch)
When the server is working or before you turn the server off or disconnect a cable from the server, be sure to identify the target server by using UID Switch first. To turn UID LED on, press UID Switch. When it is pressed again, the LED will be off. UID switch UID switch Express5800/R120e-2M User’s Guide... -
Page 52: Removing Front Bezel
Insert the attached Bezel Lock Key into the key slot and turn the key to the front bezel side while pressing it lightly to release the lock. Unlocked Locked 解除 ロック Hold the both ends of Front Bezel carefully to pull it toward you. Note Be careful not to press POWER Switch. Express5800/R120e-2M User’s Guide... -
Page 53: Removing Top Cover
Lift off the top cover (front) from the server. Loosen the thumb nut on rear panel of the server, and slide the top cover (rear) toward the rear of the server. Lift off the top cover (rear), and remove it from the server. Express5800/R120e-2M User’s Guide... -
Page 54: Removing Pci Riser Card
Battery for RAID Controller See steps 1 to 6 in Chapter 2 (1.3 Overview of Installation and Removal) for preparations. Remove the two screws from PCI riser card. Lift the PCI riser card, and remove it from the server. Express5800/R120e-2M User’s Guide... -
Page 55: Removing Support Bar
Battery for RAID Controller See steps 1 to 7 in Chapter 2 (1.3 Overview of Installation and Removal) for preparations. Remove the two screws from support bar. Lift the support bar, and remove it from the server. Express5800/R120e-2M User’s Guide... -
Page 56: Removing Air Duct
See steps 1 to 7 in Chapter 2 (1.3 Overview of Installation and Removal) for preparations. Lift the air duct and remove it from the server. Important Before removing the air duct, put cables aside. Otherwise, cables may be damaged if they are pulled together with air duct. Express5800/R120e-2M User’s Guide... -
Page 57: Internal Flash Memory (N8115-07)
See steps 1 to 7 in Chapter 2 (1.3 Overview of Installation and Removal) for preparations. Attach Internal Flash Memory and fix it with the screw provided with Internal Flash Memory. 1.10.2 Removal To remove Internal Flash Memory, reverse the installation procedure. Express5800/R120e-2M User’s Guide... -
Page 58: Tpm Kit
See steps 1 to 7 in Chapter 2 (1.3 Overview of Installation and Removal) for preparations. Install TPM Kit and secure it by pushing the nylon rivet provided with TPM Kit. Important The TPM Kit once installed cannot be removed. Express5800/R120e-2M User’s Guide... -
Page 59: Processor
Important details, see Chapter 2 (1.2 Anti-static Measures). • Make sure to use the processor authorized by NEC. Installing a third-party processor may cause a failure of the processor as well as the motherboard. Repair of the server due to failures or damage resulted from installing such a processor will be charged. - Page 60 Remove the screws that secure the dummy cover, and remove it. Note Keep the removed dummy cover for future use. Remove the protective cover from the CPU socket. Note Keep the removed protective cover for future use. Express5800/R120e-2M User’s Guide...
- Page 61 Put the additional processor on the CPU socket slowly and gently. For easy installation, hold edges of processor with your thumb and index fingers so that the notch is aligned with the key on the CPU socket. Notch Pin mark Pin mark Express5800/R120e-2M User’s Guide...
- Page 62 • Bring down the processor straight without tilting or sliding it in the socket. Lightly push the processor to the CPU socket, and close the plate. Close the socket lever marked with "← " to fix it. →" to fix it. Close the socket lever marked with " Express5800/R120e-2M User’s Guide...
- Page 63 Continue to install or remove internal optional devices, mount and connect the server, and turn it on. Run BIOS Setup Utility (SETUP) to confirm the following settings. See Chapter 2 (1. System BIOS) in "Maintenance Guide". Advanced → Processor Configuration → Processor Information [CPU ID] [L2 Cache RAM] [L3 Cache RAM] Express5800/R120e-2M User’s Guide...
-
Page 64: Replacement / Removal
Run BIOS Setup Utility (SETUP) to confirm the following settings. See Chapter 2 (1. System BIOS) in "Maintenance Guide". Advanced → Processor Configuration → Processor Information [CPU ID] [L2 Cache RAM] [L3 Cache RAM] Express5800/R120e-2M User’s Guide... -
Page 65: Dimm
64 GB 64GB Windows Server 2008 Enterprise x64 Edition 2 TB 1.5TB Windows Server 2008 R2 Enterprise 1.5TB Microsoft Windows Server 2012 Standard *1 Microsoft Windows Server 2012 Datacenter *1 *1: Up to 1 TB on virtual machine. Express5800/R120e-2M User’s Guide... -
Page 66: Memory Clock
N8102-545F 16GB DDR3-1866 REG Memory Kit Up to 2 sets 1600 MHz N8102-546F 32GB DDR3-1866 REG Memory Kit (4 DIMMs) N8102-552 12GB DDR3-1600 REG Memory Kit N8102-553 24GB DDR3-1600 REG Memory Kit 800 MHz 1066 MHz N8102-554 48GB DDR3-1600 REG Memory Kit Express5800/R120e-2M User’s Guide... - Page 67 Up to 2 sets (E5-2697v2) 1866 MHz N8102-546F 32GB DDR3-1866 REG Memory Kit (4 DIMMs) N8102-552 12GB DDR3-1600 REG Memory Kit 800 MHz 1066 MHz N8102-553 24GB DDR3-1600 REG Memory Kit N8102-554 48GB DDR3-1600 REG Memory Kit Express5800/R120e-2M User’s Guide...
-
Page 68: Memory Ras Feature
× N8102-552 12GB DDR3-1600 REG Memory Kit × × × N8102-553 24GB DDR3-1600 REG Memory Kit × × × N8102-554 48GB DDR3-1600 REG Memory Kit × × × N8102-582F 4GB DDR3-1600 REG Memory Kit × × × Express5800/R120e-2M User’s Guide... -
Page 69: Dimm Installation Order
× × N8102-540F × × × × × × N8102-541F × × × × × × N8102-545F × × × × × × N8102-546F ×: Not allowed to be install together. : Allowed to be install together. Express5800/R120e-2M User’s Guide... -
Page 70: Installation
Install a DIMM by using the following procedure. See steps 1 to 6 in Chapter 2 (1.3 Overview of Installation and Removal) for preparations. Open levers on left and right sides of DIMM slot, and remove the dummy cover. Express5800/R120e-2M User’s Guide... -
Page 71: Replacement / Removal
Note When removing a defective DIMM, check error messages displayed at POST or NEC ESMPRO and check the DIMM socket where the defective DIMM is installed. Take the steps below after replacing or removing DIMMs. Confirm that no error messages are displayed on POST. If any error message is displayed, see Chapter 3 (1. - Page 72 The memory area on the motherboard of the server is divided into four memory channels. Memory controller Memory controller Memory Mirroring, Memory Lock Step, and Memory Sparing features keep memory redundancy between memory channels by monitoring or altering memory active/inactive status, respectively. Express5800/R120e-2M User’s Guide...
- Page 73 Data 2 Data 3 Data 3 Memory controller Data 4 Data 4 Mirror set Mirror set Mirror set Mirror set Mirror set Mirror set Tips The operating system only recognizes a half of the total physical capacity. Express5800/R120e-2M User’s Guide...
- Page 74 In Memory Mirroring configuration, [Memory RAS Mode] menu is changed from "Mirroring" to "Independent" in the following cases: • When you additionally install DIMMs that unable to configure Memory Mirroring • When you remove DIMMs that takes down Memory Mirroring Express5800/R120e-2M User’s Guide...
- Page 75 • DIMMs used in LockStep set must be of the same model number. Memory controller LockStep Set LockStep Set LockStep Set LockStep Set LockStep Set LockStep Set Memory controller LockStep Set LockStep Set LockStep Set LockStep Set LockStep Set LockStep Set Express5800/R120e-2M User’s Guide...
- Page 76 In Memory Lock Step configuration, Memory RAS Mode menu is changed from "Lock Step" to "Independent" in the following cases: • When you additionally install DIMMs that unable to configure Memory Lock Step • When you remove DIMMs that takes down Memory Lock Step Express5800/R120e-2M User’s Guide...
- Page 77 The following table shows configuration allowable for memory sparing and system logical memory capacity. Capacity of DIMM installed Number of Number of CPUs DIMMs 16GB 16GB 40GB 16GB 32GB 80GB 24GB 48GB 120GB 32GB 48GB 160GB 16GB 32GB 80GB 32GB 64GB 160GB 48GB 96GB 240GB 64GB 128GB 320GB Express5800/R120e-2M User’s Guide...
- Page 78 • After restart, run SETUP again, and check if "Spared" is displayed for the following parameter. Advanced → Memory Configuration → Memory Information → CPUx_DIMMx Status • Installation order depends on CPU configuration. See the figure below. Express5800/R120e-2M User’s Guide...
- Page 79 In Memory Sparing configuration, Memory RAS Mode menu is changed to "Independent" in the following cases: • When you additionally install DIMMs that unable to configure Memory Sparing • When you remove DIMMs that takes down Memory Sparing Express5800/R120e-2M User’s Guide...
-
Page 80: Extra Battery / Flash Backup Unit For Raid Controller
Install the additional battery to the support bar by using 3 screws. The installation position of the battery depends on installed RAID Controller. Express5800/R120e-2M User’s Guide... -
Page 81: Removal
Install RAID Controller to the RAID Controller connector on motherboard, using two screws you have removed in Step 7. Connect Mini SAS cable to RAID Controller. 1.14.3 Removal For removing the battery for the RAID Controller, reverse the installation procedure. Express5800/R120e-2M User’s Guide... -
Page 82: Installing Fbu
Remove one screw from the blank cover on the PCI riser card, then remove the blank cover. Mount the RAID Controller to PCI riser card, and secure it with the screw you have removed in Step 14. Express5800/R120e-2M User’s Guide... - Page 83 Chapter 2 Preparations 1. Installing Internal Optional Devices Connect the PCI riser card to the slot on motherboard, and secure it with screws. 1.14.5 Removing FBU Remove the FBU in reverse order of installation procedure. Express5800/R120e-2M User’s Guide...
-
Page 84: Lan Riser Card
See step 1 to 6 in Chapter 2 (1.3 Overview of Installation and Removal) for preparations. Remove the screw from the blank cover. Screw Remove the blank cover. Note Keep the removed cover for future use. Remove two screws from the motherboard. Screws Express5800/R120e-2M User’s Guide... -
Page 85: Removal
Install the port cover provided with LAN Riser Card. 1.15.2 Removal Remove LAN Riser Card in reverse order of installation steps. Important To maintain the cooling effect in the server, install the blank cover in the vacant LAN Riser Card slot. Express5800/R120e-2M User’s Guide... -
Page 86: Redundant Fan Unit
Install fan units in slots FAN 1F to 4F In 1-CPU configuration. Install fan units in slots FAN 1F to 5F In 2-CPU configuration. Important If you install additional fan unit, prepare to install it according to procedures in Chapter 2 (1.12 Processor). Express5800/R120e-2M User’s Guide... -
Page 87: Installation
In 1-CPU configuration: Install redundant fan units to slots FAN 1F to 4F. In 2-CPU configuration: "Install redundant fan units to slots FAN 1F to 5F. Insert fan unit straight into slot. When the fan unit is inserted to the end, it is locked with clicking sound. Express5800/R120e-2M User’s Guide... -
Page 88: Replacement / Removal
Be sure to observe the following precautions to use the server safely. Failure to observe the precautions may cause burns, injury, and property damage. For details, refer to Safety precautions in Precautions for Use. • Pay attention to electric hazard. Express5800/R120e-2M User’s Guide... -
Page 89: Backup File Device
Backup File Device The server can contain a backup file device such as magnetic tape drive. • Use only the backup device specified by NEC. Important • The server can contain a backup device of 3.5 inch (approx. 9 cm) in width and 1.6 inch (approx 4 cm) in length or smaller one. - Page 90 Power cable Note The power cable is provided in the device bay. Connect the USB cable to connector on motherboard. Note Make sure that USB cable does not come in contact with any electronic component on motherboard. Express5800/R120e-2M User’s Guide...
-
Page 91: Removal
If any error messages are displayed, see Chapter 3 (1. POST Error Message) in "Maintenance Guide". 11. Install the device driver for backup file device. 1.17.2 Removal Remove the backup file device in reverse order of installation. Express5800/R120e-2M User’s Guide... -
Page 92: Pci Card
If the boot device is an HDD under an optional RAID Controller, the display is (Bus xx Dev 00) PCI RAID Adapter. Note that the value for xx changes depending on the PCI slot where a RAID board is installed. Express5800/R120e-2M User’s Guide... -
Page 93: Supported Boards And Available Slots
• Different boards mounted on the same bus operate at the lower frequency. Tips • When the operation performance of a PCI card is higher than the PCI slot on the server, the PCI card operates with the performance of the PCI slot on the server. Express5800/R120e-2M User’s Guide... - Page 94 [PCI Express 2.0(x8)] devices. Up to two cards can be installed. factory installed. - ○ ○ ○ ○ ○ - N8103-142 SAS Controller Dedicated to [PCI Express 2.0(x8)] connecting external devices. Up to three cards can be installed. Express5800/R120e-2M User’s Guide...
- Page 95 1000BASE-T Adapter (2ch) For additional LAN [PCI Express 2.0(x4)] port. - - - - - - ○ N8104-136 10GBASE-T Riser card For additional LAN (2ch) port. [PCI Express 3.0(x8)] Up to two cards including N8104-137/128/148/1 31 can be installed. Express5800/R120e-2M User’s Guide...
- Page 96 FC. Teaming/bonding with LAN is not available. Only one port per system can be used as LAN of N8104-131. Only one card can be installed in RHEL6. Up to two cards including N8104-136/137/128/1 31 can be installed. Express5800/R120e-2M User’s Guide...
-
Page 97
Data transfer rate of PCI slot = Transfer bandwidth × Number of lanes
x8 lane = 64 Gbps (one-way) Connector size. Cards exceeding the number of sockets cannot be connected. x4 socket can connect with x1 and x4 cards, but not x8 card. Use RS-232C cable (B). Express5800/R120e-2M User’s Guide... - Page 98 ○ ○ - N8190-153 Fibre Channel Controller For connecting external (8Gbps/Optical) Fibre Channel device. [PCI Express 2.0(x8)] Cannot be installed together - - - - ○ - with N8190-157/158. N8190-154 Fibre Channel Controller(2ch) (8Gbps/Optical) [PCI Express 2.0(x8)] Express5800/R120e-2M User’s Guide...
- Page 99 [PCI Express 3.0(x8)] N8104-137/128/148/131 can be installed. - - - - - ○ N8104-137 10GBASE-SFP+ Riser card For additional LAN port. [PCI Express 2.0(x8)] Prepare SFP+ module [N8104-129] if needed. Up to two cards including N8104-136/128/148/131 can be installed. Express5800/R120e-2M User’s Guide...
-
Page 100
Data transfer rate of PCI slot = Transfer bandwidth × Number of lanes
x8 lane = 64 Gbps (one-way) Connector size. Cards exceeding the number of sockets cannot be connected. x4 socket can connect with x1 and x4 cards, but not x8 card. Use RS-232C cable (B). Express5800/R120e-2M User’s Guide... - Page 101 Up to two cards can be installed. FBU is factory installed. Dedicated to - ○ - ○ ○ ○ - N8103-142 SAS Controller connecting external [PCI Express 2.0(x8)] devices. Up to three cards can be installed. Express5800/R120e-2M User’s Guide...
- Page 102 - N8104-148 10GBASE Adapter (SFP+/2ch) [PCI Express 2.0(x8)] - ○ - - - ○ - N8104-131 10G Converged Network Adapter (2ch) (10Gbps/Optical) [PCI Express 2.0(x8)] - - - ○ ○ ○ - N8117-01A Additional RS-232C connector *3 Express5800/R120e-2M User’s Guide...
-
Page 103
Data transfer rate of PCI slot = Transfer bandwidth × Number of lanes
x8 lane = 64 Gbps (one-way) Connector size. Cards exceeding the number of sockets cannot be connected. x4 socket can connect with x1 and x4 cards, but not x8 card. Use RS-232C cable (B). Express5800/R120e-2M User’s Guide... -
Page 104: Installation
Important Do not touch the terminal part of riser cards or PCI cards and the signal pins of electric parts installed on the board. Installing boards with dirt or oil can cause malfunction. Express5800/R120e-2M User’s Guide... -
Page 105: Removal
Run SETUP and change boot order in Boot menu. See Chapter 2 (1. System BIOS) in "Maintenance Guide" for how to specify it. If using the server while the board is removed, attach the blank cover that comes with the riser card. Express5800/R120e-2M User’s Guide... - Page 106 RAID Controller, and remove PCI bracket. Remove the two screws from server chassis, and remove RAID Controller bracket. Attach the RAID Controller bracket to RAID Controller with two screws Ports 4-7 you have removed in Step 3. Ports 0-3 Express5800/R120e-2M User’s Guide...
- Page 107 Secure the battery tray for RAID Controller with a single screw. Continue to install or remove internal optional devices, mount and connect the server, and turn it (2) When using optional RAID Controller (N8103-161/168) See Chapter 2 (1.14.4 Installing FBU). Express5800/R120e-2M User’s Guide...
-
Page 108: Additional Hdd Cage
See steps 1 to 6 in Chapter 2 (1.3 Overview of Installation and Removal) for preparations. Remove the six screws from protective cover, and remove the protective cover. Remove the blank cover of 2.5-inch HDD cage by pulling it toward you. Install the additional HDD cage. Express5800/R120e-2M User’s Guide... - Page 109 Install expander board to Expansion Bay and secure it with four screws provided with 2.5-inch HDD cage. Connect the SAS cable (short) provided with 2.5-inch additional HDD cage to RAID Controller and Expander board. Connect the provided DC cable to Expander board and additional HDD cage. Express5800/R120e-2M User’s Guide...
- Page 110 Keep the removed blank cover for future use. 1.19.2 Removal To remove an additional HDD cage, reverse the installation procedure above. Important To maintain the cooling effect in the server, install the blank cover in the vacant slot. Express5800/R120e-2M User’s Guide...
-
Page 111: Optical Disk Drive
Step 1, and remove the bracket. Remove the dummy cover. Note Keep the removed screws and dummy cover for future use. Install the optical disk drive to the tray. Secure the bracket to optical disk drive with a screw. Express5800/R120e-2M User’s Guide... - Page 112 Chapter 2 Preparations 1. Installing Internal Optional Devices Insert the optical disk drive and secure the drive tray. Connect the optical disk drive cable. 1.20.2 Removal To remove an optical disk drive, reverse the installation procedure above. Express5800/R120e-2M User’s Guide...
-
Page 113: Use Of Internal Hard Disk Drives In The Raid System
If using internal hard disk drives in RAID System with an optional RAID Controller (N8103-172/173/174) installed in the server, the SATA cable needs to be rewired. Tips When using SAS hard disk drives, RAID Controllers must be connected. Express5800/R120e-2M User’s Guide... -
Page 114: Connecting Cables
Slots 0-3 Ports 0-3 Slots 4-7 Ports 4-7 Optional RAID Controller Backplane Hard Disk Drive Slot 0 Slot 1 Ports 0-3 MINISAS1 Slot 2 Slot 3 Slot 4 Slot 5 Ports 4-7 MINISAS2 Slot 6 Slot 7 Express5800/R120e-2M User’s Guide... - Page 115 Standard HDD Cage MINISAS4 MINISAS2 Slot 6 Slot 7 Slot 8 Slot 9 Additional HDD Cage MINISAS5 MINISAS1 Slot 10 Slot 11 Ports 4-7 MINISAS2 Slot 12 Slot 13 Additional HDD Cage MINISAS6 MINISAS2 Slot 14 Slot 15 Express5800/R120e-2M User’s Guide...
-
Page 116: Notes On Building Raid System
• Do not change the mode to hibernate while building a RAID System. Important • Build a Disk Array in the RAID System using hard disk drives that have the same specifications (capacity, rotational speed, and standard). Express5800/R120e-2M User’s Guide... -
Page 117: Installing Air Duct
Put Top Cover straight on the server chassis so that it can be surely engaged with the chassis frame. Slide Top Cover toward the front of the server. Tighten the thumb nut on rear of the server. Express5800/R120e-2M User’s Guide... -
Page 118: Hard Disk Drive
Important Use hard disk drives specified by NEC. Installing a third-party hard disk drive might cause a failure of the server and it. Note the following precautions to install hard disk drives. - Page 119 Turn on the server, run SETUP utility, and then specify the boot order from the Boot menu. For details about the Boot menu, see Chapter 2 (1.2.5 Boot) in "Maintenance Guide". Tips The saved boot order is cleared when a hard disk drive is added. Express5800/R120e-2M User’s Guide...
-
Page 120: Removal
“Maintenance Guide” to erase data. Important NEC assumes no liability for data leakage should the product be transferred to a third party without erasing the data. • If you remove a disk due to a hard disk drive failure, check the slot with its DISK Note LED lit in amber. -
Page 121: Power Supply Unit
See Chapter 2 (1. System BIOS) in "Maintenance Guide", change parameters as shown below, save the settings and exit from SETUP. Server → Power Control Configuration → Cold Redundant Mode → Enabled Run SETUP again, and check if the status of Cold Redundant Mode shows Enabled in Server menu. Express5800/R120e-2M User’s Guide... -
Page 122: Installation
See Chapter 2 (5. Troubleshooting) of the Maintenance Guide for details on the error messages. If the AC POWER LEDs are off, reinstall the power supply units. If the same error message still appears, contact your service representative. Express5800/R120e-2M User’s Guide... - Page 123 To maintain the cooling effect in the server, install the blank cover in the vacant slot. Install the new power supply unit taking steps 3 to 7 of "Installation", and confirm that the power supply unit is installed normally. Express5800/R120e-2M User’s Guide...
-
Page 124: Installing The Front Bezel
1.28 Installing the Front Bezel When installing Front Bezel, engage catches of front bezel with those on mounting ear. After installing Front Bezel, lock it with Bezel Lock Key. Important Be careful not to press POWER Switch. Express5800/R120e-2M User’s Guide... -
Page 125: Installation And Connection
• Do not leave more than one device being pulled out from the rack. • Do not provide the wiring for the server to exceed the rating of the power supply. • Do not use in the environment where corrosive gas is generated. Express5800/R120e-2M User’s Guide... -
Page 126: Installing The Server To The Rack Or Removing It From The Rack
Be sure to observe the following precautions to use the server safety. Failure to observe the precautions may cause death or serious injury. For details, refer to Safety precautions in Precautions for Use. • Do not use any racks out of standards. • Use only under the specified environment. Express5800/R120e-2M User’s Guide... - Page 127 Review airflow in the rack and room and take sufficient measures so that the internal temperature will not exceed the operational temperature during operation. Air enters the server from the front and exits from the rear. Express5800/R120e-2M User’s Guide...
- Page 128 Chapter 2 Preparations 2. Installation and Connection (1) Installation This server can be mounted to a rack made by NEC or other companies. Mount the server to a rack in the following procedure. Preparation • Checking rails • Installing inner and outer rails Important Rail for left side has different shape from that for right side.
- Page 129 Safety precautions in Precautions for Use. • Do not drop. • Do not leave the server being pulled out. • Do not install with the cover removed. • Do not get your fingers caught. Express5800/R120e-2M User’s Guide...
- Page 130 When the server is pushed into the rack and is locked, push the server to the end while pulling the release levers (blue) on both sides of the server. Push the server until its lock on front panel clicks. Release lever レリーズバー Express5800/R120e-2M User’s Guide...
- Page 131 • While more than one person is supporting the bottom part of the server, Important slowly pull out the server. • Do not apply pressure on the server from top when it is being pulled out. Doing so cause the server to drop. Express5800/R120e-2M User’s Guide...
- Page 132 Chapter 2 Preparations 2. Installation and Connection Removing Outer Rail Remove outer rails from the rack in the following procedure. See Chapter 2 (2.1.2 Installing the server to the rack or removing it from the rack, (2) Express5800/R120e-2M User’s Guide...
- Page 133 Unlock lever Locking mechanism ロック解除レバー ロック機構 While pressing the lever on outer rail, push the outer rail toward inside of the rack, then remove it. FRONT REAR Express5800/R120e-2M User’s Guide...
-
Page 134: Connection
• Insert the power plug into the outlet as far as it goes. • Use only the specified power cord • Do not connect or disconnect the interface cable with the power plugged in the outlet. • Use only the specified interface cable Express5800/R120e-2M User’s Guide... - Page 135 Device with serial interface Connect the power cord to a circuit breaker of up to 15 A. Either one can connect with a display unit. Tips A leased line cannot be directly connected to the serial port connector. Express5800/R120e-2M User’s Guide...
-
Page 136: Connecting To A Uninterruptible Power Supply (Ups)
To change the settings, select Server and then AC-LINK in the BIOS setup utility, and change the displayed parameters. Select Power On to perform automatic operations by using the UPS. For details, see Chapter 2 (1. System BIOS) in "Maintenance Guide". Express5800/R120e-2M User’s Guide... -
Page 137: Chapter 3 Setup
EXPRESSBUILDER helps you to install Windows and maintain the server. 5. Installing Software Components You can install Windows and bundled software by following the instructions in "Installation Guide (Windows)". 6. Turning off the Server Turn off power when not using the server. Express5800/R120e-2M User’s Guide... -
Page 138: Turning On The Server
Important Do not connect or disconnect USB device while POST is running. POWER switch While the logo is being displayed, the self-diagnostic program (POST) runs and diagnoses the hardware. For details, see Chapter 3 (1.1.1 POST sequence). Express5800/R120e-2M User’s Guide... -
Page 139: Post
POST displays several types of message. These messages let you know that the installed CPU or connected keyboard and mouse are detected. After a while, the following message is displayed on the screen. PressSETUP, Internal Flash Memory, ROM Utility, Network Express5800/R120e-2M User’s Guide... -
Page 140: Post Error Messages
Chapter 3 (1. POST Error Message) in "Maintenance Guide". Note Take notes on the indication displayed on display unit before consulting with your sales representative. Alarm messages are useful information for maintenance. Express5800/R120e-2M User’s Guide... -
Page 141: System Bios Setup
PressSETUP, Internal Flash Memory, ROM Utility, Network If you press key at this time, SETUP runs and displays Main menu upon completion of POST. (You can also press key while NEC logo appears to display Main menu.) Tips If password is set, you will be prompted to enter password at next startup of SETUP. -
Page 142: Description On On-Screen Items And Key Usage
If you select Yes, the SETUP closes without saving the changed parameters. Quit without saving? [Yes]key Press this key to display help information. If you need help using the SETUP, press this key. Press the key to go back to the original screen. Express5800/R120e-2M User’s Guide... -
Page 143
(This might be different from the parameters configured before shipment.) Load Setup Defaults? [Yes]
key If you press this key, the following window appears. If you select Yes, the parameter you configured is saved and SETUP closes. Save configuration and exit? [Yes] Express5800/R120e-2M User’s Guide... -
Page 144: Cases That Require Configuration
Boot → Bootup Numlock State On/Off NumLock on power Boot → Quite Boot → Disabled On/Off the function to By pressing thekey, display the NEC logo during prevent the display of the POST logo. Advanced → Memory Memory... - Page 145 If you wish to exit without saving the changed parameters, select Save & Exit Discard Changes and then and Exit. Or if you wish to restore the setting to default values, select Save & Exit Load Setup Defaults. and then (The default value might be different from the factory setting.) Express5800/R120e-2M User’s Guide...
-
Page 146: Expressscope Engine 3
If you press thekey at this time, Off-line TOOL starts upon completion of POST. You can also press the key while the NEC logo is being displayed to open the Off-line TOOL MENU screen. The keyboard selection screen appears. Select your keyboard type. - Page 147 Connect the LAN cable to the management LAN connector in order to connect to the network. It will be available for use if you access EXPRESSSCOPE Engine 3 via Web browser from PC for management according to the setting. Express5800/R120e-2M User’s Guide...
-
Page 148: Expressbuilder
To use this feature, select OS (Windows reinstallation) installation in the menu after boot. Bundled software* Stores various bundled software (such as NEC ESMPRO Agent). Maintenance Diagnoses your server system. To use this feature, select Tool menu in the menu after boot. -
Page 149: Installing Software Components
Chapter 3 Setup 5. Installing Software Components Installing Software Components Continue to install software components such as OS. See the instructions below. • Installation Guide (Windows) Express5800/R120e-2M User’s Guide... -
Page 150: Turning Off The Server
Shut down the OS. The server automatically turns off after the OS shuts down. Confirm that POWER LED is OFF. Turn off peripheral devices. Tips Hibernate function of Windows Server cannot be used. Do not set Hibernate at Windows shutdown. Express5800/R120e-2M User’s Guide... -
Page 151: Chapter 4 Appendix
NEC Express5800 Series Express5800/R120e-2M Appendix Specifications Interrupt Lines Express5800/R120e-2M User’s Guide... -
Page 152: Specifications
10 to 35°C / 20 10 to 40°C / 20 Environmental Operating 10 to 40°C / 20 to 80%, to 80%, to 80%, requirements Temperature/Humidity Storage –10~55°C / 20 to 80% (no condensation either when operating or when stored) Express5800/R120e-2M User’s Guide... - Page 153 1. Specifications Product name Express5800/R120e-2M N code N8100-2073F EXPRESSBUILDER (NEC ESMPRO Manager) (Windows), NEC ESMPRO Agent, User’s Guide (electronic Main accessories document) included), Getting Started, one-touch rack rail - Installed OS Microsoft Windows Server 2008 Standard (RTM, SP2 or later), Microsoft Windows Server 2008 Enterprise...
- Page 154 890VA/880W 920VA/910W 920VA/910W 890VA/880W configuration) 10 to 35°C / 20 Environmental Operating 10 to 40°C / 20 to 80%, to 80%, requirements Temperature/Humidity Storage –10~55°C / 20 to 80% (no condensation either when operating or when stored) Express5800/R120e-2M User’s Guide...
- Page 155 1. Specifications Product name Express5800/R120e-2M N code N8100-2073F EXPRESSBUILDER (NEC ESMPRO Manager) (Windows), NEC ESMPRO Agent, User’s Guide (electronic Main accessories document) included), Getting Started, one-touch rack rail - Installed OS Microsoft Windows Server 2008 Standard (RTM, SP2 or later), Microsoft Windows Server 2008 Enterprise...
-
Page 156: Interrupt Lines
Peripheral Device (Controller) System timer SM Bus − Numeric data processor − − − COM 2 serial port COM 1 serial port VGA, LAN1 LAN2, SATA − − − Real-time clock Microsoft ACPI Compliant System Motherboard resource Express5800/R120e-2M User’s Guide...