Quick Links
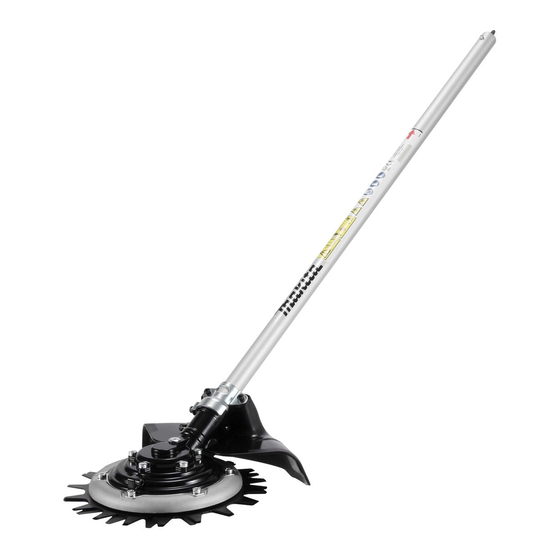
Rotary Scissors Attachment
EN
ZHCN
剪切割草头组件
Alat Tambahan Gunting
ID
Rotari
Pemasangan Gunting
MS
Berputar
Phụ Kiện Kéo Cắt Cỏ Tròn
VI
TH
อุ ป กรณ์ ต ่ อ พ่ ว งกรรไกรโรตารี ่
ZHTW
剪式割草盤
KO
안전판 회전날
Acessório tesoura rotativa
PTBR
Accesorio de Tijeras
ES
Rotativas
FA
AR
EM407MP
ضمیمه قیچی چرخنده
ملحق المقص الدوار
ORIGINAL INSTRUCTION
MANUAL
原版使用说明书
PETUNJUK PENGGUNAAN
ASLI
MANUAL ARAHAN ASAL
TÀI LIỆU HƯỚNG DẪN GỐC
ต้ น ฉบั บ คู ่ ม ื อ การใช้ ง าน
原始操作手冊
취급 설명서
MANUAL DE INSTRUÇÕES
ORIGINAL
MANUAL DE
INSTRUCCIONES ORIGINAL
031 دفترچه راهنمای اصلی
831 دلیل اإلرشادات األصلي
7
17
28
40
52
63
77
88
98
110

Related Manuals for Makita EM407MP


Summary of Contents for Makita EM407MP
- Page 1 ต้ น ฉบั บ คู ่ ม ื อ การใช้ ง าน ZHTW 剪式割草盤 原始操作手冊 안전판 회전날 취급 설명서 MANUAL DE INSTRUÇÕES Acessório tesoura rotativa PTBR ORIGINAL Accesorio de Tijeras MANUAL DE Rotativas INSTRUCCIONES ORIGINAL ضمیمه قیچی چرخنده 031 دفترچه راهنمای اصلی ملحق المقص الدوار 831 دلیل اإلرشادات األصلي EM407MP...
- Page 2 Fig.2 Fig.1 Fig.3 Fig.4 Fig.5...
- Page 3 Fig.6 Fig.10 Fig.7 Fig.11 Fig.12 Fig.8 Fig.9 Fig.12...
- Page 4 Fig.13 Fig.17 40° 40° Fig.18 Fig.14 Fig.19 Fig.15 Fig.20 Fig.16...
- Page 5 Fig.21 Fig.25 Fig.22 Fig.26 Fig.23 Fig.27 Fig.28 Fig.24...
- Page 6 Fig.29 Fig.30...
-
Page 7: Table Of Contents
SAFETY WARNINGS ..........7 MAINTENANCE ............14 PARTS DESCRIPTION ..........12 TROUBLESHOOTING ..........16 ASSEMBLY ..............13 SPECIFICATIONS Model: EM407MP Dimensions: length x 965 mm x 245 mm x 155 mm width x height Net weight 2.7 kg (without blade cover) - Page 8 Work area safety Do not overreach. Keep proper footing and balance at all times. This enables better control Keep work area clean and well lit. Cluttered or of the power tool in unexpected situations. dark areas invite accidents. Dress properly. Do not wear loose clothing or Do not operate power tools in explosive atmo- jewellery.
- Page 9 Maintain power tools and accessories. Check Never service damaged battery packs. Service for misalignment or binding of moving parts, of battery packs should only be performed by the breakage of parts and any other condition that manufacturer or authorized service providers. may affect the power tool’s operation. If dam- Follow instruction for lubricating and chang- aged, have the power tool repaired before use.
- Page 10 Preparation before use Before starting, make sure that the cutting tool has no contact with hard objects such as Before use, always check the machine is safe branches, stones etc. as the cutting tool will for operation: revolve when starting. —...
- Page 11 Never use metal multi-piece pivoting chains, ment parts. Use only identical spare parts and flail blades or blades not recommended in this accessories supplied by MAKITA. Incorrect manual. Otherwise serious injury may result. repair and poor maintenance can shorten the life When handling the metal blade, always wear of the machine and increase the risk of accidents.
-
Page 12: Parts Description
First Aid Do not operate the machine in explosive atmo- spheres, such as in the presence of flammable In case of accident make sure that a first-aid liquids, gases or dust. Machine create sparks box is available in the vicinity of the cutting which may ignite the dust or fumes. -
Page 13: Assembly
Make sure that the surface of the lever is parallel to the ASSEMBLY pipe. To remove the pipe, turn the lever toward the attach- ment side and pull the pipe out while pressing down the WARNING: Before assembling or adjusting release button. -
Page 14: Maintenance
To maintain product SAFETY and RELIABILITY, ► Fig.13: 1. Box wrench 2. Hex wrench repairs, any other maintenance or adjustment should be performed by Makita Authorized or Factory Service Remove the bolt, clamp washer, and the holder Centers, always using Makita replacement parts. together with the lower blade. Overall inspection ► Fig.14: 1. - Page 15 Install a new upper blade onto the holder. NOTE: To dismount the cutter blades, refer to the The upper blade has projection on one side. Be sure to section for dismounting the cutter blade. place the upper blade so that the projected side (arrow Resharpening the cutter blades marking printed) faces to the gear case. ► Fig.21: 1. Upper blade 2. Gear case 3. Projection CAUTION: Align the oval holes in the upper blade with the pins.
-
Page 16: Troubleshooting
Apply grease (Shell Alvania 2 or equivalent) to the drive When storing this attachment separated from the power axle every around 30 working hours. unit, put the cap onto the end of the pipe. ► Fig.28 ► Fig.30 NOTE: Genuine Makita grease may be purchased from your local Makita dealer. CAUTION: Do not prop the attachment against something such as a wall. The attachment Storage may fall suddenly and cause personal injury. - Page 18 Makita Corporation 3-11-8, Sumiyoshi-cho, Anjo, Aichi 446-8502 Japan www.makita.com 885821-910 EN, ZHCN, ID, MS, VI, TH, ZHTW, KO, PTBR, ES, FA, AR 20201126...