Table of Contents

Related Manuals for RCA DRC62705E24G


Summary of Contents for RCA DRC62705E24G
- Page 1 User manual DRC62705E24G This product contains a low power PRECAUCIÓN Producto láser laser device. RADIACIÓN LÁSER INVISIBLE Clase 1 Este producto contiene un dispositivo EN CASO DE APERTURAY DESBLOQUEO DE CIERRE. EVITE láser de baja potencia. CUALQUIER EXPOSICIÓN AL RAYO...
-
Page 2: Using The Remote Control
Remote Control To Change Remote Battery Remove the plastic sheet 1. Open the battery door. before operating remote control. Using the Remote Control • Point the remote control at the REMOTE SENSOR located on the unit. • When there is a strong ambient light source, the perform ance of the infrared 2. - Page 3 Using of Remote Controls Remote controls have different color keys to identify which unit they operate. The remote control with green keys operates Unit A which has a green stripe on the front of the unit. The remote control with blue keys operates Unit B with a similar blue stripe on the front of the unit.
-
Page 4: Control Reference Guide
Control Reference Guide 1. DVD / AV IN Green remote for Unit A Press to select between the DVD player or external video/games source. 2. MENU Press to enter and exit the main DVD menu. This option works only if the DVD has a main menu. - Page 5 Control Reference Guide 1. VIDEO MODE Blue remote for Unit B Press to adjust brightness, contrast or screen size. 2. MENU Press to enter and exit the main DVD menu. This option works only if the DVD has a main menu. Press to navigate or to adjust settings in SETUP, GOTO and MEMORY mode.
- Page 6 Control Reference Guide Unit A Unit B Unit A Unit B OPEN 4. STANDBY / ON switch Press to open the disc door. Hold the Slide to change your DVD player to front panel when open the disc door. standby mode or to turn it on. (previous) 5.
-
Page 7: Power Supply
Power Supply Using the car power adapter with splitter The included 12V car power adapter splitter allows the units to be used with vehicles that have a 12V, negative ground electrical system. Use both DVD players Use one DVD player only Car Power adapter with splitter... -
Page 8: Connection Cable
Connections Playing a DVD on unit A and B You can watch the same DVD on unit A and B. Unit A Unit B Watching a DVD on unit A and B 1. Connect the unit A and B using the included connection cable. - Page 9 Using headphones/earphones Headphones / Earphones Turn down the volume before connecting [1/8” (3.5mm) diameter plug) the headphones/earphones. Slowly raise the volume with the headphones on until you reach your desired volume. When headphones are connected, the speaker is automatically disabled. Caution: Avoid listening to sound at excessive levels which could be harmful to your ears.
-
Page 10: Mounting In A Vehicle
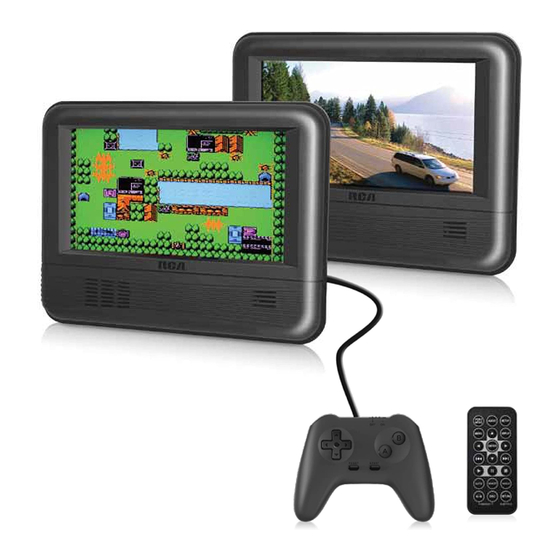
Placement Mounting in a Vehicle Connect the connection cable and car power adapter with splitter to both units, make sure to use correct remote for each unit (green rubber keys remote for green Unit (Unit A), blue rubber keys remote for blue Unit (Unit B). Tightly wrap the mounting straps around the headrest. - Page 11 Placement Using of game controller Unit A Unit B Mounting Straps Game Controller Car power adapter with splitter Blue Green Remote Control Remote Control EN - 11...
-
Page 12: Unit Operation
Unit Operation Turning the unit on 1. Slide the STANDBY / ON switch on the DVD player to the ON position. 2. The start-up picture will appear on the screens. 3. After use, slide the STANDBY / ON switch on the DVD player to STANDBY (power off). Playing a Disc - Basic Functions This owner’s manual explains the basic instructions for operating this unit. -
Page 13: Audio Selection
Notes: • The DVD player mutes sound and subtitles during reverse and forward scan of DVDs. • The fast playback speed may differ depending on the disc. Skip (Forward / Reverse) • Press the NEXT button to advance titles, chapters/tracks. •... -
Page 14: Angle Selection
Angle Selection Some DVDs contain scenes that have been shot from a number of different angles. For these discs, the same scene can be viewed from each of these different angles. 1. While you are playing a DVD with different angles recorded, press the ANGLE button to view the number of current angles available. -
Page 15: Repeat Playback
Repeat Playback You can play a specific DVD title or chapter repeatedly (title repeat, chapter repeat, A-B repeat). Repeating a Chapter 1. While the DVD is playing, press the REPEAT DISC button until the indicator displays on the screen. The current chapter is played repeatedly. Repeating a Title 2. -
Page 16: Locating A Desired Section
Locating a Desired Section Locating a Specific Chapter/Title If you know the chapter/title number for the chapter/title that you want to play, you can locate it by directly selecting that number. 1. Press the GOTO button. 2. Press the button to highlight chapter/title number, then press the button to select the chapter/title you want. -
Page 17: Viewing Jpg Files
Viewing JPG Files This unit can play JPG files recorded on a CD-R or CD-ROM disc (CD-RW is not recommendable). Viewing JPG Files 1. Open the disc door. 2. Hold a JPEG file disc by its edges and gently push it onto the spindle with the label side facing up until you hear a “click”. -
Page 18: Programmable Memory
Programmable Memory You can combine your favorite titles/chapters and play them in the order you determine. 1. Press the MEMORY button while a DVD is playing. The following display appears. Clear: Delete all the input programs. Exit: Exit memory menu and return to normal playback. -
Page 19: Customizing The Dvd Function Settings
Customizing the DVD Function Settings Language Setup 1. Press the SETUP button on the remote control in Language Menu stop mode (when disc is not playing). Player Menu 2. Press the button to select Language Menu. 3. Use the button to select the option (Player Menu, Audio, Subtitle or Disc Menu), then press button. -
Page 20: System Setup
System Setup 1. Press the SETUP button on the remote control in stop mode (when disc is not playing). 2. Press the button to select System Menu. 3. Use the button to select the option (Tv Display or Default), then press the button. -
Page 21: Troubleshooting
Troubleshooting No power • Ensure the car power adaptor is connected. • Make sure that the unit is turned on. The remote control does not function • Make sure the infrared remote sensor is not blocked. • Make sure the plastic sheet has been removed from the remote control. •... -
Page 22: Maintenance
Maintenance Cleaning the Disc A defective or soiled disc inserted into the unit can cause sound to drop out during playback. Handle the disc by holding its inner and outer edges. • Do NOT touch the surface of the unlabeled side of the disc. •...