Table of Contents
Quick Links
Table of Contents

Related Manuals for AEG BP300311K


Summary of Contents for AEG BP300311K
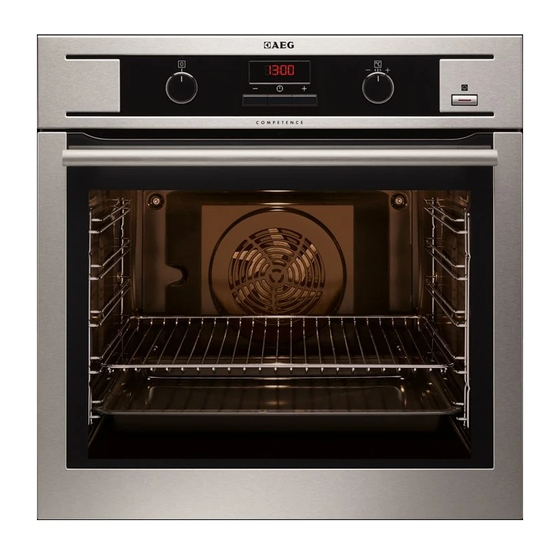
- Page 1 User Manual BP300311K Oven...
-
Page 2: Table Of Contents
13. ENERGY EFFICIENCY....................31 FOR PERFECT RESULTS Thank you for choosing this AEG product. We have created it to give you impeccable performance for many years, with innovative technologies that help make life simpler features you might not find on ordinary appliances. Please spend a few minutes reading to get the very best from it. -
Page 3: Safety Information
ENGLISH SAFETY INFORMATION Before the installation and use of the appliance, carefully read the supplied instructions. The manufacturer is not responsible for any injuries or damages that are the result of incorrect installation or usage. Always keep the instructions in a safe and accessible location for future reference. -
Page 4: Safety Instructions
Before maintenance cut the power supply. • Ensure that the appliance is switched off before • replacing the lamp to avoid the possibility of electric shock. Do not use a steam cleaner to clean the appliance. • Do not use harsh abrasive cleaners or sharp metal •... - Page 5 ENGLISH cable. Should the mains cable need • Do not operate the appliance with to be replaced, this must be carried wet hands or when it has contact with out by our Authorised Service Centre. water. • Do not let mains cables touch or •...
- Page 6 • Read carefully all the instructions for appliance has cooled down Pyrolytic cleaning. completely after use. • Keep children away from the appliance while the Pyrolytic cleaning 2.4 Care and cleaning is in operation.
-
Page 7: Product Description
ENGLISH • Before replacing the lamp, disconnect • Cut off the mains electrical cable the appliance from the power supply. close to the appliance and dispose of • Only use lamps with the same specifications. • Remove the door catch to prevent children or pets from becoming 2.7 Disposal trapped in the appliance. -
Page 8: Daily Use
4.2 Setting the time Press again and again until the indicator for the time of day flashes in After the first connection to the mains, all the display. symbols in the display are on for some To set a new time, refer to "Setting the seconds. - Page 9 ENGLISH 3. To deactivate the appliance turn the knobs for the oven functions and temperature to the off position. 5.3 Oven functions Oven function Application Off position The appliance is off. Fast Heat Up To decrease the heat-up time. True Fan Cook- To bake on up to 3 shelf positions at the same time and to dry food.
- Page 10 5.4 Activating the True Fan 7. To deactivate the appliance, press Cooking PLUS function the Plus Steam button , turn the knobs for the oven functions and This function allows to have an temperature to the off position. improvement of humidity during the The indicator of the Plus Steam button cooking.
-
Page 11: Clock Functions
ENGLISH 5.6 Display A. Timer B. Heat-up and residual heat indicator C. Water drawer (selected models only) D. Core temperature sensor (selected models only) E. Door lock (selected models only) F. Hours / minutes G. Clock functions 5.7 Buttons Button Function Description MINUS... -
Page 12: Using The Accessories
2. Press to set the MINUTE Press again and again to MINDER. switch between the clock First you set the seconds, then the functions. minutes and then the hours. At first, the time is calculated in To confirm the settings of minutes and seconds. - Page 13 ENGLISH 7.2 Trivet and Grill- / Roasting WARNING! Be careful when you remove the accessories from a hot appliance. There is a risk of burns. You can use the trivet to roast larger pieces of meat or poultry on one shelf position.
-
Page 14: Additional Functions
8. ADDITIONAL FUNCTIONS 8.1 Using the Child Lock Temperature (°C) Switch-off time (h) When the Child Lock is on, the appliance cannot be activated accidentally. 30 - 115 12.5 The door is locked , symbols 120 - 195 SAFE and... - Page 15 ENGLISH crusty outside. It decreases the • Leave the meat for approximately 15 cooking time and energy minutes before carving so that the consumption to a minimum. juice does not seep out. • Moisture can condense in the • To prevent too much smoke in the appliance or on the door glass panels.
- Page 16 Food Water in the Tempera- Time (min) Shelf po- Comments cavity em- ture (°C) sition bossment (ml) Plum cake, 160 - 180 30 - 60 Use cake mould. apple pie, cinnamon rolls 1) Preheat in an empty oven for 5 minutes before cooking.
- Page 17 ENGLISH Food Water in the Tempera- Time (min) Shelf po- Comments cavity em- ture (°C) sition bossment (ml) Roast beef 50 - 60 Pyrex round tray Chicken 60 - 80 Pyrex round tray 9.7 Baking and roasting table Cakes Food Top / Bottom Heat True Fan Cooking Time (min) Comments...
- Page 18 Food Top / Bottom Heat True Fan Cooking Time (min) Comments Tempera- Shelf posi- Tempera- Shelf posi- ture (°C) tion ture (°C) tion Small 140 - 150 2 and 4 25 - 35 In a baking cakes - two...
- Page 19 ENGLISH Food Top / Bottom Heat True Fan Cooking Time (min) Comments Tempera- Shelf posi- Tempera- Shelf posi- ture (°C) tion ture (°C) tion Victoria 2 (left and 30 - 50 In a 20 cm right) cake sandwich mould 1) Preheat the oven for 10 minutes. Bread and pizza Food Top / Bottom Heat...
- Page 20 Food Top / Bottom Heat True Fan Cooking Time (min) Comments Tempera- Shelf posi- Tempera- Shelf posi- ture (°C) tion ture (°C) tion Cannello- 180 - 190 180 - 190 25 - 40 In a mould 1) Preheat the oven for 10 minutes.
- Page 21 ENGLISH Food Top / Bottom Heat True Fan Cooking Time (min) Comments Tempera- Shelf posi- Tempera- Shelf posi- ture (°C) tion ture (°C) tion Hare 150 - 200 Cut in pieces Pheasant 90 - 120 Whole Fish Food Top / Bottom Heat True Fan Cooking Time (min) Comments Tempera-...
- Page 22 Veal Food Quantity (kg) Temperature Time (min) Shelf position (°C) Roast veal 160 - 180 90 - 120 1 or 2 Knuckle of veal 1.5 - 2 160 - 180 120 - 150 1 or 2 Lamb Food Quantity (kg)
- Page 23 ENGLISH Food Temperature Time (min) Shelf position Type of food (°C) Potato gratin 190 - 210 55 - 80 Sweet dishes 180 - 200 45 - 60 Ring cake or brioche 160 - 170 50 - 70 Plaited bread / bread crown 170 - 190 40 - 50 Cake with crumble topping...
-
Page 24: Care And Cleaning
Food Temperature Time (h) Shelf position (°C) 1 position 2 positions Peppers 60 - 70 5 - 6 1 / 4 Vegetables for 60 - 70 5 - 6 1 / 4 sour Mushrooms 50 - 60 6 - 8... - Page 25 ENGLISH Use maximum 6% vinegar without Do not start the Pyrolysis if herbs. you did not fully close the 2. Let the vinegar dissolve the residual oven door. In some models, limestone at the ambient the display shows "C3" temperature for 30 minutes. when this error occurs.
- Page 26 To stop Pyrolysis before it is completed, turn the knob for the oven functions to the off position. 6. When Pyrolysis is completed, the display shows the time of day. The oven door stays locked. 7. When the appliance is cool again, an acoustic signal sounds and the door unlocks.
- Page 27 ENGLISH When the cleaning is completed, install the glass panels and the oven door. Do the above steps in the opposite sequence. Make sure that you put the glass panels (A, B and C) back in the correct sequence. The middle panel (B) has a decorative frame.
-
Page 28: Troubleshooting
1. Deactivate the appliance. WARNING! 2. Remove the fuses from the fuse box Danger of electrocution! or deactivate the circuit breaker. Disconnect the fuse before The back lamp you replace the lamp. The lamp and the lamp glass 1. Turn the lamp glass cover cover can be hot. - Page 29 ENGLISH Problem Possible cause Remedy Steam and condensation You left the dish in the oven Do not leave the dishes in settle on the food and in the for too long. the oven for longer than 15 - cavity of the oven. 20 minutes after the cooking process ends.
- Page 30 Problem Possible cause Remedy There is no good cooking You did not activate the Refer to "Activating the True performance using the True True Fan Cooking PLUS Fan Cooking PLUS func- Fan Cooking PLUS function. function. tion". There is no good cooking You did not activate correct- Refer to "Activating the True...
-
Page 31: Installation
ENGLISH 12. INSTALLATION 12.2 Securing the appliance to WARNING! the cabinet Refer to Safety chapters. 12.1 Building In min. 550 min. 560 12.3 Electrical installation The manufacturer is not responsible if you do not follow the safety precautions from the Safety chapters. This appliance is supplied without a main min. - Page 32 Energy Efficiency Index 100.0 Energy efficiency class Energy consumption with a standard load, conven- 0.93 kWh/cycle tional mode Energy consumption with a standard load, fan-forced 0.85 kWh/cycle mode Number of cavities Heat source Electricity Volume 72 l Type of oven...
- Page 33 ENGLISH...
- Page 34 www.aeg.com...
- Page 35 ENGLISH...
- Page 36 www.aeg.com/shop...