
Related Manuals for Sony BDV-NF7220


Summary of Contents for Sony BDV-NF7220
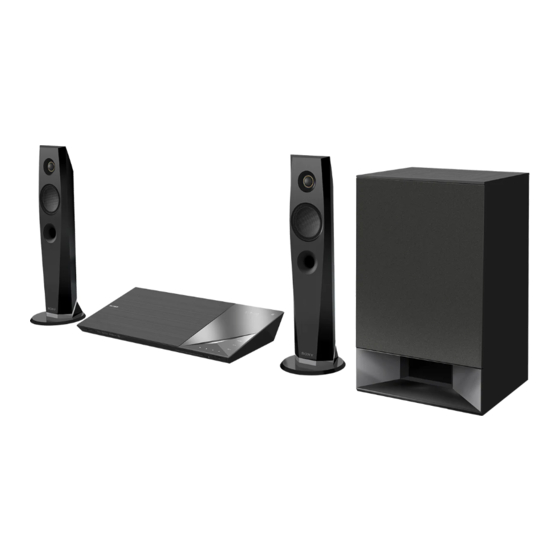
- Page 1 4-485-836-E1(1) Blu-ray Disc™/ DVD Home Theatre System Operating Instructions BDV-NF7220...
- Page 2 CAUTION WARNING The use of optical instruments with this product will increase eye hazard. Do not install the appliance in a As the laser beam used in this Blu-ray confined space, such as a bookcase or Disc/DVD Home Theatre System is built-in cabinet.
- Page 3 EU directives. equipment (applicable This product has been manufactured by in the European Union or on behalf of Sony Corporation, 1-7-1 and other European Konan Minato-ku Tokyo, 108-0075 countries with separate Japan. Inquiries related to product collection systems)
- Page 4 (such as eye strain, fatigue, of some commercially-produced film or nausea) while watching 3D video and videos and their soundtracks. images. Sony recommends that all When a prohibited use of an viewers take regular breaks while unauthorized copy is detected, a watching 3D video images.
- Page 5 • Android™ is a trademark of Google Inc. information, please visit • Google Play™ is a trademark of Google www.gracenote.com. Inc. • “Xperia” is a trademark of Sony Mobile Communications AB. • The ® word mark and logos are registered trademarks owned by Bluetooth SIG, Inc.
- Page 6 • This product incorporates proprietary • Opera® Devices SDK from Opera technology under license from Software ASA. Copyright 1995-2013 Verance Corporation and is protected Opera Software ASA. All rights by U.S. Patent 7,369,677 and other U.S. reserved. and worldwide patents issued and pending as well as copyright and trade secret protection for certain aspects of such technology.
-
Page 7: About These Operating Instructions
You agree that your non-exclusive GRACENOTE DISCLAIMS ALL license to use the Gracenote Data, the WARRANTIES EXPRESS OR IMPLIED, Gracenote Software, and Gracenote INCLUDING, BUT NOT LIMITED TO, Servers will terminate if you violate IMPLIED WARRANTIES OF these restrictions. If your license MERCHANTABILITY, FITNESS FOR A terminates, you agree to cease any and PARTICULAR PURPOSE, TITLE, AND... -
Page 8: Table Of Contents
Table of Contents Playback About These Operating Instructions ......7 Playing a Disc ......25 Unpacking ........ 10 Playing from a USB Device ..27 Guide to Parts and Controls ..11 Enjoying Music from a BLUETOOTH Device .... 27 Getting Started Using Screen mirroring ....29 Step 1: Installing the... - Page 9 Other Operations Using the Control for HDMI Function for “BRAVIA” Sync ........39 Setting the Speakers ....40 Using the Sleep Timer ....41 Deactivating the Buttons on the Main Unit ...... 41 Changing the Brightness ..42 Enjoying the Visualization on the TV Screen .....
-
Page 10: Unpacking
Unpacking • Quick Setup Guide • Speaker Installation Guide • Reference Guide • Remote control (1) • R03 (size AAA) batteries (2) • FM wire antenna (aerial) (1) • Front speakers (2) • Subwoofer (1) • Speaker cords (2, red/white) •... -
Page 11: Guide To Parts And Controls
Guide to Parts and Controls For more information, refer to the pages indicated in parentheses. Main unit Top and front panel Slot A "/1 (on/standby) E LED indicator Turns on the main unit, or sets it to White: Lights up when the main unit standby mode. - Page 12 F Soft-touch buttons/indicators (remote control sensor) I Z (open/close) N* (play) x* (stop) ./> (previous/next) About soft-touch buttons/ indicators VOL +/– The soft-touch button indicators flash FUNCTION (page 23) each time you turn on the main unit, Selects the playback source. wait until the indicators stop flashing.
- Page 13 Rear panel A TV (DIGITAL IN OPTICAL) jack D HDMI (OUT) jack (page 18) (pages 18, 19) E HDMI (IN 1/IN 2) jacks (page 19) B AUDIO IN (L/R) jacks (pages 18, 19) F LAN (100) terminal (page 21) C ANTENNA (FM COAXIAL 75 ) jack G SPEAKERS jacks (page 17) (page 21)
- Page 14 TV "/1 (on/standby) (page 16) Remote control Turns on the TV or sets it to standby mode. "/1 (on/standby) (page 23) Turns on the system or sets it to standby mode. B VISUALIZER (page 42) Selects the visualization pattern. DIMMER (page 42) Adjusts the brightness of the top panel display, soft-touch buttons indicators, and LED indicator.
- Page 15 Enters or exits the system’s home in pause mode. menu. Plays one frame at a time when pressed in pause mode. Accesses the “Sony Entertainment Network™” online service. Note FUNCTION (page 23) During Blu-ray 3D Disc playback, slow- Selects the playback source.
- Page 16 Note When you replace the batteries of the remote control, the code number may reset to the default (SONY) setting. Set the remote control again. Hold down TV ?/1. Press the corresponding button for your TV (see table below), then press...
-
Page 17: Getting Started
You can install the speakers on a wall. For Getting Started details, refer to the supplied “Speaker Installation Guide”. Step 1: Installing the Speakers Step 2: Connecting the Install the speakers by referring to the System illustration below. To assemble the speakers, refer to the supplied “Speaker Installation Guide”. -
Page 18: Connecting The Tv
Connecting the TV Select one of the following connection methods according to the input jacks on your Video connection HDMI cable (not supplied) High Speed HDMI cable The Audio Return Channel (ARC) function enables the TV to output sound through the system with an HDMI connection, without performing the B or C connection below. -
Page 19: Connecting The Other Equipment
Note To enjoy TV sound, select “TV” function for connection B or “AUDIO” function for connection C. Connecting the other equipment Connect the system, TV and other equipment as follows. You cannot enjoy the audio and video of the connected equipment on the TV through this system when the system is off or in standby mode. - Page 20 High quality HDMI cable* (not supplied) HDMI OUT * High Speed HDMI cable Optical digital cord (not supplied) DIGITAL OUT OPTICAL Audio cable (not supplied) AUDIO OUTPUT Standard quality When you make connection This connection can transmit both video and audio signals. Note •...
-
Page 21: Connecting The Antenna (Aerial)
Connecting the antenna Step 3: Preparing for (aerial) Network Connection To connect the system to your network, perform [Easy Network Settings]. For details, see “Step 4: Performing the Easy Setup” (page 22). Select the method based on your LAN (Local Area Network) environment. •... -
Page 22: Step 4: Performing The Easy Setup
LAN router to get the information about SSID and security key. For details: Step 4: Performing the – visit the following website: http://support.sony-europe.com/ Easy Setup – refer to the operating instructions supplied with the wireless LAN router – consult the manufacturer of the... -
Page 23: Step 5: Selecting The Playback Source
Press V/v to select [Easy Network Press [/1 to turn on the system. Settings], then press Switch the input selector on your TV so that the signal from the system appears on the TV screen. Step 5: Selecting the The [Easy Initial Settings] for OSD language selection appears. -
Page 24: Step 6: Enjoying Surround Sound
MIRRORING on the remote control to Digital Music Enhancer select “BT” and “SCR M” function [Digital Music] respectively. This is a technology developed by Sony to enhance the sound quality of compressed audio files by restoring high frequency range sound after compression process. Game... -
Page 25: Playing A Disc
Selecting the football mode Playback Press FOOTBALL repeatedly while watching a football match broadcast. Playing a Disc You can experience a feeling of presence in the stadium when watching For playable discs, see “Playable Discs” the football match broadcast. (page 61). •... - Page 26 Prepare for BD-LIVE (BD-LIVE Displaying the playback only). information • Connect the system to a network (page 21). You can check the playback • Set [BD Internet Connection] to information, etc., by pressing DISPLAY. [Allow] (page 49). The displayed information differs depending on the disc type and system Insert a BD-ROM with status.
-
Page 27: Playing From A Usb Device
Playing from a USB Enjoying Music from a Device BLUETOOTH Device You can play video/music/photo files About the BLUETOOTH on a connected USB device. For playable types of files, see “Playable wireless technology Types of Files” (page 62). BLUETOOTH wireless technology is a Connect the USB device to the short-range wireless technology that (USB) port. - Page 28 You can connect to a BLUETOOTH Select your system’s name device from this main unit. (“BDV-NF7220”) on the device’s Check the following before playing display. music: – The BLUETOOTH function of the Perform this step within 5 minutes, BLUETOOTH device is turned on.
-
Page 29: Using Screen Mirroring
Adjust the volume. Using Screen mirroring Adjust the volume of the BLUETOOTH device first, if the “Screen mirroring” is a function to volume level is still too low, adjust display the screen of a mobile device on the volume level on the main unit. the TV by Miracast technology. -
Page 30: Connecting To A Remote Device By One-Touch Function (Nfc)
Connecting to a remote Connecting to a Remote device by One-touch Device by One-touch listening function (NFC) Function (NFC) By holding an NFC-compatible remote device near to the N-Mark on the main What is “NFC”? unit, the main unit and remote device NFC (Near Field Communication) is a proceed to complete pairing and the technology enabling short-range... - Page 31 Note The application may not be available If the volume level is low, adjust the in some countries/regions. volume of the remote device first. If the volume level is still too low, adjust the Start the “NFC Easy Connect” volume level on the main unit. application on the remote device.
-
Page 32: Using "Songpal
Entertainment Network (SEN) You can select your preference sound field during mirroring. Press the sound field buttons (page 14). Sony Entertainment Network serves as a gateway delivering selected Internet content and a variety of on-demand entertainment straight to your main unit. - Page 33 Prepare for Sony Entertainment Playing files on a Home Network. Network (DLNA) Connect the system to a network (page 21). You can play video/music/photo files on other DLNA-certified equipment by Press SEN. connecting them to your home network. Press B/V/v/b to select the...
- Page 34 To play remote files by operating Press B/b to select [Video] or the system (Renderer) via a DLNA [Music]. controller Press V/v to select [Video You can operate the system with a Search] or [Music Search]. DLNA-certified controller (a mobile phone, etc), when playing files stored The content information (such as on a DLNA server.
-
Page 35: Available Options
[Video Settings] Available Options [Picture Quality Mode]: Selects the picture settings ([Direct], [Brighter Room], [Theatre Room], [Auto], [Custom1] and [Custom2]). Various settings and playback You can customize the following picture operations are available by pressing settings according to your preference and OPTIONS. - Page 36 [Music] only Adjusting the delay between the picture and sound [Track Search] Searches the track number during music CD playback. (A/V SYNC) [Add Slideshow BGM] When the sound does not match the Registers music files in the USB memory as pictures on the TV screen, you can slideshow background music (BGM).
-
Page 37: Sound Adjustment
Note Stereo (Audio1)] and [ Stereo (Audio2)] Sound Adjustment do not appear if only one audio stream is recorded on the disc. Selecting the Audio x CD Format, Multilingual • [ Stereo]: The standard stereo sound. Tracks, or Channel • [ 1/L]: The sound of the left channel (monaural). -
Page 38: Tuner
Presetting radio stations Tuner You can preset up to 20 stations. Before tuning, make sure to turn down the Listening to the Radio volume to minimum. Press FUNCTION repeatedly until Press FUNCTION repeatedly until “FM” appears in the top panel “FM”... -
Page 39: Receiving Radio Data System (Rds)
This function is available on TVs with the band. “BRAVIA” Sync function. The station name appears on the TV By connecting Sony equipment that is screen. compatible with the Control for HDMI function via an HDMI cable, operation is Note simplified. -
Page 40: Setting The Speakers
System Audio Control Setting the Speakers You can enjoy the sound from TV or other equipment by a simple operation. [Speaker Settings] You can use the System Audio Control function as follows: To obtain optimum surround sound, set • When the system is turned on, the the speakers’... -
Page 41: Using The Sleep Timer
[Front Left/Right] 0.0 dB: Set the front speaker level. Using the Sleep Timer [Subwoofer] 0.0 dB: Set the subwoofer level. You can set the system to turn off at a preset time, so you can fall asleep x [Test Tone] listening to music. -
Page 42: Changing The Brightness
Changing the Brightness • To avoid the information appears on the TV screen and overlaps with the visualization, set [Auto Display] in You can change the brightness of the [System Settings] to [Off] (page 50). following items: • You can also select the visualizer effect by –... - Page 43 C Cursor To enter a URL Move by pressing B/V/v/b. Place Select [URL entry] from the options the cursor on the link you want to menu. view, then press . The linked Enter the URL using the software website is displayed. keyboard, then select [Enter].
-
Page 44: Settings And Adjustments
[URL entry] Allows you to enter a URL when the software Settings and Adjustments keyboard is displayed. [Previous page] Moves to a previous displayed page. Using the Setup Display [Next page] Moves to the next page. You can make various adjustments to [Cancel loading] items such as picture and sound. -
Page 45: [Software Update]
[16:9]: Select this when connecting to a Note wide-screen TV or a TV with a wide-mode function. For information about update functions, visit the following website: [4:3]: Select this when connecting to a http://support.sony-europe.com/ 4:3 screen TV without a wide-mode function. - Page 46 x [Screen Format] x [Output Video Resolution] [Full]: Select this when connecting to a [Auto]: Outputs video signal according TV with a wide-mode function. Displays to the resolution of the TV or connected a 4:3 screen picture in 16:9 aspect ratio equipment.
-
Page 47: [Audio Settings]
[Frame]: The picture, including subjects Note that do not move dynamically, is output If your Sony equipment is not detected in high resolution. when [Auto1] is selected, the setting will have the same effect as [Auto2] setting. -
Page 48: [Bd/Dvd Viewing Settings]
x [Audio DRC] x [Sound Effect] You can compress the dynamic range of You can turn on or off the system’s the sound track. sound effects (SOUND FIELD setting (page 24)). [Auto]: Performs playback at the dynamic range specified by the disc [Sound Field On]: Enables the surround (BD-ROM only). -
Page 49: [Parental Control Settings]
x [Subtitle Language] x [BD Parental Control]/[DVD You can select the default subtitle Parental Control]/[Internet Video language for BD-ROMs or DVD VIDEOs. Parental Control] When you select [Select Language By setting Parental Control, scenes can Code], the display for entering the be blocked or replaced with different language code appears. - Page 50 x [HDMI Settings] x [Power Save Drive] [Control for HDMI] [On]: Reduces power consumption [On]: Turns on the [Control for HDMI] when volume level is low. function. You can operate mutually [Off]: Normal status. The system can between equipment that are connected output sound volume.
-
Page 51: [External Input Settings]
[Bluetooth AUDIO - AAC] connection. You can enable and disable AAC audio. [On]: AAC audio if the BLUETOOTH device supports AAC. For further details, visit the following [Off]: SBC audio. website and check the FAQ: http://support.sony-europe.com/... -
Page 52: [Easy Network Settings]
x [Network Connection Status] [Resetting] Displays the current network connection status. x [Reset to Factory Default Settings] x [Network Connection Diagnostics] You can reset the system settings to the You can run the network diagnostic to factory default by selecting the group of check if the network connection has settings. -
Page 53: Additional Information
• Keep the system and discs away from components with strong magnets, Additional Information such as microwave ovens, or large loudspeakers. • Do not place heavy objects on the Precautions system. • Do not place metal objects in front of On safety the front panel. - Page 54 On cleaning discs, disc/lens On BLUETOOTH communication cleaners • BLUETOOTH devices should be used within approximately 10 meters Do not use cleaning discs or disc/lens (unobstructed distance) of each other. cleaners (including wet or spray The effective communication range types). These may cause the may become shorter under the apparatus to malfunction.
-
Page 55: Notes About Discs
• Do not stick paper or tape on the disc. always be careful when performing communication using BLUETOOTH technology. • Sony cannot be held liable in any way for damages or other loss resulting from information leaks during • Do not expose the disc to direct... -
Page 56: Troubleshooting
The system does not work normally. “D. LOCK” appears in the top panel t Disconnect the AC power cord display. (mains lead) from the wall outlet t Contact your nearest Sony dealer or (mains), then reconnect after local authorized Sony service several minutes. facility. - Page 57 The dark area of the picture is too dark/ the entire TV screen. the bright area is too bright or t Contact your nearest Sony dealer or unnatural. local authorized Sony service t Set [Picture Quality Mode] to [Auto] facility.
- Page 58 The Super Audio CD sound of an Distortion occurs in the sound of a equipment that is connected to the connected equipment. HDMI (IN 1) or HDMI (IN 2) jack is not t Reduce the input level for the output. connected equipment by setting t HDMI (IN 1) and HDMI (IN 2) does not [Attenuation settings - AUDIO]...
- Page 59 Picture/sound quality may be t Try using the BD’s or DVD’s menu. improved by changing the t Multilingual tracks/subtitles or connection speed. Sony multi-angles are not recorded on recommends a connection speed of the BD or DVD being played.
- Page 60 t Check the following and refer to the t Depending on the usage operating instructions supplied with environment, including the wall the equipment. material, radio wave reception • The connected equipment is conditions, or obstacles between compatible with the [Control for the system and the wireless LAN HDMI] function.
-
Page 61: Playable Discs
Connecting cannot be done. t The pairing registration information Playable Discs has been erased. Perform the pairing operation again (page 28). Blu-ray Disc BD-ROM There is no sound. BD-R/BD-RE t Make sure this main unit is not too 3)4) far from the BLUETOOTH device, or DVD-ROM DVD-R/DVD-RW this system is not receiving... -
Page 62: Playable Types Of Files
Notes on discs Playable Types of Files This product is designed to play back discs that conform to the Compact Disc (CD) standard. Video DualDiscs and some music discs encoded with copyright protection Codec Container Extension technologies do not conform to the MPEG-1 Video .mpg, Compact Disc (CD) standard. - Page 63 Codec Extension Note *6*12 DSDIFF .dff • Some files may not play depending on the file format, the file encoding, the AIFF .aiff, .aif recording condition, or DLNA server ALAC .m4a condition. • Some files edited on a PC may not play. Photo •...
-
Page 64: Supported Audio Formats
Supported Audio Specifications Formats Amplifier Section POWER OUTPUT (rated) Audio formats supported by this system Front L/Front R: are as follows. 125 W + 125 W (at 6 ohms, 1 kHz, 1% THD) Function POWER OUTPUT (reference) Front L/Front R: Format “BD/DVD”... - Page 65 BLUETOOTH Section Speakers Communication system Front (SS-TSB135) BLUETOOTH Specification version 3.0 Dimensions (w/h/d) (approx.) Output 100 mm × 450 mm × 57 mm (without BLUETOOTH Specification Power stand) Class 2 147 mm × 455 mm × 147 mm (with Maximum communication range stand) Line of sight approx.
-
Page 66: Language Code List
Code Language Code Language Language Code List 1157 Persian 1516 Swedish 1428 Polish 1532 Tagalog 1436 Portuguese 1527 Tajik The language spellings conform to the 1417 Punjabi 1521 Tamil ISO 639: 1988 (E/F) standard. 1463 Quechua 1540 Tatar 1481 Rhaeto- 1525 Telugu Code Language... - Page 67 Parental Control/Area Code List Code Area Code Area 2044 Argentina 2333 Luxembourg 2047 Australia 2363 Malaysia 2046 Austria 2362 Mexico 2057 Belgium 2376 Netherlands 2070 Brazil 2390 New Zealand 2090 Chile 2379 Norway 2092 China 2427 Pakistan 2093 Colombia 2424 Philippines 2115 Denmark...
-
Page 68: Index
Index Numerics 3D 26 Dimmer 42 3D Output Setting 45 DLNA 33, 52 Dolby Digital 37 DTS 37 DVD 61 A/V SYNC 36 DVD Aspect Ratio 46 Attenuation settings - AUDIO 48 DVD Parental Control 49 Audio DRC 48 DVD-ROM 24p Output 46 Audio Language 48 Audio Output 48 Audio Return Channel 50... - Page 69 Language Code List 66 SBM 47 Screen Format 46 Screen mirroring 29, 31 Screen Saver 50 Multiplex broadcast sound 37 Screen Settings 45 Music Settings 49 SLEEP 41 Slideshow 36 Software License Information 51 Network Connection Diagnostics 52 Software Update 45 Network Settings 51 SongPal 32 NFC 30...
- Page 72 The software of this system may be updated in the future. To find out details on any available updates, please visit the following URL. http://support.sony-europe.com/ ©2014 Sony Corporation Printed in Malaysia...