
Related Manuals for Fujitsu PRIMERGY BX920 S4

Summary of Contents for Fujitsu PRIMERGY BX920 S4
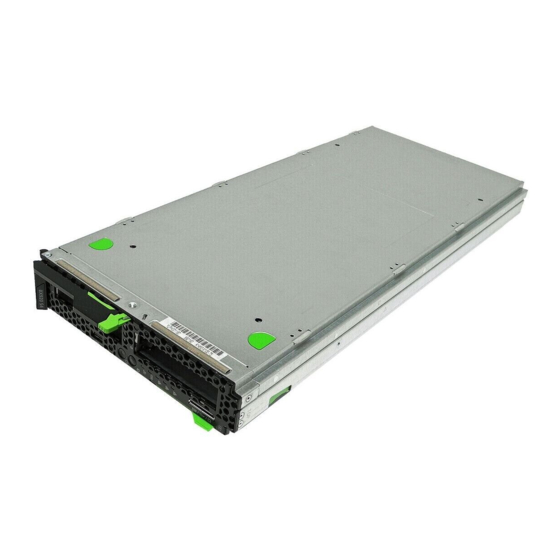
- Page 1 Operating Manual - English PRIMERGY BX920 S4 Server Blade Operating Manual November 2013...
- Page 2 – The contents of this manual may be revised without prior notice. – Fujitsu assumes no liability for damages to third party copyrights or other rights arising from the use of any information in this manual. – No part of this manual may be reproduced in any without the prior written permission of Fujitsu.
- Page 3 Before reading this manual For your safety This manual contains important information for safely and correctly using this product. Carefully read the manual before using this product. Pay particular attention to the accompanying manual "Safety Notes and Regulations" and ensure these safety notes are understood before using the product.
- Page 4 Please consult the sales staff of Fujitsu if intending to use this product for high safety use. Measures against momentary voltage drop This product may be affected by a momentary voltage drop in the power supply caused by lightning.
- Page 5 Only for the Japanese market: Although described in this manual, some sections do not apply to the Japanese market. These options and routines include: – CSS (Customer Self Service) Operating Manual BX920 S4...
- Page 6 Operating Manual BX920 S4...
-
Page 7: Table Of Contents
Contents Introduction ......9 Concept and target groups for this manual ..9 Documentation overview . - Page 8 Contents Starting up and operation ....47 Control and display elements ....47 Switching the Server Blade on and off .
-
Page 9: Introduction
This operating manual is intended for those responsible for installing the hardware and ensuring that the system runs smoothly. It contains all the information you need to put your PRIMERGY BX920 S4 server blade into operation. To understand the various expansion options, you will need to be familiar with the fields of hardware and data transmission and you will require a basic knowledge of the underlying operating system. -
Page 10: Documentation Overview
Introduction Documentation overview More information on your PRIMERGY BX920 S4 server blade can be found in the following documents: – "ServerView Quick Start Guide" – "Safety Notes and Regulations" manual " 安全上のご注意 " for the Japanese market – "Warranty" manual "... -
Page 11: Notational Conventions
Introduction – Documentation for the boards and drives – Operating system documentation – Information files in your operating system Notational conventions The following notational conventions are used in this manual: Text in italics indicates commands or menu items. "Quotation marks" indicate names of chapters and terms that are being emphasized. - Page 12 Introduction Operating Manual BX920 S4...
-
Page 13: Functional Overview
Functional overview The PRIMERGY BX920 S4 server blade is an Intel-based dual-socket server blade. It is ideal for use in data centers belonging to enterprises or Internet service providers, and makes an excellent large application server, terminal server for compute-intensive applications or DBMS server. - Page 14 Functional overview Further information on the CSS concept is provided in the "PRIMERGY ServerView Suite Local Service Concept - LSC" manual on the Fujitsu manuals server. For the latest information on optional products provided for the BX920 S4 Server Blade see the configurator of the server: http://ts.fujitsu.com/products/standard_servers/index.html...
- Page 15 Functional overview Each HDD/SSD module can accommodate an SAS/SATA hard disk drive or an SAS/SATA SSD drive. The module is connected to the SAS/SATA backplane wirelessly. This allows HDD/SSD modules to be plugged in or pulled out easily. Two SAS/SATA hard disk drives or SAS/SATA SSD drives can be controlled by the onboard SAS/SATA controller.
- Page 16 Functional overview For more information on configuring the controller, see section "Configuring the SAS/SATA RAID controller" on page Slots for expansion cards The server blade supports two optional mezzanine cards. This enables Fibre Channel connections, Infiniband connections and/or additional Ethernet connections to be implemented.
- Page 17 ASR&R (Automatic Server Reconfiguration and Restart) restarts the system in the event of an error and automatically "hides" the defective system components. The PDA (Prefailure Detection and Analyzing) technology from Fujitsu Technology Solutions analyzes and monitors all components that are critical for system reliability.
- Page 18 Server management is implemented using the ServerView Operations Manager supplied and the PDA (Prefailure Detection and Analysis) technology from Fujitsu. PDA reports the threat of a system error or overload at an early stage, allowing preventive measures to be taken.
- Page 19 Functional overview The ServerView Operations Manager enables the management of all PRIMERGY servers in the network via a central console. The ServerView Operations Manager supports the following functions: Round-the-clock monitoring, regardless of server status ● High-performance, graphical console bypass (AVR) protected by ●...
-
Page 20: Server Specification
Functional overview Server specification This section explains the specifications for the server blade. The specifications for this server blade are liable to be updated without any notice. Please be forewarned. System Board System board type D3142-B100 ® Chipset Intel C600 Processor ®... - Page 21 Functional overview Onboard or integrated controllers RAID Controller Modular RAID 5/6 controller with "MegaRAID functionality" (SAS MegaRAID) for SAS1.0 and SAS2.0. RAID levels 0, 1, 10, 1E, 5, 50, 6 and 60 are supported for internal hard disk drive configurations. SAS/SATA Controller A 6-port SAS/SATA controller is integrated on the system board;...
- Page 22 Functional overview Operating panel Operating buttons On/off button ID button Status LEDs Power indicator (orange / yellow / green) ID indicator (blue) Global error indicator (orange) CSS indicator (yellow) I/O indicator: fabric 1 (green) I/O indicator: fabric 2 (green) I/O indicator: fabric 3/4 (green) Dimensions / Weight Width 45 mm...
- Page 23 Functional overview Electrical specifications Power consumption 409 W (full configuration) Thermal dissipation 1.472 kJ/h Compliance with regulations and standards Product safety and ergonomics International IEC 60950-1 2ed; am1 Europe Safety EN 60950-1 2ed.; am1 EN 50371 EN 50392 Ergonomics ISO 9241-3 EN 2941-3 EK1-ITB2000:2013 USA / Canada...
- Page 24 Functional overview Certification Product safety approved with the system unit Global Germany GS, CE USA/Canada /CSA Japan VCCI China/Taiwan BSMI Operating Manual BX920 S4...
-
Page 25: Installation Steps, Overview
Installation steps, overview This chapter contains an overview of the steps necessary to install your Server Blade. The cross-references take you to the sections containing more detailed information on the relevant installation step: Ê First read the chapter "Important information" on page 27, particularly the section "Safety instructions". - Page 26 "ServerView Installation Manager" user guide. You can find a description of how to clone server blades in the ServerView Deployment Manager user guide (on the Fujitsu manuals server under Industry Standard Servers - Software - ServerView Suite - Server Installation and Deployment).
-
Page 27: Important Information
Important information This chapter provides safety instructions which you must observe when handling your server. Safety instructions The following safety instructions are also provided in the manual "Safety Notes and Regulations" or " 安全上のご注意 ". This device meets the relevant safety regulations for IT equipment. If you have any questions about whether you can install the server in the intended environment, please contact your sales outlet or our customer service team. - Page 28 Important information Before starting up CAUTION! During installation and before operating the device, observe the ● instructions on environmental conditions for your device (see "Server specification" on page 20). If the server has been moved from a cold environment, condensation ●...
- Page 29 Important information CAUTION! In emergencies (e.g. damaged casing, control elements or power ● cable, penetration of liquids or foreign bodies), switch off the device immediately, unplug it from the grounded power outlets, and contact your customer service center. Proper operation of the device (in accordance with IEC 60950- ●...
- Page 30 ● concerning special waste. Replace the lithium battery on the system board in accordance with ● the instructions in the "PRIMERGY BX920 S4 Server Blade Upgrade and Maintenance Manual". All batteries containing pollutants are marked with a symbol (a ●...
- Page 31 Important information Under certain circumstances, sharp CD/DVD/BD fragments can pierce the cover of the optical drive (equipment damage) and can fly out of the device (danger of injury, particularly to uncovered body parts such as the face or neck). High humidity and airborne dust levels are to be avoided. Electric ●...
- Page 32 Important information To avoid dust, damage, and deformation, keep the CD/DVD/BD in its ● case whenever it is not in use. Do not store CDs/DVDs/BDs at high temperatures. Areas exposed to ● prolonged direct sunlight or near heating appliances are to be avoided.
-
Page 33: Ce Conformity
Important information Switch off the system and remove the power plugs from the power outlets ● before installing or removing components with ESDs. You must always discharge static build-up (e.g. by touching a grounded ● object) before working with such components. Any devices or tools that are used must be free of electrostatic charge. -
Page 34: Fcc Class A Device
Important information FCC class A device Warning! This is a class A product, which may cause radio interference in a domestic environment. If this is the case, the user may be required to take adequate measures. Transporting the Server Blade CAUTION! Only transport the server blade in its original packaging or in suitable packaging which protects it from knocks and jolts. -
Page 35: Environmental Protection
Important information Environmental protection Environmentally-friendly product design and development This product has been designed in accordance with the Fujitsu standard for "environmentally friendly product design and development". This means that key factors such as durability, selection and labeling of materials, emissions, packaging, ease of dismantling and recycling have been taken into account. - Page 36 Details regarding the return and recycling of devices and consumables within Europe can also be found in the "Returning used devices" manual, via your local Fujitsu branch or from our recycling center in Paderborn: Fujitsu Technology Solutions Recycling Center D-33106 Paderborn Tel.
-
Page 37: Hardware Installation
Hardware installation CAUTION! Follow the safety instructions in the chapter "Important information" ● on page Do not expose the server to extreme environmental conditions (see ● "Ambient conditions" on page 22). Protect the server from dust, humidity and heat. Make sure that the server is acclimatized for the time indicated in this ●... -
Page 38: Unpacking The Server Blade
Hardware installation Unpacking the server blade CAUTION! Follow the safety instructions in chapter "Important information" on page Do not unpack the server blade until it is at its installation location. Ê Transport the server blade to the place where you want to set it up. Ê... - Page 39 Hardware installation To add a server blade, you must first remove a dummy module from the relevant slot. Figure 2: Removing the server blade dummy module Ê Pull up the handle of the dummy module (arrow) to unlock it. Ê Pull the dummy module out of the slot. CAUTION! Keep the dummy module for future use.
- Page 40 Hardware installation Installing the server blade CAUTION! Follow the safety instructions and information in section "Modules with Electrostatic-Sensitive Devices" on page Figure 3: Installing the server blade Ê Open the release lever. Ê Push the server blade as far as possible into the slot. Operating Manual BX920 S4...
- Page 41 Hardware installation Figure 4: Locking the server blade Ê Push the release lever up until it engages. Removal is carried out in reverse order. CAUTION! If you remove a server blade and do not replace it with a new one, you must install a dummy module to comply with the regulations regarding electromagnetic compatibility and to ensure sufficient cooling of the system components.
-
Page 42: Connecting Devices
Hardware installation Connecting devices All connections that are required to operate the server blade are made via the midplane of the system unit. When the server blade is installed, midplane contacts automatically establish connections to the infrastructure modules on the rear of the system unit: –... -
Page 43: Instructions For Connecting/Disconnecting Cables
Hardware installation Figure 5: Ports on the front USB connector (2x) Y-cable connector on the server blade VGA connector Front USB port Plug connection to the server blade. The labeled side of the plug must face left when plugged in. The Y-cable is delivered with the system unit. - Page 44 Hardware installation When removing a cable, always hold it by the plug. Never unplug a cable by pulling at the cable itself. Connect and disconnect the cables in the order described below. Connecting cables For peripherals like keyboard, mouse, display, optical drive, etc. Advanced Video Redirection and Virtual Media connection by iRMC is recommended.
- Page 45 Hardware installation Using the Y-cable When engaging between the Y-cable connector and the server blade connector is strong, and the Y cable is detached as it is, the Y-cable connector might be damaged. Therefore, please remove the Y-cable as follows. Procedure for detaching the Y-cable While strongly pushing the hook of the Y-cable connector (server blade side : 2 points),...
- Page 46 Hardware installation Figure 7: BX400 S1 system unit (floorstand version) Important You may find it difficult to remove the Y-cable because the load hangs in the ● join with the Y-cable connector. Therefore make sure it is straight when you remove it. Do not leave a Y-cable connected.
-
Page 47: Starting Up And Operation
Starting up and operation CAUTION! Follow the safety instructions in the chapter "Important information" on page Control and display elements Figure 8: Control and display elements ID card CSS indicator I/O indicator: fabric 3/4 Global Error indicator I/O indicator: fabric 2 ID button with ID indicator I/O indicator: fabric 1 On/Off button with power indicator... - Page 48 Starting up and operation Control elements On/Off button When the server blade is switched off, it can be switched on again by pressing the On/Off button. When the server blade is operating, pressing the On/Off button will switch off the server blade . CAUTION! Risk of loss of data! The On/Off button does not disconnect the server blade from...
- Page 49 Starting up and operation Global Error indicator (orange) – Lights up orange if a prefailure event has been detected that requires (precautionary) service intervention. – Flashes orange if an error was detected that requires service intervention. – Does not light up if there is no critical event. If the event is still acute after a power failure, the indicator is activated after the restart.
- Page 50 Starting up and operation I/O indicators* (green) – Lights up to indicate a network connection. – Flashes to indicate an active network connection. – Does not light up if there is no network connection. * The three I/O fabrics of the server blade are: –...
-
Page 51: Switching The Server Blade On And Off
Starting up and operation Switching the Server Blade on and off CAUTION! If you switch the server blade on and flickering stripes appear on the connected monitor, switch the server blade off again immediately (see chapter "Troubleshooting and tips" on page 63). -
Page 52: Configuring The Server Blade
– "iRMC S4 - integrated Remote Management Controller" user’s guide (on the Fujitsu manuals server under Industry Standard Servers - Software - ServerView Suite - Out-Of-Band Management) Apart from this, the operating system installation is carried out in the same way as a local installation. -
Page 53: Preparation For Remote Installation To Use Advanced Video Redirection
Remote Management Controller" User's Guide (Industry Standard Servers - Software - ServerView Suite - Out-Of-Band Management on the Fujitsu manuals server. 1. The remote management terminal is connected to the network. The remote control terminal (e.g. PC) is connected to a network that can connect to the management blade. - Page 54 Remote Management Controller" User's Guide (chapter 3, “Configuring the iRMC S4” under Industry Standard Servers - Software - ServerView Suite - Out-Of-Band Management on the Fujitsu manuals server. Ê If you want to use AVR from the remote control terminal connected to the management LAN port of the management blade, the LAN port of the iRMC must be set to "Management...
-
Page 55: Configuring The Onboard Sas/Sata Controller
A separate utility is available to the controller for MegaRAID configuration. For further information, refer to the "SAS Software User’s Guide" (on the Fujitsu manuals server under Industry Standard Servers - Expansion Cards - Storage Adapters - LSI Configuration Software) Further information on modular RAID controllers is provided in the "Modular RAID Controller Installation Guide"... -
Page 56: Configuring The Onboard Cna Controller
A separate utility is available to the controller for MegaRAID configuration. For further information, refer to the "SAS Software User’s Guide" (on the Fujitsu manuals server under Industry Standard Servers - Expansion Cards - Storage Adapters - LSI Configuration Software). - Page 57 The software that can be installed depends on your server’s hardware configuration. This configuration is detected automatically. Descriptions of operating systems not covered in the RAID controller manual are provided in the corresponding readme files under: http://www.fujitsu.com/global/services/computing/server/ia/driver/index.html (for the EMEA market). http://jp.fujitsu.com/platform/server/primergy/downloads/ (for the Japanese market).
-
Page 58: Configuring The Server And Installing The Operating System Without Serverview Installation Manager
Starting up and operation 6.3.7 Configuring the server and installing the operating system without ServerView Installation Manager Configuring the onboard SAS/SATA controller Configure the controller as described in section "Configuring the onboard SAS/SATA controller" on page Configuring the SAS/SATA RAID controller with "MegaRAID functionality" Configure the controller as described in section "Configuring the SAS/SATA RAID controller"... -
Page 59: Cleaning The Server Blade
Starting up and operation Cleaning the Server Blade CAUTION! Switch off the server blade and remove it from the system unit (see page 40). Do not clean any interior parts of the server blade yourself; leave this job to a service technician. Do not use abrasive powder or detergents which dissolve plastic to clean the housing exterior. - Page 60 Starting up and operation Operating Manual BX920 S4...
-
Page 61: Property And Data Protection
By combining these options, you can also achieve optimum protection for your system. A detailed description of the Security menu and how to assign passwords can be found in the BIOS Setup documentation on the Fujitsu manuals server. Preventing unauthorized BIOS Setup calls You can activate this protection by entering a setup password in the Security menu. - Page 62 Property and data protection Operating Manual BX920 S4...
-
Page 63: Troubleshooting And Tips
Troubleshooting and tips CAUTION! Follow the safety instructions in the "Safety notes and regulations" manual or " 安全上のご注意 " and in chapter "Important information" on page If a fault occurs, attempt to resolve it using the measures described: – in this chapter, –... -
Page 64: Flickering Stripes On Monitor Screen
Troubleshooting and tips Ê Deactivate screen saver. Enter the appropriate password. Brightness control is set to dark Ê Set the brightness control on the monitor to light. For detailed information, refer to the operating manual supplied with your monitor. Power cable or monitor cable not connected Ê... -
Page 65: No Screen Display Or Display Drifts
If the date and time are still wrong after the server has been switched off and back on again, replace the lithium battery (for a description refer to the PRIMERGY BX920 S4 Server Blade Upgrade and Maintenance Manual) or contact our customer service team. -
Page 66: Hard Disk Drive Error Messages At System Boot
Information is provided in the documentation for the RAID controller. Error message on screen The meaning of the error message is explained in the documentation for the relevant components and programs on the Fujitsu manuals server. Operating Manual BX920 S4...