Table of Contents
Table of Contents

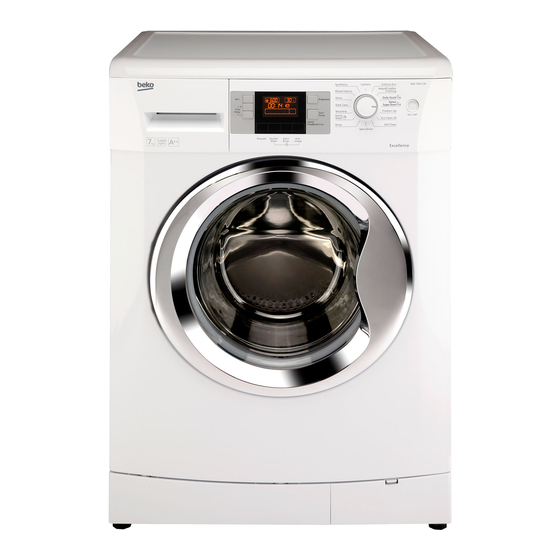
Related Manuals for Beko WM 7043 CW


Summary of Contents for Beko WM 7043 CW
- Page 1 Automatic washing machine WM 7043 CW...
- Page 2 Please read this user manual first! Dear Customer, We hope that you get the best results from the product which has been manufactured in state-of-the-art plants and passed through a strict quality control procedure. Therefore, please read the entire user manual carefully before using the product and keep it as a reference for future use.
-
Page 3: Table Of Contents
TABLE OF CONTENTS 1 Your washing machine Main programmes ....19 Additional programmes ... . 19 Overview . -
Page 4: Your Washing Machine
Your washing machine Overview 1- Power cable 5- Adjustable feet 2- Top panel 6- Loading door 3- Control panel 7- Detergent drawer 4- Filter cap 8- Drain hose... -
Page 5: Technical Specifications
Technical specifications WM7043CW Models (EN) Maximum dry laundry capacity (kg) Height (cm) Width (cm) Depth (cm) Net weight (±4 kg.) Electrical input (V/Hz) 230 V / 50Hz Total current (A) Total power (W) 2200 Spin speed (rpm max.) 1400 Stand-by mode power (W) 1.40 Off-mode power (W) 0.20... -
Page 6: Important Safety Instructions
Important safety instructions This section contains safety instructions with the values in the "Technical that will help protect from risk of personal specifications" table. Do not neglect injury or property damage. Failure to to have the grounding installation follow these instructions shall void any made by a qualified electrician. -
Page 7: Children's Safety
used out of its intended use. • The product must only be used for washing and rinsing of laundry that are marked accordingly. • The manufacturer waives any responsibility arisen from incorrect usage or transportation. Children's safety • Electrical products are dangerous for the children. -
Page 8: Installation
Installation Removing packaging Refer to the nearest Authorised Service Agent for installation of the product. To reinforcement make the product ready for use, review Tilt the machine backwards to remove the information in the user manual and the packaging reinforcement. Remove make sure that the electricity, tap water the packaging reinforcement by pulling supply and water drainage systems are... -
Page 9: Connecting Water Supply
3. Attach the plastic covers supplied in inlet. the User Manual bag into the holes on the rear panel. (P) Keep the transportation safety bolts in a safe place to reuse when the washing machine needs to be moved Ensure that the cold and hot water again in the future. -
Page 10: Adjusting The Feet
• The hose should be attached to a height of at least 40 cm, and 100 cm at most. • In case the hose is elevated after laying it on the floor level or close to the ground (less than 40 cm above the ground), water discharge becomes more difficult and the laundry may come out excessively... -
Page 11: First Use
Amps, have a qualified electrician the terminals on your plug, proceed as install a 13 Amp fuse. follows: • The specified voltage must be equal Connect the green - yellow or green to your mains voltage. (earth) wire to the terminal in the plug marked ‘E’... -
Page 12: Disposing Of Packaging Material
Disposing of the old product starting the programme, put max. 100 g of powder anti-limescale into the Dispose of the old product in an main wash detergent compartment environmentally friendly manner. (compartment nr. II). If the anti-limescale Refer to your local dealer or solid waste is in tablet form, put only one tablet into collection centre in your area to learn compartment nr. -
Page 13: Preparation
Preparation Things to be done for energy saving Following information will help you use the product in an ecological and energy- Wash with sensitive, Washing water efficient manner. .short programmes temperature • Operate the product in the highest capacity allowed by the programme you have selected, but do not overload;... -
Page 14: Correct Load Capacity
Correct load capacity The maximum load capacity depends on the type of laundry, the degree of soiling and the washing programme desired. The machine automatically adjusts the amount of water according to the weight of the loaded laundry. Follow the information in the “Programme and consumption table”. -
Page 15: Using Detergent And Softener
Using detergent and softener wool shampoo, etc.) used solely for delicate clothes. Detergent Drawer • When washing dark coloured clothes The detergent drawer is composed of and quilts, it is recommended to use three compartments: liquid detergent. - (1) for prewash •... - Page 16 encounter such a case, place the tablet detergent between the laundry, close to the lower part of the drum in future washings. Use the tablet or gel detergent without selecting the prewash function. Using starch • Add liquid starch, powder starch or the dyestuff into the softener compartment as instructed on the package.
-
Page 17: Tips For Efficient Washing
Using limescale remover • When required, use limescale removers manufactured specifically for washing machines only. • Always follow instructions on the package. Tips for efficient washing Clothes Light colours and Delicates/ Colors Dark colors whites Woolens/Silks (Recommended (Recommended (Recommended (Recommended temperature temperature temperature range... -
Page 18: Operating The Product
Operating the product Control panel Spin Speed Adjustment button Display Temperature Adjustment button Programme Selection knob On / Off button Delayed Start buttons (+ / -) Auxiliary Function buttons Start / Pause / Cancel button Display symbols - Spin Speed indicator - Temperature indicator - Spin symbol - Temperature symbol... -
Page 19: Preparing The Machine
Preparing the machine • Synthetics Use this programme to wash your 1. Make sure that the hoses are synthetic clothes (shirts, blouses, connected tightly. synthetic/cotton blends, etc.). It washes 2. Plug in your machine. with a gentle action and has a shorter 3. -
Page 20: Temperature Selection
• Hand wash compartment II. When the programme is over, leave the loading door ajar so that Use this programme to wash your the inside of the machine gets dry. woolen/delicate clothes that bear “not machine- washable” tags and for which This is not a washing programme. -
Page 21: Spin Speed Selection
If you scroll to cold wash option and press Temperature Adjustment button again, the recommended temperature for the selected programme appears on the display. Press the Temperature Adjustment button again to decrease the temperature. Economy symbol Indicates the programmes and temperatures that provide energy savings. -
Page 22: Programme And Consumption Table
Programme and consumption table Auxiliary functions Selectable Programme (°C) temperature range °C Cottons 2.30 1600 • • • • • • 90-Cold Cottons 1.50 1600 • • • • • • 90-Cold Cottons 0.85 1600 • • • • • •... -
Page 23: Auxiliary Function Selection
Auxiliary function selection • Quicker Wash This function can be used in Cottons and Select the desired auxiliary functions Synthetics programmes. It decreases the before starting the programme. washing times and also the number of Furthermore, you may also select or rinsing steps for lightly soiled laundry. -
Page 24: Time Display
• PHR (Pet hair removal) 4. Press Start / Pause / Cancel button. Delayed start countdown starts. This function helps to remove pet hair Delayed Start symbol illuminates that remain on your garments more steadily. Start symbol appears. “:” effectively. sign in the middle of the delayed start When you select this function, Prewash time on the display starts flashing. -
Page 25: Starting The Programme
Starting the programme Loading door lock 1. Press Start / Pause / Cancel button There is a locking system on the loading to start the programme. door of the machine that prevents opening of the door in cases when the 2. -
Page 26: Child Lock
5. Make changes in auxiliary functions, flashes. Symbol of the step at which temperature and speed settings if the programme was cancelled remains necessary. lit. "End" appears on the display and the programme is cancelled. 6. Press Start / Pause / Cancel button to start the machine. -
Page 27: Maintenance And Cleaning
Maintenance and cleaning is in tablet form, put only one tablet into Service life of the product extends and compartment nr. II. Dry the inside of the frequently faced problems decrease if bellow with a clean piece of cloth after cleaned at regular intervals. -
Page 28: Draining Remaining Water And Cleaning The Pump Filter
To avoid burning risk, filter must be cleaned after the water in the machine cools down. 2. Open the filter cap. If the filter cap is composed of two pieces, press the tab on the filter cap downwards and pull the piece out towards yourself. - Page 29 at the end of the hose. When the container is full, block the inlet of the hose by replacing the plug. After the container is emptied, repeat the above procedure to drain the water in the machine completely. c. When draining of water is finished, close the end by the plug again and fix the hose in its place.
-
Page 30: Troubleshooting
Troubleshooting Programme cannot be started or selected. • Washing machine has switched to self protection mode due to a supply problem (line voltage, water pressure, etc.). >>> Press and hold Start / Pause / Cancel button for 3 seconds to reset the machine to factory settings. (See "Cancelling the programme") Water in the machine. - Page 31 Loading door cannot be opened. • Door lock is activated because of the water level in the machine. >>> Drain the water by running the Pump or Spin programme. • Machine is heating up the water or it is at the spinning cycle. >>> Wait until the programme completes.
- Page 32 Machine does not switch to spinning step. • There might be an imbalance of laundry in the machine. >>> Automatic unbalanced load detection system might be activated due to the unbalanced distribution of the laundry in the drum. Machine does not switch to spinning step when the laundry is not evenly distributed in the drum to prevent any damage to the machine and to its surrounding environment.
- Page 33 Colour of the clothes faded. • Excessive laundry was loaded in. >>> Do not load the machine in excess. • Detergent in use is damp. >>> Keep detergents closed in an environment free of humidity and do not expose them to excessive temperatures. •...
- Page 34 Detergent residue in the detergent drawer. • Detergent is put in wet drawer. >>> Dry the detergent drawer before putting in detergent. • Detergent has gotten damp. >>> Keep detergents closed in an environment free of humidity and do not expose them to excessive temperatures. •...
- Page 35 Laundry remains wet at the end of the programme • Excessive foam might have occurred and automatic foam absorption system might have been activated due to too much detergent usage. >>> Use recommended amount of detergent. Machine does not switch to spinning step when the laundry is not evenly distributed in the drum to prevent any damage to the machine and to its surrounding environment.
-
Page 36: Guarantee
Guarantee Your new Beko product is guaranteed • The product must be correctly against the cost of breakdown repairs installed, located and operated in for twenty-four months from the date of accordance with the instructions the original purchase. contained in the User Instructions Booklet provided. -
Page 37: Service
Should you experience any difficulty in You should also complete the details obtaining service please contact the below; it will help us assist you when Beko Customer Help-Line. requesting service. (The model number Tel: 0845 600 4911 is printed on the Instruction Booklet e-mail:[email protected]...