Table of Contents
Quick Links
TCD320FX(e).book Page 1 Tuesday, January 18, 2005 1:25 PM
Operating Instructions
Digital Cordless Answering System
KX-TCD320FX
Model No.
This unit is compatible with Caller ID and SMS. To use these
features, you must subscribe to the appropriate service of your
service provider.
Charge the batteries for about 7 hours before initial use.
Please read these operating instructions before using the unit and save them for
future reference.
Table of Contents

Related Manuals for Panasonic KX-TCD320FX


Summary of Contents for Panasonic KX-TCD320FX
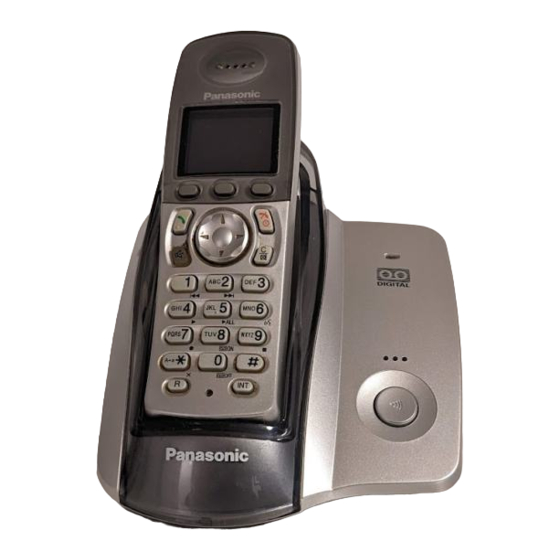
- Page 1 TCD320FX(e).book Page 1 Tuesday, January 18, 2005 1:25 PM Operating Instructions Digital Cordless Answering System KX-TCD320FX Model No. This unit is compatible with Caller ID and SMS. To use these features, you must subscribe to the appropriate service of your service provider.
- Page 2 L In the event of problems, you should contact your equipment supplier in the first instance. Declaration of Conformity: L Panasonic Communications Co., Ltd. declares that this equipment is in compliance with the essential requirements and other relevant provisions of Radio & Telecommunications Terminal Equipment (R&TTE) Directive 1999/5/EC.
- Page 3 TCD320FX(e).book Page 3 Tuesday, January 18, 2005 1:25 PM Feature highlights Feature highlights Colour display The handset’s colour display allows you to customise the handset to your liking. You can customise the handset by selecting the “wallpaper” pattern shown on the display in standby mode (page 27). If you set the wallpaper to “Off”, the display colour (page 27) setting will be used instead.
- Page 4 TCD320FX(e).book Page 4 Tuesday, January 18, 2005 1:25 PM Feature highlights SMS (Short Message Service) SMS allows you to send and receive text messages between other fixed- line and mobile phones that support compatible SMS networks and features. SMS features are available only after subscribing to Caller ID and/or appropriate service (page 39).
-
Page 5: Table Of Contents
TCD320FX(e).book Page 5 Tuesday, January 18, 2005 1:25 PM Table of Contents Preparation SMS (Short Message Service) Accessory information ....6 Important information ....7 Using SMS (Short Message Service). -
Page 6: Accessory Information
TCD320FX(e).book Page 6 Tuesday, January 18, 2005 1:25 PM Preparation Accessory information Included accessories AC adaptor Telephone line cord Rechargeable batteries PQLV19CE AAA (R03) size HHR-4EPT Handset cover Operating instructions Quick guide Additional/replacement accessories Model No. Description P03P 2 rechargeable nickel metal hydride (Ni-MH) batteries KX-TCA130FX Additional handset KX-A272... -
Page 7: Important Information
TCD320FX(e).book Page 7 Tuesday, January 18, 2005 1:25 PM Preparation Location Important information L For maximum distance and noise-free operation, place your base unit: General – Away from electrical appliances such as L Use only the AC adaptor included with this TVs, radios, personal computers or product, noted on page 6. -
Page 8: Controls And Displays
TCD320FX(e).book Page 8 Tuesday, January 18, 2005 1:25 PM Preparation L {C/T} (Clear/Mute) Controls and displays M {INT} (Intercom) N Microphone Controls Note: L Up to 3 menu items can be displayed at a time. To select a menu item not shown on Handset the current page, scroll up or down by pressing the navigator key, {e} or {v},... - Page 9 TCD320FX(e).book Page 9 Tuesday, January 18, 2005 1:25 PM Preparation Display Meaning Display Meaning icon icon Handset is accessing base SMS memory is full. (SMS unit. (intercom, paging, users only) changing base unit settings, Line is being used by etc.) another handset.
-
Page 10: Connections
TCD320FX(e).book Page 10 Tuesday, January 18, 2005 1:25 PM Preparation Soft key icons Connections Soft Action When the AC adaptor is connected, a short beep will be heard. If it is not heard, check icon the connections. Returns to the previous screen. -
Page 11: Battery Installation
TCD320FX(e).book Page 11 Tuesday, January 18, 2005 1:25 PM Preparation When the batteries are fully charged, 1 Battery installation flashes. Insert the batteries negative (T) terminal first. Close the handset cover. Note: L It is normal for the handset to feel warm during charging. -
Page 12: Turning The Power On/Off
After your Panasonic batteries are fully charged, you can expect the following Important: performance: L We recommend the use of Panasonic Ni-MH batteries (700 mAh) rechargeable batteries noted on page 6. If you install non-rechargeable batteries and Operation... -
Page 13: Screen Saver Mode
TCD320FX(e).book Page 13 Tuesday, January 18, 2005 1:25 PM Preparation Setting the date and time Important: L Confirm that the AC adaptor is connected. L Ensure that w is not flashing. If the handset is in screen saver mode, w is not displayed. -
Page 14: Making/Answering Calls
TCD320FX(e).book Page 14 Tuesday, January 18, 2005 1:25 PM Making/Answering Calls To redial the last number dialled Making calls Press q (right soft key), then press {C} or {s}. Lift the handset and dial the phone L If {s} is pressed, the unit will redial number. - Page 15 TCD320FX(e).book Page 15 Tuesday, January 18, 2005 1:25 PM Making/Answering Calls Select “Edit and Call”, then press Other features Press {<} or {>} to move the cursor, Voice enhancer then edit the number. You can change the tone quality of the L Place the cursor on the number you receiver while you are on a call.
-
Page 16: Answering Calls
TCD320FX(e).book Page 16 Tuesday, January 18, 2005 1:25 PM Making/Answering Calls L You can change the dialling mode R button (to use the recall feature) depending on your telephone line service {R} is used to access optional telephone (page 33). services. - Page 17 TCD320FX(e).book Page 17 Tuesday, January 18, 2005 1:25 PM Making/Answering Calls press {C}. To turn this feature on, see page 28. To adjust the ringer volume when an outside call comes in Press {e} or {v} when an outside call comes in.
-
Page 18: Phonebooks
TCD320FX(e).book Page 18 Tuesday, January 18, 2005 1:25 PM Phonebooks Categories Handset phonebook Categories can help you find entries in the handset phonebook quickly and easily. The handset phonebook allows you to make When adding an entry to the handset calls without having to dial manually. - Page 19 TCD320FX(e).book Page 19 Tuesday, January 18, 2005 1:25 PM Phonebooks Searching by first character (index Changing a name, phone number, search) category Press U (left soft key), then press Find the desired entry (page 18), then press $ (middle soft key). Select “Index Search”, then press Select “Edit”, then press ,.
- Page 20 TCD320FX(e).book Page 20 Tuesday, January 18, 2005 1:25 PM Phonebooks number from the handset phonebook by number or bank account PIN that you have simply pressing a dial key. stored in the handset phonebook, without having to dial manually. Find the desired entry (page 18), then press $ (middle soft key).
-
Page 21: Shared Phonebook
TCD320FX(e).book Page 21 Tuesday, January 18, 2005 1:25 PM Phonebooks L To change the audible call Shared phonebook announcement, press v, then repeat from step 6. The shared phonebook allows you to make Select “Save”, then press ,. calls without having to dial manually. Any Press {ih}. - Page 22 TCD320FX(e).book Page 22 Tuesday, January 18, 2005 1:25 PM Phonebooks Select the character entry mode that Select “Save”, then press ,. contains the character you are Press {ih}. searching for, and press ,. Press the dial key ({0} to {9}) which Playing back an audible call contains the character you are announcement...
-
Page 23: Copying Phonebook Entries
Find the desired handset phonebook Handset phonebook entries (page 18) can entry (page 18), then press $ be copied from the handset to the (middle soft key). phonebook of a compatible Panasonic Select “Copy”, then press ,. handset. Press {0}. Copying one entry To continue copying another entry, select “Yes”, then press ,. -
Page 24: Handset Settings
TCD320FX(e).book Page 24 Tuesday, January 18, 2005 1:25 PM Handset Settings Guide to handset settings For your reference, a chart of all items which can be customised for the handset is printed below. L When customising the handset, the current item or setting is highlighted. Handset settings Sub-menu Sub-menu 2... -
Page 25: Time Settings
TCD320FX(e).book Page 25 Tuesday, January 18, 2005 1:25 PM Handset Settings Time settings Ringer setup Alarm Ringer volume An alarm will sound for 3 minutes at the set Press $ (middle soft key). time once or daily. Set the date and time Select Y, then press ,. -
Page 26: Night Mode
TCD320FX(e).book Page 26 Tuesday, January 18, 2005 1:25 PM Handset Settings several seconds if the caller hangs up L If you use 12-hour time entry, select before you answer. You may hear a dial “AM” or “PM” by pressing {*} tone or no one on the line when you repeatedly before entering the time. -
Page 27: Display Setup
TCD320FX(e).book Page 27 Tuesday, January 18, 2005 1:25 PM Handset Settings Select “Ring Delay”, then press Select “Wallpaper”, then press ,. L The current wallpaper is displayed. Select the desired setting, then press Press {e} or {v} repeatedly to select the desired item, then press ,. -
Page 28: Call Options
TCD320FX(e).book Page 28 Tuesday, January 18, 2005 1:25 PM Handset Settings Note: Call options L If “Base Number” is selected and the current base unit number is 2, “-2-” is displayed. Turning call bar on/off L If “Handset Number” is selected and the This feature prohibits making outside calls. -
Page 29: Other Options
PIN. The unit will not reveal Select “On” or “Off”, then press ,. the PIN to you. If you forget your PIN, Press {ih}. consult your nearest Panasonic service Note: centre. L If keytones are turned off, error tones will Press $ (middle soft key). - Page 30 TCD320FX(e).book Page 30 Tuesday, January 18, 2005 1:25 PM Handset Settings L The following items will be retained: – Handset phonebook entries (category names, ringtones, and display colours will be reset to their default settings.) – Date and time...
-
Page 31: Base Unit Settings
TCD320FX(e).book Page 31 Tuesday, January 18, 2005 1:25 PM Base Unit Settings Guide to base unit settings For your reference, a chart of all items which can be customised for the base unit is printed below. L When customising the base unit, the current item or setting is highlighted. Base unit Sub-menu Sub-menu 2... -
Page 32: Ringer Setup
TCD320FX(e).book Page 32 Tuesday, January 18, 2005 1:25 PM Base Unit Settings Select “Ringer Setup”, then press Ringer setup Select “Night Mode”, then press Ringer volume Select “Start/End”, then press ,. Press $ (middle soft key). Enter the desired hour and minute you Select Z, then press ,. -
Page 33: Call Options
TCD320FX(e).book Page 33 Tuesday, January 18, 2005 1:25 PM Base Unit Settings If you select “No Ringing”, the base unit Changing the recall time will not ring during night mode. Change the recall time, if necessary, Press $ (middle soft key). depending on the requirements of your Select Z, then press ,. -
Page 34: Other Options
PIN. The unit will not reveal Select Z, then press ,. the PIN to you. If you forget your PIN, consult your nearest Panasonic service Enter “0000” (default base unit PIN). centre. L If you changed the PIN, enter it (page Press $ (middle soft key). - Page 35 TCD320FX(e).book Page 35 Tuesday, January 18, 2005 1:25 PM Base Unit Settings Enter the new 4-digit base unit PIN, then press ,. Press {ih}. Resetting the base unit to its default settings Press $ (middle soft key). Select Z, then press ,. Enter “0000”...
-
Page 36: Caller Id Service
TCD320FX(e).book Page 36 Tuesday, January 18, 2005 1:25 PM Caller ID Service you should view the caller list to see who Using Caller ID service called while you were out. Important: Category features for handset L This unit is Caller ID compatible. To use phonebook Caller ID features (such as displaying Categories can help you identify who is... -
Page 37: Caller List
TCD320FX(e).book Page 37 Tuesday, January 18, 2005 1:25 PM Caller ID Service Select the current setting of the category Editing a caller’s phone number colour, then press ,. before calling back Select the desired colour, then press Press $ (middle soft key). Press {ih}. - Page 38 TCD320FX(e).book Page 38 Tuesday, January 18, 2005 1:25 PM Caller ID Service Continue from step 3, “Adding entries to the handset phonebook”, page 18.
-
Page 39: Sms (Short Message Service)
TCD320FX(e).book Page 39 Tuesday, January 18, 2005 1:25 PM SMS (Short Message Service) Note: Using SMS (Short L If you try to send a message while SMS is turned off, a tone sounds and the Message Service) message is placed in the receive list with “FD”... -
Page 40: Sending A Message
TCD320FX(e).book Page 40 Tuesday, January 18, 2005 1:25 PM SMS (Short Message Service) L If your message contains over 160 Sending a message characters, the message is a long message and j is displayed. Your service provider may treat long messages Writing and sending a new differently from other messages. -
Page 41: Receiving A Message
TCD320FX(e).book Page 41 Tuesday, January 18, 2005 1:25 PM SMS (Short Message Service) Press $, select “Edit Message”, L To erase a message, press w, press ,, then continue from step 4, select “Yes”, then press ,. “Writing and sending a new message”, Press , to read the message page 40. -
Page 42: Guide To Sms Settings
TCD320FX(e).book Page 42 Tuesday, January 18, 2005 1:25 PM SMS (Short Message Service) Select “Erase”, then press ,. Note: L To erase all messages, select “Erase L If the base unit is reset to its default All”, then press ,. settings, the contents of the receive and send lists will be erased. -
Page 43: Available Character Entries For Sms
TCD320FX(e).book Page 43 Tuesday, January 18, 2005 1:25 PM SMS (Short Message Service) Available character entries for SMS Important: L For character entry when entering the name for phonebook, etc., see page 57. The dial keys are used to enter characters and numbers. Each dial key has multiple characters assigned to it. - Page 44 TCD320FX(e).book Page 44 Tuesday, January 18, 2005 1:25 PM SMS (Short Message Service) Alphabet character table (ABC) Numeric entry table (0-9) Greek character table (M) Extended character table (N) L The following are used for both uppercase and lowercase:...
-
Page 45: Answering System Features
TCD320FX(e).book Page 45 Tuesday, January 18, 2005 1:25 PM Answering System Features Recording a greeting message Answering system You can record your own greeting message (2 minutes and 30 seconds max.). This unit contains an answering system which can answer and record calls for you Press $ (middle soft key). -
Page 46: Listening To Messages
TCD320FX(e).book Page 46 Tuesday, January 18, 2005 1:25 PM Answering System Features stop flashing but will remain lit up when Erasing the greeting message the answering system is turned on. If you erase your own greeting message, the L While listening to messages, you can unit will play a prerecorded greeting switch between the receiver and speaker message for callers. -
Page 47: Recording A Voice Memo
TCD320FX(e).book Page 47 Tuesday, January 18, 2005 1:25 PM Answering System Features Note: L Messages are retained even if a power failure occurs. L To edit the number before calling back, select “Edit and Call”, press ,, edit the number, then press ,. Recording a voice memo To leave a private message for yourself or someone else, you can record up to 3... -
Page 48: Using Direct Commands
TCD320FX(e).book Page 48 Tuesday, January 18, 2005 1:25 PM Answering System Features Using direct commands Remote operation You can operate the answering system by Using a touch tone phone, you can call your pressing dial keys, rather than navigating phone number from outside and access the through the menus. - Page 49 TCD320FX(e).book Page 49 Tuesday, January 18, 2005 1:25 PM Answering System Features L If the number of rings is set to “Auto”, Remote commands (page 50), the number of rings you You can press dial keys to access certain hear will indicate whether or not you answering system functions without waiting have new messages.
-
Page 50: Guide To Answering System Settings
TCD320FX(e).book Page 50 Tuesday, January 18, 2005 1:25 PM Answering System Features L You can hang up, or enter your remote Select “Settings”, then press ,. access code again and begin remote Select “Number of Rings”, then operation. press ,. Select the desired setting, then press Guide to answering Press {ih}. - Page 51 TCD320FX(e).book Page 51 Tuesday, January 18, 2005 1:25 PM Answering System Features about once a minute until you have listened to all new messages. Press $ (middle soft key). Select u, then press ,. Select “Settings”, then press ,. Select “New Msg. Alert”, then press Select “On”...
-
Page 52: Multi-Unit Operation
TCD320FX(e).book Page 52 Tuesday, January 18, 2005 1:25 PM Multi-unit Operation Operating additional units Registering a handset to a base unit Additional handsets Up to 6 handsets can be registered to a To register an additional handset to a single base unit. Additional handsets will base unit (easy registration) give you the freedom to, for example, have The included handset and base unit are... - Page 53 TCD320FX(e).book Page 53 Tuesday, January 18, 2005 1:25 PM Multi-unit Operation Select “Select Base”, then press To register a handset to an additional base unit (manual registration) Select the desired base unit number, or You can register a handset to a base unit “Auto”, then press ,.
-
Page 54: Intercom Between Handsets
You can increase the range of the base unit by using a DECT repeater. Please use only When finished talking, press {ih}. the Panasonic DECT repeater noted on page 6. Consult your Panasonic dealer for details. Transferring calls Important: between handsets,... - Page 55 TCD320FX(e).book Page 55 Tuesday, January 18, 2005 1:25 PM Multi-unit Operation Example: When handset 1 transfers a call to handset 2 Handset 1: During an outside call, press {INT} and {2} (desired handset number). L The outside call will be put on hold. L If there is no answer, press {INT} to return to the outside call.
-
Page 56: Useful Information
TCD320FX(e).book Page 56 Tuesday, January 18, 2005 1:25 PM Useful Information Wall mounting 60 mm Screws Hooks Note: L Make sure the screws are securely fastened to the wall. L Do not pinch the telephone line cord and AC adaptor cord between the base unit and the wall. -
Page 57: Available Character Entries
TCD320FX(e).book Page 57 Tuesday, January 18, 2005 1:25 PM Useful Information Available character entries Important: L For character entry when writing SMS messages, see page 43. The dial keys are used to enter characters and numbers. Each dial key has multiple characters assigned to it. - Page 58 TCD320FX(e).book Page 58 Tuesday, January 18, 2005 1:25 PM Useful Information Alphabet character table (ABC) Numeric entry table (0-9) Greek character table (M) Extended 1 character table (N) L The following are used for both uppercase and lowercase:...
- Page 59 TCD320FX(e).book Page 59 Tuesday, January 18, 2005 1:25 PM Useful Information Extended 2 character table (O) L The following are used for both uppercase and lowercase: Cyrillic character table (P)
-
Page 60: Troubleshooting
TCD320FX(e).book Page 60 Tuesday, January 18, 2005 1:25 PM Useful Information Troubleshooting If you still have difficulties after following the instructions in this section, disconnect the AC adaptor and turn off the handset, then reconnect the AC adaptor and turn on the handset. Initial settings Problem Cause &... - Page 61 TCD320FX(e).book Page 61 Tuesday, January 18, 2005 1:25 PM Useful Information Telephone Problem Cause & solution I cannot make or receive calls. L The AC adaptor or telephone line cord is not connected. Check the connections. L If you are using a splitter to connect the unit, remove the splitter and connect the unit to the wall socket directly.
- Page 62 Cancel unused handset registrations from the base unit (page 53). L You entered the wrong PIN number. If you forget your PIN, consult your nearest Panasonic service centre. L Locate the handset and the base unit away from...
- Page 63 TCD320FX(e).book Page 63 Tuesday, January 18, 2005 1:25 PM Useful Information SMS (Short Message Service) Problem Cause & solution I cannot send or receive SMS L You have not subscribed to the appropriate service. messages. Consult your service provider. L The SMS message centre number(s) are not stored or are incorrect.
- Page 64 TCD320FX(e).book Page 64 Tuesday, January 18, 2005 1:25 PM Useful Information Problem Cause & solution I cannot operate the answering L Another handset user is using the answering system with the handset. system, SMS features, accessing the caller list or changing base unit settings.
-
Page 65: Specifications
TCD320FX(e).book Page 65 Tuesday, January 18, 2005 1:25 PM Useful Information Connections: Specifications The unit will not work during a power failure. We recommend you connect a standard telephone on the same line for power I Standard: protection. DECT (Digital Enhanced Cordless Telecommunications), GAP (Generic Access Profile) I Number of channels:... -
Page 66: Index
TCD320FX(e).book Page 66 Tuesday, January 18, 2005 1:25 PM Index Additional handsets: 52 Index Cancelling: 53 Locator: 17 PIN: 29 A Alarm: 25 Power on/off: 12 Answering calls: 16 Registration: 52 Answering system: 45 Resetting: 29 Listening to messages: 46 Settings: 24 Remote operation: 48 Settings: 50... - Page 67 TCD320FX(e).book Page 67 Tuesday, January 18, 2005 1:25 PM Index Volume Receiver: 14 Ringer (Base unit): 32 Ringer (Handset): 25 Speakerphone: 14 W Wall mounting: 56 Wallpaper: 27...
- Page 68 3 Ping Xi 8 Lu, Nanping Keji Gongye Yuan, Zhuhai, Guangdong, China 519060 Copyright: This material is copyrighted by Panasonic Communications Co., Ltd., and may be reproduced for internal use only. All other reproduction, in whole or in part, is prohibited without the written consent of Panasonic Communications Co., Ltd.