
Related Manuals for KitchenAid KCO124


Summary of Contents for KitchenAid KCO124
- Page 1 KCO124 W11407666B.indb 1 W11407666B.indb 1 3/30/2020 6:38:04 PM 3/30/2020 6:38:04 PM...
-
Page 2: Parts And Features
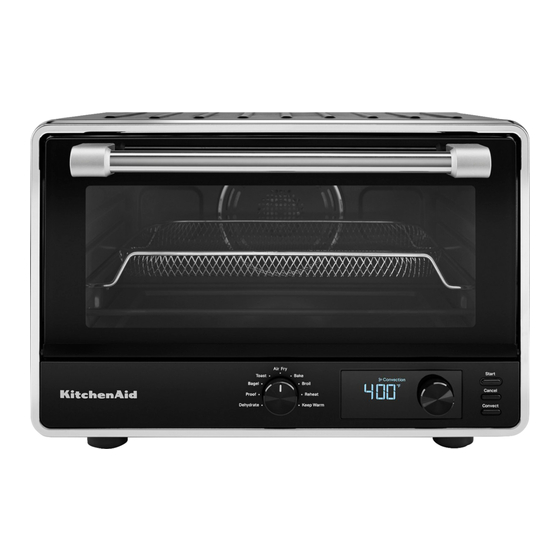
PARTS AND FEATURES Toughened glass window Temperature / Timer Knob Removable crumb tray Mode knob: Cooking mode selector Cool down surface for removable Preheating icon oven rack Shade icon Chrome-plated steel broiling rack Shade number graphic Enamel-coated pan Convection icon Chrome-plated steel oven rack Fahrenheit icon Door handle... -
Page 3: Product Safety
PRODUCT SAFETY IMPORTANT SAFEGUARDS When using electrical appliances, basic safety precautions should always be followed, including the following: 1. Read all instructions. 2. Do not touch hot surfaces. Use handles or knobs. 3. To protect against risk of electrical shock, do not put cord, plugs, or any parts of the Air Fryer in water or other liquid. -
Page 4: Electrical Requirements
PRODUCT SAFETY 14. Do not clean with metal scouring pads. Pieces can break off the pad and touch electrical parts, creating a risk of electric shock. 15. Extreme caution should be exercised when using containers constructed of materials other than metal or glass. 16. -
Page 5: Getting Started
GETTING STARTED Before first use, clean all parts and accessories (see “Care and Cleaning” section). Place the Air Fryer on a dry and flat level surface. Remove all packaging materials and labels, if present. Open the door and align the rack with the Make sure all sides are positioned with at grooves for desired positions least 4”... -
Page 6: Cooking Functions
GETTING STARTED TIME RECOMMENDATION - AIR FRY FUNCTION Food Portion Temperature Time Chicken Nuggets 1 Layer 425 °F (218 °C) 8 - 10 minutes Chicken Tenders 1 Layer 425 °F (218 °C) 13 - 15 minutes Chicken Wings 1 Layer 425 °F (218 °C) 18 - 20 minutes Fish Fillets... - Page 7 COOKING FUNCTIONS Preset Preset Cooking Rack Temperature Time Temp. Time Elements Run function Range °C (°F) Range °C (°F) (Mins.) 2 bottom; 150 °F 80 – 180 °F 1 min – 12 Dehydrate 1 - 2 6 hours high speed (66 °C) (27 –...
- Page 8 AIR FRY RACK POSITION Rack position for Air Fry Rack position for Bake, Reheat, Dehydrate, Proof, Bagel, Toast, Keep Warm, Broil Rack position for Baking large items or items that are sensative to over browning on top W11407666B.indb 8 W11407666B.indb 8 3/30/2020 6:38:09 PM 3/30/2020 6:38:09 PM...
- Page 9 USING THE DEHYDRATE FUNCTION Dehydrate option is to remove moisture content from veggies or fruits to dry and preserve them. Set the function knob to Dehydrate. The preset temperature 150 °F will be Open the door and place the food on the shown.
-
Page 10: Using The Bagel Function
USING THE PROOF FUNCTION When the time has elapsed, the end Open the door and place the food on the signal will sound and the Air Fryer will center of the rack. Close the door. shut off automatically. Press Start to start the cycle. USING THE BAGEL FUNCTION In Bagel mode, the oven distributes power between the top and bottom heating elements to nicely brown the top of cut bagels while gently warming the outside. - Page 11 USING THE TOAST FUNCTION In Toast mode, your oven distributes power to the top and bottom heating elements to maintain the desired oven temperature. Set the function knob to Toast. Shade and Open the door and place the food on the slices will be shown.
- Page 12 USING THE AIR FRY FUNCTION When the time has elapsed, the end Open the door and place the food on the signal will sound and the Air Fryer will center of the rack. Close the door. shut off automatically. Press Start to start the cycle. USING THE BAKE FUNCTION In Bake mode, food will prepare in dry heat like bread, cake, toast etc.
-
Page 13: Using The Reheat Function
USING THE BROIL FUNCTION Only the top cooking elements heat when the Broil function is selected. Use the included broil pan and grill directly on the oven rack for even browning and easy cleanup. The broil pan and grill may also be used for the Bake and Warm settings. -
Page 14: Using The Keep Warm Function
USING THE REHEAT FUNCTION When the time has elapsed, the end Open the door and place the food on the signal will sound and the Air Fryer will center of the rack. Close the door. shut off automatically. Press Start to start the cycle. USING THE KEEP WARM FUNCTION WARNING Food Poisoning Hazard... -
Page 15: Care And Cleaning
USING THE KEEP WARM FUNCTION When the time has elapsed, the end Open the door and place the food on the signal will sound and the Air Fryer will center of the rack. Close the door. shut off automatically. Press Start to start the cycle. CARE AND CLEANING NOTE: Allow the Air Fryer and accessories to cool completely before cleaning. -
Page 16: Troubleshooting Guide
This is normal and your Air Fryer is working properly. The NTC Sensor may not be working. This issue can not If “E1 or E2” flashes on the be corrected. Please see the “KitchenAid ® Warranty and display and a chime sounds: Service”... -
Page 17: Warranty And Service
IF THIS PRODUCT FAILS TO WORK AS WARRANTED, CUSTOMER’S SOLE AND EXCLUSIVE REMEDY SHALL BE REPAIR OR REPLACEMENT ACCORDING TO THE TERMS OF THIS LIMITED WARRANTY. KITCHENAID AND KITCHENAID CANADA DO NOT ASSUME ANY RESPONSIBILITY FOR INCIDENTAL OR CONSEQUENTIAL DAMAGES. This warranty gives you specific legal rights and you may also have other rights which vary from state to state or province to province. -
Page 18: Hassle-Free Replacement Warranty-Canada
For service information in Canada: P.O. Box 218, St. Joseph, MI 49085-0218 Call toll-free 1-800-807-6777. For service information in Mexico: Call toll-free 01-800-0022-767. ®/™ ©2020 KitchenAid. All rights reserved. Used under license in Canada. 18 | W11407666B.indb 18 W11407666B.indb 18 3/30/2020 6:38:27 PM... -
Page 19: Pièces Et Caractéristiques
PIÈCES ET CARACTÉRISTIQUES 12 Bouton Température/minuterie Hublot en verre trempé 13 Bouton Mode : Sélecteur du mode Ramasse-miettes amovible de cuisson Surface de refroidissement pour grille 14 Icône Preheating (Préchauffage) amovible du four 15 Icône Shade (Degré de brunissement) Grille de cuisson au gril en acier chromé Plateau émaillé... -
Page 20: Sécurité Du Produit
SÉCURITÉ DU PRODUIT CONSIGNES DE SÉCURITÉ IMPORTANTES Lors de l’utilisation d’appareils électriques, certaines précautions élémentaires de sécurité doivent toujours être observées, incluant les suivantes : 1. Lire toutes les instructions. 2. Ne pas toucher les surfaces chaudes. Utiliser les poignées ou les boutons. 3. -
Page 21: Spécifications Électriques
SÉCURITÉ DU PRODUIT 12. On ne doit insérer aucun aliment surdimensionné ou ustensile en aluminium dans la friteuse à air, car ils peuvent présenter un risque d’incendie ou de décharge électrique. 13. Lorsque la friteuse à air est en cours d’utilisation, un incendie peut se produire si la friteuse à... -
Page 22: Pour Commencer
POUR COMMENCER Avant la première utilisation, nettoyer les pièces et accessoires (voir la section « Entretien et friteuse à air nettoyage »). Placer la sur une surface plane et sèche. Retirer tous les matériaux d’emballage et toutes les étiquettes, le cas échéant. Ouvrir la porte et aligner la grille avec S’assurer que tous les côtés se trouvent les fentes pour la placer à... -
Page 23: Fonctions De Cuisson
POUR COMMENCER RECOMMANDATION DE DURÉE – FONCTION AIR FRY (FRITURE À AIR) Aliment Portion Température Durée Pépites de poulet 1 couche 425 °F (218 °C) 8 à 10 minutes Filets de poulet 1 couche 425 °F (218 °C) 13 à 15 minutes Ailes de poulet 1 couche 425 °F (218 °C) 18 à... - Page 24 FONCTIONS DE CUISSON Prérégler la Plage de Durée Fonctions No de Plage de Éléments température température préréglée de cuisson la grille durées utilisés °C (°F) °F (°C) (minutes) 2 au bas, Dehydrate 150 °F 80 à 180 °F 1 minute à convection 1 à 2 6 heures (déshydrater) (66 °C)
- Page 25 POSITION DE LA GRILLE POUR AIR FRY (FRITURE À AIR) Position de la grille pour Air Fry (friture à air) Position de la grille pour Bake (cuisson au four), Reheat (réchauffer), Dehydrate (déshydrater), Bagel, Toast (grille-pain), Keep Warm (maintient au chaud) et Broil (cuisson au gril) Position de la grille pour faire cuire de gros aliments sensibles...
- Page 26 UTILISER LA FONCTION DEHYDRATE (DÉSHYDRATER) L’option Dehydrate (déshydrater) permet de retirer l’humidité des légumes et des fruits pour les faire sécher et les conserver. Placer le bouton de fonction sur Dehydrate (déshydrater). La température préréglée de 150 °F sera Ouvrir la porte et placer les aliments affichée.
- Page 27 UTILISER LA FONCTION PROOF (LEVÉE) La fonction Proof (levée) maintient un environnement chaud et idéal pour faire Air Fry lever la pâte. Toast Bake À utiliser pour la pâte. Pour accélérer la levée Bagel Broil de la pâte. Grâce à une température de 80 à 100 °F et à...
- Page 28 UTILISER LA FONCTION BAGEL Au mode Bagel, le four répartit la puissance de cuisson entre les éléments de chauffage supérieur et inférieur pour faire dorer le dessus des moitiés de bagels tout en chauffant légèrement l’extérieur. Placer le bouton de fonction sur Bagel. Ouvrir la porte et placer les aliments au Shade (brunissement) et slices (tranches) centre de la grille.
- Page 29 UTILISER LA FONCTION TOAST (GRILLE-PAIN) Au mode Toast (grille-pain), le four répartit la puissance de cuisson entre les éléments de chauffage supérieur et inférieur afin de maintenir la température de four souhaitée. Placer le bouton de fonction sur Toast Ouvrir la porte et placer les aliments au (grille-pain).
- Page 30 UTILISER LA FONCTION AIR FRY (FRITURE À AIR) La fonction Air Fry (friture à air) utilise une combinaison d’air chaud et d’éléments chauffants pour préparer des aliments croustillants. Placer le bouton de fonction sur Air Fry (friture à l’air). La température préréglée de 400 °F sera affichée.
- Page 31 UTILISER LA FONCTION BAKE (CUISSON AU FOUR) Le mode Bake (cuisson au four) utilise une chaleur sèche pour préparer des aliments comme du pain, des gâteaux, des tranches de pain, etc. Les éléments de cuisson du haut et du bas se mettent en marche et s’éteignent pendant la cuisson.
- Page 32 UTILISER LA FONCTION BROIL (CUISSON AU GRIL) Seuls les éléments de cuisson du haut chauffent lorsque cette fonction est sélectionnée. Placer la lèchefrite avec grille incluse directement sur la grille pour un brunissement égal et un nettoyage facile. La lèchefrite avec grille peut aussi être utilisée avec les réglages Bake (cuisson) et Keep Warm (maintien au chaud).
- Page 33 UTILISER LA FONCTION REHEAT (RÉCHAUFFER) Avec la fonction Reheat (réchauffer), le four répartit la puissance de cuisson entre les éléments de chauffage supérieur et inférieur afin d’amener les aliments à la température de service. Le ventilateur de convection peut être mis en marche et éteint en appuyant sur le bouton Convection.
- Page 34 UTILISER LA FONCTION KEEP WARM (MAINTIEN AU CHAUD) AVERTISSEMENT Risque d'empoisonnement alimentaire Ne pas laisser des aliments dans un four plus d'une heure avant ou après la cuisson. Le non-respect de cette instruction peut causer un empoisonnement alimentaire ou une maladie. Au mode Keep Warm (maintien au chaud), le four répartit la puissance de cuisson aux éléments de chauffage inférieurs pour que les...
-
Page 35: Entretien Et Nettoyage
ENTRETIEN ET NETTOYAGE REMARQUE : Laisser la friteuse à air et les accessoires refroidir complètement avant de les nettoyer. Vider le ramasse-miettes et le nettoyer dans Débrancher la friteuse à air de la prise de une eau tiède et savonneuse au besoin. courant. -
Page 36: Guide De Dépannage
Si le four ne se met pas en marche : Vérifier que le disjoncteur du circuit électrique fonctionne bien. Voir les sections « Garantie KitchenAid et dépannage ». ® Si le problème ne peut être Ne pas renvoyer la friteuse à air au détaillant – les détaillants résolu :... -
Page 37: Garantie Et Service
SI CE PRODUIT NE FONCTIONNE PAS TEL QUE GARANTI, LE SEUL ET UNIQUE RECOURS DU CLIENT CONSISTE À EN OBTENIR LA RÉPARATION OU LE REMPLACEMENT CONFORMÉMENT AUX TERMES DE LA PRÉSENTE GARANTIE LIMITÉE. KITCHENAID ET KITCHENAID CANADA DÉCLINENT TOUTE RESPONSABILITÉ AU TITRE DES DOMMAGES FORTUITS OU INDIRECTS. - Page 38 P.O. Box 218, St. Joseph, MI 49085-0218 Pour des informations concernant toute intervention de dépannage au Mexique : Composer sans frais le 01-800-0022-767. ®/™ ©2020 KitchenAid. Tous droits réservés. Utilisé sous licence au Canada. 38 | W11407666B.indb 38 W11407666B.indb 38 3/30/2020 6:38:50 PM...
-
Page 39: Piezas Y Características
PIEZAS Y CARACTERÍSTICAS Ventana de vidrio reforzado Convection (Convección): Modo del interruptor de temperatura Bandeja para migas removible Perilla de temperatura/temporizador Superficie de enfriamiento para la parrilla extraíble del horno Perilla de modos: Selector de modos de cocción Parrilla asadora de acero cromado Icono Preheating (precalentamiento) Recipiente esmaltado Icono Shade (tono) -
Page 40: Seguridad Del Producto
SEGURIDAD DEL PRODUCTO MEDIDAS DE PRECAUCIÓN IMPORTANTES Al utilizar electrodomésticos eléctricos, se deben seguir las precauciones básicas de seguridad, entre las que se incluyen las siguientes: 1. Lea todas las instrucciones. 2. No toque las superficies calientes. Use las manijas o las perillas. 3. -
Page 41: Requisitos Eléctricos
SEGURIDAD DEL PRODUCTO 11. Tenga extremo cuidado al sacar la parrilla asadora, la bandeja multiuso, la rejilla del horno o al desechar grasa caliente. 12. No deben insertarse en una freidora sin aceite alimentos demasiado grandes ni utensilios de metal, ya que pueden constituir un riesgo de incendio o de choque eléctrico. -
Page 42: Cómo Comenzar
CÓMO COMENZAR Antes del primer uso, limpie todas las piezas y accesorios (consulte la sección “Cuidado freidora sin aceite y limpieza”). Coloque la en una superficie seca, plana y nivelada. Quite todos los materiales de empaque y las etiquetas, si los hay. Abra la puerta y alinee la parrilla del Asegúrese de que todos los lados horno con las ranuras para colocarla... - Page 43 CÓMO COMENZAR RECOMENDACIONES DE TIEMPO: FUNCIÓN AIR FRY (FREÍDO SIN ACEITE) Alimento Porción Temperatura Hora Croquetas de pollo 1 capa 425 °F (218 °C) de 8 a 10 minutos Frituras de pollo 1 capa 425 °F (218 °C) de 13 a 15 minutos Alitas de pollo 1 capa 425 °F (218 °C)
- Page 44 FUNCIONES DE COCCIÓN Temperatura Rango de Tiempo Función de Parrilla Rango de Elementos prefijada temperatura °C prefijado cocción n.° tiempo que funcionan °C (°F) ( °F) (min.) 2 inferior; Dehydrate 150 °F 80 °F-180 °F 1 min - 1 - 2 6 horas convección de (Deshidratar) (66 °C) (27 °C-82 °C)
- Page 45 POSICIÓN DE LA PARRILLA PARA EL AIR FRY (FREÍDO SIN ACEITE) Posición de la parrilla para el Air Fry (Freído sin aceite) Posición de la parrilla para Bake (Hornear), Reheat (Recalentar), Dehydrate (Deshidratar), Proof (Leudar), Bagel (Rosca), Toast (Tostar), Keep Warm (Mantener caliente), Broil (Asar) Posición de la parrilla para hornear alimentos grande o...
- Page 46 USO DE LA FUNCIÓN DEHYDRATE (DESHIDRATAR) La opción Dehydrate (Deshidratar) se utiliza para eliminar la humedad del contenido de vegetales y frutas para secarlos y preservarlos. Coloque la perilla de funciones en Dehydrate (Deshidratar). Se mostrará la temperatura prefijada Abra la puerta y coloque los alimentos en 150 °F (66 °C).
- Page 47 USO DE LA FUNCIÓN PROOF (LEUDAR) La función Proof (Leudar) mantiene un ambiente cálido adecuado para que la Air Fry levadura levante. Toast Bake Utilice esta función para masas, especialmente Bagel Broil para acelerar el leudado de panes. Con un rango de temperatura de 80 °F-100 °F (27 °C-38 °C) y los elementos calentadores Reheat Proof...
- Page 48 USO DE LA FUNCIÓN BAGEL (ROSCA) En el modo Bagel (Rosca), el horno distribuye la potencia entre los calentadores superior e inferior para darle un dorado agradable a la parte superior de las roscas cortadas y, a su vez, calentar la parte externa. Coloque la perilla de funciones en Abra la puerta y coloque los alimentos en Bagel (Rosca).
- Page 49 USO DE LA FUNCIÓN TOAST (TOSTAR) En el modo Toast (Tostar), el horno distribuye la potencia entre los calentadores superior e inferior para mantener la temperatura deseada. Coloque la perilla de funciones en Toast Abra la puerta y coloque los alimentos en (Tostar).
- Page 50 USO DE LA FUNCIÓN AIR FRY (FREÍDO SIN ACEITE) La función Air Fry (Freído sin aceite) usa una combinación de elementos calentadores y de aire caliente para preparar comidas crocantes. Coloque la perilla de funciones en Air Fry (Freído sin aceite). Se mostrará la temperatura prefijada 400 °F (204 °C).
- Page 51 USO DE LA FUNCIÓN BAKE (HORNEAR) En el modo Bake (Hornear), la comida se preparará en calor seco como el pan, tortas, tostadas, etc. Tanto la parte superior como inferior de los elementos de cocción se encienden y apagan mediante el horneado. Las recetas variarán y deberá...
- Page 52 USO DE LA FUNCIÓN BROIL (ASAR) Cuando se seleccione la función Broil (Asar), solamente se calentarán los elementos superiores. Use la bandeja para asar y parrilla incluidas directamente en la parrilla del horno para un dorado uniforme y una limpieza sencilla.
- Page 53 USO DE LA FUNCIÓN REHEAT (RECALENTAR) En la función Reheat (Recalentar) el horno distribuye la potencia en los calentadores superior e inferior para calentar la comida a la temperatura ideal para servir. El ventilador de convección se puede encender o apagar al presionar el botón Convection (Convección).
- Page 54 USO DE LA FUNCIÓN KEEP WARM (MANTENER CALIENTE) ADVERTENCIA Peligro de Intoxicación Alimentaria No deje sus alimentos en el horno por más de una hora antes o después de su cocción. No seguir esta instrucción puede ocasionar intoxicación alimentaria o enfermedad. En el modo Keep Warm (Mantener caliente), el horno distribuye la potencia entre los calentadores inferiores para mantener el...
-
Page 55: Cuidado Y Limpieza
CUIDADO Y LIMPIEZA NOTA: Espere a que la freidora sin aceite y los accesorios se enfríen por completo antes de la limpieza. Desenchufe la freidora sin aceite del Vacíela y lávela con agua tibia y jabonosa tomacorriente. si lo necesita. Seque los elementos con un paño suave. -
Page 56: Guía De Solución De Problemas
3 terminales. Si el horno no inicia: Revise si el fusible de la caja de disyuntores que va al horno está funcionando adecuadamente. Consulte las secciones de “Garantía y servicio de KitchenAid ”. ® Si no se puede corregir No devuelva la freidora sin aceite a la tienda, ya que ésta no... -
Page 57: Garantía Y Servicio
SI ESTE PRODUCTO NO FUNCIONA COMO SE HA GARANTIZADO, EL ÚNICO Y EXCLUSIVO RECURSO DEL CLIENTE SERÁ EL DE REPARARLO O REEMPLAZARLO SEGÚN LOS TÉRMINOS DE ESTA GARANTÍA LIMITADA. KITCHENAID Y KITCHENAID CANADA NO SE RESPONSABILIZARÁN POR DAÑOS INCIDENTALES O CONSECUENTES. - Page 58 P.O. Box 218, St. Joseph, MI 49085-0218 Llame sin cargo al 1-800-807-6777. Para obtener información acerca del servicio en México: Llame sin cargo al 01-800-0022-767. ®/™ ©2020 KitchenAid. Todos los derechos reservados. Usado bajo licencia en Canadá. 58 | W11407666B.indb 58 W11407666B.indb 58 3/30/2020 6:39:14 PM...
- Page 59 GARANTÍA Y SERVICIO CERTIFICADO DE GARANTÍA DE PEQUEÑOS ELECTRODOMÉSTICOS DE LA MARCA KITCHENAID GARANTÍA VÁLIDA SÓLO EN EL PAÍS DE ADQUISICIÓN DEL PRODUCTO GARANTIZADO IMPORTANTE: Este Certificado o Tarjeta de Garantía debería presentarse junto a la factura o boleta de compra o recepción original del producto garantizado. Para Colombia: la factura será...
- Page 60 Cuando el producto ha sido alterado o reparado por personas o establecimientos no autorizados por Whirlpool. CERTIFICADO DE GARANTÍA DE PEQUEÑOS ELECTRODOMÉSTICOS DE LA MARCA KITCHENAID Derechos del Beneficiario / Titular: • El Garante se compromete a reparar el producto garantizado en un plazo de treinta (30) días hábiles contados a partir de la fecha de la solicitud de reparación, salvo eventuales...
- Page 61 Marca: Tamaño o capacidad (si aplica): Material y color predeterminado CERTIFICADO DE GARANTÍA DE PEQUEÑOS ELECTRODOMÉSTICOS DE LA MARCA KITCHENAID Para hacer efectiva esta garantía: • Este documento deberá ser presentado para cualquier trámite relacionado con la garantía de productos adquiridos dentro de los países que se mencionan a continuación. Si usted compró...
- Page 62 Horario de atención: lunes a viernes de 8:00 am a 5:00 pm E-mail: [email protected] Consulte también nuestros sitios web: www.kitchenaid.com.do ®/™ ©2020 KitchenAid. Todos los derechos reservados. Usado bajo licencia en Canadá. 62 | W11407666B.indb 62 W11407666B.indb 62 3/30/2020 6:39:14 PM 3/30/2020 6:39:14 PM...
- Page 63 W11407666B.indb 63 W11407666B.indb 63 3/30/2020 6:39:14 PM 3/30/2020 6:39:14 PM...
- Page 64 CANADA: 1.800.807.6777 | KitchenAid.ca MEXICO: KitchenAid.com.mx LATIN AMERICA: KitchenAid-Latam.com ®/™ ©2020 KitchenAid. All rights reserved. Used under license in Canada. Tous droits réservés. Utilisé sous licence au Canada. Todos los derechos reservados. Usada en Canadá bajo licencia. W11407666B 03/20 W11407666B.indb 64 W11407666B.indb 64...