Table of Contents
Table of Contents

Summary of Contents for AEG ALT58BC
- Page 1 ALT58BC ALT58BC401 Original instructions...
- Page 2 mportant! It is essential that you read the instructions in this manual before assembling, operating, and maintaining the product. Subject to technical modifications.
- Page 4 Replacing the brushcutter head Replacing the line trimmer head Installing the blade head Installing the line trimmer head...
- Page 5 Attaching the harness Installing the bike handle Installing the brushcutter guard Installing the line trimmer guard...
- Page 6 Starting the product Attaching the lower shaft Reloading the trimming line Cleaning the product...
- Page 7 Inserting and removing the battery pack Storing the product Operating the line trimmer Operating the brushcutter...
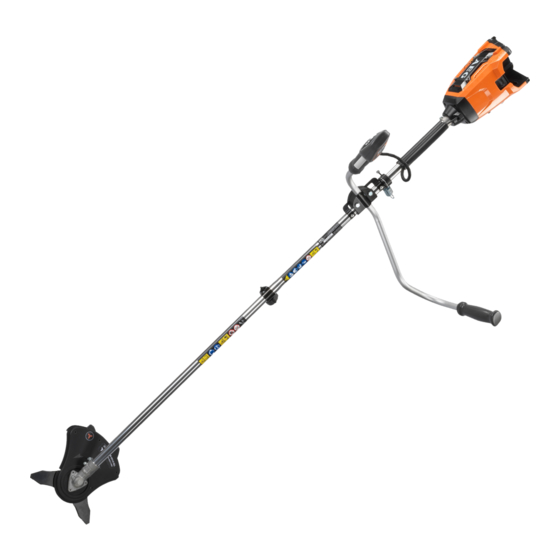
- Page 8 THROTTLE LOCK LINE TRIMMER GUARD LINE TRIMMER HEAD THROTTLE TRIGGER BLADE HEAD BRUSHCUTTER GUARD LOWER SHAFT...
- Page 9 HARNESS ATTACHMENT HANGER BIKE HANDLE UPPER SHAFT KNOB...
- Page 10 Installing the bike handle...
- Page 11 Installing the brushcutter guard...
- Page 12 Installing the line trimmer guard...
- Page 13 Installing the blade head NOTE: When installing the blade head, always use a new nylon locking nut. Not using a new nylon locking nut can result in damage to the product or injury to the user.
- Page 14 NOTE: Make sure that the nylon locking nut torque is ≥ 25 Nm when assembling the blade. Failure to follow this procedure can result in serious injury. Nylon locking nut should have at least 4 turns after finger tight.
- Page 15 Installing the line trimmer head...
- Page 16 Replacing the line trimmer head...
- Page 18 NOTE: When installing the blade head, always use a new nylon locking nut. Not using a new nylon locking nut can result in damage to the product or injury to the user.
- Page 19 NOTE: Make sure that the nylon locking nut torque is ≥ 25 Nm when assembling the blade. Failure to follow this procedure can result in serious injury. Nylon locking nut should have at least 4 turns after finger tight.
- Page 20 Replacing the brushcutter head...
- Page 24 Attaching the lower shaft click...
- Page 25 Removing the lower shaft Attaching the harness...
- Page 26 Inserting the battery pack click Removing the battery pack...
- Page 27 75-100 % 50-75 % 25-50 % 0-25 %...
- Page 28 Starting the product click...
- Page 29 Operating the brushcutter click...
- Page 32 Operating the line trimmer click...
- Page 35 Reloading the trimming line...
- Page 36 2.1 M 2.1 M...
- Page 37 Cleaning the product...
- Page 38 Storing the product...
- Page 39 NOTE: Always store the product in a cool, dry, well-ventilated area.
- Page 40 click...
- Page 41 TECHNICAL DATA CORDLESS LINE TRIMMER / BRUSHCUTTER ALT58BC/ALT58BC401 Voltage 58V d.c. No-load speed - Line trimmer 5150/min - Cut swath 430 mm No-load speed - Brushcutter 5800/min - Cut swath 256 mm Cutting line diameter 2.4 mm Cutting capacity - Line trimmer...
- Page 42 shock if your body is earthed or grounded WARNING! This product is not intended to be used by children or ■ Do not expose power tools to rain or wet conditions. Water entering a persons with reduced physical, mental, or sensory capabilities, or lack of power tool will increase the risk of electric shock.
- Page 43 WARNING! Never use cutting means or attachments, which are not ● before checking, cleaning, and working on the product specified by AEG in this manual. This includes the use of metal multi- ● before changing accessories piece pivoting chains and flail-blades. These items are known to break up during use and present high risk of serious injury to the operator or ●...
- Page 44 Should components need to be replaced which have work practices are all thought to contribute to the development of these not been described, please contact one of our AEG service agents (see our symptoms. There are measures that can be taken by the operator to possibly list of guarantee/service addresses).
- Page 45 proper tightness to ensure that the product is in safe working condition. Any part that is damaged should be properly repaired or replaced by an authorised Wear eye, ear, and head protection. service centre. Bring the product to an authorised service centre to replace damaged or unreadable labels.
- Page 46 The following signal words and meanings are intended to explain the levels of risk associated with this product. DANGER Indicates an imminently hazardous situation, which, if not avoided, will result in death or serious injury. WARNING Indicates a potentially hazardous situation, which, if not avoided, could result in death or serious injury.
- Page 48 Techtronic Industries Australia Pty Ltd 31 Gilby Road, Mount Waverley, VIC, 3149, Australia Techtronic Industries N.Z. Limited AEG is a registered trademark used under Unit C, 70 Business Parade South, license from AB Electrolux (publ). Highbrook, Auckland 2013, New Zealand ©...

