Table of Contents

Summary of Contents for Motorola 80FLIWBM5DG
-
Page 2: Table Of Contents
CONTENTS SAFETY PRECAUTIONS • INSTALLATION INSTRUCTIONS • NAME OF PARTS • ACCESSORIES • SPECIFICATION SHEET • LOCK AND UNLOCK METHOD • INTRODUCTION TO EACH COMPARTMENT • OF DETERGENT BOX • CONTROL PANEL • PROGRAM INTRODUCTION • VARIOUS FUNCTIONS • CLEAN AND MAINTENANCE •... -
Page 3: Safety Precautions
SAFETY PRECAUTIONS • To protect the user and other people’s health and property, be sure to observe the following safety notice. WARNINGS PLEASE READ THIS PART OF MANUAL CAREFULLY FOR PROPER OPERATION BEFORE USING YOUR MACHINE. • The precautions stated here are classified as “Warning” and “Attention” according to the damage and the emergency caused by misoperation, and are described respectively in line with the marks below. - Page 4 professional technician as otherwise you may be subject to electric shock, may cause fire or get injured. • Electricity supply must be unplugged with dry hands. Otherwise, this may cause electric shock. • Damaged loosen wire plug should used. Otherwise electric shock, short circuit or fire may take place. •...
- Page 5 • Do not put gasoline, benzine, alcohol, thinner of fabrics with these stains into or near to the washing machine. To prevent fire or explosion which may cause injuries. • This washing machine is equipped with the electricity wire with grounding socket.
- Page 6 • This washing machine is strictly prohibited to get close to the locations with candle, mosquito repellent incense, dog-end or other kinds of open flame. To avoid injuries caused by the lock damage. • Do not operate the machine when there is gas leak.
- Page 7 WARNINGS • Keep children away from the washing spinning basket and do not place box or shelves next to the washing machine. Children may fall into the basket resulting in injuries. This appliance is not intended for use by persons (including children) with reduced physical, sensory or mental capabilities, or lack of experience and knowledge, unless they have been given supervision or instruction concerning use of the appliance by a person responsible for their safety.
- Page 8 Electricity supply must be unplugged with dry hands during maintenance and repair. Otherwise, electric leakage causing injuries may occur. • If the supply cord is damaged, it must be replaced by the manufacturer, its service agent or similarly qualified persons in order to avoid a hazard.
- Page 9 Water supply hose should be tightly screwed to the unit. Failure to do so may result in water leakage. Used for a long period of time, the unit may result in water leakage caused by loosen union nut. So please check it in time and screw tightly again.
- Page 10 Check water supply hose connection by turning on the water • before washing . To prevent damages caused by possible water leakage due to loosen screw or not tightly. • The new hose-sets supplied with the appliance are to be used and that old hose-sets should not be reused.
-
Page 11: Installation Instructions
INSTALLATION INSTRUCTIONS Transportation Two people are needed to carry the machine. One person on one side carries the machine by holding the machine feet. Location of washer Washing machine must be installed on the ground which must be hard, flat and skid proof. Please do not lay the washing machine on the soft blanket or wooden floor. - Page 12 protection device is not stuck at the bottom of the washing machine before use, otherwise it will affect the normal use of washing machine. Adjust the machine horizontally There will be strong shock, noise, and disfunction in operation if the washing machine is not steadily installed.
- Page 13 INSTALLATION INSTRUCTIONS Connecting the Supply Hose 1. Check that sealing washers are firmly seated. 2. Attach the curved end of the hose to the inlet valve of the washing machine, tighten the coupling nuts securely by hand. 3. Attach straight end of the hose to the tap. Tighten the coupling nuts securely by hand.
- Page 14 INSTALLATION INSTRUCTIONS CONNECTION OF DRAIN HOSE 1. When washing machine does not work, put drain hose at back of washing machine. (as pic 1 shows) 2. When washing machine works, put drain hose into drainage pond (as pic 2 shows), you can also put end of drain hose into sewer, and keep space between end of drain hose and sewer elbow to avoid difficult to drain water out of washing machine.
- Page 15 Installation steps are as follows: 1. Remove the rat mesh and remove the double-sided adhesive stickers around the rat mesh. 2. Tilt the washing machine back, slowly put down on the cushion, pay attention to the washing machine operating panel should be facing forward.
- Page 16 4. Fix the left and right sides and the back of the rat mesh with special screws (large round cap screws). After fixing, gently lift the washing machine and place it smoothly.
-
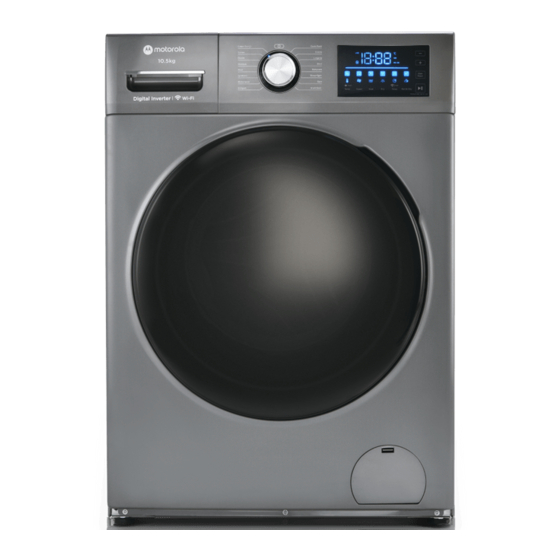
Page 17: Name Of Parts
NAME OF PARTS ATTENTION • We suggest the user to run the drum clean program before the 1 time washing. • Don’t forget to close the water tap and take down the power plug to avoid any flood and fire disaster. -
Page 18: Accessories
ACCESSORIES... -
Page 19: Specification Sheet
SPECIFICATION SHEET Rated wash capacity 8.0kg Rated spin capacity 8.0kg Rated voltage 230V~50Hz Rated heating power 1800W Rated power 2000W Washing noise 54dB Spin noise 75dB Water pressure 0.03~1. 0MPa Product dimension 600x595x850... -
Page 20: Lock And Unlock Method
LOCK AND UNLOCK METHOD DOOR LOCK When the machine is working, the door locks automatically. I can’t be opened. UNLOCK When the machine is working, the user press the “START/STOP” button. The door can be unlocked after inner tub stopping spin. •... -
Page 21: Introduction To Each Compartment
INTRODUCTION TO EACH COMPARTMENT OF DETERGENT Precautions • High bubble Washer powder or detergent is forbidden. • Use the detergent in accordance with the instruction by its manufacturer. • Excessive detergents will cause too much bubble and affect the rinse, also create function faults. -
Page 22: Control Panel
CONTROL PANEL The distribution Start/Stop Press the button to start and press again for a stop. Power knob • It is to start or stop the power supply. (When the programs finished, machine can be closed automatically.) Program choice •... - Page 23 CONTROL PANEL Speed button • Set the spin speed according to user’s requirement. • Some programs have the limitation on setting the spin speed. Delay button • It is for washing reservation function to set time from beginning to finish. Rince + button •...
-
Page 24: Program Introduction
PROGRAM INTRODUCTION Cotton Eco Wash of cotton. Cotton Wash of cotton. Mix Wash Mix Wash of cotton and synthetics clothes. Denim Wash of denim. Wool Wash of wool which can be washed by machine. Synthetic Wash of synthetic. Winterwear Wash of winter wear Quick Wash Wash of small amount or light dirty clothes. - Page 25 Spin speed Default Temp. (℃) Washing (RPM) Program duration Default capacity Default (HH:MM) (Selectable) (Selectable) Rated Cotton Eco 4:53 60℃ 1200 capacity 30℃ 1000rpm Rated (0-10-20- (400-600- Cotton 1:08 capacity 30-40-60- 800-1000- 80) 1200) 1000rpm 30℃ (400-600- Mix Wash 1:03 ≤6kg (0-10-20- 800-1000-...
- Page 26 (0-10-20- (400-600- 30-40-60) 800-1000) 30℃ 800rpm Shirt 1:05 ≤3kg (0-10-20- (400-600- 30-40-60) 800-1000) 800rpm 80℃ (400-600- (0-10-20- Babycare 2:23 ≤4kg 800-1000- 30-40-60- 1200- 80) 1400) 1000rpm Rinse + (400-600- 0:21 ≤6kg —— Spin 800-1000- 1200) 1000rpm (400-600- Spin 0:12 ≤6kg ——...
- Page 27 PROGRAM INTRODUCTION User instruction for the normal clothes Method 1. Preparation. • Put the clothes in and close the door. • Put the detergent or washing powder into the detergent box. • Switch on the water tap, put the drain-pipe, plug the power supply. 2.
- Page 28 Instruction to delay wash Method • Switch on the power and choose the suitable program and buttons according to user’s requirement. Press the delay button to setting the finishing time. Press the start/stop button to start-up the delay wash function. (Delay time has every one hour interval and maximum is 24 hours.) Attention •...
-
Page 29: Various Functions
VARIOUS FUNCTIONS ADD CLOTH DURING WASH FUNCTION Used this function to add washing when machine is running. Method Press “Start/Stop” button till the clock light off. Door lock is released and shows “Add”. Please add washing and close the door, press the “Start/Stop” button to continue to wash. - Page 30 So the door can’t be opened and the button except power button can’t be handled. When cancel this function, door can be opened again. Set/Cancel method Open the power and press “Temp” button for 3 seconds till the buzzer sound. The child lock function is finished to set. If repeat this action, the child lock function will be cancelled.
-
Page 31: Clean And Maintenance
CLEAN AND MAINTENANCE • Please maintain the machine after long time using. It can enlarge the life time. • Please take off the power supply when maintenance. MACHINE BODY • Please use soft cloth to clean the body after washing every time. If there is much dirty, please put some detergent or soap water on the cloth to clean the body. - Page 32 WATER INLET VALVE CLEAN (SUGGESTED TWICE A YEAR) 1. Take out the inlet pipe. 2. Take out the filter screen. 3. Use the toothbrush to clean the filter scree and then assemble it again. 4. Connect the inlet pipe after cleaning. DRUM CLEAN (ONE TIME MONTHLY SUGGESTION) There may be dirty rest in the drum after long time using.
- Page 33 CLEAN AND MAINTENANCE Machine gets frozen 1. Using hot towel to envelop the water tap and connector. 2. Disassemble the inlet pipe and put it into hot 50 degree hot water. 3. Put 2-3 liter 50 degree hot water into tub. 4.
-
Page 34: Non - Failure Conditions
NON-FAILURE CONDITION CONDITION REASON Door can‘t be • Water temperature is too high or power cut. opened. • Setting child lock function • The clothes is clamped between door and gasket. Peculiar smell. • Because using rubber components, it has rubber smell at the beginning. - Page 35 Power failure. revolve. If recover the power, machine still not revolve, please press “power turn on/off” then reset program. Emergency open • When the power failure for a long time and you door. want to take out the clothes, unplug the power cord, waiting for the inner drum stop, pull down the emergency rope on the bottom right...
-
Page 36: Troubleshooting Guide
TROUBLESHOOTING GUIDE Fault Phenomenon Inspection Point Solution Code • Whether the outlet have No display Out of electricity. operation. • Whether the outlet is plugged in. • Power cut or not. • Leakage protector switch off or not. • Set up booing function or not. - Page 37 • Suspension of drying. drops to safety. • Ensure the washer in No spin. Add 2 pieces right place of cloth and steady. Press the • Make sure don’t have Start/Pause. too much cloths and too big cloths button, when there have fewer cloths.
-
Page 39: Warranty Terms & Conditions
Warranty Terms & Conditions Flipkart India Private Limited ("Company") warranties the product to be free from manufacturing defects or any other specific defect as may be specified in the Specific Terms and Conditions below. The warranty is for a period mentioned in the Specific Terms and Conditions below, the invoice (if not specified in the Specific Terms and Conditions below), as well as the product listing page, and such period shall commence from the date of purchase of the product by... - Page 40 Warranty does not cover any external accessories and fittings to the product. All plastic, rubber, glass, or aesthetic parts and consumable replacements will be on a chargeable basis. Warranty shall not apply to damages caused to the product by accident, voltage fluctuations, lightening, ingress of water (beyond certified limits, if any), fire or any other natural calamity, improper ventilation, dropping or excessive shock, or any external cause beyond Company's control.
- Page 41 All transportation & handling expenses incurred while replacing or repairing will be payable by the Customer. For any warranty claim requested by the Customer from the region beyond municipal limits of the jurisdiction of the ASC, a visit by an authorised service personnel may be arranged by the Company through its ASC, on a case to case basis, at its sole discretion and the charges towards such visit will be borne by the Customer.
- Page 42 In the event of repairs of any part (s) of the product, the Warranty will thereafter continue and remain in force only for the unexpired period of the Warranty. Moreover, the time taken for repair and in transit whether under the Warranty or otherwise shall not be excluded from the Warranty period.
- Page 43 KEEP OUT OF REACH OF CHILDREN Children should be supervised to ensure that they do not play with the appliance.