Table of Contents
Available languages
Available languages
Quick Links
Chapters
Table of Contents

Related Manuals for Sony GPS-CS1KA


Summary of Contents for Sony GPS-CS1KA
- Page 1 Printed on 70% recycled paper using VOC (Volatile Organic Compound)-free vegetable oil based ink. Printed in Japan GPS Unit Kit/ Kit d’unité GPS Operating Instructions Mode d’emploi GPS-CS1KA © 2007 Sony Corporation 2-319-847-11(1)
- Page 2 To reduce fire or shock hazard, do not expose the unit to rain or moisture. For Customers in the U.S.A. If you have any questions about this product, you may call: Sony Customer Information Services Center 1-800-222-SONY (7669) The number below is for the FCC related matters only. Regulatory Information...
- Page 3 For Customers in Canada This Class B digital apparatus complies with Canadian ICES-003. For Customers in Europe Hereby, Sony Corporation, declares that this GPS-CS1 GPS unit is in compliance with the essential requirements and other relevant provisions of the Directive 1999/5/EC.
- Page 4 Disposal of Old Electrical & Electronic Equipment (Applicable in the European Union and other European countries with separate collection systems) This symbol on the product or on its packaging indicates that this product shall not be treated as household waste. Instead it shall be handed over to the applicable collection point for the recycling of electrical and electronic equipment.
-
Page 5: Table Of Contents
Table of contents Features ... 6 Precautions ... 8 What is GPS?... 11 Preparing Identifying parts... 14 Attaching the carabiner ... 15 Inserting a battery ... 16 Using the unit Record the GPS log using the GPS unit ... 18 Using the software Using the supplied software ... -
Page 6: Features
Features This unit is a portable GPS unit to receive and record position information. Using this unit and the supplied software, you can: Check the locations of where you took pictures on a trip, etc. • Apply position information to the pictures you took, organize the •... - Page 7 Apply position information to the pictures using “GPS Image Tracker” (page 28) Launch the supplied software (GPS Image Tracker) and • import the GPS log recorded on the unit to your computer. Match the imported pictures with the GPS log files, then •...
-
Page 8: Precautions
Precautions When using this unit, please keep the following in mind. On a battery A battery is not supplied An LR6 (size AA) alkaline battery or an HR6 (size AA) Nickel-Metal Hydride battery is necessary for recording log data in this unit. Purchase a battery before using the unit. - Page 9 Sony products We cannot guarantee the processing of still images taken with non-Sony digital still cameras or digital video cameras with the supplied software. If you apply position information to these images, some of the data information may be changed.
- Page 10 We recommend that you save the images under different file names after applying position information, or backup the images before processing. Also please note that the functions which will be unavailable after processing with the program depend on each manufacturer.
-
Page 11: What Is Gps
What is GPS? The GPS is a navigational system that calculates position from accurate US aviation satellites. This system allows you to track down your exact location on the earth. The GPS satellites are located in six orbits, 20,000 km above us. The GPS consists of a total of 24 GPS satellites: Four of the satellites are placed into each orbit, and at least three satellites are required to pinpoint your location. - Page 12 Notes The positions of GPS satellites vary. Depending on the location and • time you use a GPS receiver, it may take longer for tracking or the receiver may not track the location at all. “GPS” is the system tracking location by receiving radio signals from •...
- Page 13 On tracking errors Error caused by position of GPS satellites The unit automatically tracks your present location when the unit receives radio signals from three or more GPS satellites. The tracking error caused by the GPS satellites is about to ±10 m. Depending on the environment of the location, the tracking error can be greater.
-
Page 14: Preparing
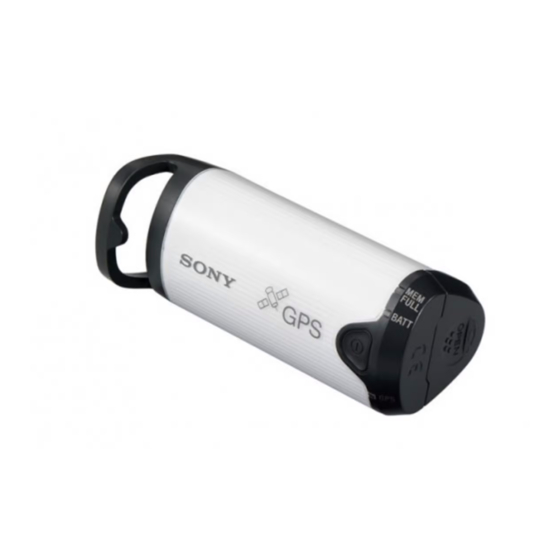
Preparing Identifying parts 1 Carabiner attachment loop (Power) button 5 BATT (Battery) lamp 7 Battery cover 8 CLEAR button (USB) jack 2 Antenna portion 4 GPS lamp 6 MEM FULL (Memory Full) lamp 9 Jack cover... -
Page 15: Attaching The Carabiner
Attaching the carabiner Attach the supplied carabiner to the carabiner attachment loop of the unit in the following procedure. Detach the attachment string from the main body of the carabiner as illustrated below (1) and draw the string through the carabiner attachment loop of the unit (2). Thread the carabiner string through the carabiner loop (3), then attach it in the main body (4). -
Page 16: Inserting A Battery
Inserting a battery The following batteries are acceptable. LR6 (size AA) alkaline battery* • HR6 (size AA) Nickel-Metal Hydride battery (recommended for use at • low temperatures) * When an LR6 (size AA) alkaline battery is used, the battery life is shorter at a low temperature. - Page 17 Turn the power off and hold the unit with the battery cover up, then remove the battery. Be sure not to drop the battery. Battery duration LR6 (size AA) Sony alkaline battery (not supplied) about 10 hours When you use the unit at low temperatures, we recommend you use a •...
-
Page 18: Using The Unit
Using the unit Record the GPS log using the GPS unit This unit can record your position and time (GPS log files) in the internal memory. When you turn on the power, tracking starts, and GPS log recording starts. The unit tracks the location automatically and records the position every fifteen seconds after tracking starts. - Page 19 Take pictures with a camera. Press the (Power) button longer to turn the unit off after using. The GPS log recorded on the unit is stored as a log file during the time • the unit is turned on. Tips •...
- Page 20 Checking remaining battery power You can check the remaining battery power on the status of the BATT • lamp by pressing Lights in green: 70 % or more power remains.* Flashes green: 20 % to 70 % power remains.* When the available remaining power becomes 20 % or lower, the BATT lamp flashes red.
- Page 21 On the recording memory The unit can record GPS log files up to about 360 hours. When the available internal memory becomes 10 % or lower, the MEM • FULL lamp flashes red. When the internal memory becomes full, the power is turned off automatically after the MEM FULL lamp lights up for a minute.
-
Page 22: Using The Software
Using the software Using the supplied software You can view the GPS log files recorded in the unit on the computer and check the locations of where you took pictures on the map using the supplied software. This section describes the English version of screen contents. The supplied CD-ROM contains software applications, “GPS Image Tracker”... -
Page 23: Installing The Supplied Software
Installing the supplied software Install the supplied software in the following procedures. Shut down all application software in use. • Log on to a computer as Administrator. • Installing “GPS Image Tracker” and “Picture Motion Browser” Turn on your computer, and insert the supplied CD-ROM into the CD-ROM drive. - Page 24 Follow the instructions on the screen to complete the installation. • When the restarting confirmation message appears, restart the computer by following the instructions on the screen. • DirectX may be installed depending on system environment of your computer. Remove the CD-ROM after the installation.
-
Page 25: Importing Pictures To Your Computer To Enjoy The Pictures On The Map
• Browser”. Launch “Picture Motion Browser” on the computer. Double-click the (Picture Motion Browser) icon on the desktop. Or, from the Start menu: Click [Start] [Programs]) [Sony Picture Utility] [All Programs] (in Windows 2000, [Picture Motion Browser]. Using the software... - Page 26 After the camera is automatically detected, the [Import Images] screen is displayed. • In Windows XP, if the AutoPlay Wizard appears, close it. (Media Check Tool) icon in the taskbar. icon: Click [Start] [Sony Picture Utility] [All Programs] (in Windows 2000, [Tools] [Media Check Tool].
- Page 27 Import the pictures. To start importing pictures, click the [Import] button. By default, pictures are imported into a folder created in “My Pictures” that is named with the date of importing. To change the “Folder to be imported”, choose [Import Settings] for Imported Images] from the [File] menu.
- Page 28 Click the Folders to View] from the [File] menu. The settings screen for “Viewed folders” registration is displayed. Specify the folder with images for importing to register the folder as one of the “Viewed folders”. Click [OK]. The image information is registered in the database. •...
- Page 29 [Start] t [All Programs] (for Double-click the Windows 2000, [Programs]) t [Sony Picture Utility] t [GPS Image Tracker]. Connect the unit to the computer. Pull out the jack cover as illustrated in the following and connect the unit with the GPS log files to the computer using the supplied USB cable.
- Page 30 Delete the USB connection. 1 Double-click Double-click here (USB Mass Storage Device) t [Stop]. 2 Click 3 Confirm the device on the confirmation window, then click [OK]. 4 Click [OK]. The unit is disconnected from the computer. • Step 4 is unnecessary for Windows XP. Add pictures and apply position information to the pictures.
- Page 31 (Picture Motion Browser) icon on the desktop. Or, from the Start menu: Click [Start] [Programs]) [Sony Picture Utility] Select the still images that you want to display on the map. On “Map View”, you can only display still images with position information as...
- Page 32 3 Click [Delete Position Information]. The position information will be deleted. Technical support Additional information on this product and answers to frequently asked questions can be found at the Sony Customer Support Website. http://www.sony.net/ icon on its thumbnail from which...
-
Page 33: Additional Information
Additional information Trouble shooting If you run into any problem using the unit, use the following table to troubleshoot the problem. If the problem persists, contact your Sony dealer or local authorized Sony service facility. A recorded log file is missing. - Page 34 The pictures are not displayed at the correct position (Tracking error is large). You may not apply the accurate position information to the pictures in • the following (page 13). The clock setting of the camera is incorrect. You can change the date –...
-
Page 35: Specifications
Approx. 0.3 W (Operating on a battery) Operating time on a battery (When used at 25 °C (77 °F)) Approx. 10 hours (When using an LR6 (size AA) Sony alkaline battery), Approx. 14 hours (When using an HR6 (size AA) Sony Nickel-Metal... - Page 36 Approx. 55 g (2 oz) (excluding a battery) Supported image format JPEG format file compatible with Exif 2.1 or later (Warranty is not applicable to images taken with non-Sony cameras.) Included items • GPS Unit (GPS-CS1) (1) • Carabiner (1) •...
- Page 38 Cet appareil numérique de la classe B est conforme à la norme NMB-003 du Canada. Note pour les clients européens Par la présente, Sony Corporation déclare que cette unité GPS GPS-CS1 est conforme aux exigences essentielles et aux autres dispositions de la directive 1999/5/CE.
- Page 39 Traitement des appareils électriques et électroniques en fin de vie (Applicable dans les pays de l’Union Européenne et aux autres pays européens disposant de systèmes de collecte sélective) Ce symbole, apposé sur le produit ou sur son emballage, indique que ce produit ne doit pas être traité...
- Page 40 Table des matières Caractéristiques ... 5 Précautions ... 7 Qu’est-ce que le GPS ? ... 10 Préparation Identification des pièces... 13 Fixation du mousqueton... 14 Mise en place d’une batterie ... 15 Utilisation de l’unité Enregistrement du journal GPS au moyen de l’unité GPS ...
-
Page 41: Caractéristiques
Caractéristiques Ce dispositif est une unité GPS portable pour recevoir et enregistrer des informations de position. En utilisant cette unité et le logiciel fourni, vous pouvez : Vérifier les endroits où vous avez pris des images pendant un voyage, • etc. - Page 42 Application des informations de position aux images au moyen de « GPS Image Tracker » (page 29) Lancez le logiciel fourni (GPS Image Tracker) et importez le • journal GPS enregistré dans l’unité sur votre ordinateur. Faites correspondre les images importées avec les fichiers de •...
-
Page 43: Précautions
Précautions Lors de l’utilisation de cette unité, pensez aux points suivants. Batterie Une batterie n’est pas fournie Une pile alcaline LR6 (format AA) ou une batterie Nickel-Métal Hydride HR6 (format AA) est nécessaire pour enregistrer les données de journal dans cette unité. Achetez une batterie avant d’utiliser l’unité. Remarques sur les batteries Nickel-Métal Hydride Chargez la batterie Nickel-Métal Hydride avant d’utiliser l’unité... - Page 44 Utilisation et rangement Avant d’utiliser l’unité, assurez-vous qu’elle fonctionne correctement. • Ne secouez pas et ne heurtez pas cette unité. Ceci pourrait non • seulement provoquer des dysfonctionnements et empêcher l’enregistrement du journal, mais aussi provoquer une détérioration des données enregistrées. Cette unité...
- Page 45 Cela peut se produire même si les fichiers sont en format JPEG conforme Exif 2.1 pris avec un appareil de marque autre que Sony. Si vous copiez les images traitées vers votre appareil numérique ou caméscope numérique pour les visualiser, ou essayez de les utiliser avec...
-
Page 46: Qu'est-Ce Que Le Gps
Qu’est-ce que le GPS ? Le GPS est un système de navigation qui calcule la position actuelle à partir de signaux précis de satellites de l’aviation américaine. Ce système vous permet de déterminer votre localisation exacte sur la terre. Les satellites GPS sont placés sur six orbites, 20 000 km au-dessus de nos têtes. - Page 47 Remarques Les positions des satellites GPS varient. Selon l’endroit et le moment où • vous utilisez un récepteur GPS, la localisation de la position peut prendre plus longtemps ou le récepteur peut ne pas déterminer du tout la position. « GPS » est le système localisant une position en captant des signaux •...
- Page 48 Il est possible que l’unité ne puisse pas localiser de position lorsque • vous vous déplacez à une vitesse d’environ 500 km/heure (300 miles/ heure) ou plus. Erreurs de localisation Erreur provoquée par la position des satellites GPS L’unité localise automatiquement votre position actuelle lorsqu’elle reçoit des signaux radio de trois satellites GPS ou plus.
-
Page 49: Préparation
Préparation Identification des pièces 1 Boucle de fixation du mousqueton 2 Partie antenne 3 Touche (Alimentation) 4 Témoin GPS 8 Touche CLEAR (Effacer) 9 Couvercle de prise 5 Témoin BATT (Batterie) 6 Témoin MEM FULL (Mémoire pleine) 7 Couvercle de batterie 0 Prise (USB) Préparation... -
Page 50: Fixation Du Mousqueton
Fixation du mousqueton Mettez en place le mousqueton fourni sur la boucle de fixation de mousqueton de l’unité en procédant comme suit. Détachez le cordon de fixation du corps principal du mousqueton comme illustré ci-dessous (1) et faites passer le cordon dans la boucle de fixation de mousqueton de l’unité... -
Page 51: Mise En Place D'une Batterie
Mise en place d’une batterie Il est possible d’utiliser les batteries suivantes. Pile alcaline LR6 (format AA)* • Batterie Nickel-Métal Hydride HR6 (format AA) (recommandée pour • une utilisation à basse température) * La durée d’utilisation d’une pile alcaline LR6 (format AA) est plus courte à basse température. - Page 52 Coupez l’alimentation et tenez l’unité avec le couvercle de batterie vers le haut, puis retirez la batterie. Veillez à ne pas laisser tomber la batterie. Autonomie de la batterie Pile alcaline LR6 (format AA) Sony (non fournie) environ 10 heures Nous vous recommandons d’utiliser une batterie Nickel-Métal Hydride •...
-
Page 53: Utilisation De L'unité
Utilisation de l’unité Enregistrement du journal GPS au moyen de l’unité GPS Cette unité peut enregistrer votre position et l’heure (fichiers de journal GPS) dans la mémoire interne. Lorsque vous mettez l’unité sous tension, la localisation commence et l’enregistrement du journal GPS commence. L’unité... - Page 54 Lorsque la localisation est difficile et pendant que le témoin GPS est en • mode d’exploration, dirigez la partie antenne de l’unité vers le haut et attendez un moment. Si l’unité ne peut pas effectuer la localisation même après une attente de cinq minutes, il est possible que vous vous trouviez dans un endroit où...
- Page 55 Conseils • La localisation peut être difficile selon les conditions ambiantes. Vérifiez de temps en temps l’état du témoin GPS. • Vous pouvez fusionner deux fichiers de journal GPS enregistrés séparément du fait de la mise sous/hors tension de l’unité en un seul fichier à l’aide du logiciel fourni. Les informations de position seront terminées par cette procédure.
- Page 56 Mémoire d’enregistrement Cette unité peut enregistrer des fichiers de journal GPS pendant jusqu’à environ 360 heures. Lorsque la capacité de mémoire interne disponible atteint 10 % ou • moins, le témoin MEM FULL clignote en rouge. Lorsque la mémoire interne est pleine, l’alimentation se coupe automatiquement après que le témoin MEM FULL s’allume pendant une minute.
-
Page 57: Utilisation Du Logiciel
Utilisation du logiciel Utilisation du logiciel fourni Vous pouvez visualiser les fichiers de journal GPS enregistrés dans l’unité sur un ordinateur et vérifier les endroits où vous avez pris les images sur la carte à l’aide du logiciel fourni. Cette section décrit la version anglaise des écrans. Le CD-ROM fourni contient les applications logicielles «... - Page 58 Remarques sur la connexion de l’unité à un ordinateur Les opérations ne sont pas garanties pour tous les environnements • matériels et logiciels mentionnés ci-dessus. Si vous connectez simultanément deux périphériques USB ou plus à un • même ordinateur, il se peut que certains d’entre eux, y compris votre appareil, ne fonctionnent pas, selon le type de périphériques USB utilisés.
-
Page 59: Installation Du Logiciel Fourni
Installation du logiciel fourni Installez le logiciel fourni en procédant comme suit. Fermez tous les logiciels d’application ouverts. • Ouvrez une session sur l’ordinateur en tant qu’administrateur. • Installation de « GPS Image Tracker » et « Picture Motion Browser » Allumez l’ordinateur et introduisez le CD-ROM fourni dans le lecteur de CD-ROM. - Page 60 Sélectionnez la langue désirée, puis cliquez sur [Next] (Suivant). L’écran « License Agreement » (Contrat de licence) apparaît. Lisez attentivement ce contrat. Si vous acceptez les termes de ce contrat, cliquez sur le bouton à côté de [I accept the terms of the license agreement] (J’accepte les termes du contrat de licence), puis cliquez sur [Next] (Suivant).
-
Page 61: Importation D'images Vers Votre Ordinateur Pour Les Visualiser Sur La Carte
Lancez « Picture Motion Browser » sur l’ordinateur. Double-cliquez sur l’icône Ou, depuis le menu Démarrer : Cliquez sur [Start] Windows 2000, [Programs] (Programmes)) Picture Sony) [Picture Motion Browser]. (Picture Motion Browser) sur le bureau. [All Programs] (sous [Sony Picture Utility] (Utilitaire Utilisation du logiciel... - Page 62 Après que l’appareil a été détecté automatiquement, l’écran [Import Images] s’affiche. • Sous Windows XP, si l’Assistant de lecture automatique apparaît, fermez-le. (Media Check Tool) dans la barre des tâches. : Cliquez sur [Start] [Sony Picture Utility] [All Programs] (sous [Tools] [Media...
- Page 63 Importez les images. Pour commencer l’importation d’images, cliquez sur le bouton [Import]. Les images sont importées, par défaut, dans un dossier créé dans « My Pictures » dont le nom est la date d’importation. Pour changer le « Folder to be imported », choisissez [Import Settings] [Location for Imported Images] dans le menu [File].
- Page 64 Cliquez sur l’icône [Register Folders to View] dans le menu [File]. L’écran de réglages pour l’enregistrement de « Viewed folders » s’affiche. Spécifiez le dossier contenant les images à importer pour enregistrer le dossier comme l’un des « Viewed folders ». Cliquez sur [OK].
- Page 65 Lancez le logiciel « GPS Image Tracker ». Double-cliquez sur l’icône t [All Programs] (Tous les programmes) (sous Windows 2000, [Programs] (Programmes)) t [Sony Picture Utility] (Utilitaire Picture Sony) t [GPS Image Tracker]. Connectez l’unité à l’ordinateur. Ouvrez le couvercle de prise comme illustré ci-dessous et connectez l’unité...
- Page 66 Importez les fichiers de journal GPS. Cliquez sur [OK] dans la fenêtre « Log File Import » (Importer fichier journal). Annulez la connexion USB. 1 Double-cliquez sur Double-cliquez ici 2 Cliquez sur masse USB) t [Stop] (Arrêter). 3 Confirmez le périphérique dans la fenêtre de confirmation, puis cliquez sur [OK].
- Page 67 Ajoutez des images et appliquez des informations de position aux images. Cliquez sur [Add Picture Files…] (Ajouter fichiers image…) dans la fenêtre principale et spécifiez les fichiers d’image enregistrés sur l’ordinateur pour importer les fichiers. Cliquez sur [Save All…] (Enregistrer tout…) pour enregistrer les images fixes avec des informations de position ajoutées.
- Page 68 Il est en outre aussi possible d’ajouter et d’afficher des images fixes avec informations de position en les glissant-déplaçant vers la fenêtre principale « Affichage Plan ». (Picture Motion Browser) sur le bureau. [Picture Motion Browser]. [All Programs] (sous [Sony Picture Utility] (Utilitaire...
- Page 69 Les informations de position sont supprimées. Support technique Des informations complémentaires sur ce produit et des réponses à des questions fréquemment posées sont disponibles sur le site Internet d’assistance Client Sony. http://www.sony.net/ sur sa vignette, dont vous Utilisation du logiciel...
-
Page 70: Informations Complémentaires
Dépannage Si vous rencontrez un problème lors de l’utilisation de l’unité, reportez- vous au tableau suivant pour remédier au problème. S’il persiste, contactez votre distributeur Sony ou centre de service après-vente local Sony. Un fichier de journal enregistré manque. Il se peut que vous ayez utilisé l’unité dans des endroits où l’unité GPS •... - Page 71 Votre ordinateur ne reconnaît pas l’unité. Il se peut que votre ordinateur ne reconnaisse pas correctement l’unité • parce que vous avez connecté l’unité et l’ordinateur avec le câble USB avant de démarrer l’ordinateur. Débranchez le câble USB, redémarrez l’ordinateur, puis reconnectez le câble USB.
-
Page 72: Spécifications
Environ 10 heures (lors de l’utilisation d’une pile alcaline LR6 (format AA) Sony), Environ 14 heures (Lors de l’utilisation d’une batterie Nickel-Métal Hydride HR6 (format AA) Sony) La durée d’autonomie peut différer selon la situation ou les conditions ambiantes. Fréquence de réception 1 575,42 MHz (bande L1, code C/A) Méthode de réception... - Page 73 Format d’image pris en charge Fichier de format JPEG compatible avec Exif 2.1 ou ultérieur (La garantie ne s’applique pas aux photos qui ne sont pas prises avec des appareils Sony.) Articles inclus • Unité GPS (GPS-CS1) (1) • Mousqueton (1) •...