Quick Links
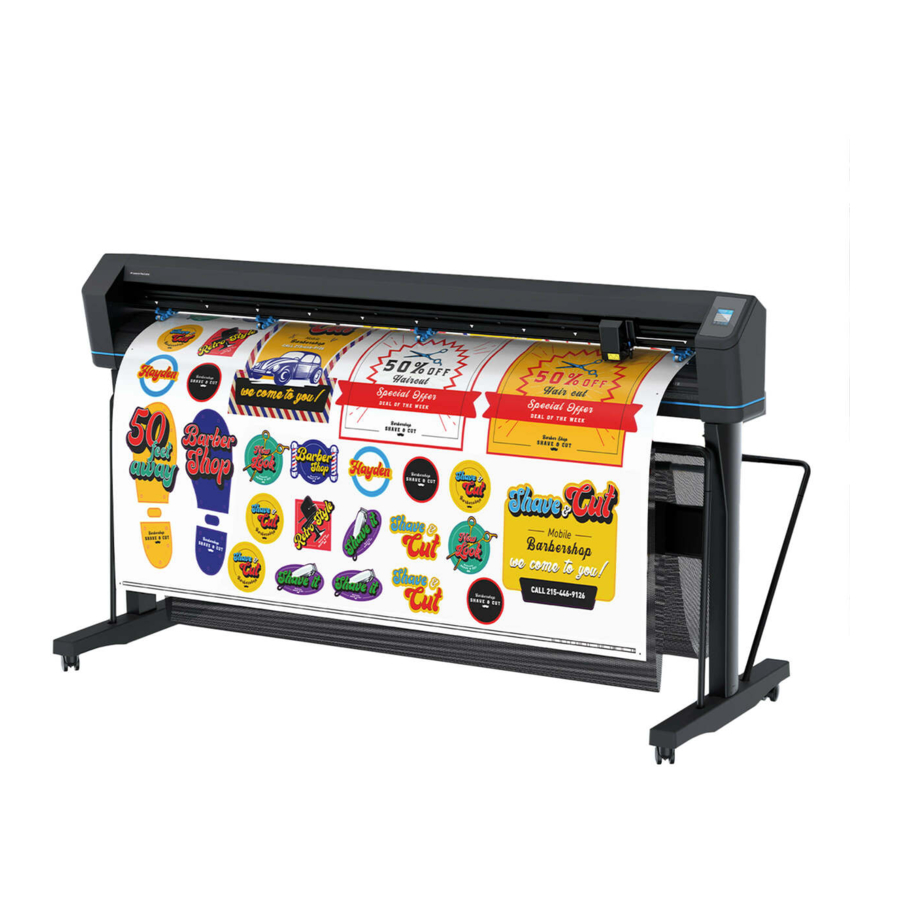
HP Latex Plus Cutter
EN
Assembly instructions
Massicot HP Latex Plus
FR
Instructions d'assemblage
HP Latex Plus Schneide-
DE
maschine
Montageanleitung
Plotter da taglio HP Latex
IT
Plus
Istruzioni per l'installazione
Cortadora HP Latex Plus
ES
Instrucciones de montaje
Sistema de Corte HP Latex
PT
Plus
Instruções de montagem
HP laxex Plus قاطع
AR
تعليمات التجميع
*9TL96-90004*
9TL96-90004
© Copyright 2021 HP Development Company, L.P.
Large Format Division
Camí de Can Graells 1-21 · 08174
Sant Cugat del Vallès
Barcelona · Spain
All rights reserved
Printed in XXX
EN
In-box content list:
IT
Elenco dei contenuti della
- Cutter body
confezione:
- Stand
- Corpo del plotter da taglio
- HP standard holder
- Supporto
- HP standard blades (x2)
- Supporto standard HP
- HP cut-off knife
- Lame standard HP (x2)
- HP 3-in media flanges
- Lama di taglio HP
- Power cord
- Flange per supporti HP da 3 pollici
- Software RIP card
- Cavo di alimentazione
- Setup poster
- Scheda software RIP
- Introduction guide document
- Pieghevole di installazione
- Documento di guida introduttiva"
FR
Liste du contenu de la boîte
- Corps du massicot
ES
Lista del contenido de la caja:
- Support
- Support standard HP
- Armazón de la cortadora
- Lames standard HP (x2)
- Soporte
- Couteau sectionneur HP
- Soporte HP estándar
- Brides de substrat HP de 3 po
- Cuchillas HP estándar (2)
- Cordon d'alimentation
- Cuchillo de corte de HP
- Carte RIP du logiciel
- Pestañas del sustrato 3 pulg. de HP
- Poster d'installation
- Cable de alimentación eléctrica
- Document du manuel
- Tarjeta RIP de software
d'introduction
- Póster de configuración
- Guía de introducción al documento
DE
Übersicht über den -
Verpackungsinhalt:
- Gehäuse der Schneidemaschine
- Standfuß
- HP Standard-Halterung
- HP Standardklingen (2)
- HP Schnittmesser
- HP 3-Zoll-Medienflansche
- Netzkabel
- Software-RIP-Karte
- Setup-Poster
- Einführungsleitfaden
EN
Please read these instructions carefully. These assembly instructions explain how to assemble the cutter.
Notice that the icons used in this document are also located on the cutter packaging. The icons help you locate the
parts needed at each stage of the assembly. Because spare screws are supplied, some screws will remain unused after
assembly of the cutter.
FR
Veuillez lire attentivement ces instructions. Ces instructions d'assemblage expliquent comment assembler le
massicot. Notez que les icônes utilisées dans ce document apparaissent également sur l'emballage du massicot. Les
icônes vous aident à localiser les pièces requises à chaque étape de l'assemblage. Des vis de rechange étant fournies, il
se peut que certaines vis ne soient utilisées après l'assemblage du massicot.
DE
Lesen Sie diese Anleitungen sorgfältig durch. Diese Montageanleitung enthält Instruktionen für den
Zusammenbau der Schneidemaschine. Die darin verwendeten Symbole befinden sich auch auf der Verpackung der
Schneidemaschine. Die Symbole erleichtern das Auffinden der Teile, die in den einzelnen Montagephasen benötigt
werden. Da im Lieferumfang Reserveschrauben enthalten sind, können einige Schrauben nach dem Zusammenbau der
Schneidemaschine übrig bleiben.
IT
Leggere attentamente queste istruzioni. Queste istruzioni di installazione spiegano come assemblare il plotter
da taglio. Le icone utilizzate in questo documento si trovano anche sulla confezione del plotter da taglio. Le icone
consentono di individuare le parti necessarie durante i vari passaggi dell'installazione. Poiché vengono fornite viti di
riserva, alcune di queste viti potrebbero risultare inutilizzate al termine dell'installazione del plotter da taglio.
ES
Lea atentamente estas instrucciones. Estas instrucciones de montaje explican cómo montar la cortadora.
Observe que los iconos utilizados en este documento también se encuentran en el embalaje de la cortadora. Los iconos
le ayudan a localizar las piezas necesarias en cada etapa del montaje. También se incluyen tornillos de repuesto, por lo
que algunos pueden quedar sin utilizar después de montar la cortadora.
PT
Leia as instruções com atenção. Essas instruções de montagem explicam como montar o cortador. Observe que
os ícones usados neste documento também estão localizados na embalagem do cortador. Os ícones ajudam a localizar
as peças necessárias em cada etapa da montagem. Como são fornecidos parafusos sobressalentes, alguns parafusos
podem sobrar após a montagem do cortador.
يرجى ق ر اءة هذه التعليمات بعناية. تشرح تعليمات التجميع هذه كيفية تجميع القاطع. الحظ أن األيقونات المستخدمة
في هذا المستند توجد أيض ً ا على تغليف القاطع. تساعدك األيقونات على تحديد موقع األج ز اء المطلوبة في لك مرحلة من
.التجميع. ونظر ً ا إلرفاق مسامير إضافية، فإن بعض المسامير تبقى غير مستخدمة بعد تجميع القاطع
PT
Lista de conteúdo da caixa:
- Corpo do sistema de corte
- Suporte
- Suporte padrão HP
- Lâminas padrão HP (x2)
- Lâmina de corte HP
- Flanges de mídia de 3 pol. HP
DE
- Cabo de alimentação
Fuß) und hinter der Schneidemaschine ein Freiraum von 1 m (3,3 Fuß) erforderlich.
- Cartão RIP de software
IT
- Pôster de instalação
anteriore e di 1 m (3,3 piedi) sul retro.
- Documento guia de introdução
ES
1 m (3,3 pies) en la parte trasera.
:قائمة محتويات الصندوق
AR
- هيلك القاطع
PT
- حامل
atrás.
المساحة الالزمة للتجميع هي 3 م (01 أقدام) في المقدمة و 1 م (3.3 أقدام) في
PH - حامل قياسي من
PH - شفرتان قياسيتان من
PH - سكين قطع من
- حواف وسائط مقاس 3 بوصة
PH من
- سلك طاقة
(معالج الصورPIR - بطاقة برنامج
IT
)النقطية
- م ُ لصق اإلعداد
ES
- مستند دليل المقدمة
PT
60
IT
ES
PT
minutos.
EN
may be required to complete the installation of this cutter. Contact your IT manager
to get connectivity settings.
FR
serveur proxy web peuvent être nécessaires pour réaliser l'installation de ce
massicot. Contactez votre responsable informatique pour obtenir les paramètres de
connectivité.
DE
der Schneidemaschine möglicherweise ein Web-Proxy-Server-Name
und ein Port angegeben werden. Fragen Sie Ihren IT-Manager nach den
Verbindungseinstellungen.
IT
una porta del server proxy Web per completare l'installazione di questo plotter da
taglio. Contattare il responsabile IT per ottenere le impostazioni di connettività.
ES
y un puerto de servidor proxy web para completar la instalación de esta cortadora.
Póngase en contacto con su administrador de TI para obtener la configuración de
conectividad."
PT
servidor proxy da web podem ser necessários para completar a instalação deste
cortador. Entre em contato com o seu gerente de TI para obter as configurações de
conectividade.
AR
1
The space required for assembly is 3m (10ft feet)
EN
in front and 1m (3,3ft feet) at the back.
FR
L'espace requis pour l'assemblage est de 3 m
(10 pieds) à l'avant du massicot et de 1 m (3,3 pieds)
à l'arrière.
Für den Zusammenbau ist vor der Schneidemaschine ein Freiraum von 3 m (10
Per l'installazione, è necessario lasciare uno spazio di 3 m (10 piedi) nella parte
El espacio necesario para el montaje es de 3 m (10 pies) en la parte frontal y de
O espaço necessário para a montagem é de 3m (10 pés) à frente e 1m (3,3 pés)
EN
2 people are required to perform certain tasks.
L'exécution de certaines tâches nécessite la présence de 2 personnes.
FR
DE
Für bestimmte Tätigkeiten werden 2 Personen benötigt.
Per determinate operazioni, sono necessarie 2 persone.
Algunas tareas se deben realizar entre 2 personas.
São necessárias 2 pessoas para a realização de determinadas tarefas.
يتطلب األمر وجود شخصين إلج ر اء مهام معينة
EN
Time required for assembly of the cutter is approximately 60 minutes.
FR
Le temps requis pour l'assemblage du massicot est d'environ 60
minutes.
DE
Der Zusammenbau der Schneidemaschine dauert ca. 60 Minuten.
Il tempo necessario per installare il plotter da taglio è di circa 60 minuti.
El tiempo de montaje de la cortadora es de aproximadamente 60 minutos.
O tempo necessário para montagem do cortador é de aproximadamente 60
الوقت الالزم لتجميع القاطع هو 06 دقيقة تقريب ً ا
Note: Depending on your LAN installation, a web proxy server name and port
Remarque : Selon votre installation de réseau local, un port et un nom du
Hinweis: Abhängig von Ihrer LAN-Installation müssen bei der Installation
Nota: A seconda dell'installazione LAN, potrebbe essere necessario un nome e
Nota: Dependiendo de su instalación LAN, es posible que necesite un nombre
Nota: Dependendo da instalação da sua rede local, o nome e a porta de um
مالحظة: وفق ً ا لتثبيت شبكة االتصال المحلية لديك، قد يتطلب األمر اسم خادم
وكيل ويب ومنفذ إلكمال تركيب هذا القاطع. تواصل مع مدير تكنولوجيا المعلومات
.لديك للحصول على إعدادات قابلية االتصال
AR
.الجزء الخلفي
AR
AR
AR

Related Manuals for HP Latex Plus


Summary of Contents for HP Latex Plus
- Page 1 - Lâmina de corte HP à l’arrière. - HP 3-in media flanges - Lama di taglio HP - Flanges de mídia de 3 pol. HP Für den Zusammenbau ist vor der Schneidemaschine ein Freiraum von 3 m (10 Instructions d’assemblage - Power cord - Flange per supporti HP da 3 pollici - Cabo de alimentação...
- Page 2 .جهز سطح مستو ٍ لوضع جسم القاطع عليه، ننصح بطاولة أزل الغطائين على األط ر اف والحقيبة البالستيكية. انتبه للغطائين .أفرغ جسم القاطع من الصندوق وضعه على السطح المستوي .على األط ر اف، محاور القاطع محفوظة داخلها .هام: يتطلب األمر شخصين www.hp.com/go/plusprintandcutter/stand_assembly...
- Page 3 Assemble the cutter Assemblage du massicot Zusammenbau der Schneidemaschine Assemblaggio del plotter da taglio Monte la cortadora Montar o sistema de corte تركيب القاطع The stand parts are at the bottom of the box (1), and The stand box includes the basket (1) and the stand (2). Remove the stand parts from the box.
- Page 4 Identify the screws. Identify the tools. Insert 2 M5x18 screws and washers at the bottom of the Insert the horizontal beam into slots in the legs. horizontal panels (left and right), and screw them in 7 to 8 turns. Identifiez les vis. Identifiez les outils.
- Page 5 Firmly insert 2 M5x18 screws and washers just above the two Turn the stand upside down Push the 4 wheels into the feet. Mount both feet to the legs with a clamp plate and 4 M5x60 screws that are in the slots at each side. Important: 2 people are required.
- Page 6 Turn the stand upright. Place the stand next to the cutter and lock the wheels. Locate the left and right positioning pins to place the cutter on Place the cutter on the stand, and make sure it is correctly the stand. positioned on the pins.
- Page 7 Fix the cutter to the stand with two M5x18 screws each side. Optional: Take the power cord and the LAN or USB cable and Optional: The right-hand side, fix the cable to the stand with 4 Mount the left and right roll support brackets and fix mark them at 26-28 cm from the end.
- Page 8 If you did not route the cables, you can insert the small Guide the cables through the slots in the side cover and fix Insert another set of small covers, then mount the cover at Put a cap at each end of the tubes. covers.
- Page 9 Slide the two guiding bushes and the brake over a roll as Put the 2 rolls onto the roll support brackets. Make sure the Locate the basket parts. Unroll the basket and put it in the floor. shown. Check the parts are well positioned. brake is correctly positioned.
- Page 10 Insert the long straight tube into the middle loop of the Insert the L tubes through the end loops and across the basket Pass the basket between the printer and the stand. Remove the stopper from the long straight tube. Insert the basket.
- Page 11 Insert the 4 small tubes. The basket is now assembled. Insert the 4 straight tubes into the holes on feet. Turn the tubes clockwise 90° until the spring buttons snap Important: Be sure the orientation of the spring buttons is into place.
- Page 12 Individuare l’etichetta di supporto posizionata all’interno del plotter da taglio insieme alla licenza RIP. Incollare l’etichetta sul retro del plotter da taglio come Immettere il numero di serie utilizzando il numero di serie del plotter da taglio (Soluzioni di taglio HP Latex Plus) o il numero di serie mostrato.
- Page 13 Setting up the cutter Installation du massicot Einrichten der Schneidemaschine Installazione del plotter da taglio Configuración de la cortadora Configuração do cortador إعداد القاطع Unlock the wheels and move the cutter to its final location. Important: If the knife is not installed, take it from the Install the LAN cable and power cables at the back of the accessory box and install it.
- Page 14 Switch the cutter on. The front panel prompts you to select a language and follow Your HP FlexiPrint and Cut RIP license is included, go to: www.saicloud.com to download it using the activation code the first configuration steps. written on the card provided.
- Page 16 The information contained herein is subject to change without La información contenida en el presente documento está sujeta a notice. The only warranties for HP products and services are set forth cambios sin previo aviso. Las únicas garantías de los productos y...