Sony CDX-GT56UI Operating Instructions (CDX-GT56UI) Operating Instructions Manual
Car audio: fm/am compact disc player
Show thumbs
Also See for CDX-GT56UI Operating Instructions (CDX-GT56UI):
- Operating instructions manual (56 pages) ,
- Specifications (5 pages) ,
- Installation/connections (2 pages)
Table of Contents
Available languages
Available languages
FM/AM
Compact Disc
Player
Owner's Record
The model and serial numbers are located on the bottom of the unit.
Record the serial number in the space provided below.
Refer to these numbers whenever you call upon your Sony dealer
regarding this product.
Model No. CDX-GT56UI Serial No.
To cancel the demonstration (DEMO) display, see page 5.
Para cancelar la pantalla de demostración (DEMO), consulte la
página 4.
CDX-GT56UI
4-410-927-
Operating Instructions US
Manual de
instrucciones
(1)
ES
Chapters
Table of Contents

Related Manuals for Sony CDX-GT56UI Operating Instructions (CDX-GT56UI)


Summary of Contents for Sony CDX-GT56UI Operating Instructions (CDX-GT56UI)
-
Page 1: Compact Disc Player
The model and serial numbers are located on the bottom of the unit. Record the serial number in the space provided below. Refer to these numbers whenever you call upon your Sony dealer regarding this product. Model No. CDX-GT56UI Serial No. - Page 2 All other marks and logos are the property of their respective owners. All rights reserved. ZAPPIN and Quick-BrowZer are trademarks of Sony Corporation. Windows Media is either a registered trademark or trademark of Microsoft Corporation in the United States and/or other countries.
- Page 3 Warning if your car’s ignition has no ACC position Be sure to set the Auto Off function (page 19). The unit will shut off completely and automatically in the set time after the unit is turned off, which prevents battery drain. If you do not set the Auto Off function, press and hold ...
-
Page 4: Table Of Contents
Table of contents Getting Started ........... . . 5 Canceling the DEMO mode . -
Page 5: Getting Started
Getting Started Canceling the DEMO mode You can cancel the demonstration display which appears during turning off. Press and hold the select button. The setup display appears. Rotate the control dial until “DEMO” appears, then press it. Rotate the control dial to select “DEMO-OFF,”... -
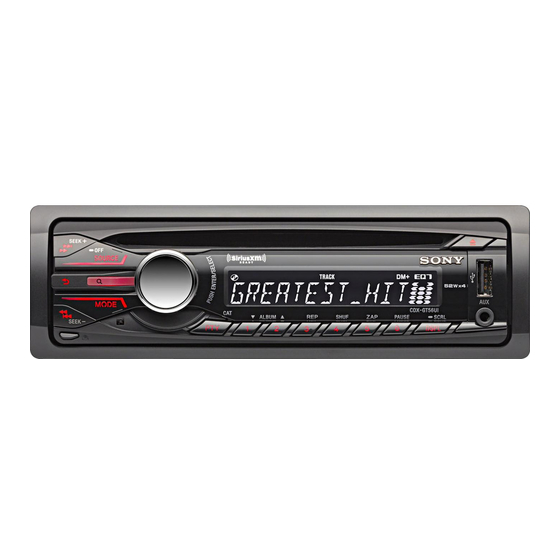
Page 6: Location Of Controls
Location of controls Main unit This section contains instructions on the location of controls and basic operations. SEEK +/– buttons Radio: To tune in stations automatically (press); find a station manually (press and hold). CD/USB: To skip tracks (press); skip tracks continuously (press, then press again within about 1 second and hold);... -
Page 7: Number Buttons
PTY/CAT* button page 9, 20 To select PTY in RDS. Number buttons Radio: To receive stored stations (press); store stations (press and hold). CD/USB: /: ALBUM / (during MP3/ WMA/AAC playback) To skip albums (press); skip albums continuously (press and hold). -
Page 8: Rm-X211 Remote Commander
RM-X211 Remote commander Remove the insulation film before use. OFF button To turn off the power; stop the source. SOURCE button* To turn on the power; change the source (Radio/CD/USB/AUX). ()/ () buttons To control Radio/CD/USB, the same as ... -
Page 9: Radio
Radio Storing and receiving stations Caution When tuning in stations while driving, use Best Tuning Memory (BTM) to prevent an accident. Storing automatically — BTM Press repeatedly until “TUNER” appears. To change the band, press repeatedly. You can select from FM1, FM2, FM3, AM1 or AM2. -
Page 10: Playing A Disc
Type of programs NEWS (News), INFORM (Information), SPORTS (Sports), TALK (Talk), ROCK (Rock), CLS ROCK (Classic Rock), ADLT HIT (Adult Hits), SOFT RCK (Soft Rock), TOP 40 (Top 40), COUNTRY (Country), OLDIES (Oldies), SOFT (Soft), NOSTALGA (Nostalgia), JAZZ (Jazz), CLASSICL (Classical), R AND B (Rhythm and Blues), SOFT R B (Soft Rhythm and Blues), LANGUAGE (Foreign Language), REL... -
Page 11: Usb Devices
USB devices • MSC (Mass Storage Class)-type USB devices compliant with the USB standard can be used. • Corresponding codec is MP3 (.mp3), WMA (.wma), AAC (.m4a) and AAC (.mp4). • Backup of data in a USB device is recommended. For details on the compatibility of your USB device, visit the support site on the back cover. -
Page 12: Ipod
iPod In these Operating Instructions, “iPod” is used as a general reference for the iPod functions on the iPod and iPhone, unless otherwise specified by the text or illustrations. For details on the compatibility of your iPod, see “About iPod” (page 22) or visit the support site on the back cover. -
Page 13: Operating An Ipod Directly - Passenger Control
Operating an iPod directly — Passenger control You can operate an iPod directly even when connected to the dock connecter. During playback, press and hold . “MODE IPOD” appears and you will be able to operate the iPod directly. To exit the passenger control, press and hold . -
Page 14: Searching A Track By Name - Quick-Browzer
Shuffle play Select SHUF ALBUM SHUF DISC* SHUF PODCAST* SHUF ARTIST* SHUF PLAYLIST* SHUF GENRE* SHUF DEVICE* SHUF OFF *1 iPod only *2 CD only *3 USB and iPod only To play album in random order. disc in random order. podcast in random order. -
Page 15: Searching A Track By Listening To Track Passages - Zappin
Press the select button. The display returns to the Quick- BrowZer mode and the selected item appears. Rotate the control dial to select the desired item and press it. Playback starts if the selected item is a track. To cancel Jump mode, press ... -
Page 16: Sound Settings And Setup Menu
Sound Settings and Setup Menu Changing the sound settings Adjusting the sound characteristics During reception/playback, press the select button. Rotate the control dial until the desired menu item appears, then press it. Rotate the control dial to select the setting, then press it. Press (BACK). - Page 17 The equalizer curve setting can be memorized for each source. Customizing the equalizer curve — EQ7 Setting “CUSTOM” of EQ7 allows you to make your own equalizer settings. Select a source, then press the select button. Rotate the control dial until “EQ7 SETTING”...
-
Page 18: Adjusting Setup Items
Rotate the control dial to select the subwoofer position from “NEAR,” “NORMAL” or “FAR,” then press it. Press (BACK). To cancel listening position, select “OFF” on step 3. Adjusting the listening position You can fine-tune the listening position setting. During reception/playback, press the select button. - Page 19 CAUT ALM* (Caution Alarm) Activates the caution alarm: “ON,” “OFF” (page 5). AUX-A* (AUX Audio) Activates the AUX source display: “ON,” “OFF” (page 20). AUTO OFF Shuts off automatically after a desired time when the unit is turned off: “NO,” “30S (Seconds),”...
-
Page 20: Using Optional Equipment
Using optional equipment Auxiliary audio equipment By connecting an optional portable audio device to the AUX input jack (stereo mini jack) on the unit and then simply selecting the source, you can listen on your car speakers. Connecting the portable audio device Turn off the portable audio device. -
Page 21: Additional Information
Rotate the control dial to select “LOCK SEL,” then press it. Rotate the control dial to select “LOCK- ON,” then press it. To unblock the channels, select “OFF” in step 3, then enter the passcode. The initial passcode is “0000.” Changing the passcode On the set up menu (page 19), rotate the control dial to select “PARENTAL,”... -
Page 22: About Ipod
Folder (album) If you have any questions or problems MP3/WMA/ concerning your unit that are not covered in AAC file (track) this manual, consult your nearest Sony dealer. -
Page 23: Maintenance
Maintenance Replacing the lithium battery of the remote commander When the battery becomes weak, the range of the remote commander becomes shorter. Replace the battery with a new CR2025 lithium battery. Use of any other battery may present a risk of fire or explosion. Notes on the lithium battery •... -
Page 24: Specifications
Specifications AUDIO POWER SPECIFICATIONS CEA2006 Standard Power Output: 17 Watts RMS 4 at 4 Ohms < 1% THD+N SN Ratio: 80 dBA (reference: 1 Watt into 4 Ohms) Tuner section Tuning range: 87.5 – 107.9 MHz Antenna (aerial) terminal: External antenna (aerial) connector Intermediate frequency: 25 kHz Usable sensitivity: 8 dBf Selectivity: 75 dB at 400 kHz... -
Page 25: Troubleshooting
Troubleshooting The following checklist will help you remedy problems you may encounter with your unit. Before going through the checklist below, check the connection and operating procedures. For details on using the fuse and removing the unit from the dashboard, refer to the installation/connections manual supplied with this unit. - Page 26 PTY displays “- - - - - - - -.” The current station is not an RDS station. RDS data has not been received. The station does not specify the program type. CD playback The disc cannot be loaded. ...
-
Page 27: Error Displays/Messages
OFFSET There may be an internal malfunction. – Check the connection. If the error indication remains on in the display, consult your nearest Sony dealer. OVERLOAD USB device is overloaded. – Disconnect the USB device, then change the source by pressing . - Page 28 Your subscription has been updated. – Press the select button. If these solutions do not help improve the situation, consult your nearest Sony dealer. If you take the unit to be repaired because of CD playback trouble, bring the disc that was...
- Page 30 Todos los derechos reservados. ZAPPIN y Quick-BrowZer son marcas comerciales de Sony Corporation. Windows Media es una marca comercial registrada o una marca comercial de Microsoft Corporation en los EE. UU. y otros países.
- Page 31 Tabla de contenido Procedimientos iniciales ..........4 Cancelación del modo DEMO .
-
Page 32: Procedimientos Iniciales
Procedimientos iniciales Cancelación del modo DEMO Es posible cancelar la pantalla de demostración que aparece durante el apagado. Mantenga presionado el botón de selección. Aparecerá la pantalla de ajustes. Gire el selector de control hasta que aparezca “DEMO” y, a continuación, presiónelo. -
Page 33: Extracción Del Panel Frontal
Extracción del panel frontal Es posible extraer el panel frontal de la unidad para evitar que la roben. Mantenga presionado . La unidad se apagará. Presione y, a continuación, extraiga el panel frontal hacia usted. Alarma de precaución Si gira el interruptor de la llave de encendido hasta la posición OFF sin haber extraído el panel frontal, la alarma de precaución sonará... -
Page 34: Ubicación De Los Controles
Ubicación de los controles Unidad principal Este apartado contiene instrucciones acerca de la ubicación de los controles y las operaciones básicas. Botones SEEK +/– Radio: Para sintonizar emisoras en forma automática (presionar); para localizar una emisora en forma manual (mantener presionado). - Page 35 Botón (BACK) Presione para volver a la pantalla anterior. Receptor del control remoto Botón MODE* página 9 Presione este botón para seleccionar la banda de radio (FM/AM). Manténgalo presionado para acceder o cancelar el modo de control del pasajero.
-
Page 36: Control Remoto Rm-X211
Control remoto RM-X211 Retire la película de aislamiento antes de usar la unidad. Botón OFF Para apagar la alimentación; para detener la fuente. Botón SOURCE* Para activar la alimentación; para cambiar la fuente (Radio/CD/USB/ AUX). Botones ()/ () Para controlar la Radio/CD/USB, de la misma manera que con ... -
Page 37: Radio
Radio Almacenamiento y recepción de emisoras Precaución Para sintonizar emisoras mientras maneja, utilice la función BTM (Memoria de la mejor sintonía) para evitar accidentes. Almacenamiento automático — BTM Presione varias veces hasta que aparezca “TUNER”. Para cambiar de banda, presione ... - Page 38 Selección de PTY (Tipos de programa) Muestra el tipo de programa que se recibe actualmente. Asimismo, busca el tipo de programa seleccionado. Presione durante la recepción de FM. Si la estación está transmitiendo datos PTY, aparece el nombre del tipo de programa actual.
-
Page 39: Reproducción De Un Disco
Reproducción de un disco Esta unidad permite reproducir discos CD-DA (incluidos CD TEXT) y CD-R/ CD-RW (archivos MP3/WMA/AAC (página 24)). Inserte el disco (con la etiqueta orientada hacia arriba). La reproducción se inicia automáticamente. Para expulsar el disco, presione . Nota Al expulsar o insertar un disco, mantenga desconectado cualquier dispositivo USB para... -
Page 40: Ipod
Para detener la reproducción, mantenga presionado durante 1 segundo. Para quitar el dispositivo USB, detenga la reproducción de USB y extraiga el dispositivo USB. Notas • No utilice dispositivos USB demasiado grandes o pesados, ya que se podrán caer debido a la vibración, o bien, provocar una conexión deficiente. -
Page 41: Utilización Directa Del Ipod - Control De Pasajero
Mantenga presionado durante 1 segundo para detener la reproducción. Para quitar el iPod, detenga la reproducción del iPod y extraiga el iPod. Precaución para iPhone Al conectar un iPhone mediante USB, el volumen del teléfono se controla a través del iPhone. Para que el volumen del dispositivo no sea extremadamente alto tras una llamada, durante las llamadas, no lo aumente en la unidad. -
Page 42: Búsqueda Y Reproducción De Pistas
Búsqueda y reproducción de pistas Reproducción de pistas en diferentes modos Puede escuchar pistas varias veces (reproducción repetida) o en orden aleatorio (reproducción aleatoria). Los modos de reproducción disponibles difieren según la fuente de sonido seleccionada. Durante la reproducción, presione ... -
Page 43: Búsqueda De Una Pista Por Nombre - Quick-Browzer
Búsqueda de una pista por nombre — Quick- BrowZer™ Puede buscar una pista fácilmente en un CD o dispositivo USB por categoría. Presione (BROWSE)*. La unidad accede al modo Quick- BrowZer y aparece la lista de categorías de búsqueda. Cuando aparezca la lista de pistas, presione (BACK) varias veces hasta que aparezca la categoría de búsqueda... -
Page 44: Zappin
Búsqueda por orden alfabético — Búsqueda alfabética Cuando se conecta un iPod a la unidad, es posible buscar un elemento deseado de manera alfabética. Presione + en el modo Quick- BrowZer. Gire el selector de control para seleccionar la primera letra del elemento deseado y, a continuación, presiónelo. -
Page 45: Ajustes De Sonido Y Menú De Configuración
Ajustes de sonido y Menú de configuración Cambio de los ajustes de sonido Ajuste de las características de sonido Durante la recepción/reproducción, presione el botón de selección. Gire el selector de control hasta que aparezca el elemento de menú deseado y, a continuación, presiónelo. -
Page 46: Uso De Funciones De Sonido Sofisticadas - Sistema De Sonido Avanzado
Uso de funciones de sonido sofisticadas — Sistema de sonido avanzado El Sistema de sonido avanzado crea un campo de sonido ideal en el automóvil gracias a su procesamiento digital de señales. Selección de la calidad de sonido — Preajuste de EQ7 Puede seleccionar una curva de ecualizador entre 7 curvas de ecualizador (XPLOD, VOCAL, EDGE, CRUISE, SPACE,... - Page 47 Presione (BACK) dos veces. La curva de ecualizador se almacena en “CUSTOM”. Optimización de sonido por Alineación de tiempo — Posición de escucha La unidad puede simular un campo de sonido natural al demorar la salida de sonido de cada altavoz con el fin de adaptarse a su posición.
-
Page 48: Ajuste De Los Elementos De Configuración
DM+ Avanzado DM+ Avanzado mejora el sonido comprimido digitalmente, ya que restaura las altas frecuencias que se pierden en el proceso de compresión. Durante la reproducción, presione el botón de selección. Gire el selector de control hasta que aparezca “DM+” y, a continuación, presiónelo. - Page 49 AUTO OFF Desconecta la alimentación automáticamente una vez transcurrido un período de tiempo deseado cuando la unidad está apagada: “NO”, “30S (segundos)”, “30M (minutos)”, “60M (minutos)”. REAR/SUB* Permite cambiar la salida de audio: “SUB-OUT” (altavoz potenciador de graves), “REAR-OUT” (amplificador de potencia).
-
Page 50: Uso De Equipo Opcional
Uso de equipo opcional Equipo de audio auxiliar Si conecta un dispositivo de audio portátil opcional a la toma de entrada AUX (minitoma estéreo) de la unidad y simplemente selecciona la fuente, podrá escucharla por los altavoces del automóvil. Conexión del dispositivo de audio portátil Apague el dispositivo de audio portátil. - Page 51 Almacenar canales Mientras recibe el canal que desea almacenar, mantenga presionado un botón numérico (del al ) hasta que aparezca “MEM”. Para recibir el canal almacenado, seleccione SX1, SX2 o SX3 al presionar y luego presione un botón numérico (del al ).
-
Page 52: Información Complementaria
Información complementaria Precauciones • Deje que la unidad se enfríe antes de usarla si el automóvil ha estado estacionado bajo la luz directa del sol. • No deje el panel frontal o los dispositivos de audio dentro del automóvil; de lo contrario, se puede producir una falla debido a la temperatura alta bajo la luz directa del sol. - Page 53 Si desea realizar alguna consulta o solucionar algún problema relativo a la unidad que no se trate en este manual, póngase en contacto con el distribuidor Sony más cercano.
-
Page 54: Mantenimiento
Mantenimiento Sustitución de la pila de litio del control remoto El alcance del control remoto disminuye a medida que se agota la pila. Sustitúyala por una pila de litio CR2025 nueva. El uso de cualquier otra pila podría provocar un incendio o una explosión. -
Page 55: Especificaciones
Especificaciones Sección del sintonizador Rango de sintonización: De 87,5 a 107,9 MHz Terminal de antena: Conector de antena externa Frecuencia intermedia: 25 kHz Sensibilidad útil: 8 dBf Selectividad: 75 dB a 400 kHz Relación señal-ruido: 80 dB (estéreo) Separación: 50 dB a 1 kHz Respuesta de frecuencia: 20 –... -
Page 56: Solución De Problemas
Solución de problemas La siguiente lista de comprobación le ayudará a solucionar los problemas que puedan producirse con la unidad. Antes de consultarla, revise los procedimientos de conexión y de funcionamiento. Para obtener información sobre cómo usar el fusible y quitar la unidad del tablero, consulte el manual de instalación/conexiones suministrado con esta unidad. - Page 57 No es posible utilizar la sintonización programada. Almacene la frecuencia correcta en la memoria. La señal de emisión es demasiado débil. No es posible utilizar la sintonización automática. La señal de emisión es demasiado débil. – Use la sintonización manual. PTY muestra “- - - - - - - -”.
- Page 58 Es posible que se haya producido una falla interna. – Revise la conexión. Si el indicador de error permanece en pantalla, póngase en contacto con el distribuidor Sony más cercano. OVERLOAD El dispositivo USB está sobrecargado. – Desconecte el dispositivo USB y, a continuación, presione ...
- Page 59 – Presione el botón de selección. Si estas soluciones no ayudan a mejorar la situación, póngase en contacto con el distribuidor Sony más cercano. Si entrega la unidad para su reparación a causa de problemas en la reproducción de CD, lleve el disco que se utilizó...
- Page 60 http://www.sony.net/...