Motorola O2 Manual
Digital cordless telephone with answering machine
Hide thumbs
Also See for O2:
- Manual (60 pages) ,
- Quick start manual (11 pages) ,
- User manual (142 pages)

Related Manuals for Motorola O2


Summary of Contents for Motorola O2
- Page 1 Motorola O2 Digital Cordless Telephone with Answering Machine Ideal for outside use For: O211, O212, O213 and O214 Warning: Charge the handset for 16 hours before use.
- Page 2 Make internal calls, transfer external calls, hold a 3-way conversation between two internal callers and an external caller. Need help? If you have any problems setting up or using your O2, please contact Customer Services on: Luxembourg: 8002-5704 The Netherlands: 0800-0226749 Belgium: 0800-79171 Alternatively, you may find the answer in the ‘Help’...
- Page 3 1 x Belt clip (pre installed) • Power adaptor for the charger • Screws and plugs for wall mounting If you have purchased an O2 multiple pack you will also have the following additional items: • O2 handset with standard •...
-
Page 4: Table Of Contents
Getting started ..............7 Getting to know your phone .........11 Using the phone ............... 16 Switch the handset on / off .................16 To make a call ....................16 To make a call by pre-dialling ..............16 To make a call using fast call keys ............16 To make a hands-free call ................16 Call from the phonebook ................16 Call from the Calls Lists .................17... - Page 5 4.16 To check memory status ................24 4.17 To delete all entries ..................24 Calls Lists ................25 New calls alert ....................25 To view details of the call ................25 To save a number from the Calls Lists to the phonebook ....26 To delete a Calls Lists entry ................26 To delete entire Calls Lists ................26 To redial the last number ................27 To view and dial a number in the redial list ..........27...
- Page 6 Base settings ..............35 To set the base ringtone ................35 To set the base ringer volume ..............35 To change the dialling mode ..............35 To set ring priority ..................35 To change the recall mode ................36 To change the System PIN ................36 To reset the phone ..................37 To switch ECO on / off ..................37 To switch ECO PLUS on / off..............37 9.10...
-
Page 7: Getting Started
Although the O2 handset is water resistant we do not recommend you locate your main base or charger in the bathroom or other humid areas. You need to place your O2 base within 2 metres of the mains power and telephone wall sockets so that the cables will reach. The socket-outlet should be installed near the equipment and should be easily accessible. - Page 8 Setting up Important The base station must be plugged into the mains power at all times. Do not connect the telephone line cord into the wall socket until the handset is fully charged. Use only the power adaptor and telephone line cord supplied with the product.
- Page 9 Important Warning! Use only the approved rechargeable Ni-MH battery pack (750mAh Ni-MH rechargeable battery pack) supplied with your O2. Battery low icon is displayed and you hear a warning beep every 30 seconds during a call, you will need to recharge the handset before you can use it again. When charging, icon will scroll on the display.
- Page 10 Battery performance In ideal conditions, fully charged batteries should give up to 12 hours talk time or up to 250 hours standby time on a single charge Note that new batteries do not reach their full capacity until they have been put to normal use for several days.
-
Page 11: Getting To Know Your Phone
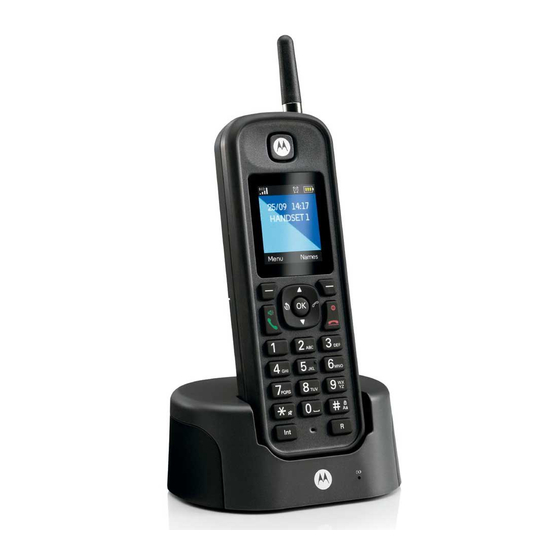
Getting to know your phone Overview of your handset A Earpiece B Display See page 13 for an overview of the display icons. C Scroll up / Volume up Scroll up through lists and settings. During a call, press to increase the earpiece and hands-free volume. When the phone is ringing, press to increase the handset ringer volume. - Page 12 Talk / Hands-free Make or answer a call. Activate and deactivate hands-free during a call. G * / Ringer off Dial a *. Press and hold to switch handset ringer on or off. H Intercom Press to make an internal call. Antenna Can be unscrewed and either a standard or long range antenna can be used.
- Page 13 Handset display DECT signal strength Displays when ECO mode is on. Displays when ECO PLUS is on Handset ringer volume is Off. Displays when in hands-free mode. Displays when the answering machine is on. The alarm clock has been set. The keypad is locked.
- Page 14 Overview of the base / Charger Base Charger A Paging/Find handset This function allows you to page for the handset user or locate a missing handset. Paging calls cannot be answered by a handset. Press on the base. All handsets registered to the base will ring and display Paging Call.
- Page 15 Menu map Answer Machine Clock & Alarm Registration Play Date & Time Register HS Play All Alarm Select Base Time Format De-register Answer On/Off Record Memo Settings Names Outgoing Msg. Set Handset From menu in standby: Del. Messages Ringtone Search Answer Settings Ringer Volume Add Entry...
-
Page 16: Using The Phone
Using the phone Switch the handset on / off Press and hold to turn the handset on / off. To make a call Press 2. Dial the telephone number. To make a call by pre-dialling Enter the phone number (maximum 32 digits). If you make a mistake, press Clear. -
Page 17: Call From The Calls Lists
Call from the Calls Lists Note You need to subscribe to your network’s Call Display service to be able to see the caller’s number in the Calls Lists. Press Menu, the display shows and press Select. Calls Lists 2. Scroll to highlight the calls list (Missed Calls,... -
Page 18: To End A Call
3.12 To end a call Press or replace the handset on the cradle. Note After you hang up, the duration of your call is displayed for 5 seconds. 3.13 Intercom 3.13.1 Make an internal call If you have more than one handset registered to the base, you can make internal calls between two handsets. -
Page 19: To Lock The Keypad
2. Press OK. 3. When the other handset answers, press to connect all three callers and Join begin the conference call. 4. If there is no answer from the other handset, press to return to your external caller. 5. Press to end the call. -
Page 20: Phonebook
Phonebook The handset phonebook can store up to 200 names and numbers. Note Numbers can be up to 24 digits long and names up to 16 characters long. Entries are stored in alphabetical order. To dial phonebook entries In standby mode, press . -
Page 21: Character Map
Press to move between characters/digits. Press to delete a character, or press and hold to delete all Clear Clear characters. Character map Case Assigned characters and symbols L / U . , - ? ! ¡ ¿ ’ @ : ; / 1 a b c 2 ä... -
Page 22: To Search An Entry
To search an entry Press to enter the phonebook menu. Names is highlighted. Press Select. The first entry is highlighted on the Search display. 3. Enter the first letter of the name to search alphabetically then scroll to the exact entry. 4. -
Page 23: To Assign A Ringtone
6. Copy is completed when the message “copied” appears on the display. 7. Press to return to standby mode. Note If an entry with the same number is already stored in the receiving handset, it will not be copied. 4.10 To assign a ringtone In standby mode, press... -
Page 24: To Clear A Fast Call Number
4.13 To clear a fast call number Press to enter the phonebook menu. Names is highlighted. Press Select. The first entry is highlighted on the Search display. 3. Enter the first letter of the name to search alphabetically then scroll to the exact entry, then press Options. -
Page 25: Calls Lists
Calls Lists If you have subscribed to Call Display service, and provided the identity of the caller is not withheld, the number of the caller will be displayed together with the date and time of the call (if provided by the network). Notes If the caller’s number is stored in your phonebook along with a name, the name will also be displayed. -
Page 26: To Save A Number From The Calls Lists To The Phonebook
5. Display shows Details. Press Select. Show The number (or name if stored in the phonebook), date and time of the call are displayed. 6. Press to return to the previous menu level or to return to standby Back mode. To save a number from the Calls Lists to the phonebook Press to enter the... -
Page 27: To Redial The Last Number
3. Scroll to highlight the calls list (Missed Calls, Received Calls, Dialled Calls) you want. Calls 4. Display shows ?. Press to confirm. Delete All Calls 5. Press to return to standby mode. To redial the last number The phone lets you redial any of the last 20 numbers called. Numbers can be up to 32 digits long. -
Page 28: Agenda
Agenda To add a new event Use the phone to remind you of details of up to five events such as birthdays, anniversaries or appointments. Up to 24 characters can be entered as the subject. Press Menu, scroll and press Select. Agenda 2. -
Page 29: To Edit An Event
3. Scroll and press Select. The description, date and time of Show Details the agenda are displayed. 4. Press to return to the previous menu level or to return to standby Back mode. To edit an event Press Menu, scroll and press Select. -
Page 30: Clock & Alarm
Clock & Alarm If you have subscribed to your network’s Caller Display service, the date and time is set automatically for all handsets when you receive your first call. If you are not subscribed to Caller Display service, you can set the date and time manually. -
Page 31: Handset Settings
Handset settings To set the handset ringtone You can set different ringtones for external calls and internal calls. Select from 20 handset ringtones. You will hear a sample ring as you scroll to each ringtone. Press Menu, scroll and press Select. Settings is highlighted. -
Page 32: To Change The Handset Name
To change the handset name If you are using more than one handset with the base, you can give each handset a personalised name to easily distinguish between the handsets. A name can be up to 10 characters long. Press Menu, scroll and press Select. -
Page 33: To Set The Screensaver
To set the screensaver When the screensaver is set to Clock, an analogue clock is displayed. The screensaver comes on when the screen backlight switches off in standby mode. To change the backlight timeout setting, see “To set light timeout” in the next section. -
Page 34: To Set Pbx Access Code
8.11 To set PBX Access Code If the phone is connected to a switchboard, you may need to enter an PBX Access Code in the dialling sequence to be able to connect to the outside line. The PBX Access Code will be displayed at the beginning of a number on the screen. -
Page 35: Base Settings
Base settings To set the base ringtone Select from 5 base ringtones. You will hear a sample ring as you scroll to each ringtone. Press Menu, scroll and press Select. Settings 2. Scroll and press Select. Set Base is highlighted. Press Select. Ringtone 4. -
Page 36: To Change The Recall Mode
4. Scroll then press Select. All Handsets Select Handset If you choose Handset, all available handsets are displayed. Select Scroll to the handset you want then press Select. • • Scroll to the number of rings that you want to set: 2, 4 or 6 and press Select. -
Page 37: To Reset The Phone
Reset complete and the unit will restart automatically. To switch ECO on / off Your O2 offers an ECO function which reduces the transmitted power and energy consumption when switched on. This feature is set to by default. -
Page 38: Default Settings
9.10 Default settings Handset Name HANDSET Key tone Auto pick up Ringer melody (EXT) Melody 3 Ringer melody (INT) Melody 1 Ringer volume Earpiece volume Phonebook Unchanged Call list Unchanged Redial list Unchanged Master PIN 0000 Keypad lock Time format 24 hours Alarm Dial mode... -
Page 39: Registration
Register HS 6. Bases are displayed. If necessary, scroll to a new base you wish to register the O2 handset to and press Select. 7. If you are replacing a base that is already indicating when you press In Use,... -
Page 40: To De-Register A Handset
2. Scroll and press Select. Select Base 3. All the base numbers are displayed. use) is shown beside the base number where the handset was previously registered to. Scroll to the base you want and press Select. 4. The display shows When registration is complete, the Searching Base X…. -
Page 41: Answering Machine
11.2 To change answer delay Answer delay sets the number of times the O2 will ring before the answering machine picks up your call and starts playing the OGM. You can change this setting to between 2-9 rings or Saver. -
Page 42: New Messages Alert
11.5 Outgoing messages The OGM is the message a caller first hears when the answering machine picks up their call. The O2 comes with 2 pre-recorded OGMs, or you can record your own. 11.6 To record a personalised OGM You can record personalised OGMs up to 3 minutes long for your callers. -
Page 43: To Play Or Delete Your Personalised Ogm
11.8 To play or delete your personalised OGM Deleting a personalised OGM automatically reinstates the pre-recorded one. You cannot delete a pre-recorded message. Press Menu, the display shows Machine, press Select. Answer 2. Scroll and press Select. Outgoing Msg. 3. Scroll and press Select. -
Page 44: Call Screening
11.11 Call screening When the answering machine is on and takes a call, you can screen the message via the handset When the handset rings, wait for the answering machine to take the call. When the caller begins leaving a message, the display shows Recording. Press to hear the caller. -
Page 45: Remote Access
When the memory is full, the OGM will automatically be set to Only. You Answer must delete old messages before the O2 can record new messages. 11.14 Remote access Remote access allows you to operate your answering machine and listen to your messages by calling the O2 from another phone. -
Page 46: To Switch Remote Access On / Off
(error beeps). Please enter your security code”. You can try entering the code again. If it is still incorrect you will hear the voice prompt or two beeps (error beeps) and the O2 will hang up. 11.15 To switch remote access on / off Press Menu, the display shows Machine, press Select. -
Page 47: Help
Help icon is not scrolling during charge • Bad battery contact – move the handset slightly. • Battery is full – no need to charge. No dialling tone • No power – check the connections. Reset the phone: unplug and plug back in the mains. - Page 48 Noise interference on your radio or television • Your base or charger may be too close. Move it as far away as possible. Answering machine does not record messages • Switch the answering machine on. • The memory may be full. If so, you will need to delete some messages. •...
-
Page 49: General Information
General information Important This equipment is not designed for making emergency telephone calls when the power fails. Alternative arrangements should be made for access to emergency services. This product is intended for connection to analogue public switched telephone networks and private switchboards in Europe. Important safety instructions Follow these safety precautions when using your phone to reduce the risk of fire, electric shock, and injury to persons or property:... - Page 50 • Do not install this product near a bath tub, sink, or shower. • Operate this phone using only the power source that is indicated on the marking label. If you are unsure of the power supply to your home, consult with your dealer or local power company.
- Page 51 Consumer Products and Accessories Warranty Thank you for purchasing this Motorola branded product manufactured under license by Meizhou Guo Wei Electronics Co. Ltd., AD1 section, Economic Development Area, Dongsheng Industrial District, Meizhou, Guangdong, China.
- Page 52 What Does this Warranty Cover? Subject to the exclusions contained below, MZGW warrants that this Motorola branded product (“Product”) or certified accessory (“Accessory”) sold for use with this product that it manufactured to be free from defects in materials and workmanship under normal consumer usage for the period outlined below.
- Page 53 (c) use of the Products or Accessories for commercial purposes or subjecting the Product or Accessory to abnormal usage or conditions; or (d) other acts which are not the fault of Motorola or MZGW, are excluded from coverage.
- Page 54 Your O2 has a REN of 1. A total REN of 4 is allowed. If the total REN of 4 is exceeded, the telephones may not ring. With different telephone types there is no guarantee of ringing, even when the REN is less than 4.
-
Page 55: Wall Mounting
Wall mounting Important Before you wall-mount your O2, check that you are not drilling into any hidden wiring or pipes. Before you drill, make sure the power and telephone line cables will reach the sockets. Use the following templates to mark the drilling locations. - Page 56 2. Insert the wall plugs if necessary, then insert the screws leaving about 5mm protruding from the wall on which to hang the phone. 3. Slot the holes on the back of the base over the screw heads and gently pull the base/charger down to make sure it is securely in place.
-
Page 57
... -
Page 58
... - Page 60 Manufactured, distributed or sold by Meizhou Guo Wei Electronics Co. LTD., official licensee for this product. MOTOROLA and the Stylized M Logo are trademarks or registered trademarks of Motorola Trademark Holdings, LLC. and are used under license. All other trademarks are the property of their respective owners.