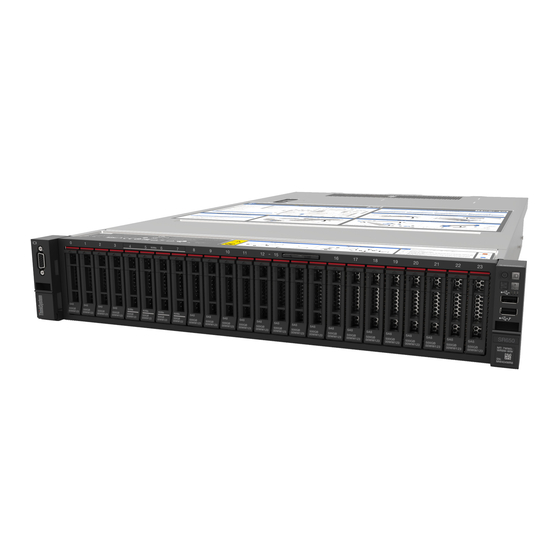
Lenovo ThinkSystem SR650 Quick Start Manual
-48 v dc
Hide thumbs
Also See for ThinkSystem SR650:
- Maintenance manual (244 pages) ,
- Setup manual (226 pages) ,
- Product manual (87 pages)
Quick Links
ThinkSystem SR650/SR630/SR550 -48 V DC Power Supply
This document provides the important information about ThinkSystem SR650/SR630/SR550 -48 V DC
Power Supply. Store the documentation for future reference.
Notes:
• This type of power supply is only powered by -48 V DC.
• This type of power supply can only be used on the SR650/SR630/SR550 servers.
• Before installing the power supply, user should confirm the technical feasibility with Lenovo.
The option kit includes the following part:
Figure 1. ThinkSystem SR650/SR630/SR550 -48 V DC Power Supply
1 1

Summary of Contents for Lenovo ThinkSystem SR650
- Page 1 • This type of power supply is only powered by -48 V DC. • This type of power supply can only be used on the SR650/SR630/SR550 servers. • Before installing the power supply, user should confirm the technical feasibility with Lenovo. The option kit includes the following part:...
-
Page 2: Hot-Swap Power Supply Replacement
The following illustration shows the LEDs of the power supply. Figure 2. LEDs of power supply Description Power input LED • Green: The power supply is connected to the ac power source. • Off: The power supply is disconnected from the ac power source or a power problem occurs. - Page 3 S035 CAUTION: Never remove the cover on a power supply or any part that has this label attached. Hazardous voltage, current, and energy levels are present inside any component that has this label attached. There are no serviceable parts inside these components. If you suspect a problem with one of these parts, contact a service technician.
- Page 4 If only one power supply is installed, you must turn off the server before removing the power supply. This power supply only supports some special configurations of the SR650/SR630/SR550 servers. For more information, consult the local Lenovo team. 在直流输入状态下,若电源供应器插座不支持热插拔功能,请务必不要对设备电源线进行热插拔,此操作可能...
- Page 5 S019 CAUTION: The power-control button on the device does not turn off the electrical current supplied to the device. The device also might have more than one connection to dc power. To remove all electrical current from the device, ensure that all connections to dc power are disconnected at the dc power input terminals.
- Page 6 To remove a hot-swap power supply, complete the following steps: Watch the procedure. A video of the removal process is available: • Youtube: https://www.youtube.com/playlist?list=PLYV5R7hVcs-A25P7vBoGa_wn7D7XTgDS_ • Youku: http://list.youku.com/albumlist/show/id_50483444 Step 1. If the server is in a rack, adjust the cable management arm (CMA) to gain access to the power supply bay.
-
Page 7: Install A Hot-Swap Power Supply
Step 3. Press the release tab toward the handle and carefully pull the handle at the same time to slide the hot-swap power supply out of the chassis. Note: Slightly pull the power supply upwards when sliding the power supply out of the chassis, if you have installed one of the following CMA kits: •... - Page 8 • Ensure that the devices that you are installing are supported. For a list of supported optional devices for the server, go to: http://www.lenovo.com/us/en/serverproven/ Notes: • Ensure that the two power supplies installed on the server have the same wattage.
- Page 9 DANGER Electrical current from power, telephone, and communication cables is hazardous. To avoid a shock hazard: • Do not connect or disconnect any cables or perform installation, maintenance, or reconfiguration of this product during an electrical storm. • Connect all power cords to a properly wired and grounded electrical outlet. •...
- Page 10 S019 CAUTION: The power-control button on the device does not turn off the electrical current supplied to the device. The device also might have more than one connection to dc power. To remove all electrical current from the device, ensure that all connections to dc power are disconnected at the dc power input terminals.
- Page 11 Before installing a hot-swap power supply, touch the static-protective package that contains the new hot- swap power supply to any unpainted surface on the outside of the server. Then, take the new hot-swap power supply out of the package and place it on a static-protective surface. To install a hot-swap power supply, complete the following steps: Watch the procedure.
- Page 12 Step 2. Note the orientation and slide a power-supply filler is installed, remove it. Figure 8. Hot-swap power supply filler removal Step 3. Slide the new hot-swap power supply into the bay until it snaps into position. Figure 9. Hot-swap power supply installation After installing the hot-swap power supply: 1.
- Page 14 First Edition (September 2018) © Copyright Lenovo 2018, 2018. LENOVO, and THINKSYSTEM are trademarks of Lenovo. All other trademarks are the property of their respective owners. © 2018 Lenovo. LIMITED AND RESTRICTED RIGHTS NOTICE: If data or software is delivered pursuant to a General Services Administration (GSA) contract, use, reproduction, or disclosure is subject to restrictions set forth in Contract No.


